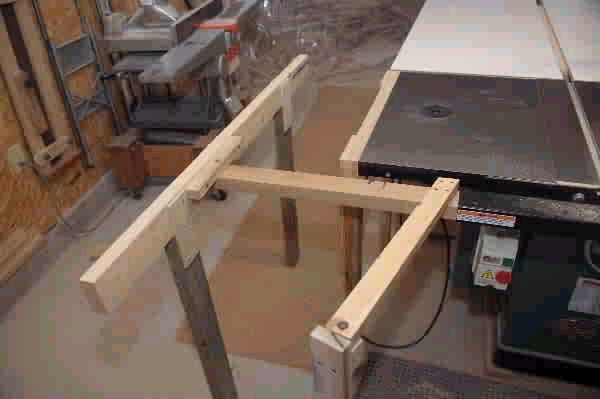
The “gore horn” sled support system..
Being a member of an online woodworking forum has its rewards. You get to share ideas, learn from a worldwide membership and you can actually save money, not to mention a lot of head scratching. As I was about to post this entry in the blog a fellow member posted a discussion in Knots, Taunton’s woodworking forum, about the same sled I had constructed.
I thought it would helpful to present two different approaches to skinning the same cat as it were, so here goes.
Zolton’s Sled
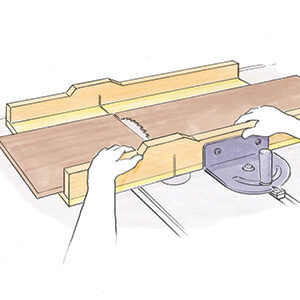
When I first saw the photo of the “Ultimate Crosscut Sled” on the cover of the August 2008 issue of FWW, I said to myself, “Man, that’s for me; ” – a big, accurate sled, with a stop that you can flip out of the way, and a measuring tape to boot. What’s not to like about that?
My old sled was a “carpenter’s” sled, as described by John McCormack, the author of the Ultimate Sled article. It was big, heavy, and had a fence fore and aft. Yet for all its heft it was only good for crosscuts up to 26 inches wide. I needed something bigger. Despite having a rather small shop, I do handle a lot of sheet goods, and cutting them precisely has always been difficult to achieve with the tools I had on hand.
A couple of things had to change in my version of the Ultimate Sled though. One was the size. Not only didn’t I have room to store something the size of McCormack’s sled, I was worried that I wouldn’t be able to lift it on and off the table. So, instead of 48-1/2 inches wide, mine is about 41 – and 48 long. Not a large reduction, but enough that it allows me to store the sled so it rests on my shop’s concrete block foundation wall, tucked nearly under a lumber rack near my tablesaw.
Also, I downsized the 3/4” MDF McCormack called for and made my sled of 1/2” inch MDF. That turned out to be the key weight-reducing item, and it makes the contraption relatively easy to mount and dismount – making it more likely that I’ll take the time to use it.
Once I had the sled cut out and constructed (more of less to McCormack’s specifications, though my fence, consisting of three inch wide, doubled-up veneer core birch plywood with a maple facing, is not as wide or sturdily constructed as his) I came to the problem of what to use for the runner. He recommends using a piece of steel, and that’s probably the best material if it is available. In my case it wasn’t available locally, and mail ordering a piece would have run around $30.
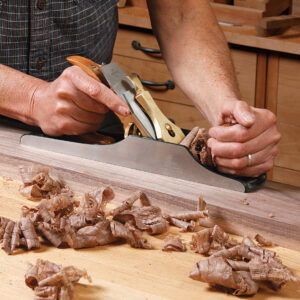
I opted instead for a runner made of ultra high molecular weight plastic. I found some in a scrap bin at a local plastics and steel outlet. The counterperson wasn’t even going to bother to ring up the $2.00 sale, but I insisted on paying and he eventually relented and took my two bucks. Cutting it to size was easy. I was able to saw it pretty close on my tablesaw and then planed it in for the final fitting. Weird stuff to plane. There’s a lot of “give” to it, and the shavings are full of static electricity, so they stick to the plane and everything else they come into contact with.
Before mounting the UHMW material onto the underside of the sled, I took the time to cut a ¾ inch wide groove into the underside of the MDF panel. It’s just a nick, not even 1/16 inch deep, but I figured it would keep the UHMW from squirming around while I screwed it into place, and would serve as a good indexer should I eventually run across and then upgrade to a suitable steel runner. I screwed the runner in place from the underside, through the UHMW into the MDF with ½ screws. So far they seem to be holding up well.
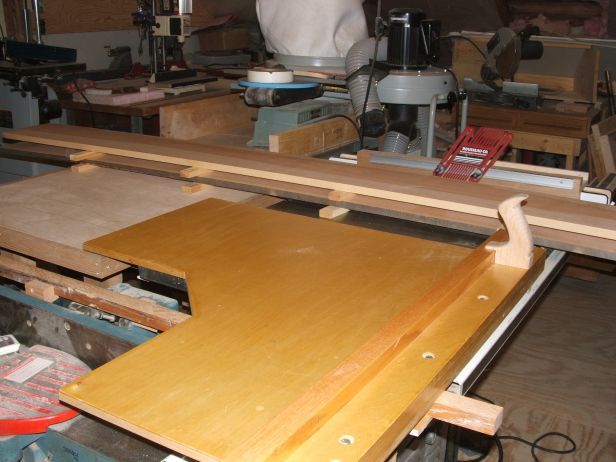
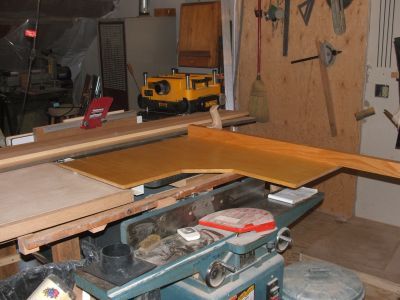
Once I had the sled built, it was immediately obvious that I would need to add some support to the outboard end when I was using it to make crosscuts. The sled, probably because it is made of 1/2” rather than 3/4” MDF, droops slightly when it hangs off the left side of my saw’s tabletop. Worse, pulling it back toward me, for instance to make a cut on a wide panel, felt precarious. What I needed was a system that would lend support not only to the left hand, outboard end, but also to the sled when it was pulled back in preparation to cut a wide panel. And the “system” had to be easy and quick to knock down or get up and running when I needed it.
McCormack’s article contained a sidebar that describes an adjustable sawhorse that he recommends for use under the outboard end of the sled. It looks as though it would work just fine, but it also looked to me like a one-use type of fixture that I don’t have the room to have hanging around my shop. So I had to come up with something more compact and easily storable.
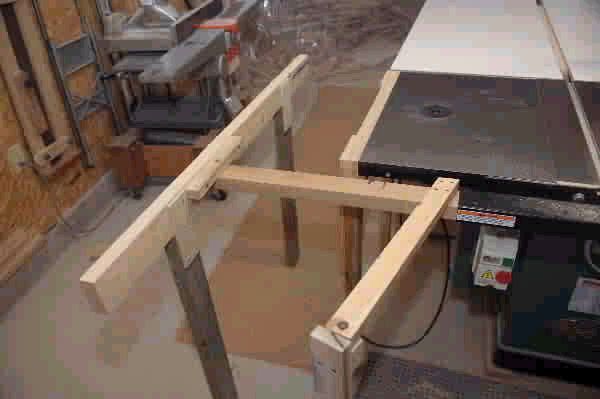
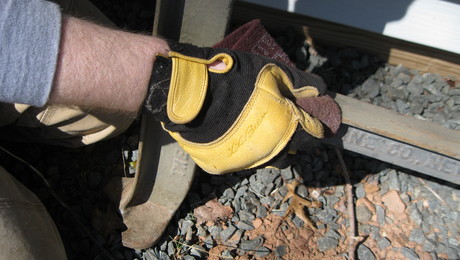
It was only when I discovered the open end of the steel box tubing on the end of my Shop Fox tablesaw fence that I saw a way clear to what I call the “gore horn” sled support system (“gore horn” because if you aren’t paying attention, you can gore yourself on the portion of the support leg that sticks out toward the operator of the saw).
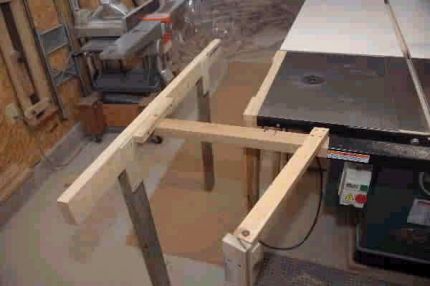
There is a main support bar that slides into the open end of the box tubing. I used a piece of poplar long enough that it hits one of the through-bolts that attaches the tubing to the saw, stopping it. Then I bored a 5/16” hole through both the box tubing and the poplar at the same time. A ¼ inch bolt drops down through the holes – no nut or washer on the other end of the bolt – and locks the poplar in place so it can’t pull out.
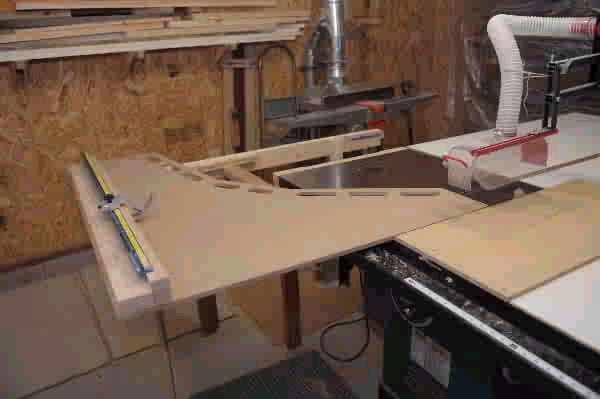
The gore horn, with detachable leg, was then screwed to the main support bar, and an outboard support “horse” constructed to attach to the end of the support bar, both with the drop-through bolt connection used on the box tubing and main support bar. The support horse has lag screws driven into the end grain at the bottom of its legs. They can be easily screwed up or down in order to adjust the top height of the horse so it is even with the saw table height.
A simple “catcher” board, placed on the saw to the right of the blade before using the sled, completes the system. It is made of 1/2” MDF with a hardwood runner attached to the underside. I drove a screw into the slot extension recess on my melamine outfeed table to stop movement of the catcher board if it happens to try to ride along with a piece being cut. Should I need that slot to be clear for use with another fixture or jig, I can just remove the “stop” screw.
Storing the sled and its accouterments, as seen in one of the photos in the Knots post, takes up very little room. And I can assemble everything and put it into use in less than 45 seconds. Taking it down and storing it again is even faster.
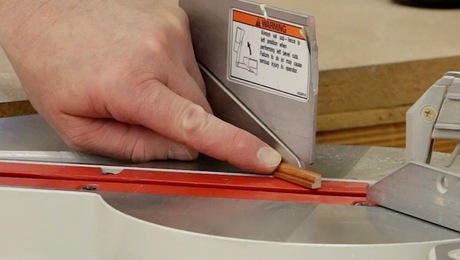
A Kreg “Top Track” aluminum extrusion on the fence completes the sled, and makes it a real joy to use. Before, if I needed to cut multiple pieces on my carpenter’s crosscut sled, I used my measuring tape – going from a tooth on the sawblade to a place I’d mark on the fence, and then clamping a stop block in place. That’s a time-consuming and inaccurate process. Now, it’s just a matter of loosening the Flip Stop’s knob and moving the indicator’s precision line to the exact spot on the tape that I want. I can square an end of a board with the stop flipped out of the way, and then drop it down to cut the piece to the measurement I want.
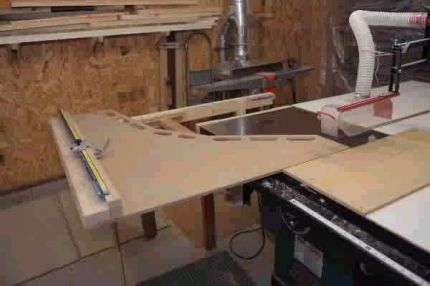
One of the better things about building the sled is that I was able to construct it using largely scrap material I already had on hand. The priciest components were the Kreg Top Track and Flip Stop, everything else was free or nearly so. In all, this new take on the “Ultimate” sled is a big boon to the accuracy and productivity in my shop.
Zolton
Kidderville Acres’ Sled
When I first saw the Ultimate Crosscut Sled article in FWW #199 my first impression was, “I can build that”. After a quick tour of my woodshop it quickly became apparent that I’d need a lot more space or a smaller version of the sled. A smaller version was scaled and sketched from the dimensions in the article and construction soon began.
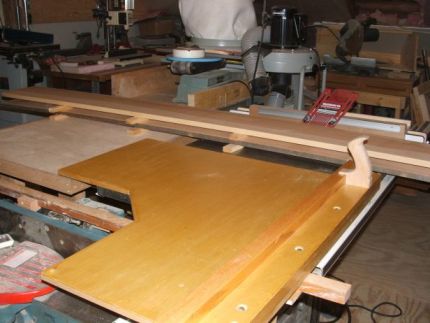
I started with a 5’ x 5’ piece of ½“ Baltic Birch, for lack of ¾” MDF which I thought would be too heavy and has proven to be a wise choice. The rear fence consists of 2 sections of ½” x 2” x 3’ Baltic Birch laminated together and the fence face is a solid piece of Red Oak that I recycled from a landfill.
The cut sequence for the plywood was cut two 2” wide strips off two sides of the 5’ x 5’ sheet, size them to 3 feet long and then layout and cut the scaled down sled from the rest. I’m sure this could have been done more efficiently to minimize waste but I wanted a factory edge on the 2” strips. Makes for easier alignment when setting up the lamination. Besides, like clamps you never have enough baltic birch for jigs & fixtures, right?
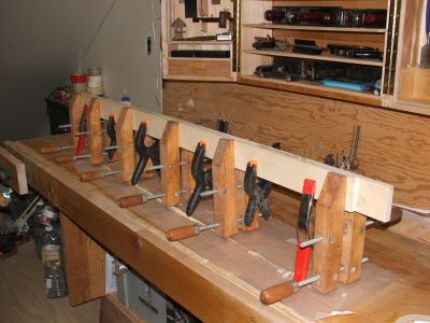
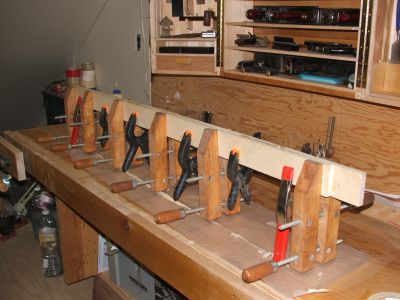
Construction started with laminating the two 2”strips for the rear fence, then sanded with the drum sander for smooth edges on each of the long sides after the glue had dried overnight. From this point I followed the construction sequence given in the original article.
To me there are two areas where making sleds gets a little tricky. One is setting the runner(s) in place and the other is squaring the fence to the sled. The method I use gets me close in one step. I predrill/countersink the holes in the runner material first, set the runner in the mitre slot and place the sled on top squaring it to the fence with the blade retracted. Then pull the sled and runner back to expose the frontend, from underneath set the screw through the runner and into the sled. Slide the sled forward and do the same for the backend.
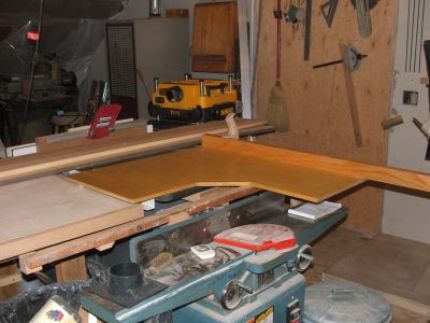
This sled because of it size, told me that I would have to make the cradle first to support it for alignment and affixing the runner to the bottom. I used the offcut from the red oak fence. Sometimes you get lucky and in this case my jointer provides support for the cradle arm. Placing a straight edge on the saw top showed the cradle arm resting on the jointer to be flush with the top! The support stand for the cradle is cobbled together from the scrap bin.
With a billing as Ultimate Crosscut Sled it seemed it should have an appropriate handle don’t you think? In my case it turned out to be a handplane tote from a Millers Falls #15 plane made from more of the recycled red oak. Rough cut on the bandsaw, smoothed and shaped with a drawknife and fitted to my mit with files and rasps.
After using it for several months it became apparent that the Kreg Top Track and stop mechanism would be welcome enhancements instead of using handscrews – they are on order. Another requisite for this fixture is to make sure your tablesaw is properly tuned and aligned with your mitre slots – helps to maintain your sanity too.
Bob @ Kidderville Acres




Comments
I would like to copy "A Tale of Two Tablesaw Sleds" to my printer, but can only receive the first page. Help.
Sorry about that. We're still working out the bugs on this new blogging platform. Until we fix the problem, I'd recommend copying the text of this post, and pasting it into a program like MS Word. Then printing. Sorry for the inconvenience.
Gina
FineWoodworking.com
VaughnAndrew,
I use firefox and by clicking on print preview it shows all pages and will print all pages as they appear here...
Regarding the easiest way I have seen to set the runner and square the sled to the blade, I've not tried this for a TS sled yet, but it worked beautifully for a skill saw guide that also happens to account for the width of the saw base...
1) Build the sled slightly over size, with the excess on the blade side of the runner.
2) When placing the fence, use a slot on the blade end and only attach it at either end initially.
3) Place the runner on the underside of the sled take care to keep it as perpendicular to the sled's fence as it practical.
4) Raise the blade just high enough to cut the sled base, place the runner in the track and cut off the excess from the base. Assuming that your blade is parallel to the track when you do this, the sled's edge is now perfectly parallel to the blade!
5) Using your most accurate square, tweak the position of the fence until it is square to the blade edge of the base, and then add additional screws.
6) Now raise the blade all the way and cut the fence to final length.
7) Finally, install tapes, stop tracks, etc.
Lots of steps, but very little measuring and it takes advantage of the fussy measuring you have already done in setting up the saw.
For VaughnAndrew:
If you are using Windows XP/2K...
Download and install CutePDF. It is a free program that installs a "printer" that creates PDF files instead of actually printing to your paper printer. I've used it extensively to capture web pages and it rarely, if ever, fails. You can download everything here:
http://www.cutepdf.com/Products/CutePDF/writer.asp
Be sure to download both the "Free Download" and the "Free Converter" files. Install (ie run) the converter.exe first. Then run the CuteWriter.exe file. Once that is done, you will have a new printer in your printers folder of the Control Panel called "CutePDFWriter". Select that printer whenever you want to print a Web page.
When you "print" with the CuteWriter, it will prompt for a name for the PDF file. I put PDF's on the Desktop so they are easy to find. Once CutePDFWriter has finished saving your file, open it with Acrobat Reader, or Fox Reader from
http://www.foxitsoftware.com . To view the file, you have to locate the file and double-click it (now you see why I put them on the Desktop).
Once you have the PDF open in your reader, you can print all or some of the pages. I find that I don't really need to print much at all, since the PDF is viewable anytime.
Hope this helps
Joe
I just purhsed my table saw and found the alterations or variations on a theme provided above to be of great help in building my sled. I love this forum and the people here who are kind enough to share their experiance to newcomers of this awesome hobby!
Thanks bowmkr, always glad to help. Right now I'm thinking thru some new fixtures for the sled; just some simple stuff like mitre attachment, adapt it to do tapered legs. Got any ideas?
Vaughn: There's also another freebie called PDF995 which sounds like it does about the same thing as the one TrophyJoe suggested.
All you folks if ye haven't had the opportunity, hop on over the moat and check out Knots, the FWW woodworking forum - lots of great advice and help o'er there.
Regards,
how wide of a board will the sled safely cut (& accurately)? the length of the sled is 48 1/2 inches, but the runner is only 36. it seems like the sled would do about 36... true?
thanks all
i am looking for more input on the ultimate crosscut sled.
has anyone else built one,any other changes?
You can see photos of this storage solution for the Ultimate Crosscut Sled on my FWW post:
https://www.finewoodworking.com/item/104507/ultimate-crosscut-sled-revisited
The Stealth Bomber Crosscut Sled
This past summer I constructed the crosscut sled design described by John McCormack in his cover story, “The Ultimate Crosscut Sled,” (August, 2008). I fondly call it “the Stealth Bomber,” since it resembles the aircraft’s shape and the sled is quite “bomber,” meaning dead-on accurate. A couple of problems with the Bomber arose while preparing to build it: I wouldn’t be able to repeatedly cut workpieces longer than five feet and the 3/4″ mdf sled would be heavy, creating a storage issue.
So to address the first obstacle, I decided to add a telescoping flip stop to the Kreg Top Trak. The telescope slides out from a rabbet in the back of the fence trapped between the hard maple and plywood back fence and is locked in position with a Festool clamp. The Kreg Top Trak, adhesive rule tape & flip stop makes crosscutting a dream.
After a bit of pondering a storage solution, I traced the sled on the 4′ x 8′ outfeed table at the opposite far corner from the table saw and cut out an embedded and lockable Stealth Bomber hangar or docking station that makes the sled flush with the table saw top & puts the sled’s fence completely out of the way of the saw’s ripping path. The lock is a fixed piece in one of the sled’s many oval hand holds on the sled’s outer perimeter.
No need to develop a hernia by lifting the Bomber’s heft off the table saw, just slide it around the outfeed table and land it down into the hangar. The bomber’s hangar also keeps the sled from being bumped out of square or damaged by lifting it off the saw and placing it elsewhere. I squared the fence to the blade once and I have not had to tune it up since.
In addition to McCormack’s adjustable sawhorse supporting the sled on the saw’s left flank, I also use a five-foot infeed rip support located on the right side of the sled’s runner. I am able to safely crosscut 37 inches on the new Delta Unisaw since the blade is set back further than other table saws..
I can now quickly, repeatedly and accurately crosscut cabinet parts and trim work. Set-up time takes about a minute. John McCormack’s ultimate shop-made sled is by far the best of its kind and well worth the time it takes to build.
Log in or create an account to post a comment.
Sign up Log in