Readers have recently mentioned difficulty in drawing a line to exact length and achieving a clean rectangle with a face. This is the most basic operation in SketchUp and without success here, chances of any further advancement are nil.
There are a number of things that get in the way of achieving this basic skill for beginners for example:
- Not using the mouse correctly, i.e., holding the left mouse button when it should only be a click
- Straying from the axis; red, green, or blue
- Not taking advantage of the “inferences” that SketchUp automatically displays
- Wondering when and how to type the length
- Not understanding how the Measurement box works. You can’t click in this box to accomplish anything. SketchUp understands when it will accept typed input without any mouse clicking in that box.
- Forgetting to hit the enter key after typing a length
- Being way zoomed out or drawing a line far back in the 3D space, so that a line shows up as a miniscule dash or dot
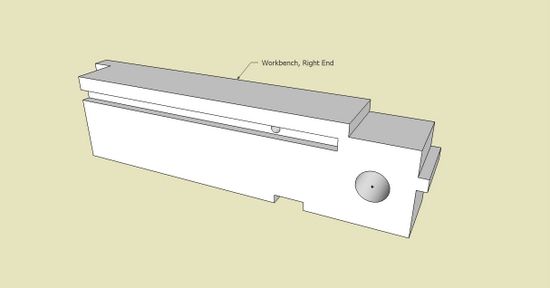
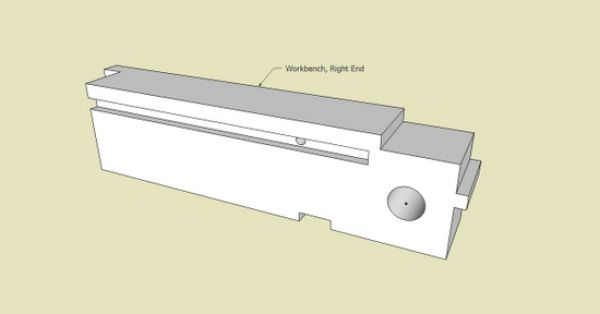
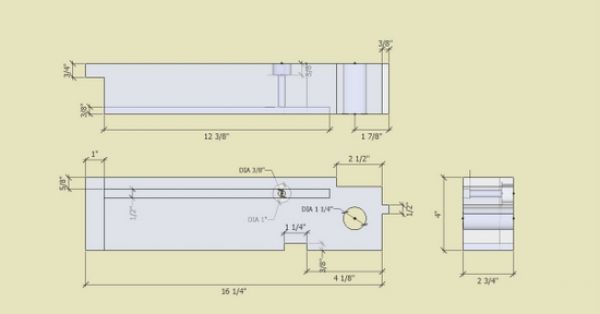
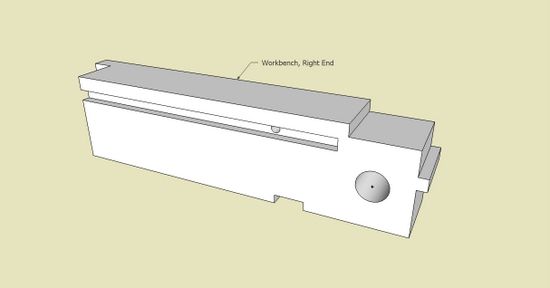
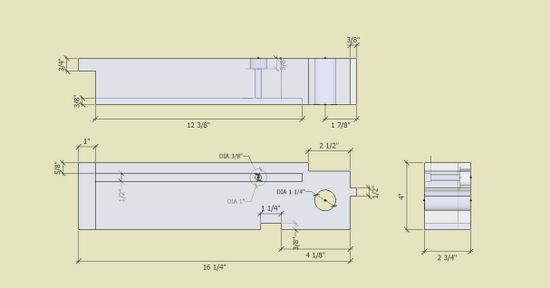
As an exercise in building this skill, let’s use this component which is a piece of a maple workbench. At first we will only create the front face of the component (no 3D nor cut outs or embellishments).
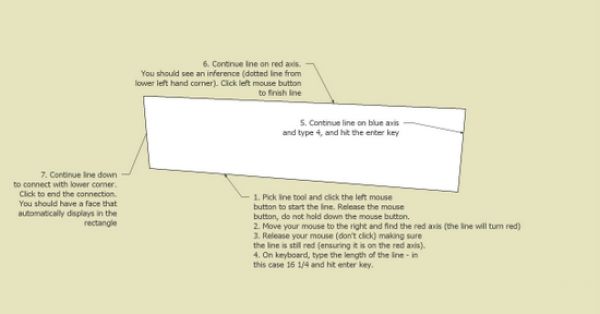
Step 1: Pick the line tool. To start the line click the left mouse button and immediately release the mouse button. DO NOT HOLD DOWN THE LEFT MOUSE BUTTON WHILE DRAWING A LINE. When you move the mouse you will see the line extend out from the starting point.
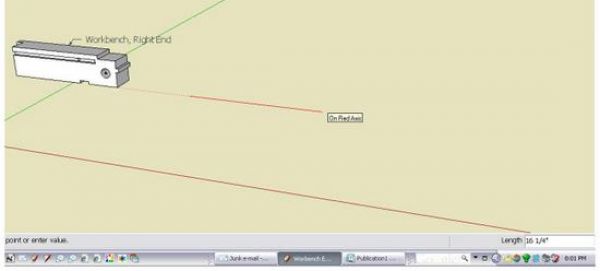
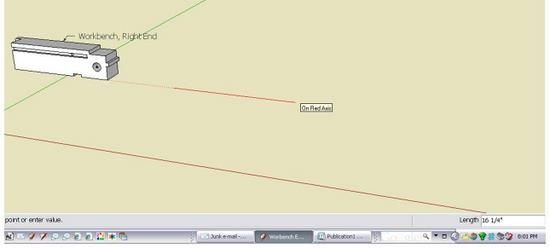
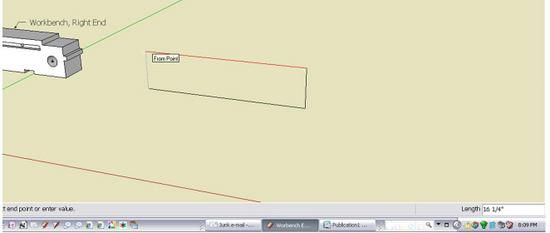
Now find the red axis – the line will turn red and you should see a flag saying “On Red Axis” as shown below. Pull the line out on the red axis to any length – it doesn’t matter how long. Release your hand from the mouse (do not click anything), and start typing the exact length, in this case 16 1/4. Type the number just as I’ve done with a space between the 16 and the 1/4.
You will see 16 1/4 in the Measurements Box (lower right hand corner). Don’t click a mouse in this box thinking this is required to enter a number. Just type and it will be there automatically.
You could also type 16.25 and get the same results. (If your settings of units are architectural or metric, then you need to type consistent units.)
When you are done typing, hit the ENTER key and the line is done and exact length.
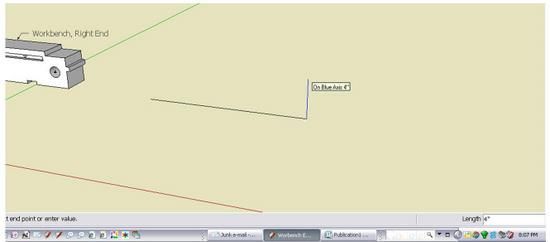
Step 2: Continue the line upward on the blue axis. Make sure your line turns to blue color. Release the mouse at any length without clicking, then type 4 and ENTER.
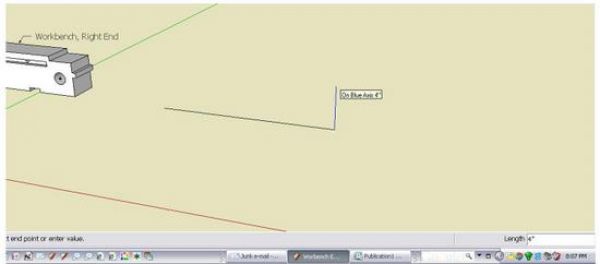
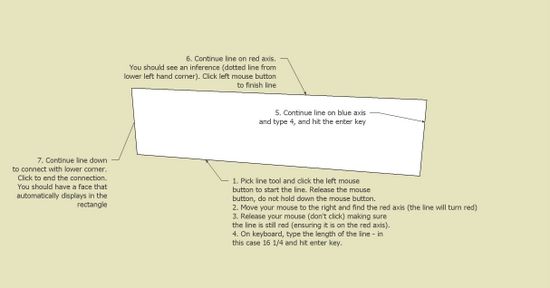
Step 3: Continue the line in reverse on red axis. Make sure line turns red. As you get close to the correct length of 16 1/4, SketchUp should give an inference indication showing a dotted line upwards from the lower left corner. (Sometimes you have to help SketchUp find the inference by hovering your mouse over the lower left hand corner then raising back up to the red axis). Click the mouse to stop the line on the inference, then continue on down to complete the rectangle.
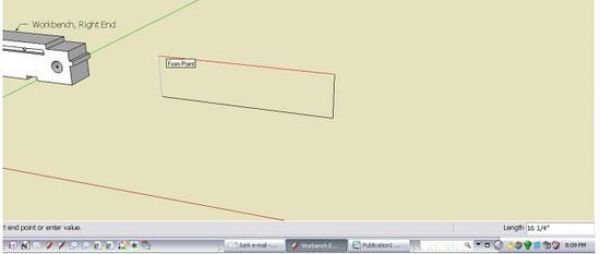
Step 4: When you finish the rectangle, a “face” will automatically appear and fill in the space. If you do not get a face, then you’ve not maintained the geometry so all lines are coplanar…. You’ve not stayed on axis.
Here is a completed rectangle with stepwise notes on its creation.
This process may feel very strange at first, but with practice it becomes automatic without much thought. We’ve only done the front face of the component, so there is quite a bit more you can do in completing the model and gaining confidence in drawing to exact length and staying on axis.


Comments
Thanks for the clear description, Tim. Another good resource for walking you through these types of things is Aidan Chopra's videos on YouTube (http://www.youtube.com/profile?user=aidanchopra&view=playlists). Between your posts and his videos, I've gotten the hang of SketchUp pretty quickly even without any prior exposure to CAD tools.
Log in or create an account to post a comment.
Sign up Log in