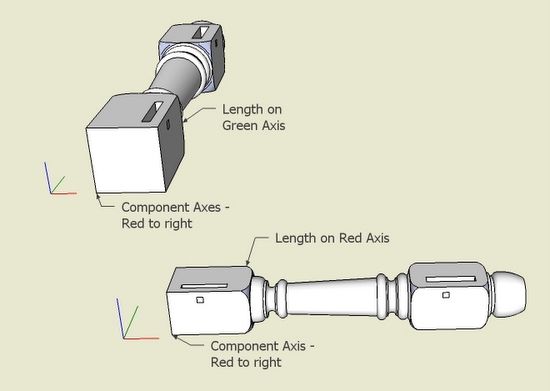
Last week I showed how to mirror table legs using the Flip Along feature of SketchUp. As pointed out in comments to the post, there are conditions which will affect the results of Flip Along. In my post I showed how it works effectively on the condition that the leg component is created in its proper orientation within the table (achieving a component axis which is aligned with the model axis).
For example, I showed a left front leg component that was created initially in that left front position. If the leg component had been created horizontally (something not recommended), the flip along procedure would not have worked as shown in my post.
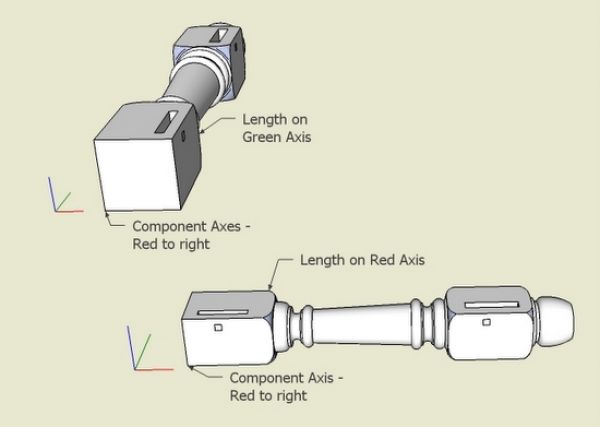
The Flip Along command is actually executed on the component’s axis which is based on its orientation when first created as a component. You can check the component’s axis by checking a box in SketchUp at Window/Model Info/Components/Show Component’s Axis.
The following illustrations show what happens when the leg component is made in a horizontal position (something I would not recommend doing).
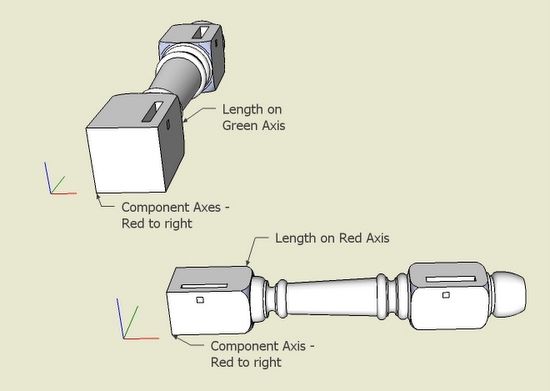
I will show flip along results if using a leg that is created in two different configurations – one with red axis along the length of the leg, and the other with the green axis along the length of the leg.
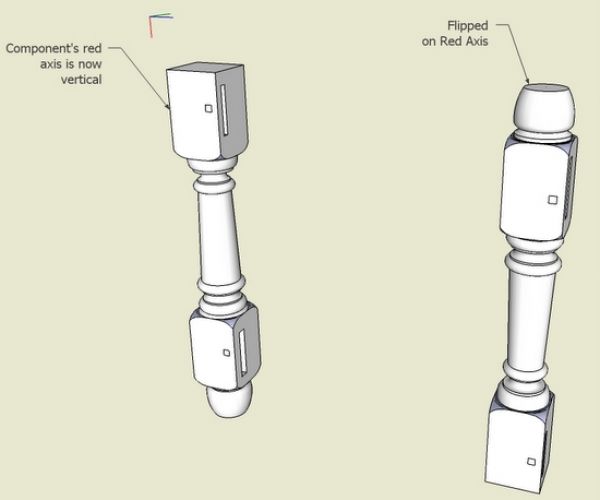
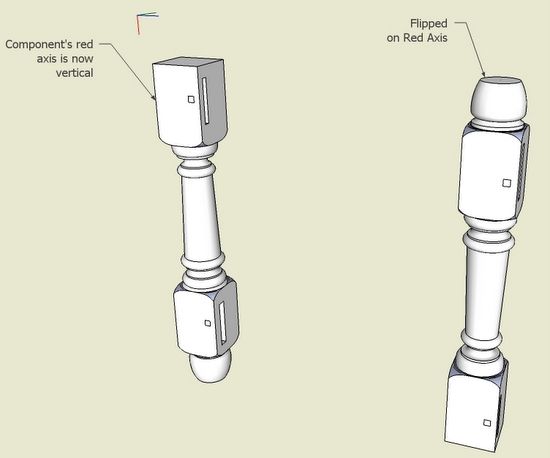
Here I’ve rotated the leg – with length along red – vertically, then copied and moved along the model’s red axis and flipped as I had done in my first post. Naturally we get a very surprising result with the flipped leg upside down. But this makes sense since the original component’s red axis is along the length of the leg, now vertical. (I’ve shown a small colored axis representing the component’s axis). The model’s red axis is from left to right.
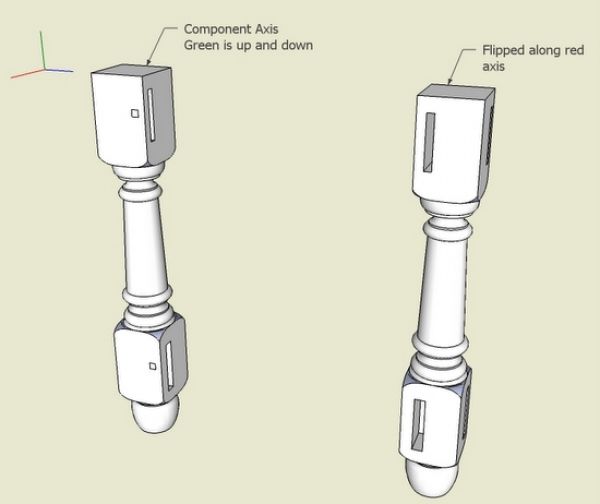
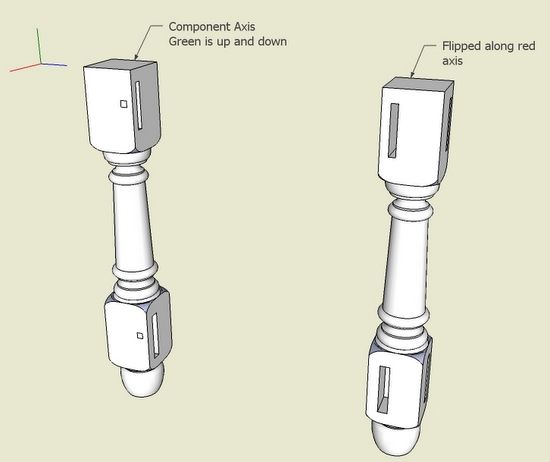
In this illustration, I’ve rotated vertically the leg which had the green axis along its length. When I flip along the red axis, the result is again not appropriate for the right front leg. Based on flip along using the original component’s axis, the result is understood. The hidden mortise on the back side of the original leg, is now showing on the front of the copied and flipped leg.
We can avoid these anomalies by creating components in their actual position within the model. This is the process that both Dave Richards and I recommend. It saves time to build models in an integrated way, with components created in their position within the assembly.
As always, you can also mirror using the Scale tool by grabbing the appropriate handles and typing “-1”. If you have components created in a way not aligned with the model axis, then the use of the scale tool can work more effectively than flip along.
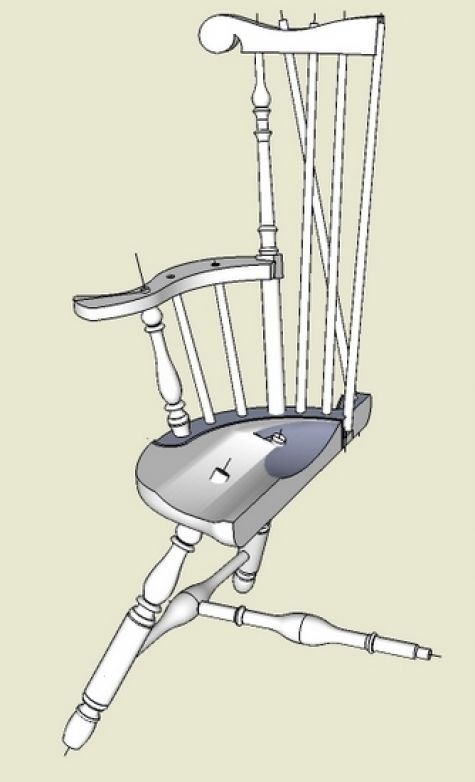
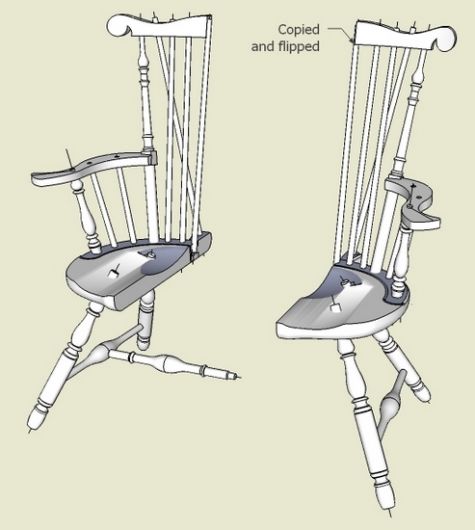
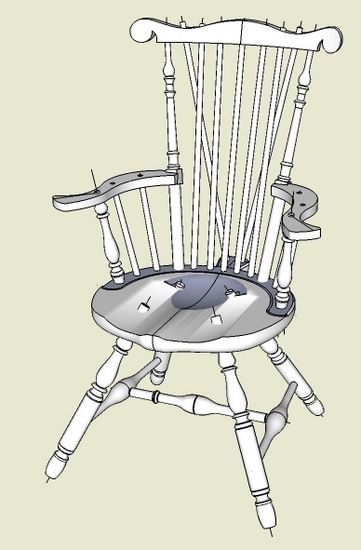
Flip along can also be applied for multiple selected components. For example, I find it handy to create the left half of a Windsor chair. Since Windsors are symmetrical, I then copy the half design and flip along the model axis. In this case flip along is not using the component’s axis, rather the model’s axis.
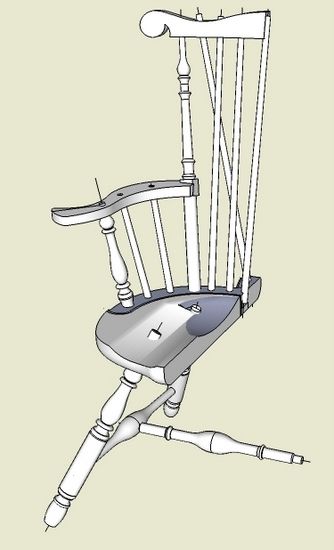
Here’s a typical design of the left half of a Windsor chair.
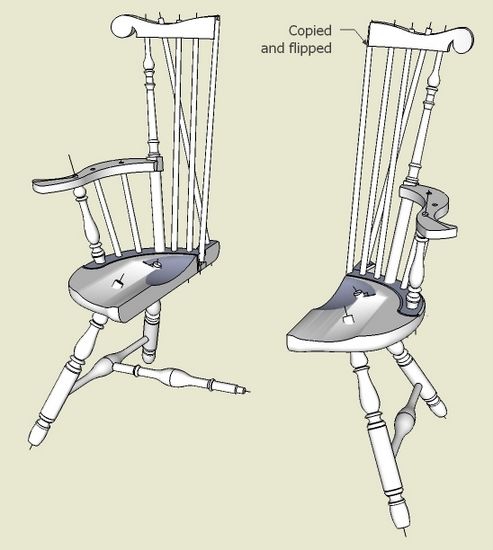
Using the select tool, I draw a left to right select box around the left half, tap the Ctrl Key, and move the copy to the right, then flip along the red axis.
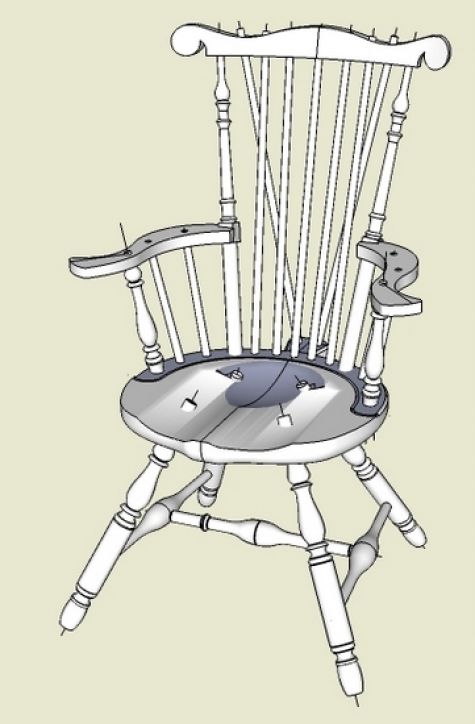
I usually connect the two halves at the front top corner of the seat. The centerlines can be hidden if desired (eraser while holding the shift key) to remove the “seams”.




Comments
A trick which saves a few clicks when duplicating the other half of a symmetrical model is "paste in place." It only works if the piece you are duplicating/reversing is a component or a group.
Select your component or components, copy (using ctl c) and, paste in place (I have shift c set up as a shortcut). This puts a copy right on top of the original. Scaling this copy by -1 then puts the reversed copy into just the right place without having to move it.
Scaling that way, John, will work if you don't hold Ctrl which invokes scale about center and you push from the correct handle.
Log in or create an account to post a comment.
Sign up Log in