Finish Recipe: Arts and Crafts Look Without Harsh Chemicals
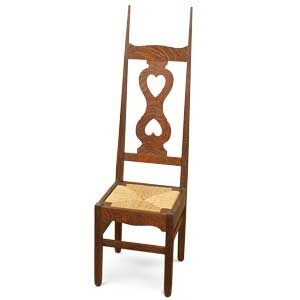
Gregory Paolini mimics the look of a traditional Stickley finish on his bow-arm Morris chair without fuming the piece using industrial ammonia.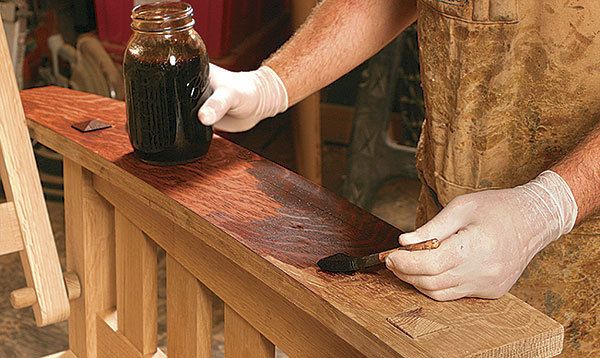
Project Type: Chair
Materials: Quartersawn white oak
Maker: Gregory Paolini
Finish Products: J E Moser aniline dye W1430 Early American Cherry, Minwax 2716 Dark Walnut stain, Minwax satin Polycrylic, Minwax paste wax
Skill Level: Intermediate
Article: Bow-Arm Morris Chair
Chairs get a lot of wear, so I needed a finish that not only protects the wood, but the coloring under the topcoat as well. In addition, people who sit in Morris chairs tend to rest things like glasses and bottles on the arms, so moisture resistance was important to me as well. The topcoat for this chair is sprayed water-based polyurethane, which builds and dries fast, is water resistant, very durable, and does not pose any fire hazard while spraying.
THE PROCESS:
1. Sand
Sand all of the components with a random-orbit sander, starting with 100 grit, then 150 grit and finishing with 180 grit
2. Apply the aniline dye
I mix my dyes at 1 oz of powder to 1 quart of water. Apply the dye, maintaining a wet edge to avoid streaks when dry. Once the piece is completely covered, wipe the piece off with paper towels. Allow to dry overnight. The purpose of the dye is to give the entire piece a uniform underlying color.
3. Scuff off the raised grain
The water-based dye will raise the grain. I use 220 grit to scuff-sand the piece. Don’t use any more pressure than the weight of your hand. The goal is to remove the raised grain, not the color. If you do sand through, you can touch up areas with more dye using an artist’s brush.
4. Stain comes next
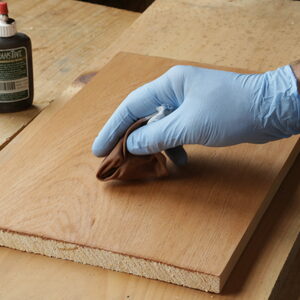
Next I apply the oil-based pigment stain. Oil pigment stains are more apt to rest and settle in the oak’s coarse, open grain but wipe off the fine grain of the ray flecks, resulting in a beautiful contrast. Shake the stain vigorously to distribute the pigment, then apply it quickly using a disposable foam brush. By the time you finish coating the chair, you can go back and wipe off the excess. I prefer to use disposable paper rags for this step. Be sure to lay them out to dry to avoid any fire risk.
After about an hour, wipe down the piece again. The Minwax stain yields great color, but has a tendency to bleed from the pores after a while.
5. Apply water over oil
This recipe uses a water-based finish over an oil-based stain, so it’s important to make sure that the stain has dried thoroughly. I generally let the piece dry in a warm room for at least a week. In cooler temperatures or higher humidity areas, you may want to wait even longer.
To prep the piece for water-based polyurethane, blow it off with compressed air or wipe it with a clean rag -– do not use a tack cloth.
For ease of application, I like to spray the water-based polyurethane. If you don’t have a way to spray the finish, apply the water-based polyurethane with a synthetic-bristle brush or a disposable foam brush.
To spray on the finish, I thin it 10% with distilled water and use a compressor-driven HVLP spray gun with a 1.8 mm tip. If you use a turbine setup, keep in mind the warm air from the turbine could promote dry spray.
Water-based finishes contain more solids per volume and build faster than oil-based finishes. Two coats of finish should provide plenty of protection, but I like to apply a third coat on the tops of the arms. Scuff-sand with 400 grit between coats if you need to remove any dust from the finish.
6. Rub out the finish and wax it all at the same time
After the water-based polyurethane has cured, I charge a maroon Scotchbrite pad with paste wax and rub the piece with the grain. Allow the wax to dry, and buff the wax with a shoe shine brush.
Learn more about Paolini’s finishing technique in his Build a Bow-Arm Morris Chair video workshop.
Fine Woodworking Recommended Products
Diablo ‘SandNet’ Sanding Discs
Bumblechutes Bee’Nooba Wax






Log in or create an account to post a comment.
Sign up Log in