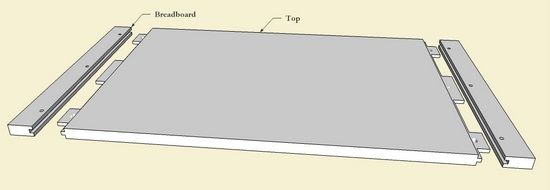
I’ll show my SketchUp procedure for making detail connections of a breadboard to a table top. This design, while using tenon pegs, allows for seasonal movement of wood which is a main consideration for breadboards.
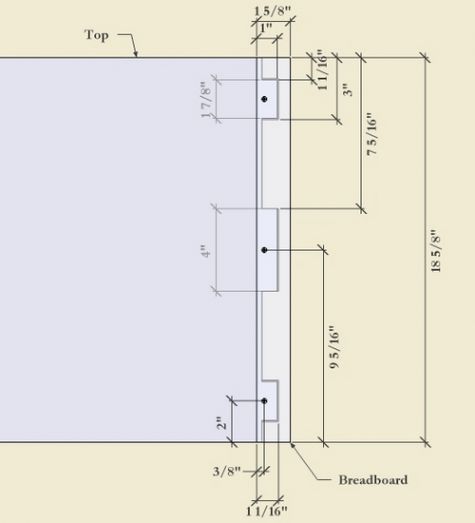
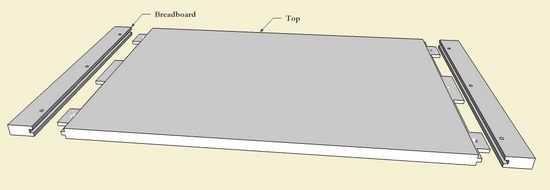
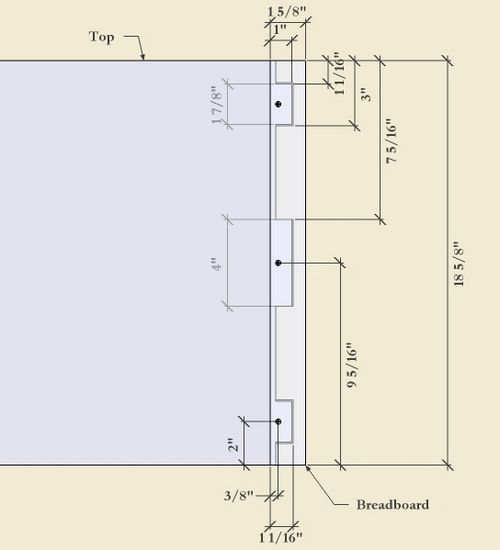
This is the exploded view of the design followed by a top down X-ray orthographic with dimensions.
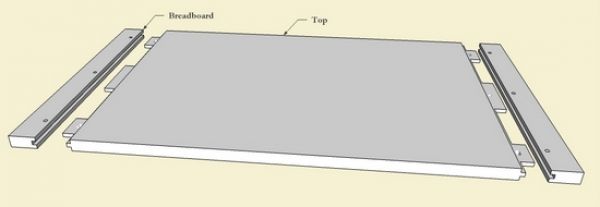
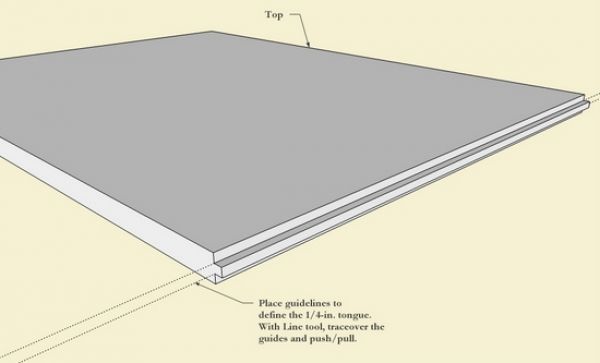
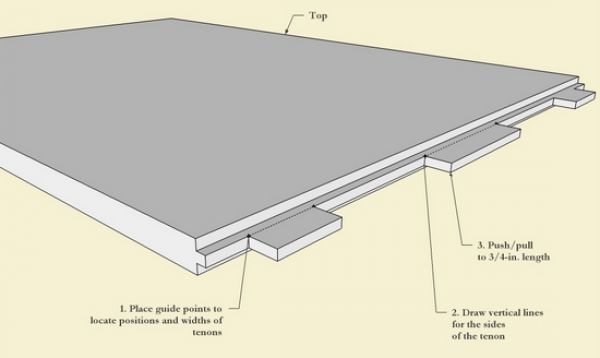
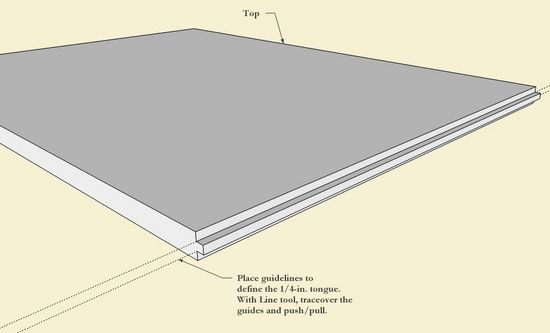
Step 1: Create the short tongue on the edge of the top piece. With Tape Measure tool place guidelines to show the location of the tongue in the center of the 3/4-in. thickness of the top. Using the Line tool, trace over the guidelines. Now Push/Pull the tongue to a length of 1/4-in.
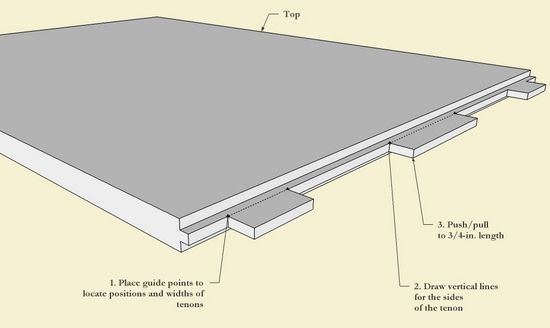
Step 2: With the Tape Measure tool place guidepoints or guidelines at locations for the tenon extensions of the joint. Using the Line tool draw vertical lines at those locations, then with the Push/Pull tool, pull the tenons to a length of 3/4-in.
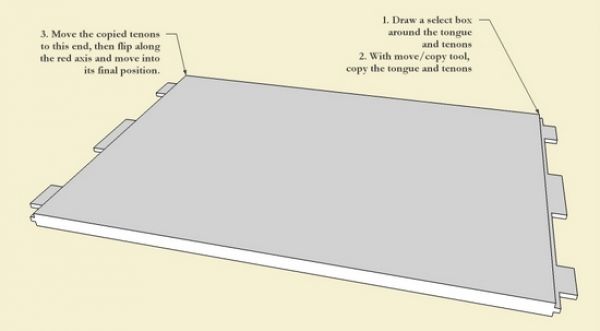
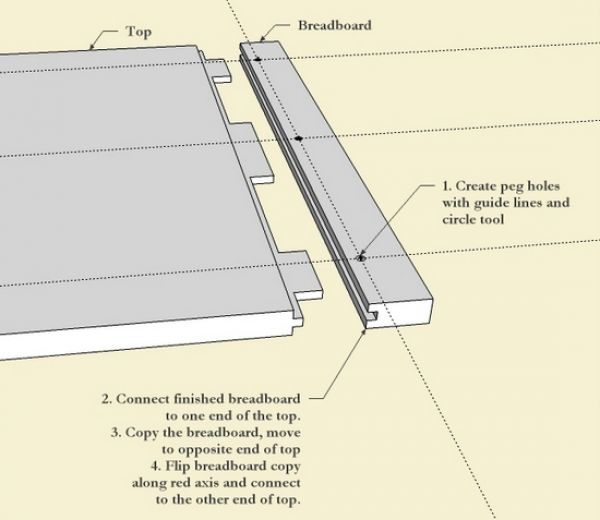
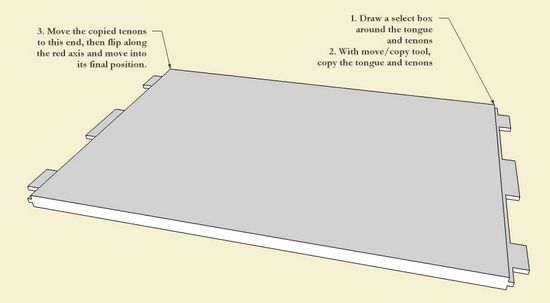
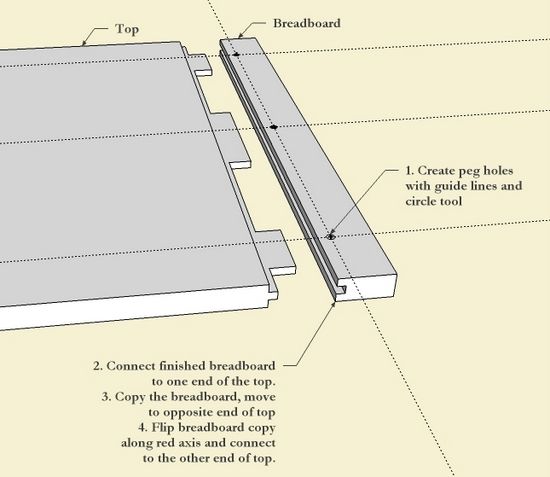
Step 3: Copy the completed joinery on the right side of the top, and move the copy to the left end. Right click on the selected copy and choose Flip Along the red axis. Then move the copy into final position.
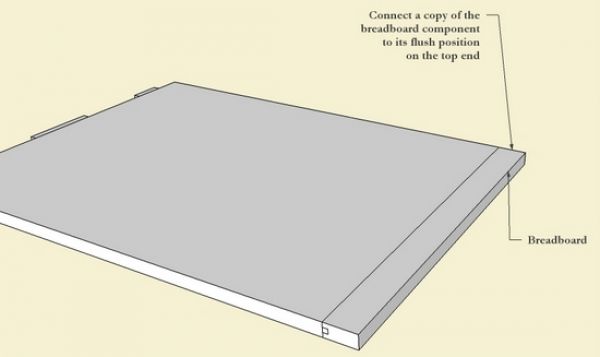
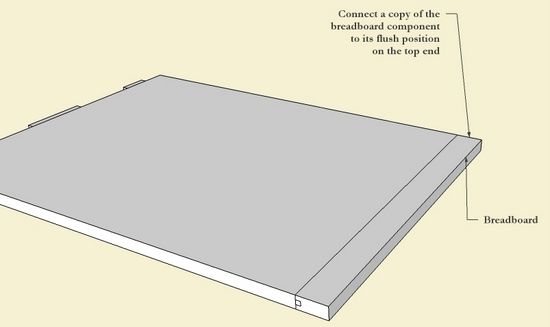
Step 4: Connect a blank breadboard component (no joinery, just a plank) to the end of the table top.
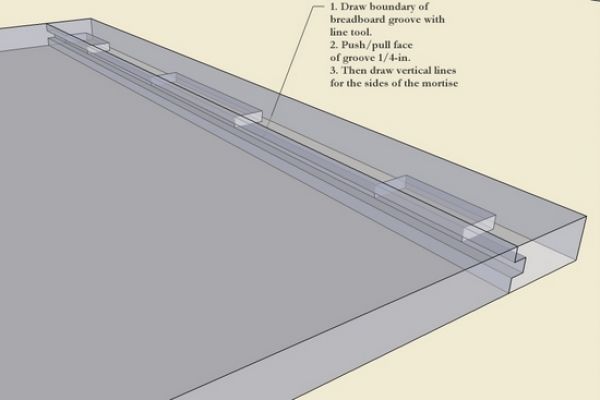
Step 5: You could create the groove and mortises in the breadboard blank separately from its connection to the top, but this requires careful measurements and placement of many guidelines. I prefer to make these mortises by using the existing tenons on the table top.
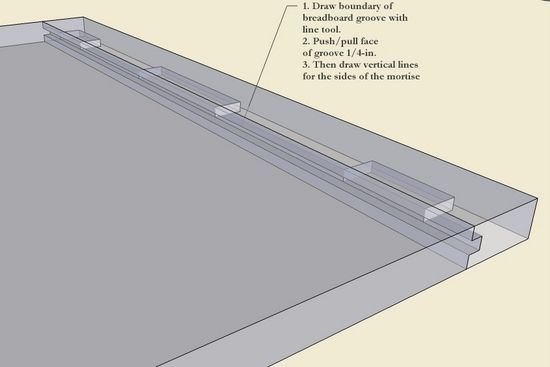
So I turn on X-ray face style so I can see the inside tongue and tenons of the table top. After choosing Edit Component (for the breadboard), using the Line tool trace over the tongue location on the edge face of the breadboard. Tap the Left Arrow Key to force the line on the green axis. Using the Push/Pull tool, push the groove to a depth of 1/4-in. Make short vertical lines for the location of the mortises.
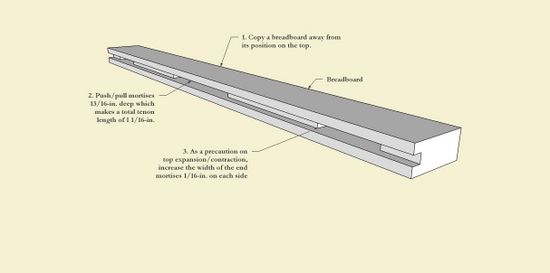
Step 6: Make a copy of the breadboard and move it a small distance away from the top. With the Push/Pull tool, push the mortises 13/16-in. which makes the total tenon length 1 1/16-in. Increase the width of the end mortises by 1/16-in. on each end. This will allow expansion/contraction of the table top while the end tenons are not glued. Use the Push/Pull tool to increase mortise width. After you do one side, you can repeat the same push/pull by double-clicking on the face for the 1/16-in. movement.
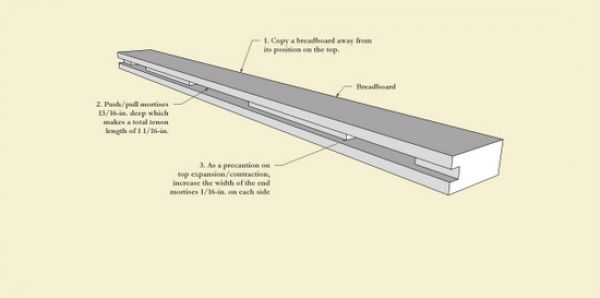
Step 7: Place guidelines to show location of peg holes. Using the circle tool, draw 1/4-in. diameter holes and “drill” them through to the other side of the breadboard with the Push/Pull tool.




Comments
Tim, it seems like doing an intersect between the Breadboard and the top should give you the same result, but it doesn't seem to work when both the top and the breadboard end are defined as components. Any idea why?
It seems to work when the breadboard is not defined as a component.
I hope Tim doesn't mind me chiming in. The Intersect operation won't modify the breadboard component unless the component is open for editing. It's essentially the same as any other modification you might want to do (except Scaling). You have to be editing the component to make any changes to it.
Dave
mnedman: Interesting comment regarding the failure of intersection in this case. The results of intersection here are very much related to the flush position of the breadboard flat against the edge of the top piece. SketchUp will not detect any intertection of the table top tongue or long tenons. I will show how this works in a blog entry tonight.
Tim
I'm in the process of making some BB end tables. Shouldn't the outer mortises be a little wider than the tenons to allow for movement?
Oops, forgot that's the purpose of elongating the peg holes in the tenons. Ignore my previous question.
WouldWorker, yes you are right that the end mortises in the breadboard are wider than the tenons in top. In the case of this table, the end mortises are 2-in. wide and the tenons are 1/16-in. I was using sugar pine that is a very stable wood in seasonal swings. There is a slot in the tenon so that the pin can allow the movement.
I made these tables about 5 years ago. I can see and feel the change in dimension on the ends of the breadboard depending on what time of year it is. I can tell that the differential movement is taking place, and is working properly to avoid splitting the top.
Tim
WouldWorker: I should have said that the end tenons are 1 7/8-in. wide, giving 1/16-in. margin on each side of the corresponding mortises.
Tim
Log in or create an account to post a comment.
Sign up Log in