Miter-Gauge Basics
How to get the most from this standard tablesaw accessory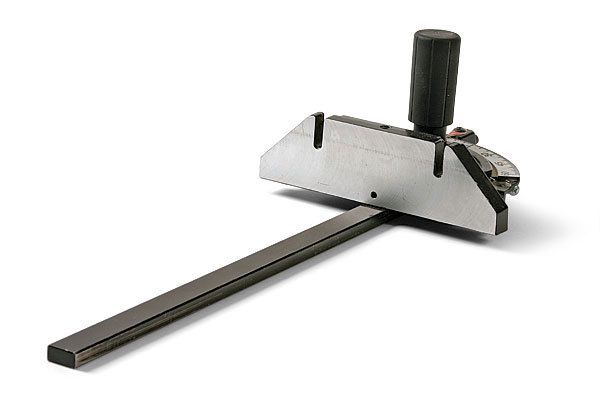
Synopsis: With a miter gauge on your tablesaw, you can accurately cut workpieces to length with square ends and make a variety of angled cuts, including those for mitered corners. Add stop blocks, an auxiliary fence, and a second miter gauge, and this accessory can do all manner of shop tasks.
From Fine Woodworking #205
Not long after you set up your first tablesaw, you’ll find yourself reaching for one of woodworking’s most common and useful accessories—the miter gauge. Standard equipment with every tablesaw, a miter gauge is the tool many beginners use to make their first crosscuts.
With a miter gauge, you can accurately cut workpieces to length with square ends and make a variety of angled cuts, including those for mitered corners. As you progress in your woodworking, you’ll probably add a crosscut sled to your tool kit (see Fundamentals: “Build a simple crosscut sled for the tablesaw,” FWW #188), but you won’t outgrow the miter gauge.
Setting up the gauge: The miter gauge consists of a bar and an adjustable head with a knob to lock the adjustment. The bar fits in the slots in the saw table that run parallel to the blade. Look for a sturdy aluminum headstock and an unobtrusive locking knob with a secure and comfortable grip.
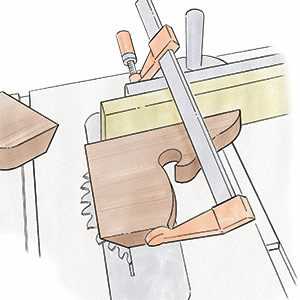
Attaching an auxiliary fence will help brace the stock against the blade’s tendency to push back toward the user and cause it to pivot on the corner of the gauge. The fence should be tall enough to retain its strength when the blade passes through it. Extending the fence 1 1⁄2 in. or so past the blade will help you safely push short cutoffs beyond the blade.
The preset angle stops on most miter gauges are rarely accurate. To set for 90°, put the gauge in the slot upside down and, with the lock knob loosened, slide the head up flat against the rip fence rail and tighten the knob. If the saw is properly set up, that should do it. Check it once with a drafting triangle to make sure it is accurate.
Making a basic crosscut: To make a 90° crosscut, simply hold the stock against the miter-gauge fence and push the gauge through the cut. To avoid pinning the stock to the table and to keep your hands a safe distance from the blade, apply downward pressure only over the gauge’s steel bar. After completing the cut, be sure to move the stock off the gauge and away from the blade before sliding the miter gauge back. This avoids the chance that the blade will catch, and throw, the workpiece during the return stroke.
You can work to a simple pencil mark, but a stop block makes it easy to crosscut multiple pieces to the same length. My block is hinged and designed to work with my 3-in.-tall auxiliary fence. A small piece of 1⁄4-in. plywood fastened at the top of the block keeps it about 1⁄8 in. off the saw table. This gap prevents dust buildup, which can hinder accuracy. The plywood also keeps the stop perpendicular to the table.
For the full article, download the PDF below:
Fine Woodworking Recommended Products
Rockler Deluxe Panel Clamp

Stanley Powerlock 16-ft. tape measure
Forrest Woodworker II Blade







Log in or create an account to post a comment.
Sign up Log in