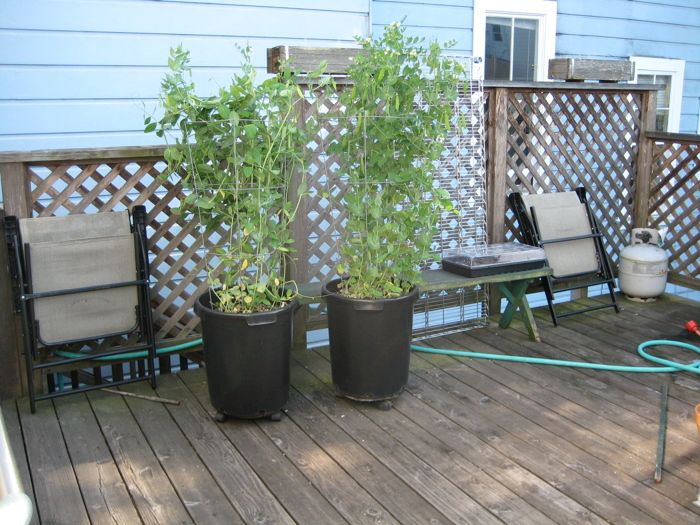
It may not look like much, but this space is 13.5 feet long (and the peas can be rolled out of the way).
I try to avoid cliches, but you don’t know what you have until it’s gone. I moved to San Francisco from Chicago for what I thought was my dream job and my dream man. On the latter point, at least, I was correct: I gained a husband, but I lost my wood shop.
In Chicago, I rented a shop space of almost 1400 sq. ft. from the generous and deservedly renowned furniture maker, designer, and instructor, Jeff Miller. After two years of trying, I’ve found nothing in my general area of California that is truly affordable, secure, and accessible by public transit. There’s also what I can only stereotypically refer to as the “California flakey” behavior I’ve encountered: People who claim they’ll go in on a shared space and never follow through, and the supposed hippie “collectives” that actually mean “only metal workers.” Collective, indeed.
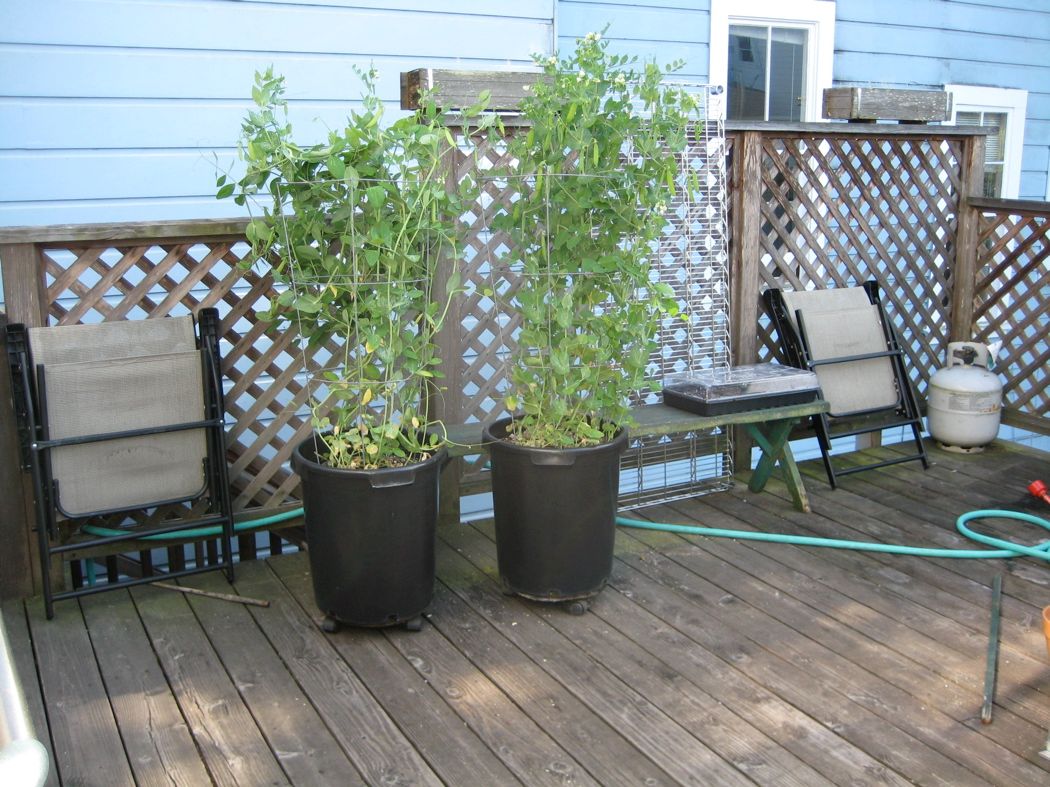
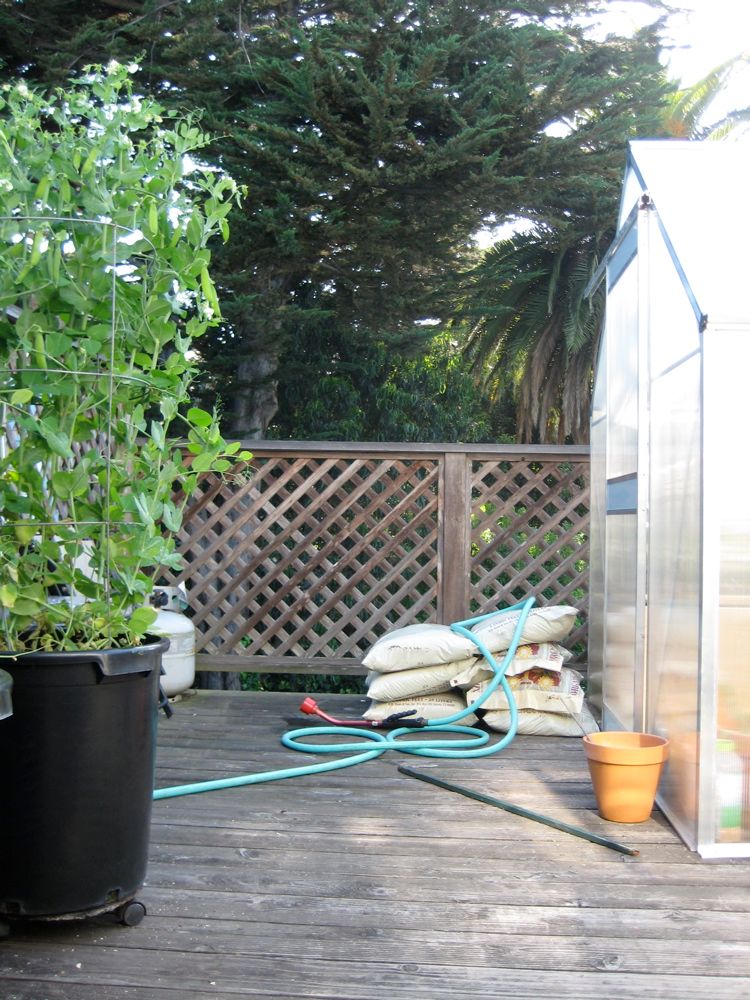
That means my “shop” is going on my outdoor deck.
| More odd shop spaces: • A Mobile Workshop • Studio Apartment Workshop • A Tokyo “Dungeon” Workshop • 36-sq.-ft Shop |
A popular sentence in our household is: “We may not have a ________, but we have a deck.” We may not have a garage or shed, but we have a deck, and specifically a space about 13.5 feet long and 6.5 feet wide at its narrowest point.
Pros and Cons
Pro: Close to home. The shop will be just outside my bedroom, through a sliding door. I’ll actually get some work done!
Pro: Free. I can’t say this of anyplace else in the San Francisco area!
Con: Moisture! San Francisco is often foggy and sometimes rainy. My bench should be finished like outdoor furniture. Fortunately, FW had some recent recommendations on finishes to use for this.
When I thought about moisture, I also remembered the marine covers we had on our boats in the summer, on the Great Lakes. I ordered and received samples from Seattle Fabrics (which specializes in marine fabric) and plan to sew a two-piece bench cover: 1) a bottom piece on which the bench can always rest, protected from puddles and other moisture on the deck’s surface, and 2) a top piece shaped to fit the bench that snaps closed to the bottom part, protecting the entire bench from moisture. I may also place rubber feet on the bench, or place or a rubber mat between the deck wood and the bench bottom for additional moisture protection from below.
Con: Light. Direct sunlight can fade certain types of unfinished wood, like cherry. If you don’t believe me, try the experiment in which you leave a piece of cherry out in the sunlight with a house key or coin resting on it. You’ll be able to see the key or coin’s outline perfectly after a sunny day.
Pro: Ventilation. I’ll produce the same amount of dust (though possibly less, without my power tools around), but I won’t be in an enclosed space. I don’t plan to use a dust filtration system, save for those included with tools to suck dust away.
Con: Finishing. Bugs and dust will get stuck in drying finish, but finishing is a minimal concern right now. If necessary, I can use folded screens (Japanese style, for instance) or ask the landlady if I can briefly borrow the downstairs garage for finishing purposes.
Con: Wood and tool storage. I can’t store a lot of wood, so I’ll have to use it soon after buying it. This is acceptable. I have a minimal amount of power tools in California anyway (they would have cost a fortune to move, so they’re shacked up with dad for the moment), so I mostly use hand tools. Hand tools are small and easy to store inside my apartment. I’m considering adding a heavy, plastic storage container that could double as deck seating if necessary.
Con: The weather dictates work time. No woodworking on rainy days (one of the times it’s most appealing to me!).
Con: No big power tools. I may have mental block, but I can’t imagine leaving a table saw outside – and there really isn’t room for it.
Pro: Assembly space. I have plenty of room to assemble larger projects on the unused areas of the deck.
Pro/Con Lighting. As long as there’s sunlight, our energy costs won’t rise, but my work will be confined to daylight hours. I can, however, add some sort of light to the wall of the house beside the deck, or purchase a standing lamp that I can place beside the bench.
Pro: Power outlets. There’s one outside and another easily accessible through the kitchen window. An extension cord will do the trick.
Additional Bench Requirements:
- It needs a vise. No surprise here. I have to have one. I’ve done enough woodworking to know that a door across two saw horses won’t work for me at this point. Since you don’t buy many of these in a lifetime, I chose the Jorgensen that recently came out on top in FW evaluations.
- Budget: $300 (not including the vise) – and I’d love to do it for less.
- It shouldn’t be too nice. $1,200 for a bench that’s going to be outside? No way. This is also the first bench I’ll own, not borrow (“my” first bench was really a combo router-table-saw-outfeed table, and the real bench in the shop was a loaner from Jeff Miller).
- It can’t have a cast iron base. Bench parts will have to be carried by a 135-lb. female up a very tall flight of stairs to get to the deck (we live on the second floor of an old Victorian). Lightweight is better.
- It needs to be 37.5″ – 38″ tall. I’m 5’11” and short counters cause me serious back pain. I’m always standing with my legs spread out to make myself shorter. The 37-38″ target is tall enough but will allow me to exert enough downward force on a piece.
- Easy to build without an existing table or bench. My bench will be built atop a few sawhorses and, if necessary, on top of some styrofoam (lying on the deck which will enable me to saw through legs without sawing through the deck).
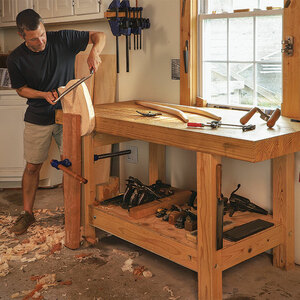
After a great deal of research, I was ready to go with the “Workbench in a Weekend” plan by Tom Casper. The plan is clear about how few starting materials you need: two sawhorses and the most basic of tools, and I recommend it. He’s also clear about starting with workhorses, then making a box that serves as a core piece of the bench but also doubles as the working table throughout.
I admit I looked at all the cuts (and thus pieces) involved in his design, and feel inclined to make fewer. I want to add some outdoor furniture finish to my bench and don’t want to finish that many pieces. I’m also hesitant about the soft lumber bench top and even less certain of my ability to get that soft lumber level and smooth.
Fortunately, I found an even simpler plan here on finewoodworking.com (no, they’re not paying me), along with a video (How to Build a Work Bench in Season Two of the Getting Started in Woodworking series). The video assuaged any concerns I had about assembly, and I think I can adapt the process to using sawhorses instead of a table. Hey, if they can make everything in an 18 minute edited video, I figure I can do it this weekend.
I’d love to hear thoughts and feedback before I go shopping this weekend and get started. What have I forgotten?What have I missed? What do I not know that I don’t know?





Comments
Stephany! Glad you're building our Getting Started bench. You really can build it in a weekend. We made ours on camera in less than two days and that included the multiple retakes.
You're post also hit home for me because I spent 5 years living in San Francisco trying to pursue my woodworking hobby. Here's what I did:
1. Found a pro shop to do all my big cuts. I made friends with the guys over at Woodshanti. you can look them up online. Not cheap, but I made sure all the tasks were very clear and organized to limit the time (they charged by the hour).
2. I rented a "shop" that was actually just a metal storage container with a roll-up door and power supply. It was located on the corner of Pennsylvania Ave and Ceasar Chavez. A guy named Dennis Magri rented the space and owned British-Magri Motorcycles next door. Cost me $300 bucks a month but I was able to outfit the space with enough tools to make furniture. I basically had to sell one thing per month to pay the rent.
Good luck with everything and keep us updated on your progress!
I have yet to make room for a table saw in my small shop. Most everything is done with hand tools, a circular saw, and a bandsaw. This set-up makes sheet goods a pain to deal with. But a solution to another problem has proven to be the solution to my sheet goods problem.
I am still working out some issues regarding drainage and occasionally a nice rivulet will find its way through the shop. As a result, I collect red 2 liter bottle racks/holders. Anytime something has to temporarily be on the floor, I place it on a plastic rack. So, between casters and plastic racks, nothing ever touches the floor of my shop.
I had always cut sheet goods on sawhorses in my driveway with a circular saw and straight edge. This guarantees holding the saw at some awkward angle or having to stop during a cut. One day day I was forced to cut sheet goods inside because it was raining. I did not feel like dragging out sawhorses. So, I threw down four or five of the red plastic racks, drew a line and made a very nice cut.
The beauty of the method is that you are able, in my opinion, to get closer to the work and place yourself more directly over the cut. If you use enough racks, the sheet good is very stable and you can slide along on your knee or the side of your leg. Also, if you happen to get a little to close to one of the supports/racks, the saw cuts right through with no problem. And, best of all, they are free.
Hello Stephany,
I to have an outdoor "shop". OK it is in my carport but I struggle with a lot of the same issues you do. Rain is probably the worst. I use several of those large plastic bins with the snap tops. What was pretty cool about your article is that I built the bench you mentioned "Workbench in a Weekend" about 10 years ago. It not fancy. Plywood and 2x4's glued and screwed with a salvaged solid core door as a top. No finish. It has served me quite well.
If I was building another, I think I would choose like you did. Happy wood working, watch those fingers!
Tom Goodman
Bailey, NC
Hi Stephany,
I also have an 'outside shop' at my Adirondack camp. Little different approach - I cleaned out the junk in our 'mower shed' (mowers too - they are outside) - an 8 x 10 - and now 'roll out' my tools to the gravel driveway in front of it when I use my 'shop'..
For both space and cost I bought Hitachi benchtop bandsaw, drill press, and belt sander. They work - the bandsaw particularly is nice for bevelled backs of Adirondack chairs because the saw tilts - not the table. Also Ryobi mitersaw and 10" table saw (Home Depot), router table mounted in a workmate, Sunhill 12" planer. I wouldn't want to work 8/4 Oak with this stuff - but for Western Red Cedar and White Pine - they are fine. And my favorite - a Festool TS-55 plunge saw/guide system. Next week, I'll bring up an MFT. (The TS-55 is perhaps the one Festool worth its cost - it is really great. Here is an example of what I used it for outside: http://www.cfnet.net/yc/)
Thoughts: Can some part of the deck be enclosed on three sides with a shed roof top - and perhaps your marine fabric used as a roll down/drop down 'door'? Here the rain is really a pita - I now keep the bandsaw and the drill press in the shed and use them there undercover - the rest I roll out when I use them.
That said - the rain is the worst. I also would really like to be in the shop when it rains - and thats a lot more here in the Adirondacks than at SF.
If I can somehow find the money I am looking at possibly a 'sheds-r-us'-type prefab from Home Depot - 12 x 16. Almost 200 sf! I will be in Hog Heaven - comparatively..
Good Luck!
Chris
My first shop was 7x11 with a shopsmith knockoff at the center. The windows were plastic sheeting. That was outdoors enough. I think you might start to think Japanese, on the deck. Put a waterproof cabinet for tools in one corner, some flip down floor panels along one side, and a knockdown planing bench somewhere else.
Of course you are nuts. I think the bedroom is a better place for a shop. I recall having my Legacy mill in there awhile ago. Sleep on the foldout couch or a murphy.
Enjoy the quest...but you will still want a better shop.
I rely on my back yard to cut down large sheets, so the rain was a real problem for me too. To allow me to continue to work outside even when raining, I made a version of an awning to cover an area of about 8ft x 12ft. I bought two pieces of robust and waterproof general purpose tarpaulin and tied them together to make one piece to cover the area. I then attached a rope and pulley to each of four points (two on the wall of the house, one on an adjacent wall, one on a shed several feet away) and these attach to the corners of the tarpaulin.
When I need to use the area, I attach each of the four ropes to a corner of the tarpaulin (for convenience I use quick-release catches for this, like rock climbers use) and raise each corner via its pulley. Once I tie the other end of each rope to a bracket on the wall, the whole thing is very secure. The pulleys on the house side are higher than those on the other/outer side to create a slope in the tarpaulin so that water runs off.
Unfortunately, on windy days the rain can still blow under the tarpaulin, but in general it works well, was inexpensive, and didn't make a big impact on the appearance of the house (important if you are renting or plan to sell up at some point). In an attempt to tackle the wind+rain, I tied a smaller piece of tarpaulin to hang at the open side, which is where the wind generally comes from, and this worked reasonably well.
The tarpaulin needs to be strong where the ropes attach to it - mine came with metal rings pressed into the edges, but I needed some extra attachment points so bought some additional rings myself (very cheap) and pressed them in place with the simple tool that was supplied with them. Also, the ropes and pulleys should obviously be weather resistant - I thought my pulleys were, but unfortunately they are not and so they have rusted. They still work, but they are just a bit ugly which could be an issue for a landlord/landlady.
Because of limited space, I too use a Festool TS55 for cutting sheet goods (and solid woods too, sometimes). It works very well. However, for a few years I made do very well with a homemade alternative - a middle-of-the-road circular saw fitted with a good blade and homemade cutting guides with sacrificial cutting table, to be precise. The quality of cut was excellent and of a very similar standard to that of the Festool. The benefits of the Festool for me are that the cutting guides are a lot lighter and more robust, so moving them around and storing them is easier and safer, and the dust extraction on the Festool saw is better than with my previous saw. Also, I like the plunge mechanism on the Festool, not least from a safety point of view. My previous setup was based on the very clever ideas in the following article:
http://www.thewoodshop.20m.com/graphics/circularsawintheshop.pdf
Good luck with your plans!
Just one word of 'concern'.
MDF is great stuff - but it DOESN'T play well with moisture.
You might consider using a coupla sheets of plywood for the top.
I also lived in San Francisco, and I believe that metal tools should not be outside! Unless you live in the Mission.
San Francisco Joke: A 3 year old child was walking with his mom down Parnassus street one morning. The sun was shining. He looked up and said "look, mommy, blue fog!"
3 small suggestions: work small, work by hand, work inside. In a "shop" you need to provide proper dust collection to protect your lungs. In your living space, you can see any sawdust and mess you make, so you are more likely to protect your lungs properly.
2 large suggestions: TechShop in Menlo Park, and The Crucible in Oakland. They have all the tools you want but don't have space for, plus tools for things you don't know how to do yet. Even if you have a great guy, sometimes you want to meet some other folks who make things. In my experience, both places are full of creative people who do not think a glassworker or welder or seamster is better than a woodworker.
Good luck, post pictures when you are done.
I second @Brannam's thought. Go Japanese. Less gear "required" and it is much easier to break down and put away.
Check out http://www.daikudojo.org.
I'm a woodworker in San Francisco, originally from the east coast, and I can absolutely identify with the your troubles with the california flakiness (and don't even get me started on the metal only shops). Some of the greatest folks out there to talk to and make friends with, but when it comes to something like sharing a shop, it's all but impossible. It seems like having a workshop on a porch would be the worst possible place, but I can understand how you ended up out there. The last post seems to have a lot of good ideas for dealing with the city though.
I've built quite a few guitars and pieces of small furniture using mostly hand tools and a few hand-held power tools, all on a third story porch in a small apartment in burlington vermont. It was very very tiny.
The key was getting easy to access my tools (in a closet in the apartment) so that I could quickly obtain and put away what I needed for the day. A five gallon bucket with padded bottom and one of those slip-in "toolbox" things helped immensely for getting a variety of handtools in and out without making a hundred trips. (most of the handtools lived on a series of pegboard and cubbies in the closet)
I ended up using the railings of the porch as my work surface to do most of my rough work, and a cheap fold-down workbench with a piece of MDF for more exacting things, or as a platform for the router table or small drill press. (Although I did a fair amount of drilling work indoors.)
It limited my woodwork to warm weather, (although with a pair of insulated work gloves, I could work well into the beginning of winter)
Dust collection was a shop vac hooked to things that made dust. I tried to use hand tools and edge tools over sandpaper whenever possible to cut down on flying airborne dust and noise.
The hardest part was turning around, particularly when holding a piece of lengthy lumber! Wacked my head a couple of times.
So you can always make do! I'd suggest storing tools inside, and making it as easy as possible to get them outside as needed. Perhaps this means making a rollable tool chest.
My new "shop space" is about the same, although we have a spare bedroom for some work to take place in. I'm jealously eyeing Blum Tool companies portable workbenches and thinking of building something similar.
For tool storage, you might see if you can find a reasobly priced dock box from a marine supply outfit in the bay area. Dock boxes are weather proof, lockable and can be used as seating in a pinch. I'm sure you could find a good used one if the marine outfits try to gouge you too much on price. It is nice to work outside, I do whenever weather permits.
good luck
Stephany, Welcome to the Bay Area!
I hate to tell you but you're going to be highly disappointed working outside in SF. If you put power tools out there, rust is your least worry. It's noise. Be nice with your neighbors and if you have parties, invite them (makes them feel indebted to you ). Samuel Clemens said once that the coldest winter he ever spent was a summer in San Francisco. There is truth to that because as the Central Valley warms up, that cold Pacific air moves in to compensate. All that air powers itself through the Golden Gate and you freeze!
If you deal with just hand tools, then you might have to refinish that work bench every other year. Check the ground under the deck and see if you see any green stuff growing. If you do, the deck is on the weather side and it is going to be moist.
Its good to see one more woodworker in the Bay Area!
Think about whether you even need a traditional workbench and vise. Fine Woodworking #202 has a great article, "Forget What You Know About Workbenches." It is a system of two narrow beams (actually torsion boxes) on two stout sawhorses that seems infinitely adaptable to various tasks and very easy to store when not in use. For vises, he is able use bar clamps in very ingenious ways. You could even use pressure treated pine and marine plywood or, if you want to spring for it, teak or cedar.
If I had to do it all over again I would do it that way.
One thought for outdoor storage of tools: I have read of people storing paints outdoors in fridge/freezers rescued from garbage, and perhaps you could use something like that for your tools. If the body of it were not damaged then I expect it should seal well to keep out moisture and the fact that it is already insulated might be useful too.
Of course, a freezer could be too large for your space, but on the other hand it could act as a useful work surface/bench too (I'm thinking here of the flip-top style of freezer that are common here in Europe).
Thanks for the responses! All of you have been so resourceful and helpful. I wish I'd gotten email notification of comments, because I had no idea they were here and now feel terribly rude.
The near-constant rain of the past few weeks has made working outside an impossibility most of the time. I have decided to add an indoor bench (jpierce, I'm ogling the Blum "Pony" in another browser window, which I didn't know about until you mentioned them - thanks!) but will keep the exterior set-up for most power tool use and projects that will produce a lot of dust. The Blum, or something like it, could easily fit in our living room and I think my dear husband secretly loves the fact that it can be easily broken down and put away.
tomcarver and cybritton: Rain has been the worst for me too. I'd purchased plastic-coated/laminated MDF for the bench top, thinking that it would offer some moisture protection, but the top was just too slippery to use safely. The exposed MDF (between the coating) became too moist and warped and flaked anyway, and this just from the times that it was briefly uncovered (I usually had it wrapped in a tarp). For the outdoor bench, I will definitely use plywood or similar as other people have suggested. I've been keeping my eye out for used or scrap butcher block and plywood on Craigslist and Freecycle.
cahudson42in: A Festool like yours is a dream. I'm so glad to hear you think it's worthwhile. I'd just love to have one. A girl can dream!
I loved your thought as to whether some part of the deck could be enclosed on three sides with a shed roof top with marine fabric used as a roll down/drop down 'door'?. The landlady said no and, believe it or not (to add to my California irritation), said that the neighbors would argue it was an extension to the house and call the zoning commission. I didn't test this, because I'm sure it's quite likely given what I've learned of San Francisco politics and laws.
Branman: You wrote "Of course you are nuts. I think the bedroom is a better place for a shop. I recall having my Legacy mill in there awhile ago. Sleep on the foldout couch or a murphy." I'll take that to my newlywed husband tonight and see how he feels about giving up the Tempur-Pedic and the dining and living room furniture from his grandparents and mine. ;) I think I have a better chance with the living room.
You also wrote "Enjoy the quest...but you will still want a better shop." But of course I do! Dealing with life in one of the most expensive cities in the US is a reality for the moment, but it doesn't mean I don't WANT a better shop. It's just not going to happen (here) anytime soon. Like most other people right now, we're squarely in "make do" mode.
doozer, your tarp solution sounds ingenious. It is something I can try on the deck and plan to. I appreciated that you wrote that it "didn't make a big impact on the appearance of the house (important if you are renting or plan to sell up at some point)." You truly understand the constraints of being a renter! Thanks for the sympathy and your idea: It's such a creative way to work within current constraints.
tarsier recommended The Crucible in Oakland. Thanks to your testimony, I'm signed up for a carving class, which I know nothing about. I was so pleased to see that The Crucible is easily accessible via public transit, so I can get there quickly via BART, seeing as how we're going on year six of no car ownership.
Jaytease: Thanks for the cultural empathy. Let me know if you go to Bay Area Woodworkers or similar. I'm making "engagement with the larger local woodworking community" a big goal this year.
jpierce, I love your attitude that you can always make do. That's where I am right now, and I'm trying to have fun and stay creative with it rather than focus on things I want but can't afford. There's just no use in that right now and figuring out how to make do is much more fun anyway!
McKay: I purchased a Suncast storage box (this one: http://www.suncast.com/productdisplay.aspx?id=314&pid=139) and it's working SO well. For the record, Suncast products are Made in the USA, which is incredibly important to me and possible others. We snapped it together inside of 10 minutes and my tools are staying super dry in the rain right now. I'm still keeping an eye on the rust inside, but all of my tools are also in their own cases inside of the box for extra protection.
kareardo, my power tools (which I don't use all that much compared to hand tools) have NOTHING on the family screaming matches from the neighbors, which wake us up at 5:30 AM some days. I relish the chances I get to run the router for a while in productive retaliation. :)
Log in or create an account to post a comment.
Sign up Log in