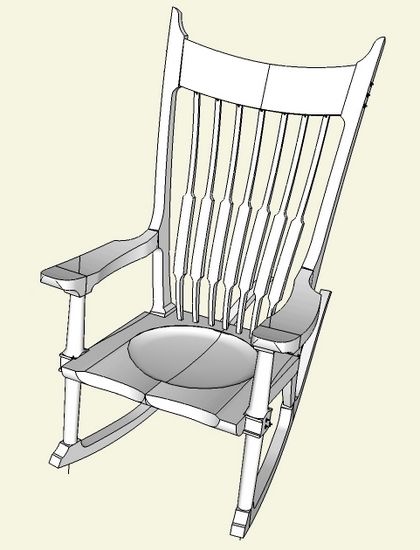
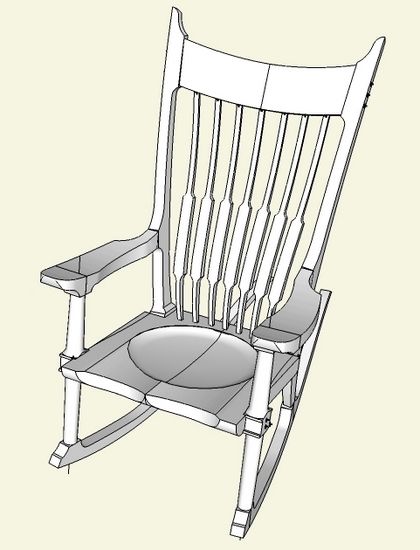
I was not satisfied with my first attempt at the Maloof Rocker Arm as shown in last week’s blog entry. So I re-read the FWW # 42 article, “How to Make a Rocker”. Each time I read Maloof’s text, I find another valuable nugget of information. However, in the case of the arm, I wish more had been said. Also, it would have been nice to have a top view of the chair which would have provided important shaping information.
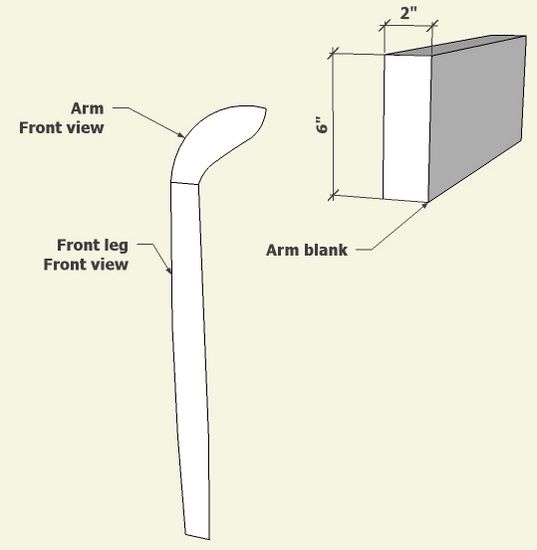
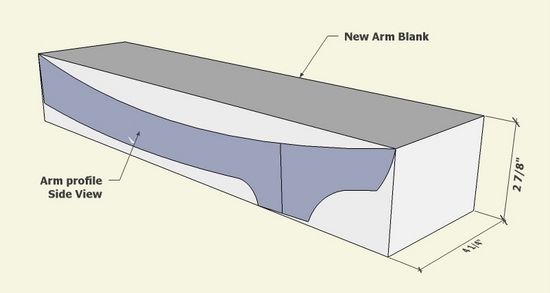
Maloof briefly describes using “a piece of 8/4 stock, 6 -in. wide and 19 long”. So with that information, I began to noodle in SketchUp. From the front view scan of the chair (imported into SketchUp as an image), I drew the shape of the arm as it sits on top of the front leg. This is shown below along with the 8/4 piece of arm blank.
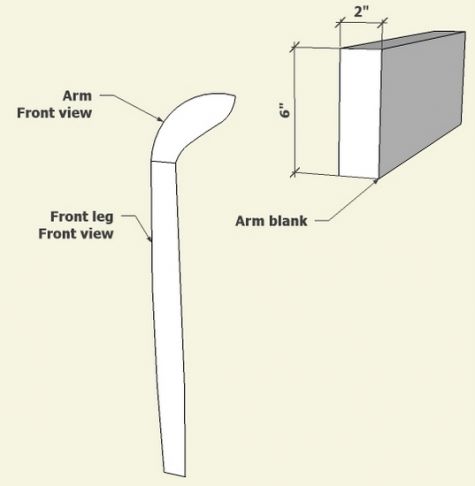
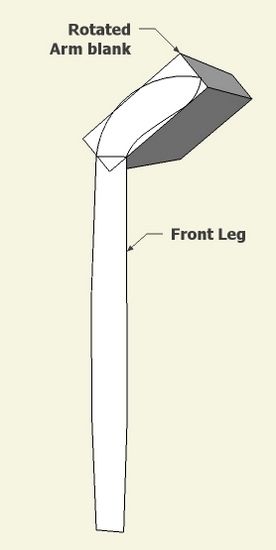
I realize that the only way to use that 8/4 arm blank is to rotate it as shown below.
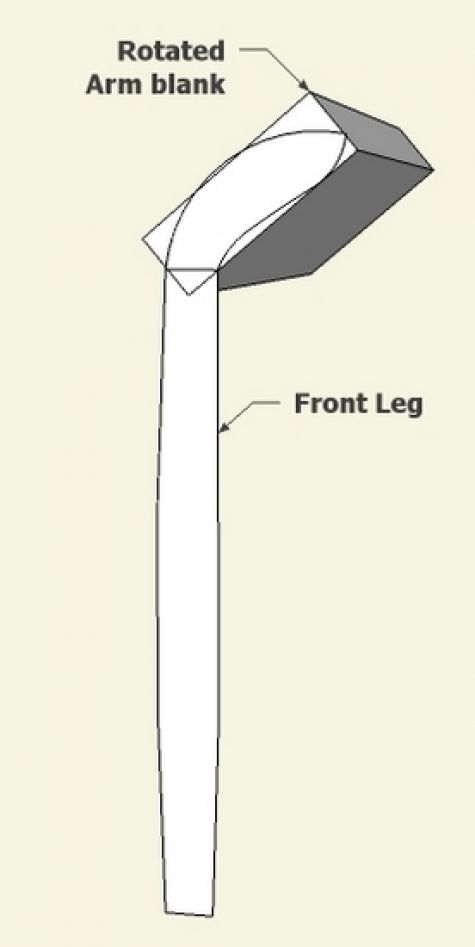
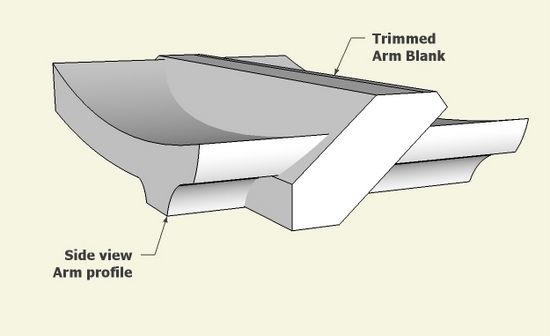
Could this be how Maloof used the 8/4 blank? I’m beginning to question this. Nevertheless, I continue with the SketchUp design. I trimmed the blank (as if with a bandsaw), then combined it with the side view arm profile. Now I can select all, and execute Intersect with Selected.
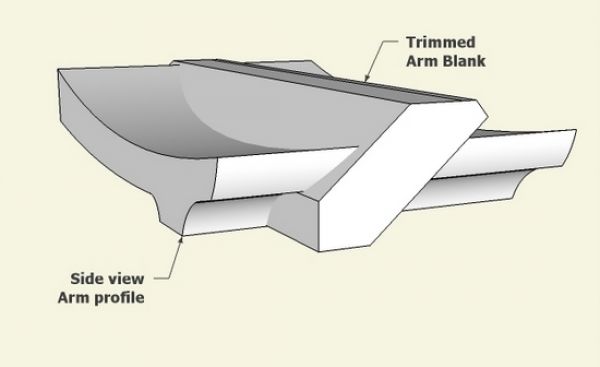
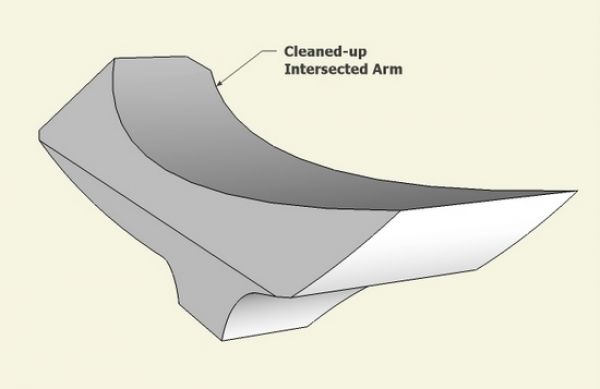
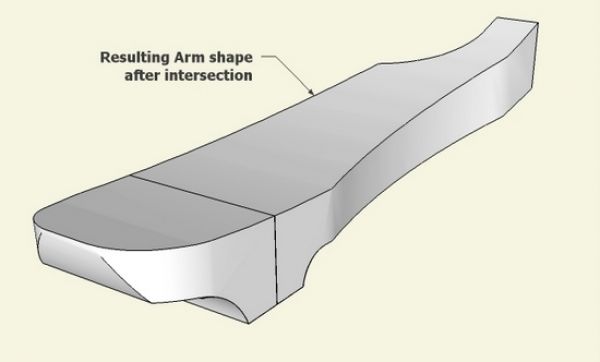
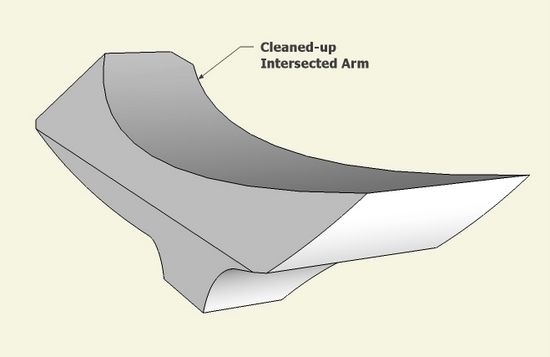
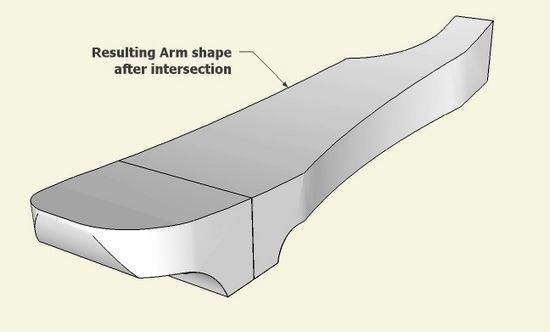
After intersection and clean-up, below is the resulting shape. But I was doubtful about doing this work on the bandsaw and gave up on this process of arm shaping.
To avoid positioning the arm blank on an angle (which makes bandsawing difficult), I decided to increase the thickness of the stock to 12/4 and change the procedure as follows.
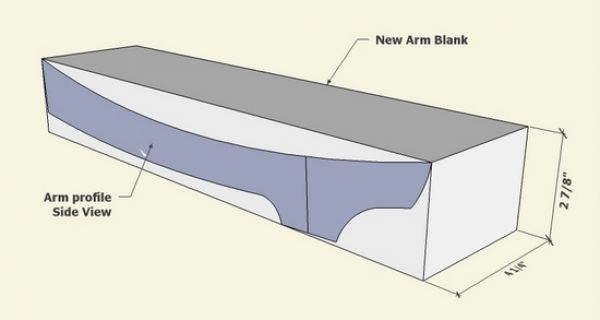
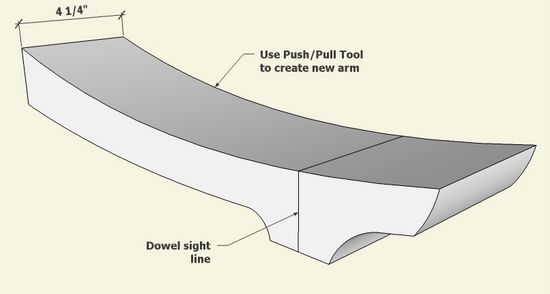
Step 1: With the side view shape of the arm, use Push/Pull to create a width of about 4 1/4-in. I like to maintain the dowel joint line on the shape to help with mark my stock for boring the 1/2-in. hole for the dowel. This shape will be easy to band saw.
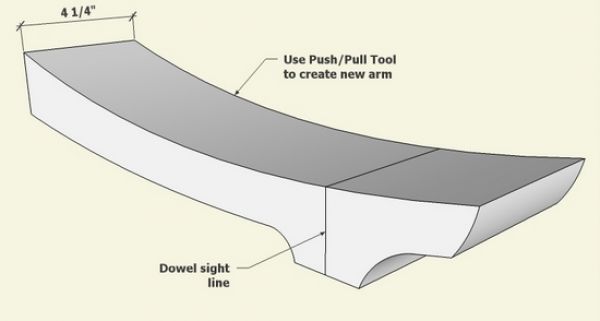
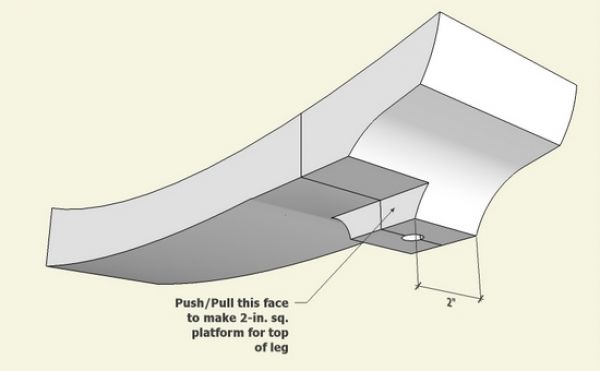
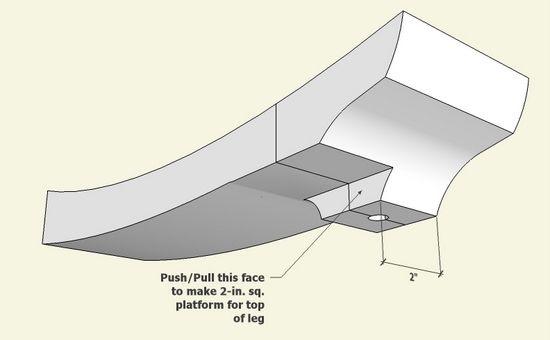
Step 2: Use the Push/Pull Tool to size the joint platform which connects to the top of the front leg. I also “drilled” the 1/2-in. diameter hole for the dowel.
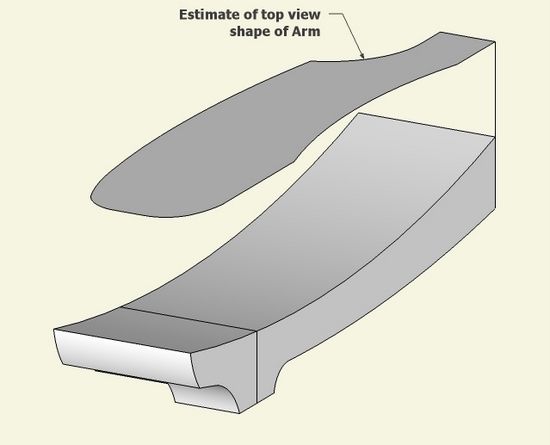
Step 3: There is no information in the article about the shape of the arm looking from the top. After looking at other pictures, including FWW # 25, I estimated a shape as shown below.
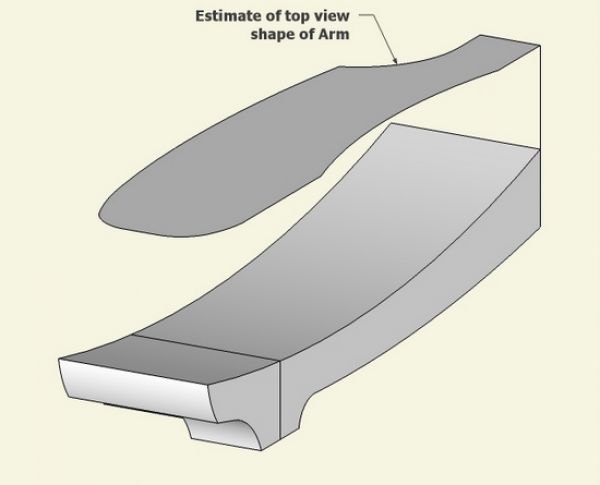
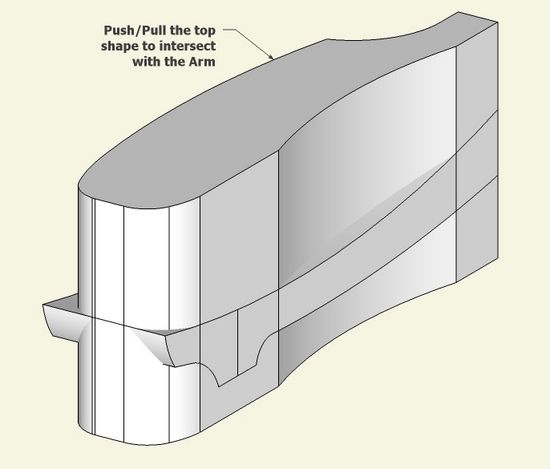
Step 4: With the Push/Pull Tool, increase the depth of the top shape and push through the arm as created from the side shape. Then select all, and execute Intersect Selected.
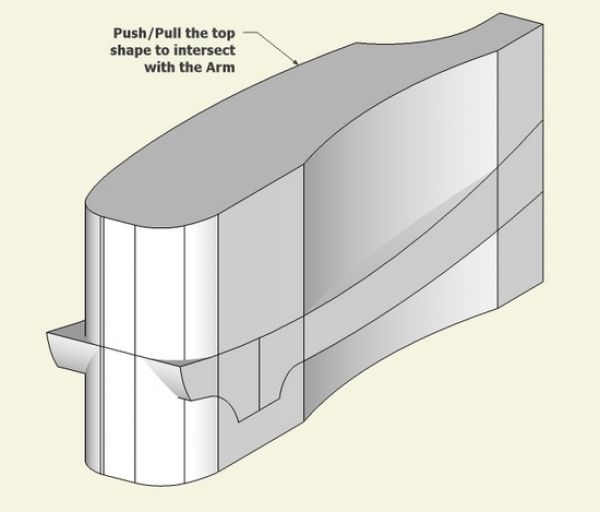
Step 5: After cleaning up the waste with the Eraser, we have a bandsawed rough shaped arm.
Step 6: Position the new arm on the rocking chair. The positioning is somewhat tedious because of the angles. In X-ray view, I can place the dowel socket center on the arm with the dowel socket center in the top of the leg. With the Rotate Tool and some centerline guidelines, I can shift the arm to its properly engaging angle with the leg. I then use the rotate tool (from the center of the dowel) to position the rear arm face to the back leg.
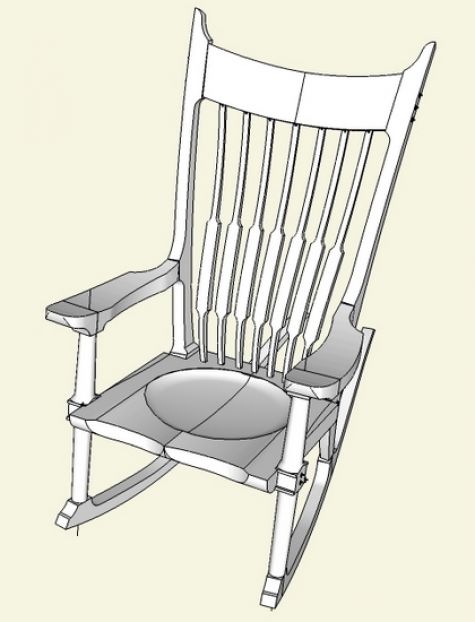
I used this procedure to recreate the arms in the shop. Now they are ready for shaping.




Comments
Tim,
I was having this same dilemma, and found the answer (kind of) on Wikipedia. On Sam Maloof's wikipedia site there is a link to a Woodworking Channel where Sam makes an arm for his rocker. The was helpful. Let me know what you think.
To pht36: yes, I've now seen his videos and he does strange things with the bandsaw. Needless to say, we haven't adopted his techniques.
Tim
Log in or create an account to post a comment.
Sign up Log in