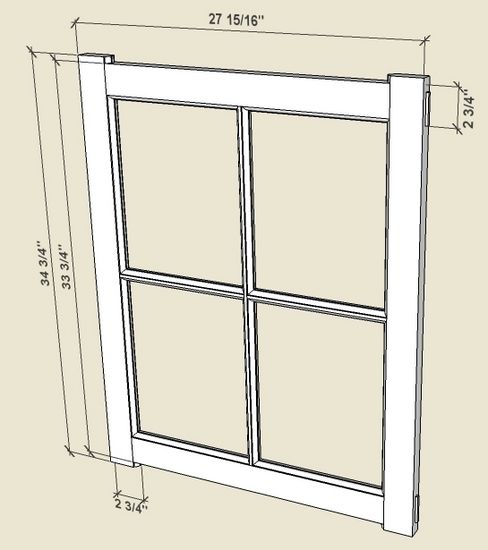
Roy Underhill was a recent guest speaker at Mt. Diablo Woodworker’s in Pleasant Hill, CA. It was a fantastic and entertaining day of demonstrations and discussion. One of Roy’s subjects during the day included the design and building of a traditional window sash. His method is quite different than what I had shown in a previous blog entry – http://finewoodworking.taunton.com/item/4790/making-a-window-sash-or-breakfront-cabinet-door – wherein I showed sash-bar intersections using a mitered intersection joint. Roy uses a “scribed” intersection joint which is better for expansion/contraction issues. Below I have showed how I reconstructed his scribed method in SketchUp.
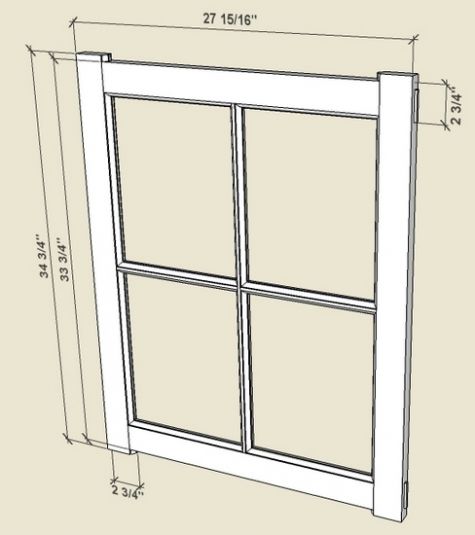
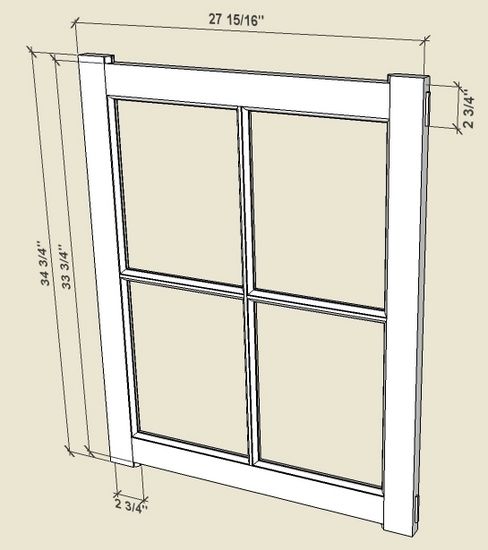
Here is a model of the sash shown by Roy (the overall dimensions are not exact). Roy’s sash included extra length in the tenons so that they fully protrude through the stiles. Also, his stiles have extra length to provide a “horn” which is good protection when banging out the mortise.
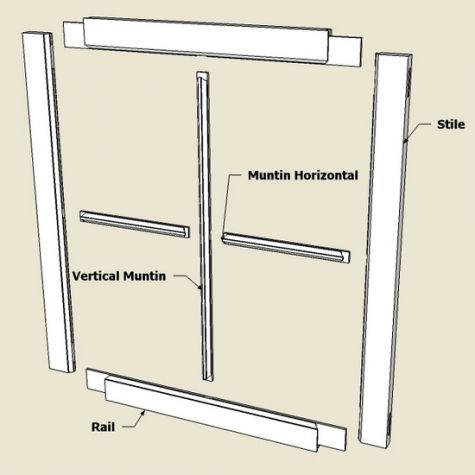
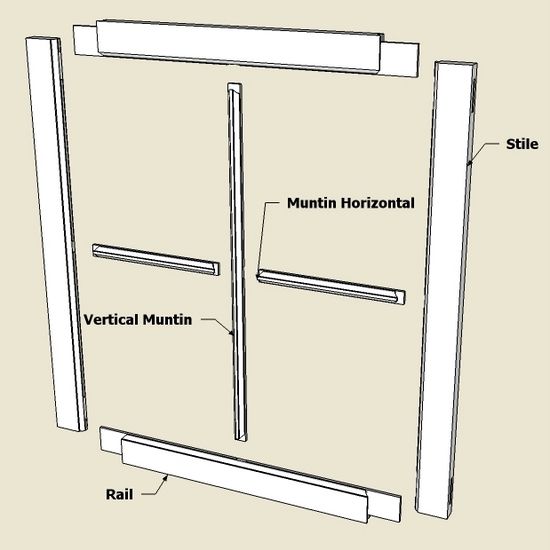
Here is the exploded view:
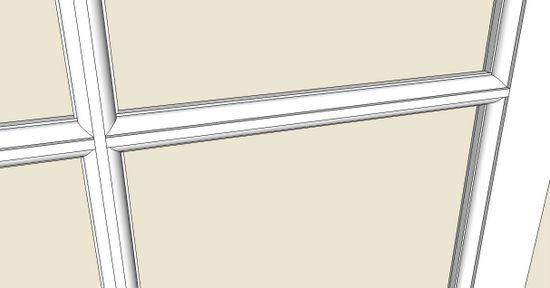
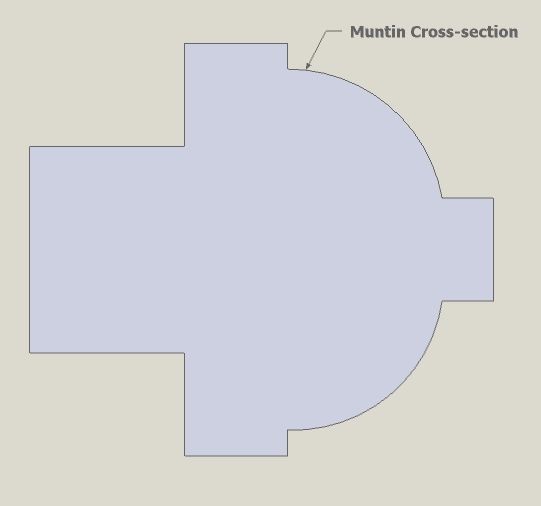
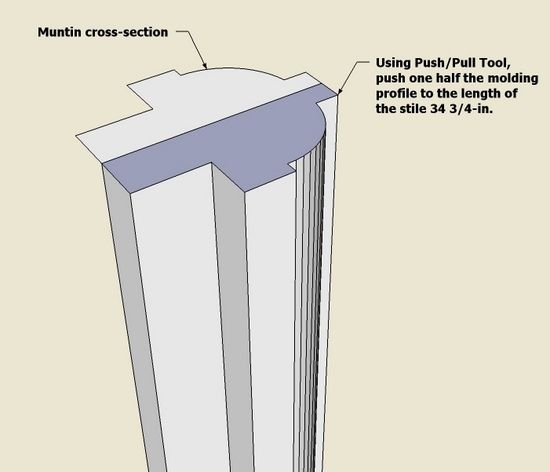
This is a close approximation of the muntin cross-section shape used by Roy:
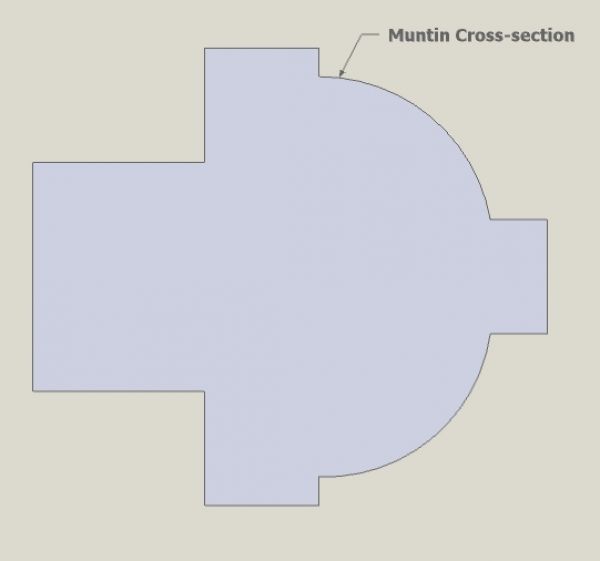
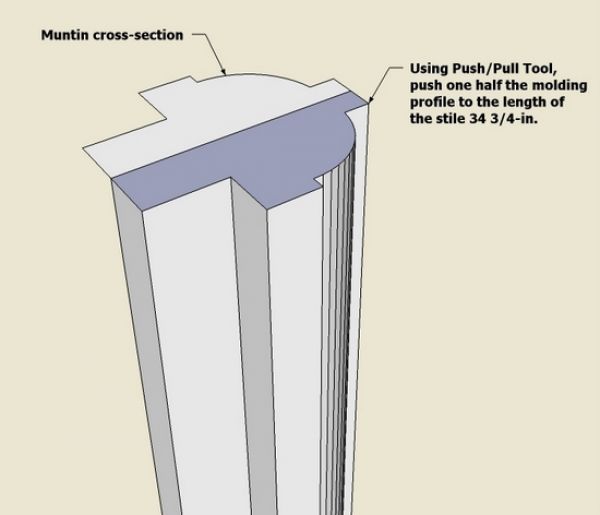
Step 1: Make the vertical stile first. Use the muntin cross section to start the making of the stile. Use the Push/Pull Tool to create the full length of the stile (molded edge only in this step).
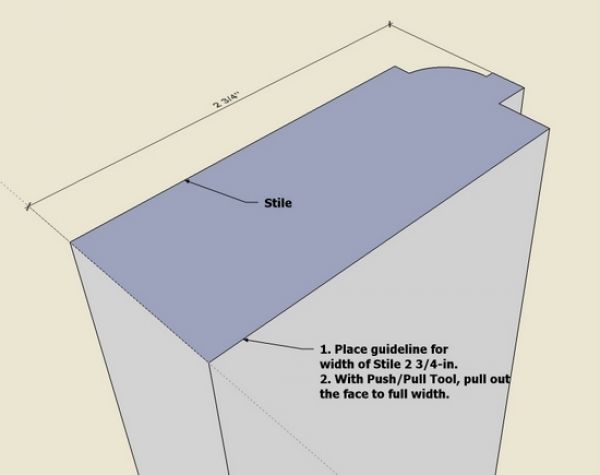
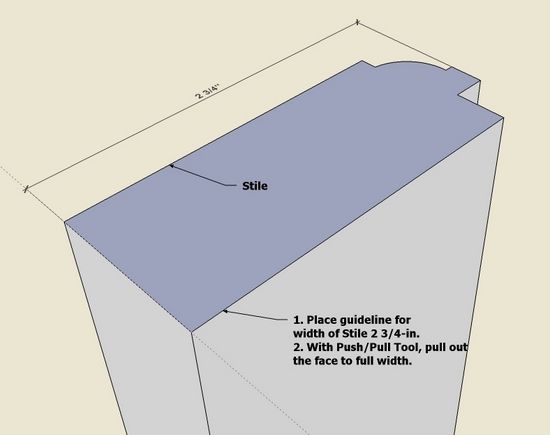
Step 2: Now make the remaining width of the stile by using the Push/Pull Tool.
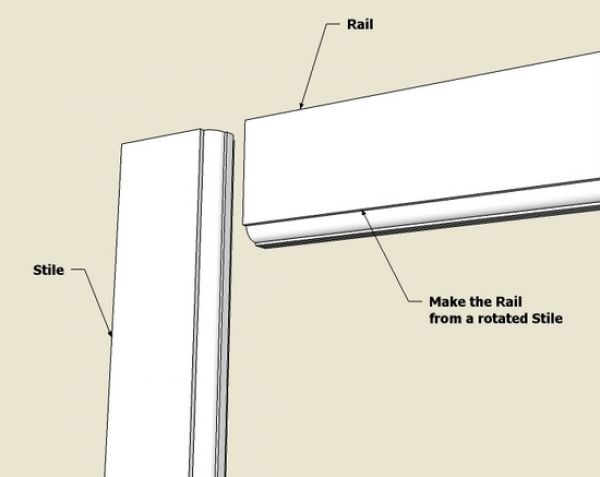
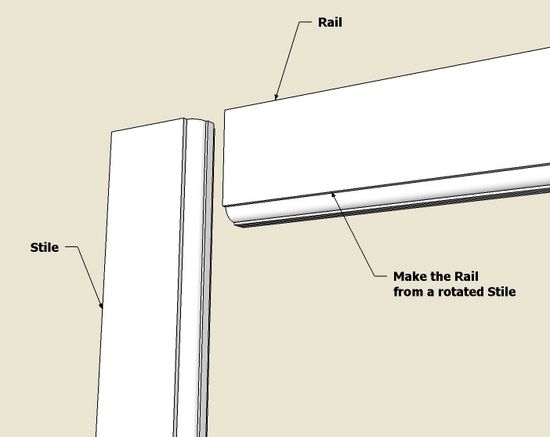
Step 3: Make the top rail from a rotated copy of the stile.
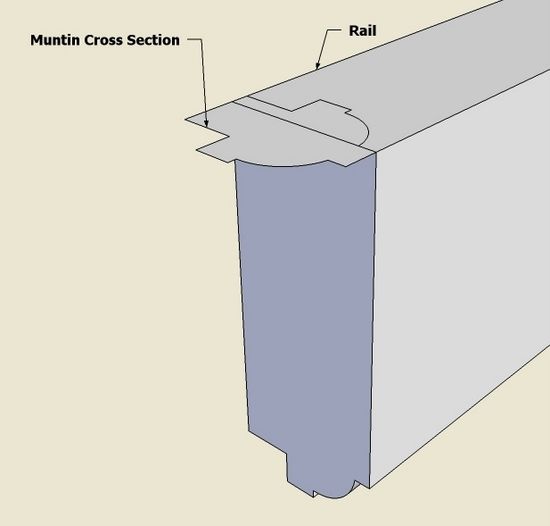
Step 4: We need to create the “scribed” joint in this step by using the muntin cross-section again.
Place the shape on top of the rail edge as shown below.
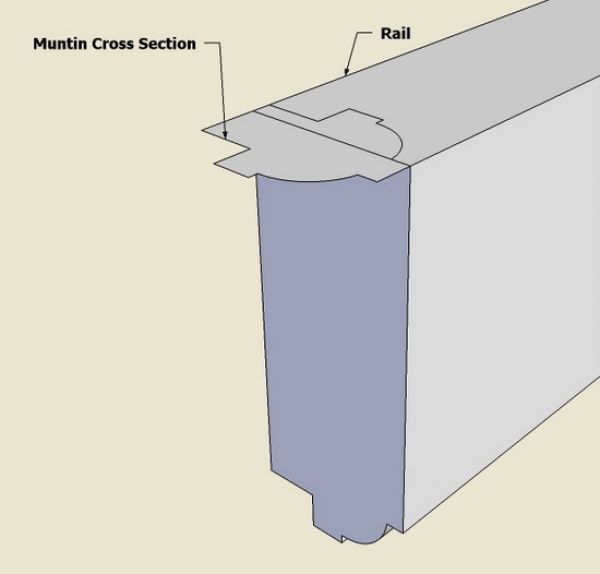
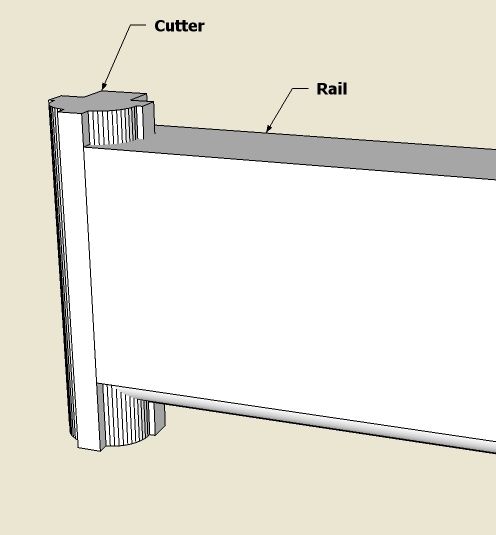
Step 5: With the Push/Pull Tool, create a “Cutter” which will be used to create all the scribed joints in the sash including those for the muntins or sash bars.
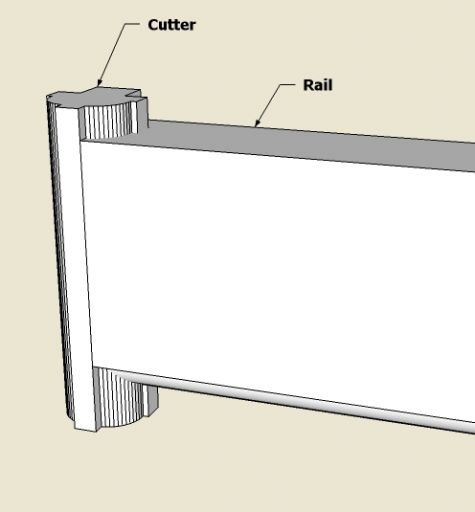
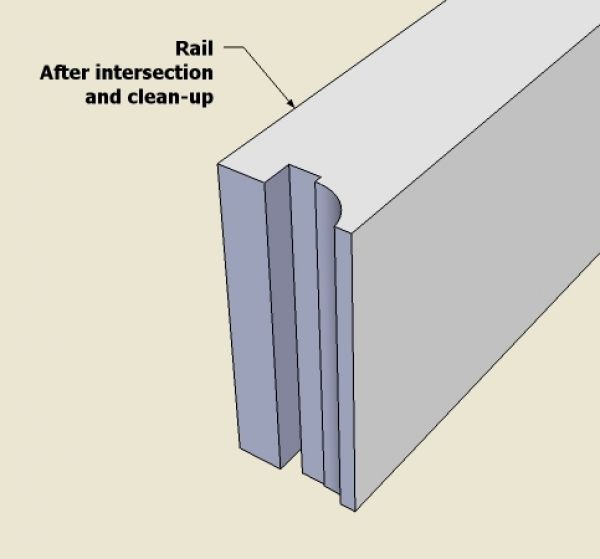
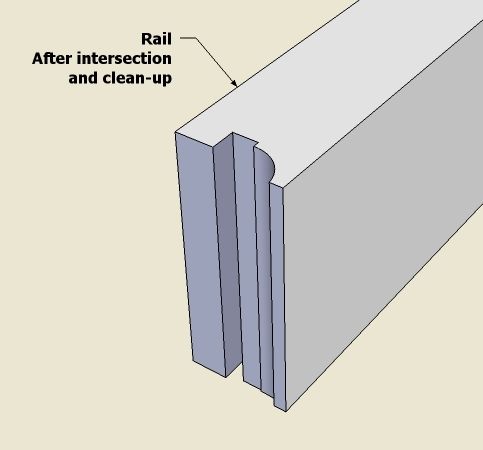
Step 6: Explode the Cutter and the Rail, select all surfaces and edges by drawing a select box around the pieces with the Select Tool. Right click on the selected graphics, and pick Intersect Selected from the pop-up menu. Then use the Erasure Tool to clean up the waste material.
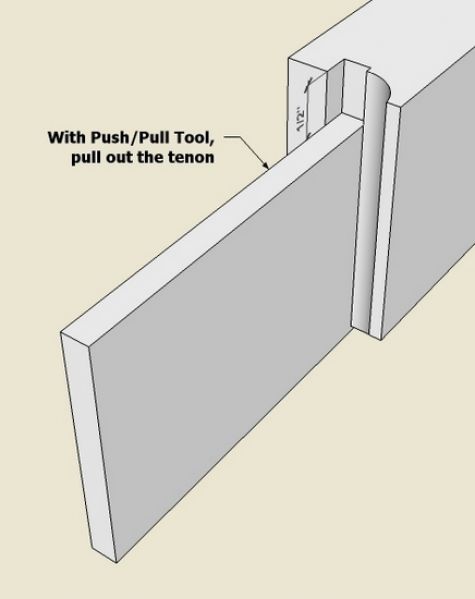
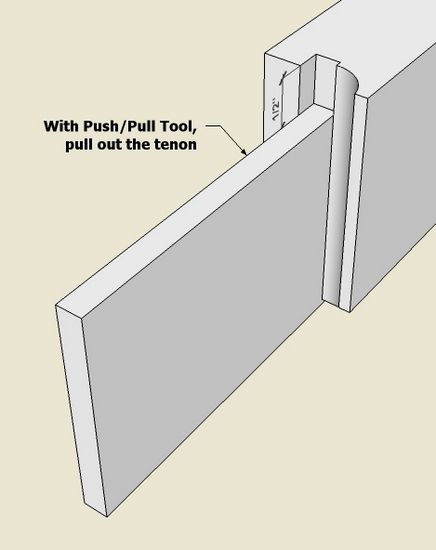
Step 7: With the Push/Pull Tool pull out the tenon in the rail. Note that there is a 1/2-in. shoulder on the top edge of the rail tenon.
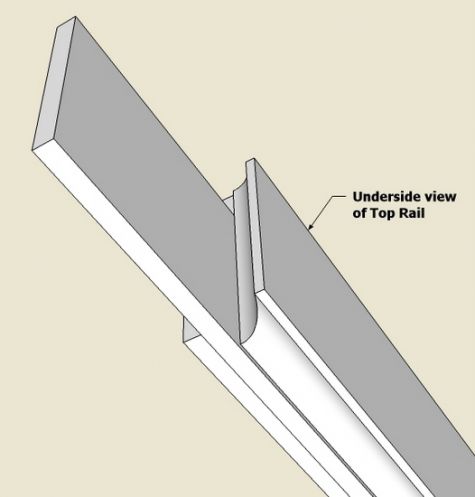
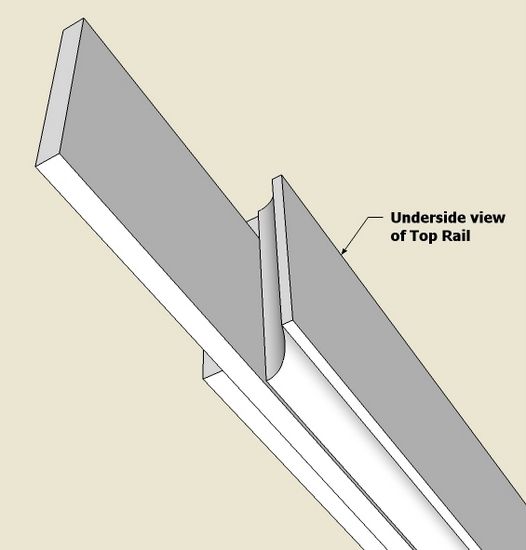
Step 8: Here is an underside view of the top rail.
The next step would be to join up the Rail and Stile and create the mortise in the Stile. With the Line Tool, you can draw lines where the tenon penetrates the outside edge of the Stile. Then with the Push/Pull Tool, push out the mortise the full width of the Stile.
The scribed joints for the muntins are done similarly using “Intersect Selected”.
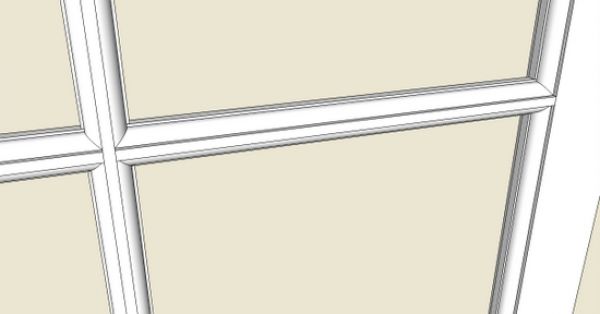
I will need a new tool in the shop for making these scribed joints – a scribing gouge which Roy demonstrated admirably.





Log in or create an account to post a comment.
Sign up Log in