High-Gloss Finish Made Simple
Automotive polish makes it fast and foolproof.

Synopsis: Learn the secrets to applying a high-gloss finish that brings out the color, depth, and figure in wood. Brushing or spraying alone won’t do it. The secret is applying thin coats of film finish and then polishing them either by hand or machine. Sean Clarke takes you through the steps: sealing the wood, filling the grain, building the finish, leveling the topcoat, and rubbing out to a high sheen.
See how Clarke rubs out the finish using an electric polisher in a companion video.
 Nothing matches a high-gloss, rubbed-out finish for enhancing the color, depth, and figure in wood. However, you won’t get this flawless and glossy look from brushing or spraying alone: It is achieved by applying certain types of film finish and then polishing them either by hand or machine.
I recommend shellac or lacquer (not waterbased) for this process. While I’ll demonstrate by brushing on lacquer, I’ll also give recipes for spraying lacquer and for brushing or spraying shellac (see p. 57).
Although certain styles of furniture such as Art Nouveau may have the whole surface polished (or “rubbed out”), with other styles it is quite acceptable to rub out just the most noticeable surface, such as a tabletop. Or, you can start the rubbing-out process but stop before a high gloss is reached, and instead achieve a flawless, semigloss sheen.
A perfect surface is critical: For this highly reflective finish, the surface of the wood must be absolutely flat and smooth. This means that all milling marks, whether the telltale ripples of a power planer or the ridges from a handplane, must be removed. Start sanding at P150 grit and work up to P220 grit. If you are working with a harder wood such as maple, you may need to start with P120 grit. If you plan to use a water-based dye, wet the surface with water to raise the grain, let the wood dry for one to two hours, and sand lightly with P320-grit paper to remove the raised grain. Apply the stain, allow it to dry for at least four hours, and lightly sand with P220-grit paper.
Open-pored woods need to be filled— When applying a film finish to open-grained species such as oak, walnut, and mahogany, use grain filler. You’ll need fewer coats of finish and less sanding between coats to achieve a flat surface, and you’ll avoid the risk of the grain structure reappearing as the finish cures and shrinks down into the pores. Cherry and maple are sufficiently close-grained not to need filling. Before applying grain filler, apply a washcoat of dewaxed shellac to prevent staining.
You can use oil-based filler (I like Bartley’s; www.bartleycollection.com), or waterbased (I use Behlen’s; www. woodcraft.com). Both come in light, dark, and neutral, but you can tweak them with water- or oil-soluble dye powders (www.woodworker.com) to customize the color. The oil-based filler gives you a longer working time, which first-time users may appreciate, but the water-based is ready more quickly for topcoating.
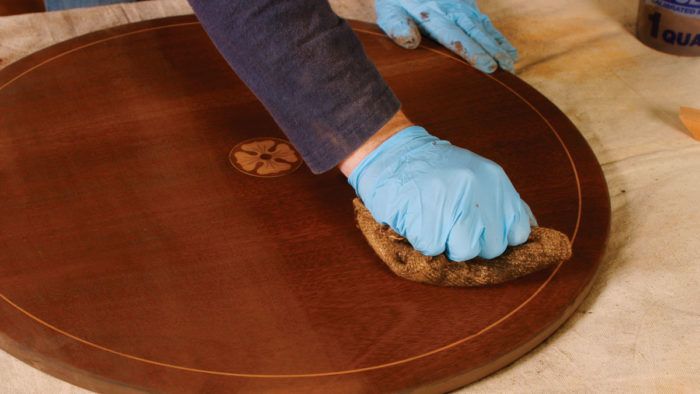
Apply the filler with an old natural-bristle brush, working across the grain. Wait about five minutes, then use a plastic scraper or credit card to gently remove the excess from the surface. Wait about 15 minutes and then use a piece of burlap or a white abrasive pad to remove the remaining excess. The next day, lightly sand to leave the pores uniformly filled but with no filler on the surface.
 From Fine Woodworking #206
For the full article, download the PDF below:
Fine Woodworking Recommended Products

Bumblechutes Bee’Nooba Wax

Bahco 6-Inch Card Scraper

Odie's Oil


Log in or create an account to post a comment.
Sign up Log in