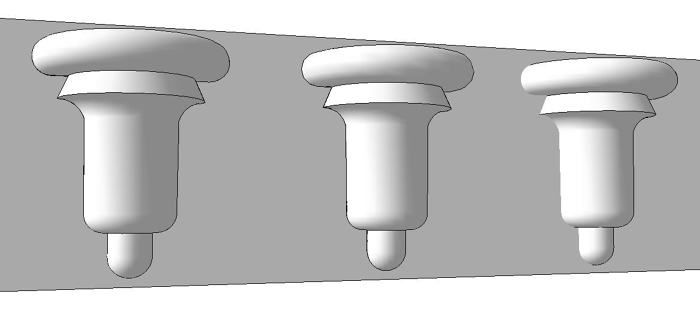
In the previous blog post, Tim shows how he added some amazing detail to a SketchUp model of a cornice for a bookcase he built. Adding these sorts of details in a SketchUp model can be very useful in working out exactly how you’ll build the project in the shop. Tim figured out quite quickly that it would be easier to build the bookcase to fit the cornice than to work the other way around.
TIm has given me permission to add a few comments related to drawing these small detail pieces. He’s also loaned me the profile he drew to use as an example.
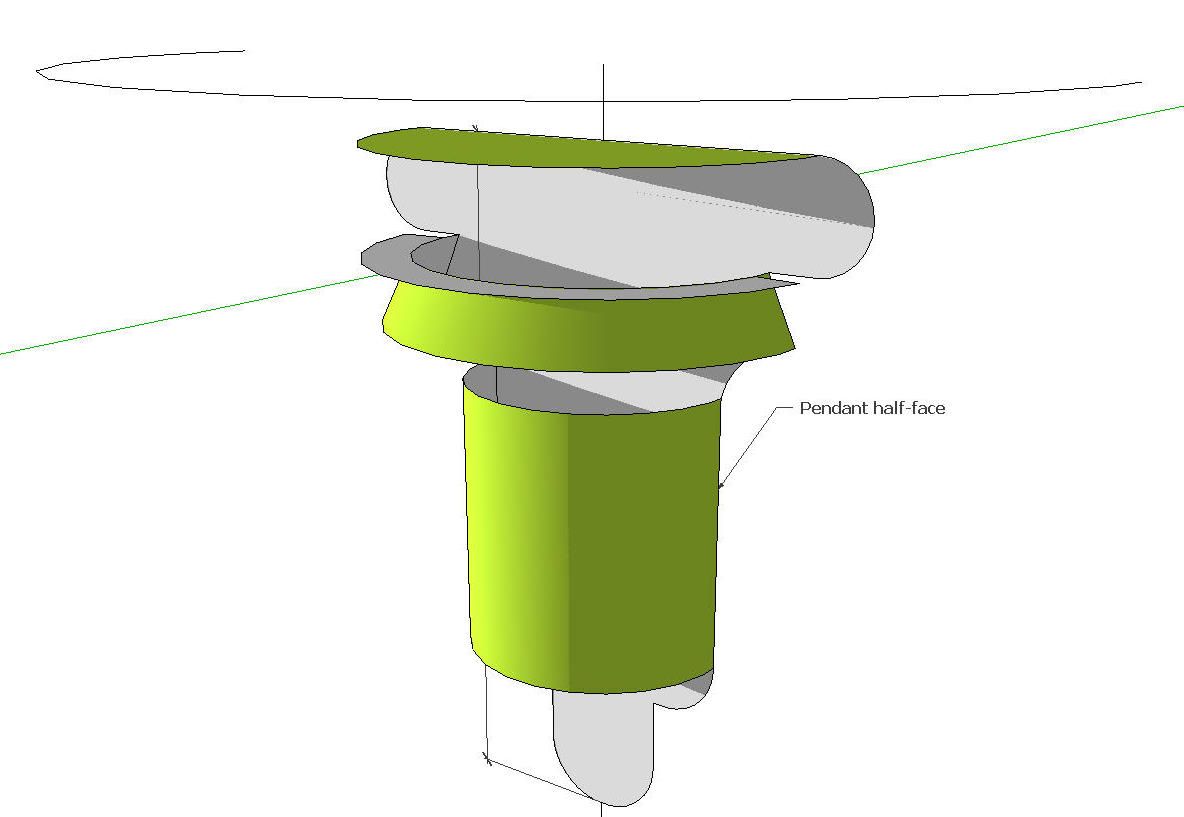
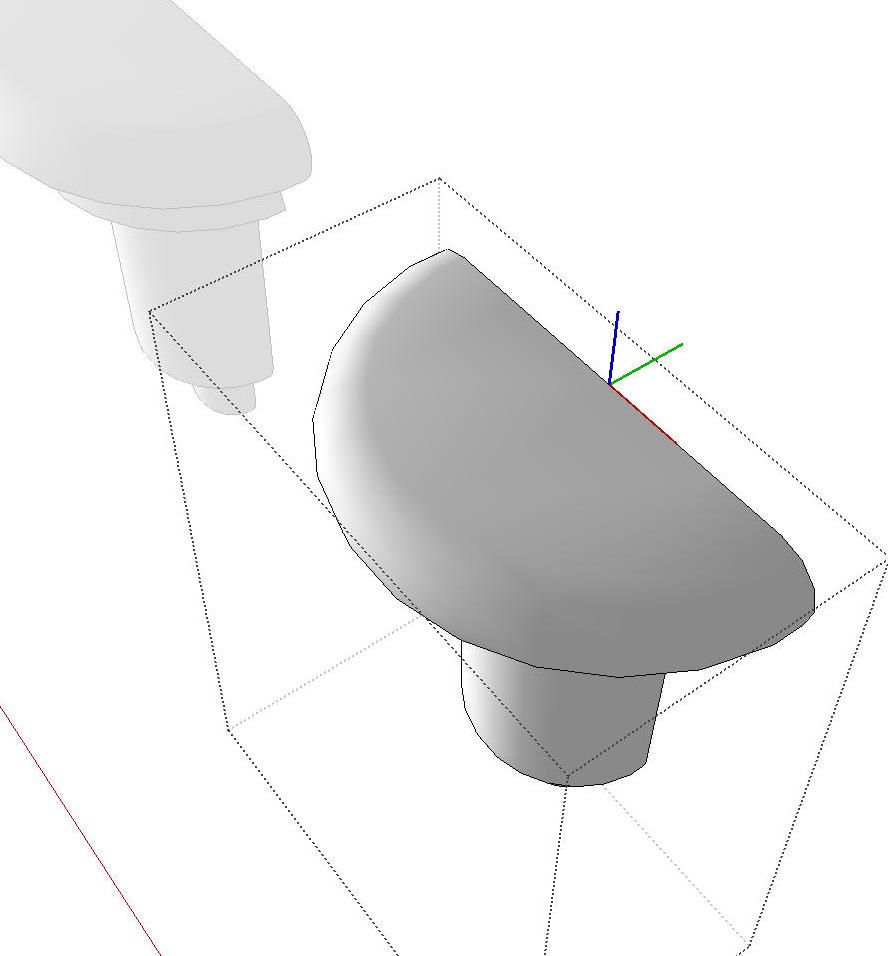
Tim mentioned scaling up the model before running Follow Me. For a small item like this, that is very important. Here’s what you get if you don’t. I left it turned inside out for the example but you can see that there are a lot of missing faces. This is due to their small size. SketchUp doesn’t like to fill those.
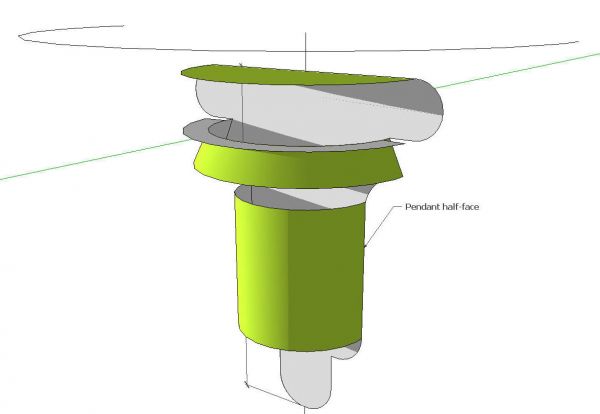
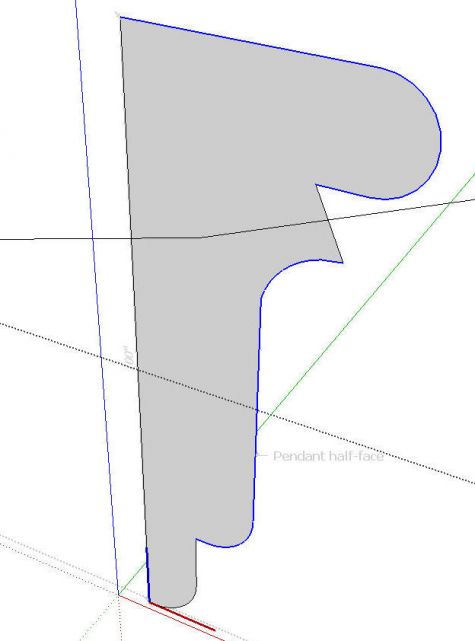
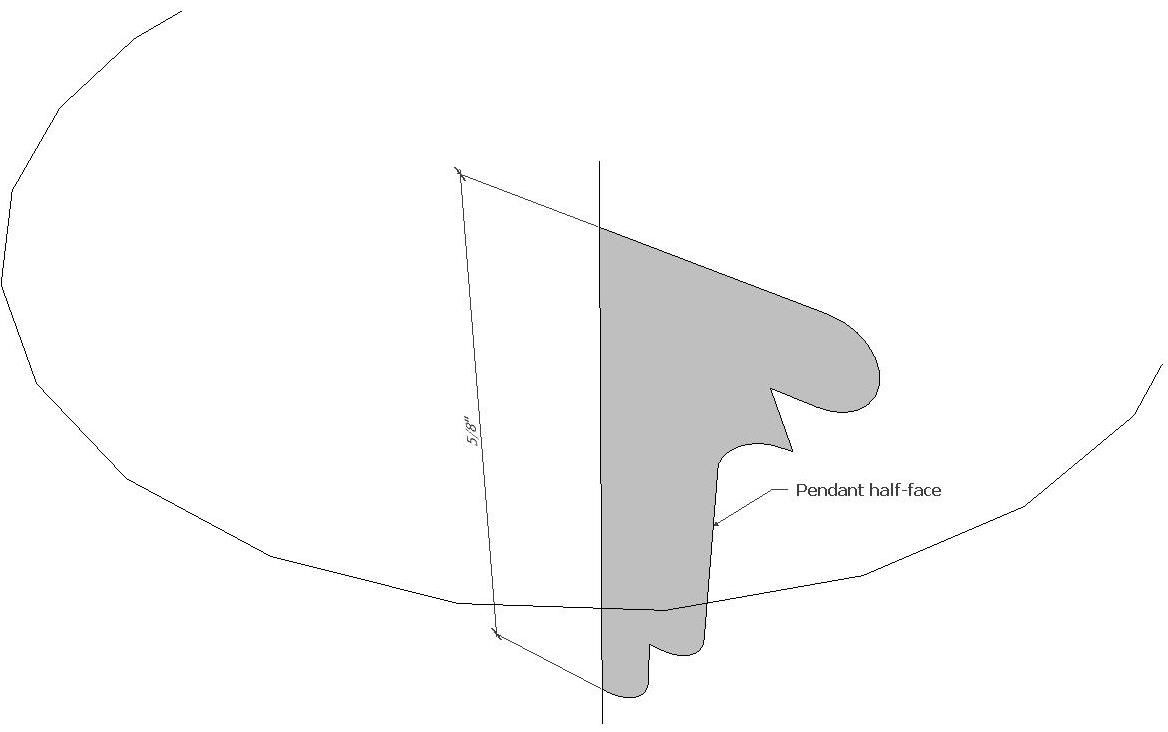
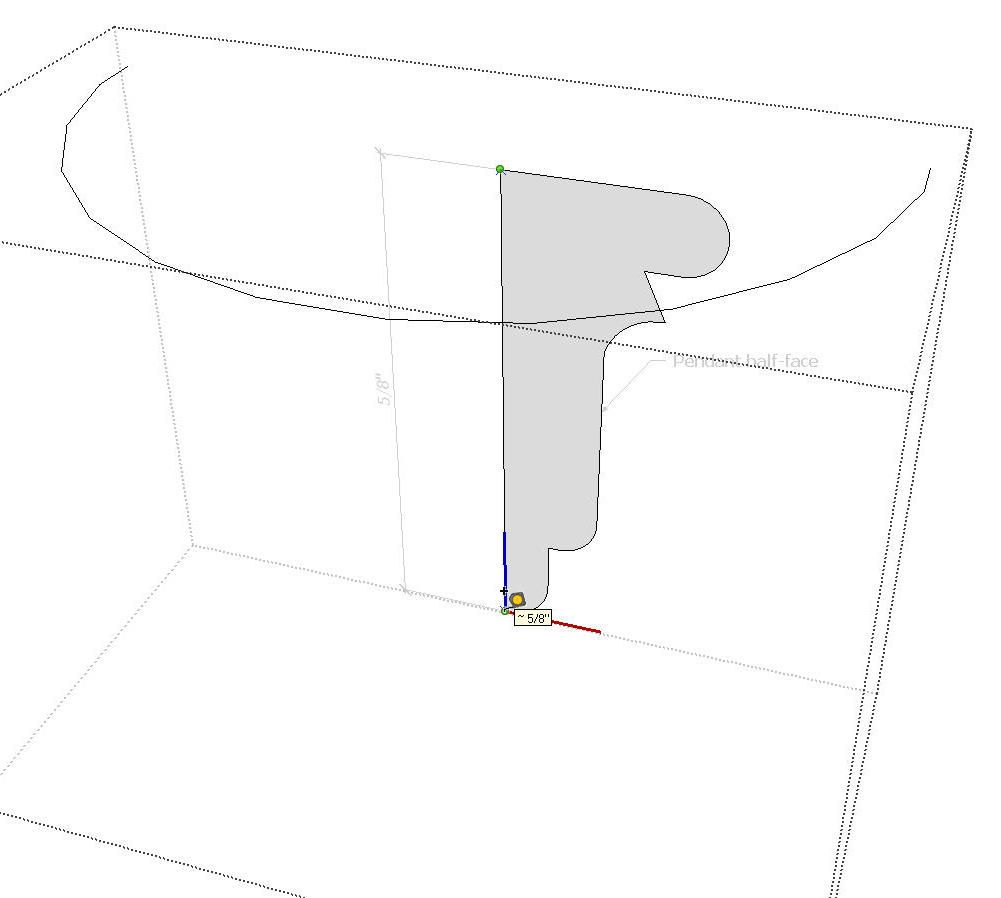
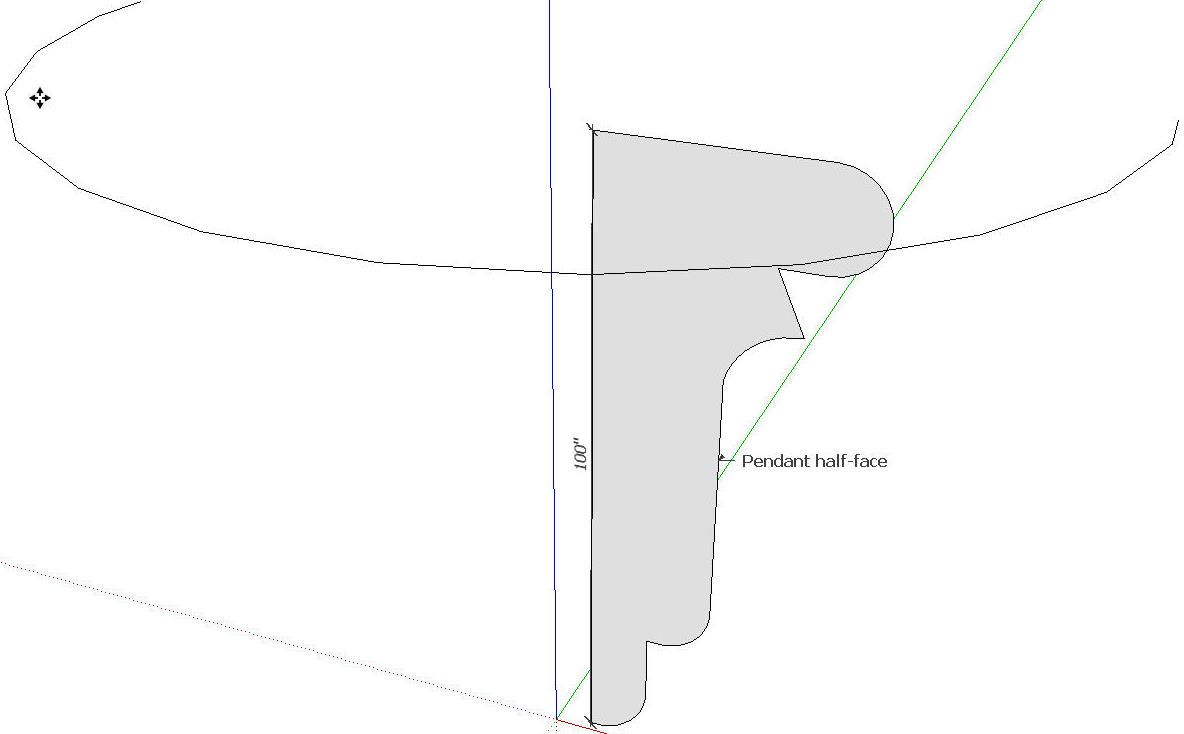
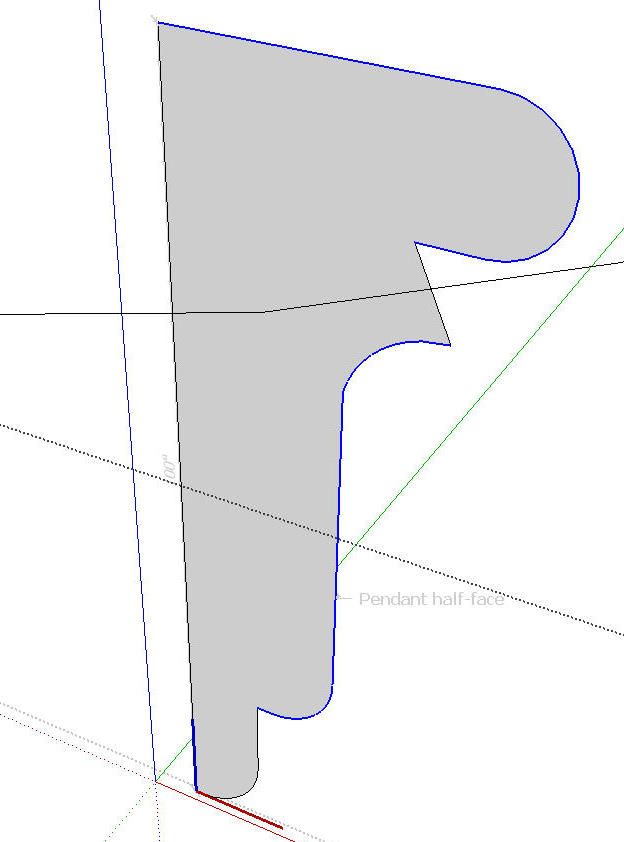
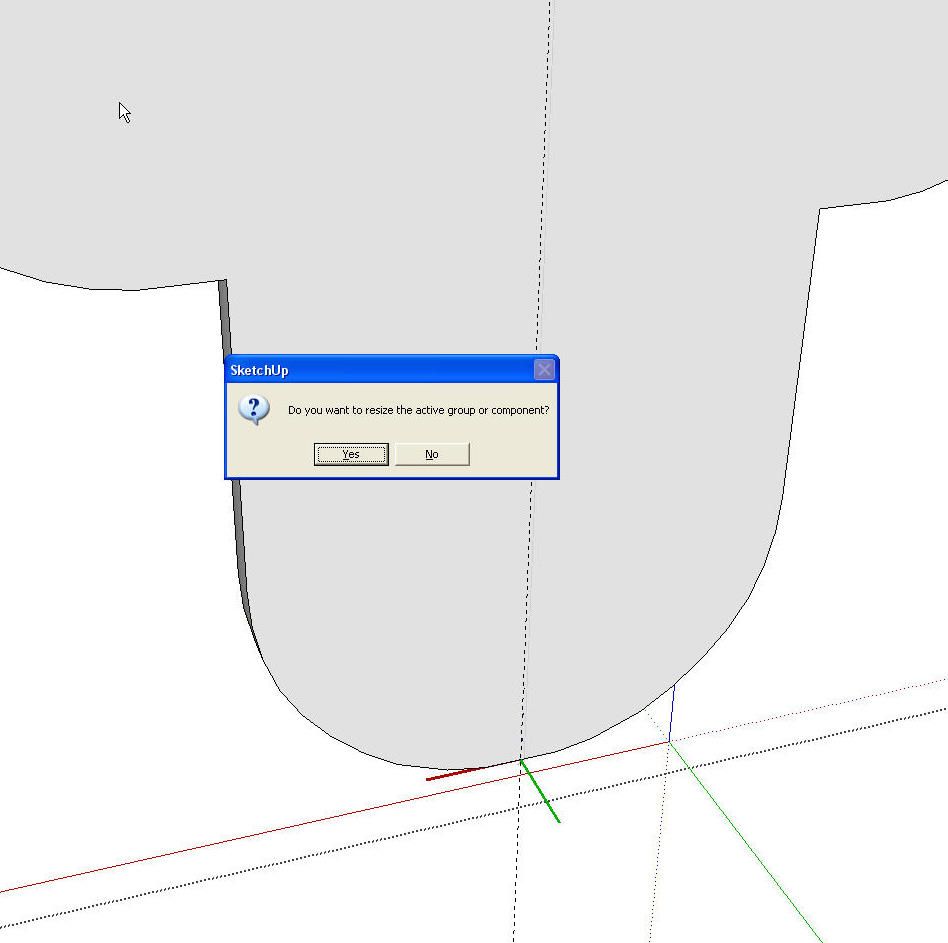
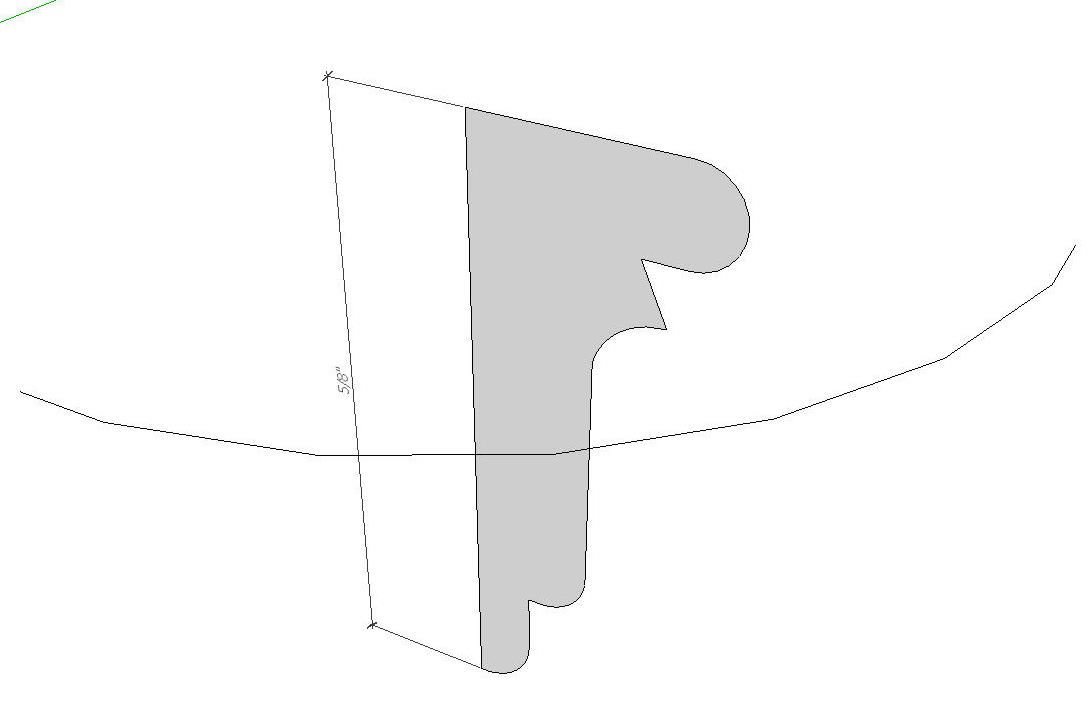
So before running Follow Me, scale the component up and the faces will be created. There are a couple of option s at this point. As Tim mentioned, he used the Scale tool. An alternative is to use the Tape Measure tool. I measured the 5/8″ height of the profile making sure to click at both ends of the vertical line. Then I entered 100 and hit the Enter key.
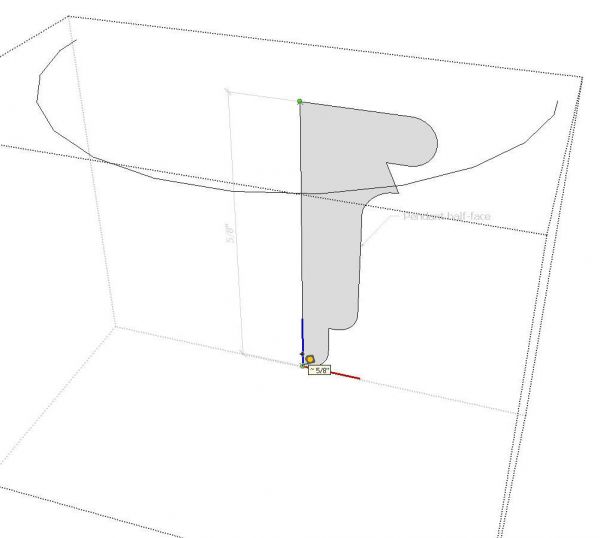
The size of the component isn’t very critical at this point as long as it is large. Entering 100 results in the compnoent being 100″ tall.
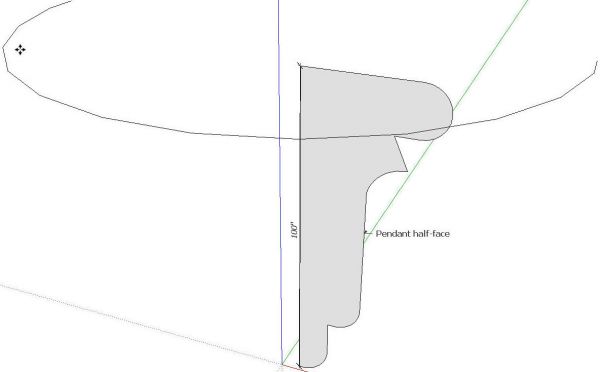
At this point, Follow Me will successfully create the turning. After the shape is made, measure the same distance again and enter the original length. to scale the component back down. If I am building a component in place in the model, I will copy the component off to the side, scale that copy up and do the work I need to do on that large copy. When I’m finished I simply delete the enlarged copy. The original copy of the component will show the same work done. This saves scaling down and possibly adjusting the position of the component in the model.
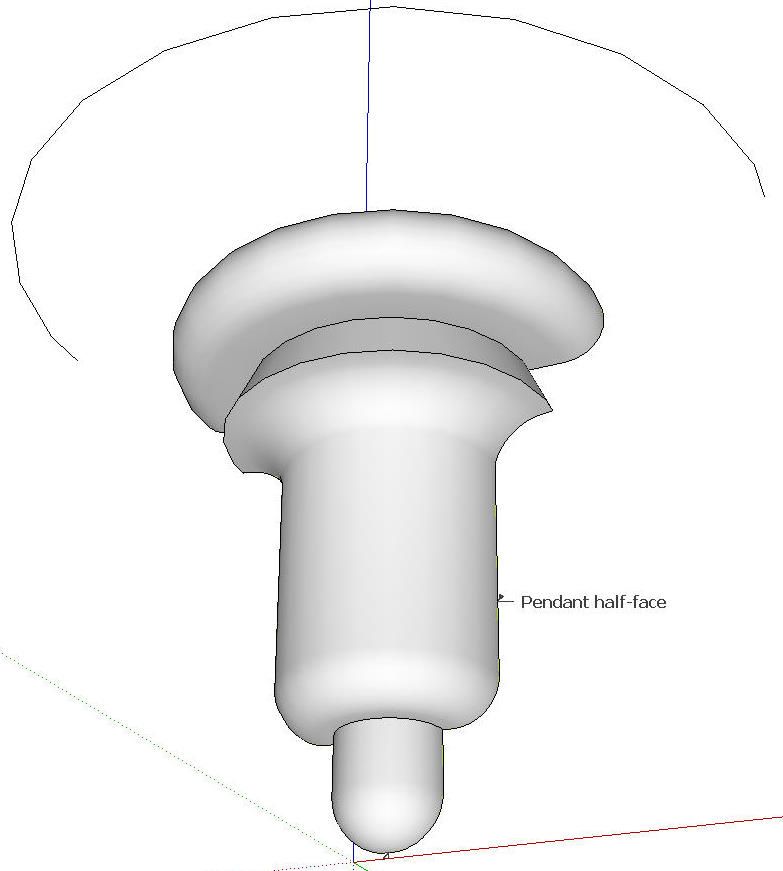
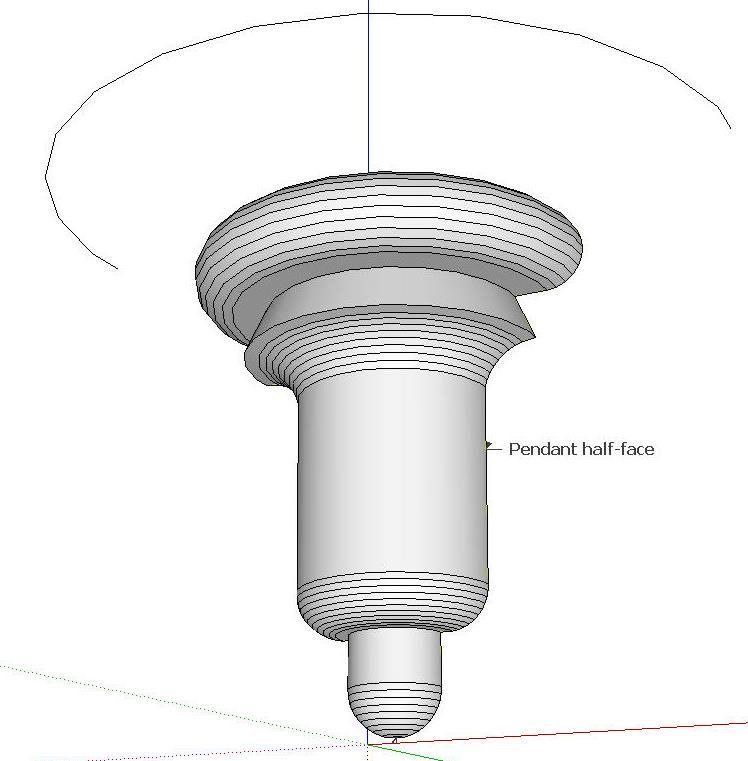
After running Follow Me on the profile, I had a bunch of lines wrapped around the shape because the curves were exploded.
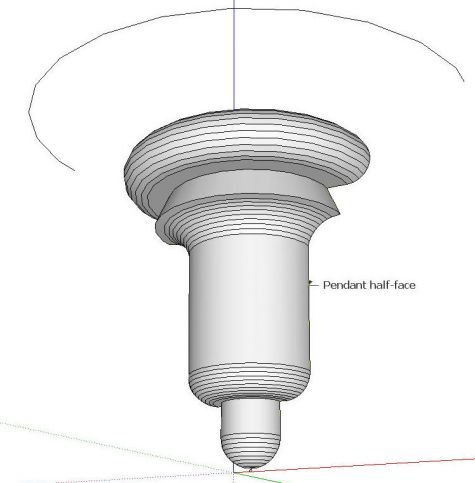
These lines need to be softened or they’ll appear as very heavy black areas when looking at the entire model. This can be done using the Soften function from the Contect menu or it can be prevented altogether by welding the edges before running Follow Me.
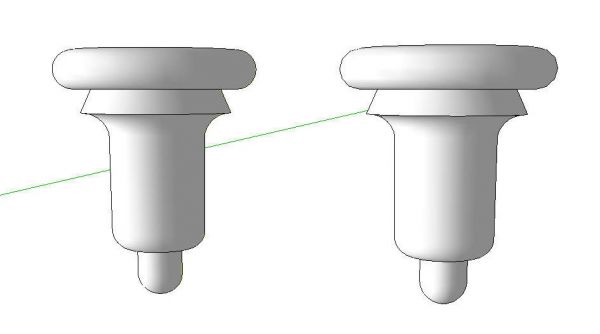
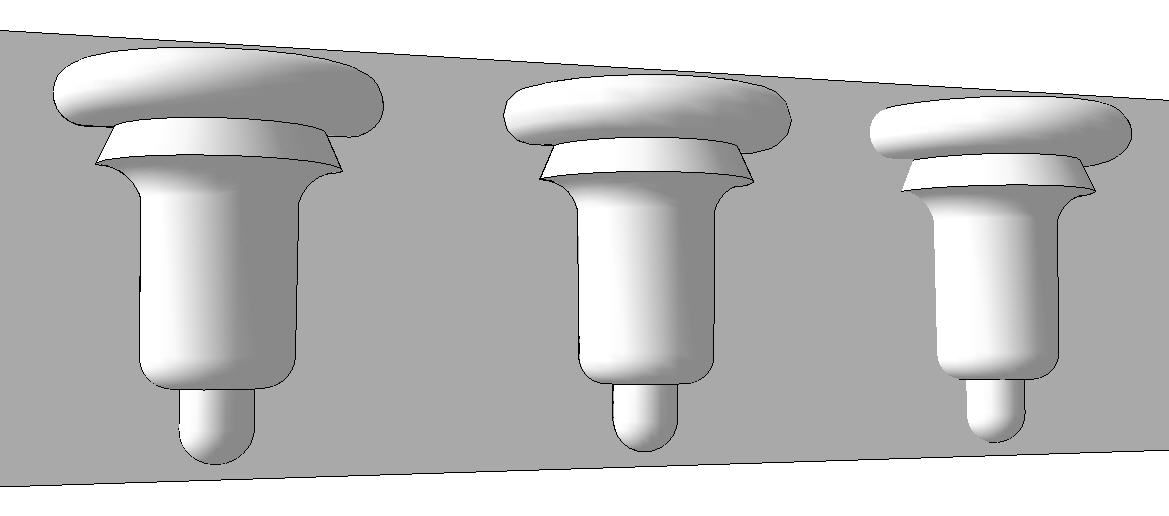
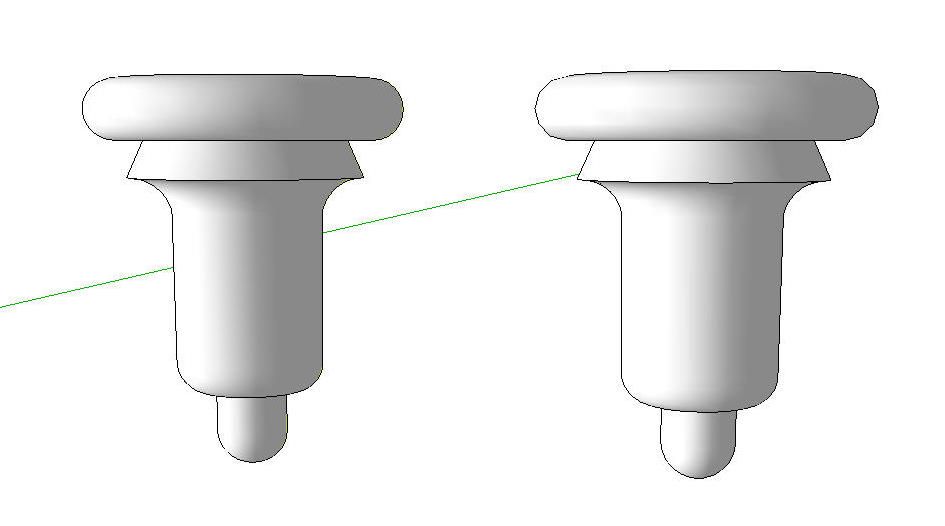
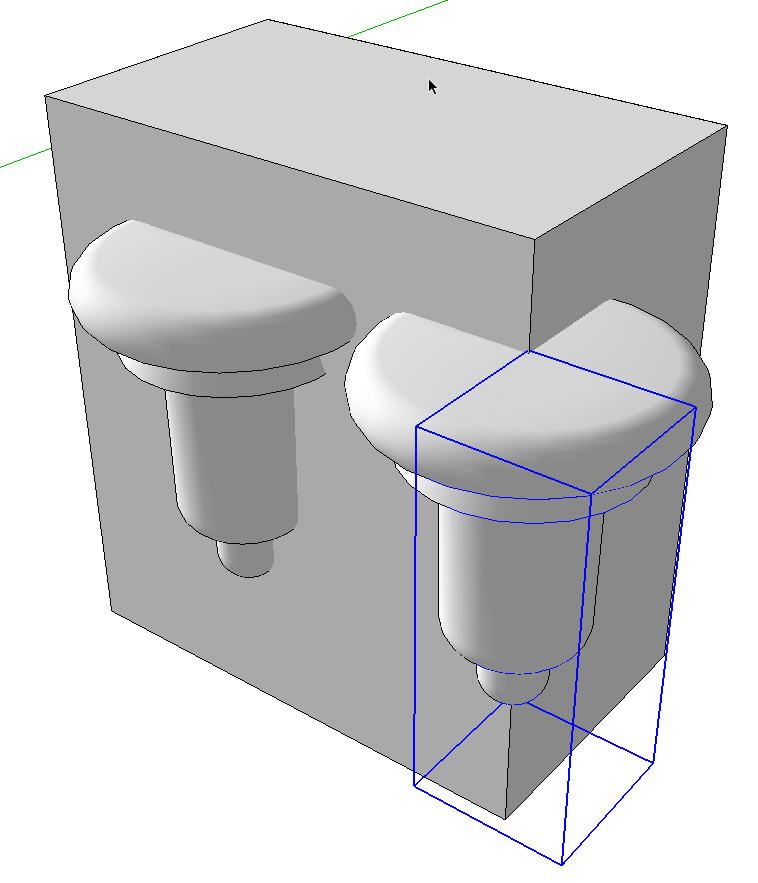
With the turning a component, copying it multiple times in the model will have little impact on the file size. There are a couple of other strategies that could be used to make this component even “lighter” in the model. One of those is to reduce the number of segments used to create the arcs. Tim’s original uses the default 12-segment arcs. The arcs could be reduced to 6 segments without causing much of a change in appearance.Below, the turning on the right was created using 6 segment arcs. The one on the left is from the original version of the profile.
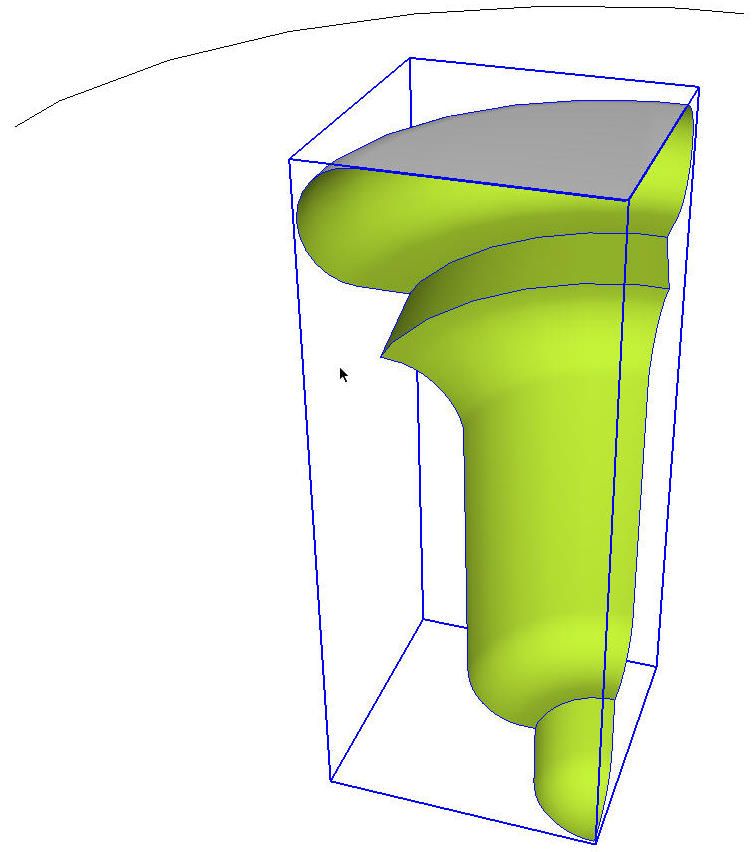
Another strategy would be to make only a quarter of the full turning.
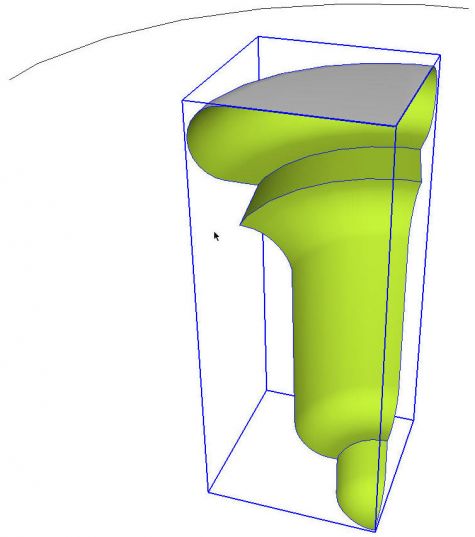
This component can then be Copy/Rotated to make the parts required.
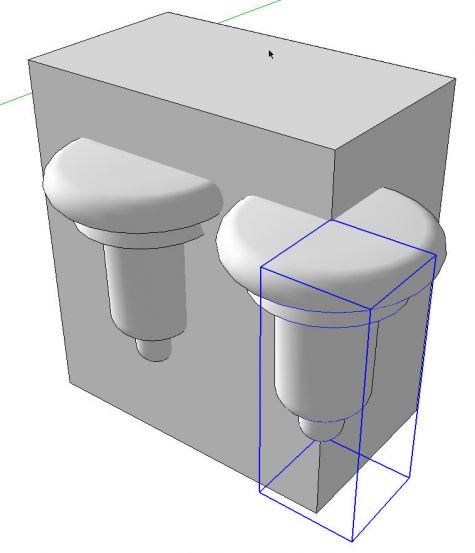
With the edges of the component hidden, There will be no apparent difference. This allows the same component to be used along the flat surfaces as well as at the corners and eliminates one component definition.
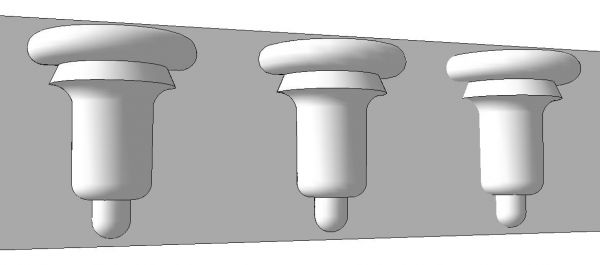
And here are all three versions of the turning side by side. They are hard to tell apart.





Comments
Thanks Dave, this is a great method of simplifying things.
what gauges do you use for the turnings? ;o)
you mentioned "welding edges" (before running follow me) - what exactly is that? I don't remember running into this in sketchup as of yet.
Hi Sharon,
Thanks.
By simplifying the assembly into components, there may be a chance of re-using the components in other models so not only is it efficient for the current model, it can save time later as well.
Tim's the guy who did these turnings originally. I'm currently sans lathe.
Welding the edges referred to using the Weld plugin (I've got a link to it in the last post I made about plugins. to weld the line segments together so they act as a single entity. Circles and arcs, while made up of multiple line segments, act as single entities when selected or for operations such as Push/Pull and Follow Me. If a profile is made up of a combination of arcs and line segments, edges will show from those intersections after either Push/Pull or Follow Me. These edges can be cleaned up with either the Soften option from the Context menu or by holding Ctrl (Option on Mac) while running over the edges with the Eraser tool. Welding the edges beforehand eliminates the need to do either one of those things.
Follow Me explodes curves so if you copy the profile off the end of the resulting geometry to use it later, you'll find you need to reweld or later soften the edges. I would guess that Tim had already run Follow Me on the profile before he sent it to me which meant I ended up with the results shown in the first image of the turned shape.
The Weld plugin also comes in handy when you have a lot of edges to select for copying or other operations. You can make it possible to select a whole string of line segments with a single click.
To see a very simple difference with welded and unwelded edges, draw a circle and then next to it, draw a 24-sided polygon. Use Push/Pull to pull them up to 3D. Notice the difference between the two. Before Push/Pull, they look identical. The difference though is that the circle's segments are welded together while the polygon's edges aren't.
Log in or create an account to post a comment.
Sign up Log in