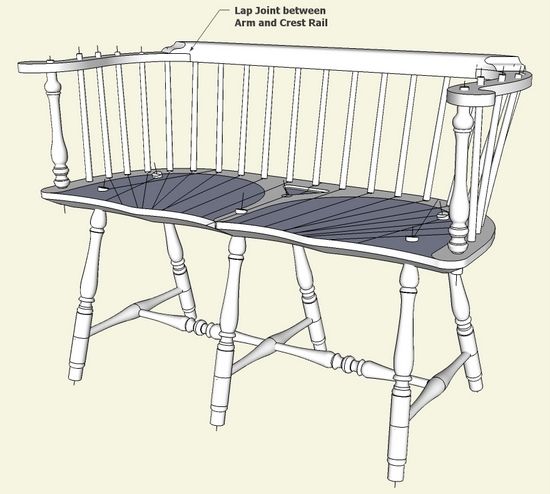
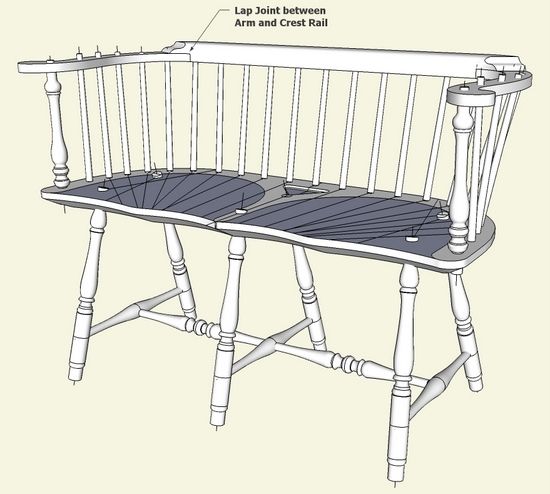
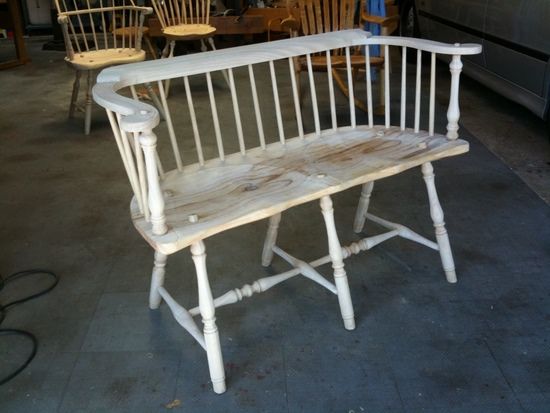
I’m continuing my repertoire of Windsor chairs by adding a two-seat, low-back Settee. This one from Connecticut, circa 1820. As usual I start with the design in SketchUp and found a unique situation with the Arm/Crest Rail combination. These parts are connected with lapped joints at the corners and then there is considerable shaping required. I’ll show the steps I used to create these parts and their joints.
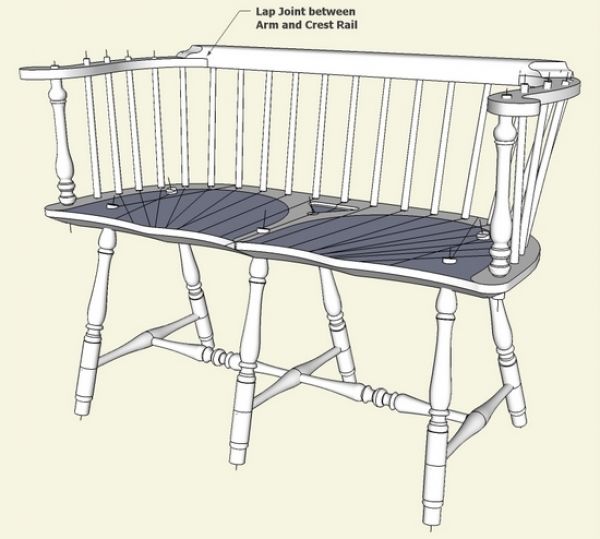
First, here is a look at the complete model in SketchUp: Note that I did not scoop the seat in the SketchUp model, and the multiple angled lines are sight lines for the spindle sockets.
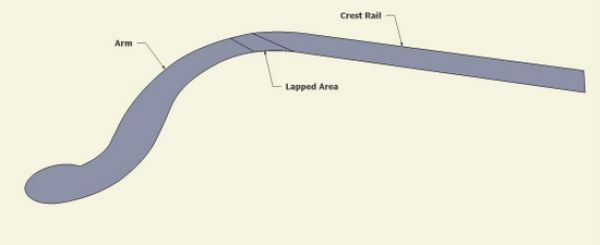
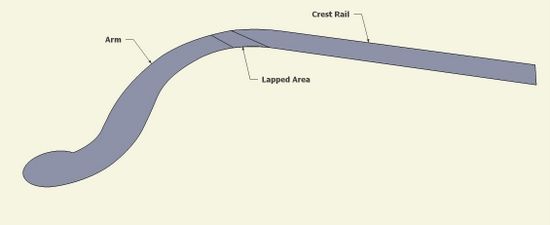
Step 1: Create the shaped faces of the combined Arm and Crest Rail. Use only one-half of the symmetrical combination as the other half is duplicated later, flipped and connected.
I was able to trace over a scanned image of a top view of the Settee to quickly achieve the flat face shown below. Notice the lapped area of joint between the two pieces. Now create components for each of these pieces, including the lapped area in both components.
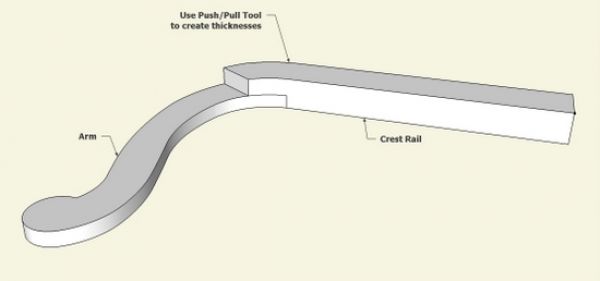
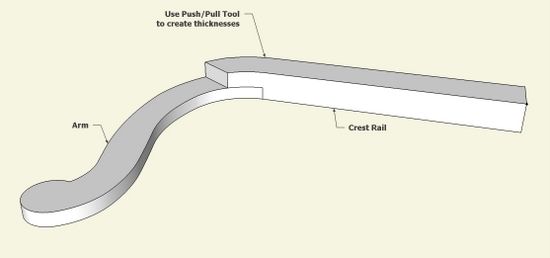
Step 2: Edit the components and use the Push/Pull Tool to give the two parts their thicknesses. Also using Push/Pull, leave a notched area on the underside of the Crest Rail so that the Arm exactly fits.
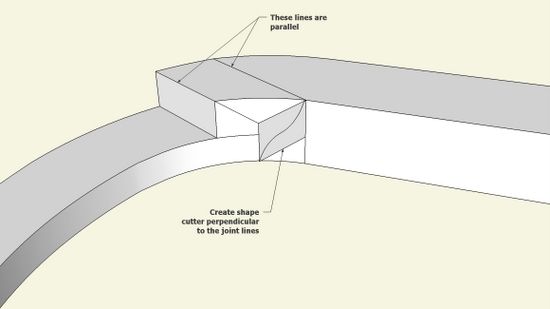
Step 3: To create the ogee shaped transition on the Crest Rail, make a shape perpendicular to the lapped area.
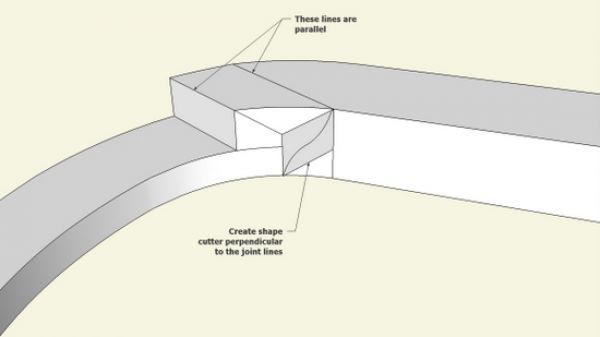
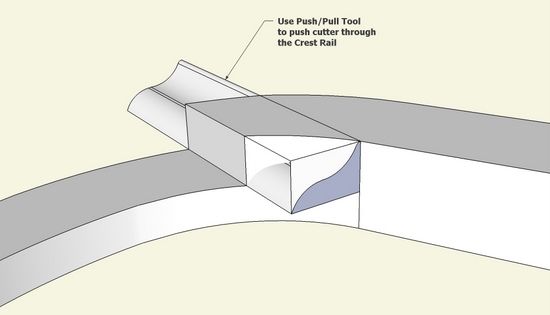
Step 4: Use the Push/Pull Tool to push the shaped cutter all the way through the lapped area beyond the other side. Now we are prepared to do an Intersection to create the ogee.
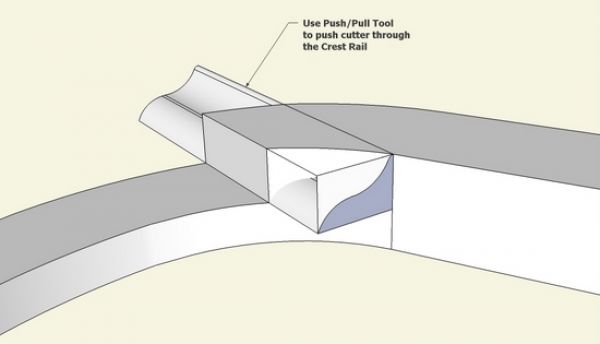
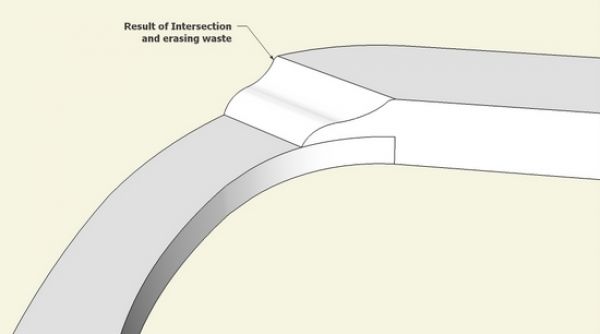
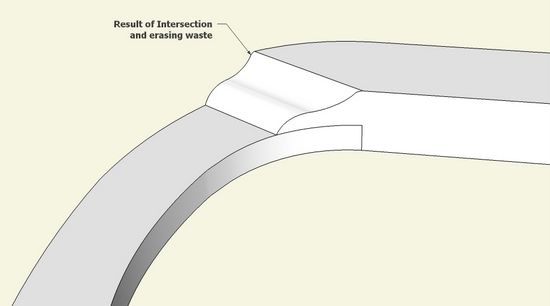
Step 5: After Intersection there is quite a bit of clean-up with the Eraser Tool.
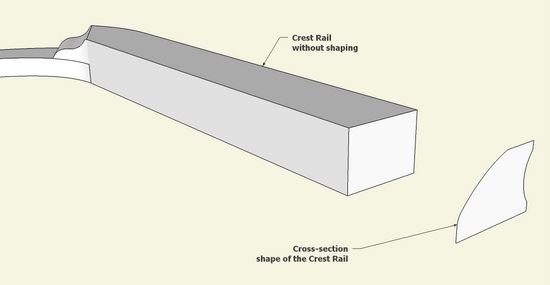
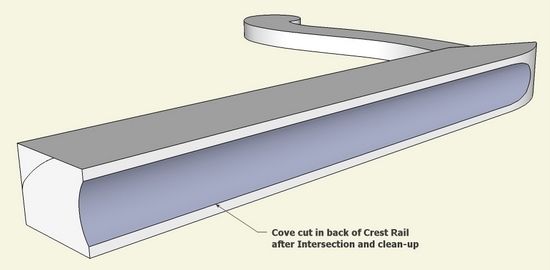
Step 6: More shaping is required on the Crest Rail. Create a profile of the shape or the rail’s desired cross-section. There is a cove cutout in the back face of the rail, and considerable rounding on the top front of the rail.
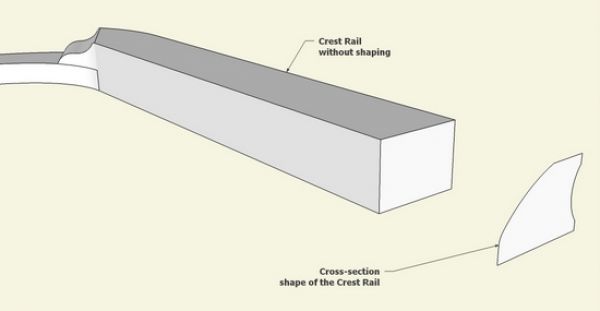
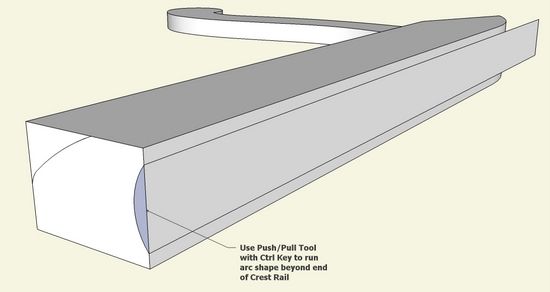
Step 7: To create the cove cutout in the back, use the Push/Pull Tool along with the Ctrl Key and push the cove shape beyond the other end. This prepares us for an Intersection to complete the cove cutout.
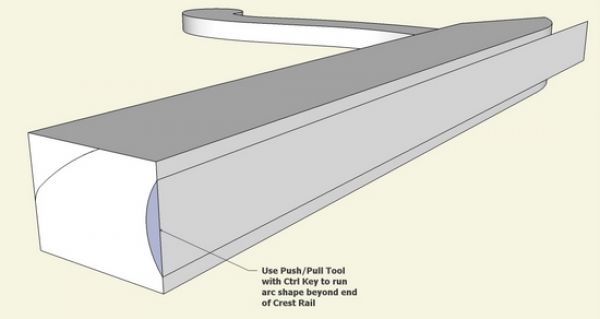
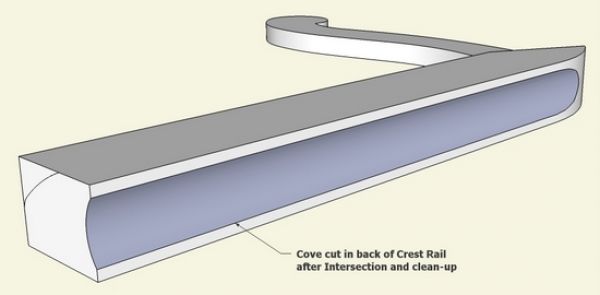
Step 8: Execute an Intersection then clean up the waste with the Eraser Tool.
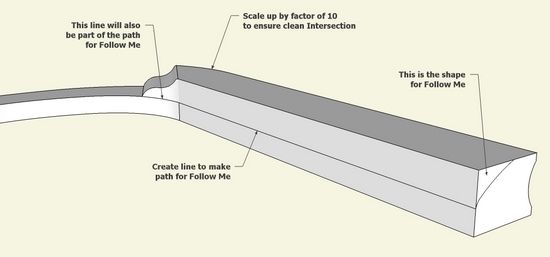
Step 9: I scaled up by 10 before doing the Intersection of the front shape. This will help with a quality intersection at the ogee shaped corner area. Also, I used Follow Me to make the shape properly turn at the corner. So the path included an arc line at the corner lapped area.
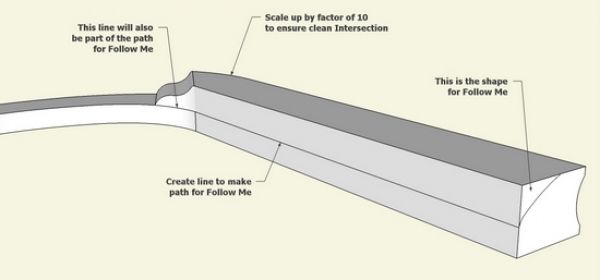
Step 10: After Follow Me, do an Intersection and carefully clean up the waste at the corner lapped area.

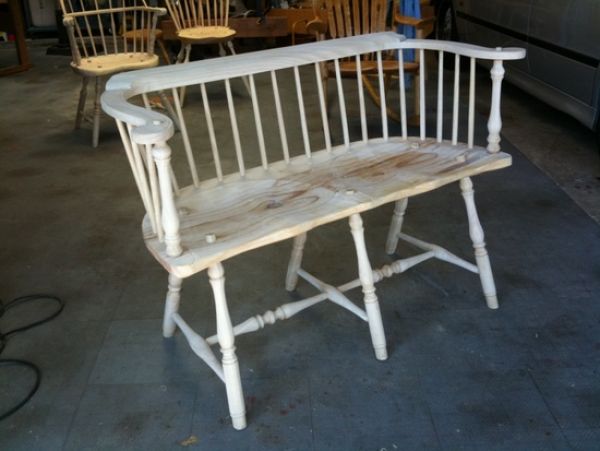
I’ve constructed the piece – the seat is Monterey pine, and the remaining parts are from local ash. No finish yet.
KJ6APQ



Comments
Tim,
You like me have two expensive hobbies. But unlike me....you use sketchup at the expert level and for the same things I want to use it for. I love your work. Took a Windsor chair class three or four years ago from the Chairwright, Bill Gullberg in Illinois, came home with a chair but did not follow through. Lots of excuses why.
You have reinspired me and I am going to get going. I am in the process of building a bow back side chair. Have the seat carved and I'm turning the legs. Learning sketchup slowly. How do you make the curves. Bezierspline,rb??? I find it very challenging.
Keep putting up the good stuff.
George
WA0FSE
To redryder (WA0FSE): I wondered how long it would take to recognize that second expensive hobby. Not long. I'm working 20 m and can hear MN.
I use the standard Arc Tool to do the trace overs. It reuires creating arc segments that connect tangentially. It takes some practice but I'm able to do it quite fast. SketchUp helps this by indicating a tangent connection by turning cyan color.
Tim
Ah...shortwave radio. How I miss it....but not the expense.
Log in or create an account to post a comment.
Sign up Log in