A Bench That Fits Every Room
Tapered seat is comfortable, elegant, and easier to make than it looks.

Synopsis: The clean, contemporary style of this bench makes it versatile enough to use in the dining room, foyer, hallway, porch, or even the back yard. The seat slats are tapered with beveled edges. The routed groove in the legs serves a dual purpose — hiding the glueline and adding a design element. A simple planer jig and templates make it easy to build multiples of this bench. And aside from the mortise-and-tenon joints, everything on it, from the tapers to the grooves to the pocket joints, is simple to execute.
I designed this bench to match a dining table, but its clean, contemporary style and comfortable seat let it sit just as well in the foyer, bedroom, mudroom, or on the front porch. It even works under a tree in the backyard, if made with exterior woods and finishes.
The slight taper on the tops of the seat slats complements their beveled edges. The legs, which are glued up from two boards, have a routed groove that both hides the glueline and ties the legs to the spaced seat slats. The legs also are arched along the bottom, a detail repeated on the stretchers.
These design details seem difficult, but they are surprisingly straightforward. Tapering the seat slats would be tough by hand, but I’ll show you how a simple stick turns a planer into a tapering machine.
Make a template for the legs

You could make the legs from a single 15-in.-wide board, but few people have a jointer and planer wide enough to handle it. I recommend using two narrower boards for each leg.
Leave some extra width on the boards. That will help keep the glueline centered so it will be hidden by the routed groove. Keep the boards a bit long as well, so there’s room to adjust them for the best grain match. After gluing the boards together, joint one edge and rip the leg to width, keeping the glueline centered.
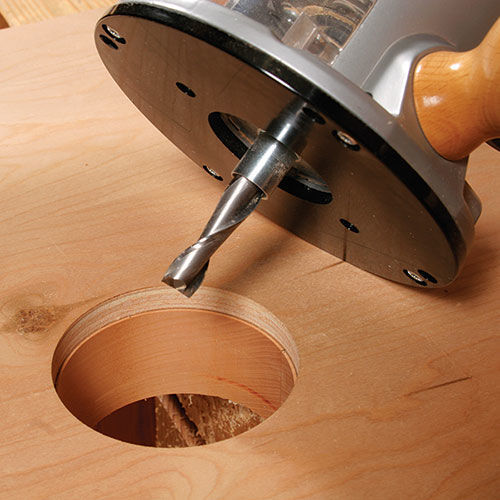
Making a template for the legs is time well spent. A Forstner bit large enough to cut the hole in the leg will leave tearout on the walls of the hole. The template allows you to drill the hole undersize and rout it to finished diameter with a spiral bit, leaving a smooth surface.
I guide the spiral bit with a bushing, so the hole in the template needs to be 3 1⁄2 in. dia. to account for the offset and create a 3 3⁄8-in.-dia. hole. The arc, on the other hand, is made with a bearing-guided, flush-trimming bit, so it should be actual size on the template. To draw the arc, use a 1⁄8-in.-thick batten made from quartersawn lumber. Register the ends of the batten against two small clamps, push it to its apex, and trace the arc.
Remove the waste at the bandsaw. Smooth the cut by sanding to the line. Bore the hole at the drill press and attach the fences.
Put that template to work
Use the template to mark the arc and hole on your leg stock. Then bandsaw and drill out the waste. Put the leg back in the template and secure it to the bench—I use holdfasts. There’s no need for double-faced tape, because the three fences and clamping pressure hold the leg in place. Rout the arc and hole to final size.
For the full article, download the PDF below:
From Fine Woodworking #207
Fine Woodworking Recommended Products

Sketchup Class

Drafting Tools

Stanley Powerlock 16-ft. tape measure


Log in or create an account to post a comment.
Sign up Log in