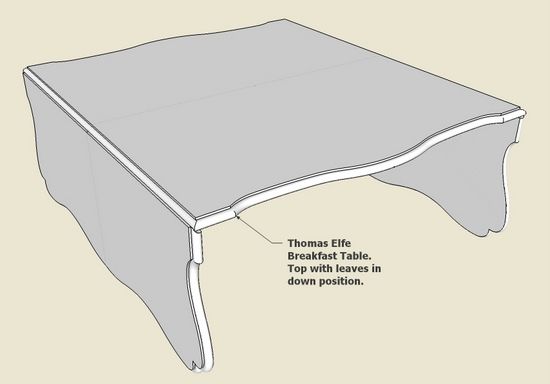
I started out thinking a tutorial on making a rule joint would be quite straightforward. My mistake was underestimating what it would take to use a fancy Thomas Elfe Breakfast Table as the example. I’m interested in re-constructing one of this Charleston, SC famous cabinetmaker’s pieces. It is a beautiful example of his art work, and includes quite an elaborate shaped top with a thumb-nail like molded edge.
The rule joint itself was not all that difficult – the problem was the shaping and edge treatment to the leaf and table top. This required Follow Me and Intersect operations involving many arc shapes and lots of computer resources. SketchUp handled the complexity but groaned on my computer during these operations.
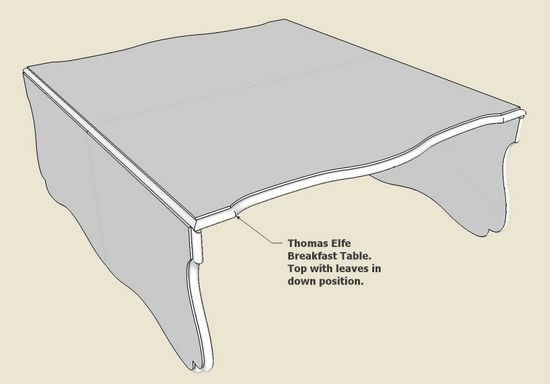
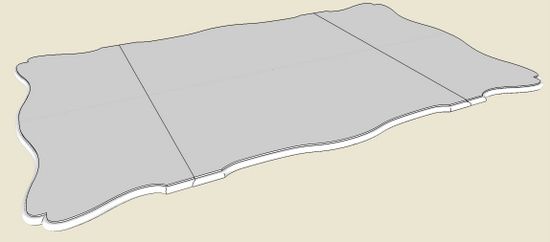
Here is a complete model of the table top shown with the leaves in the down position.

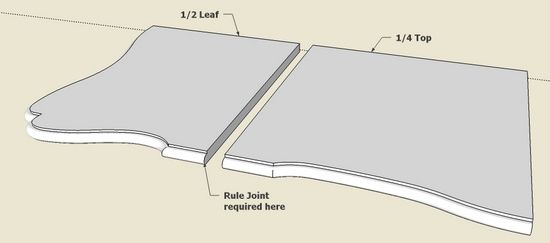
Step 1: Since the leaves and the top involve elaborate shaped edges, it is important to develop the edge treatment on one-half of the leaf, and one-quarter of the top. Below is an illustration of the fractional parts of the table top with the edge treatment but without the rule joint. It is easier to create the rule joint after the edge treatment and on these fractional pieces. Later in the process we can copy the quarters and halves to assemble the complete table top.

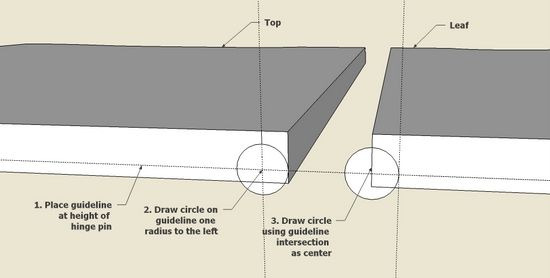
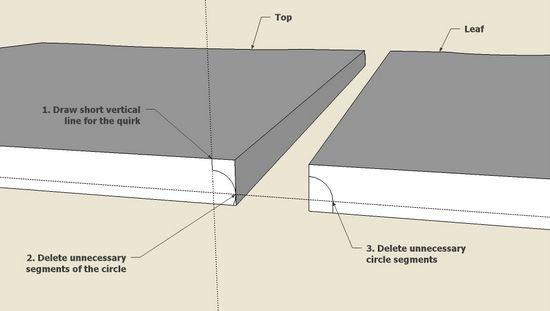
Step 2: Before creating a rule joint, it is best to have the hinges on hand and to know where the hinge pin center will exist within the table top. The first step in creating a rule joint is to identify the height of the hinge pin which in this case is 1/8-in. The illustration below is on the flat edge of the top and leaf. It is easier to create the geometry on this flat edge rather than working from the “molded” edge.

Step 3: After drawing the radius of the rule joint above, delete the waste segments of the circles, leaving the matching shapes of the rule joint.

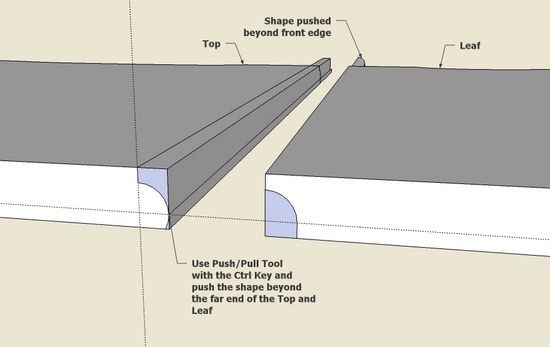
Step 4: Use the Push/Pull Tool and tap the Ctrl Key, and push the rule joint shapes beyond the far edge of the top and leaf. The far edge is molded, so the rule joint shape will need to be “intersected” with the molded edge shape.

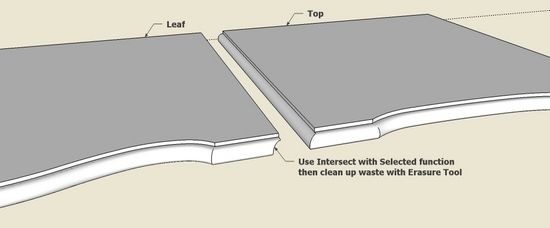
Step 5: Now I’ve turned the pieces around looking from the front. Use the Intersect function to cut the rule joint through the molded edge. Use the Eraser Tool to clean up the waste.

Step 6: Now the fractional pieces of the top and leaf can be copied, flipped and combined to complete the full table top. There will be lines showing at the joining of these pieces, and they can be hidden by using the Eraser Tool with the Shift Key.

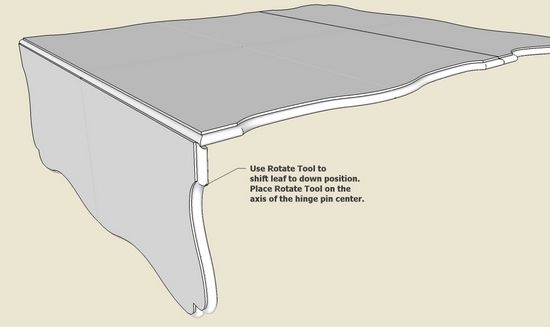
Step 7: Here I’m testing the rotation of the rule joint. Find the center of rotation which is the hinge pin center of the hinge. I had to locate this center position with two temporary lines. Then I picked the Rotate Tool, achieved the proper axis orientation of the protractor, held the shift key and positioned the protractor on the center of rotation. I rotated the leaf 90 degrees.

I will show the hinge and its location in the table top assembly in a follow-up blog entry.


Log in or create an account to post a comment.
Sign up Log in