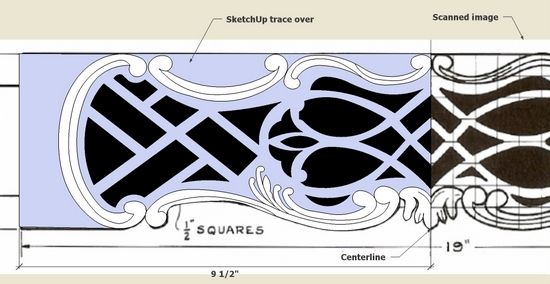
Continuing my series on the Thomas Elfe Breakfast Table, this post covers the creation of the fancy carved and pierced apron. I don’t even try to model actual carved surfaces, rather “brand” the apron with the shapes and outline of the carvings. This is sufficient to make a full size template from SketchUp which is used to mark the carving shapes on the apron blank.
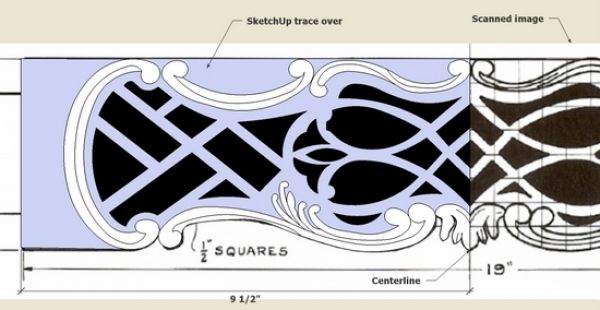
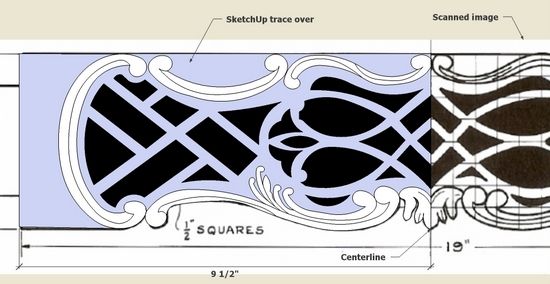
Step 1: Fortunately I am able to find a decent front view of the apron which I’ve scanned and imported as an image into SketchUp. On top of this scanned view, I use the arc and line tools to trace over the carving and pierced shapes. Below you can see my traced over shapes on top of the scanned image. Note that I’ve only traced over one-half of the apron length as the component is symmetrical.
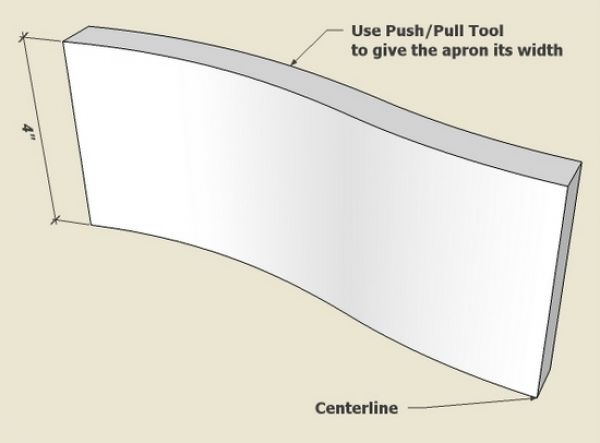
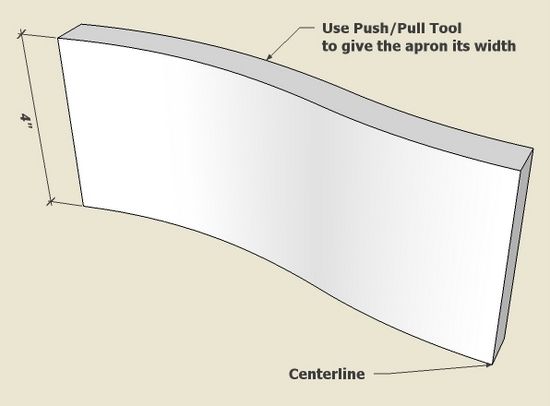
Step 2: The apron is also not flat, rather undulating in shape as viewed from the top. Again I’ve only traced over one-half of the length since the component is symmetrical.

Step 3: After creating the undulating shape above, use the Push/Pull Tool to create the apron width of 4 inches.
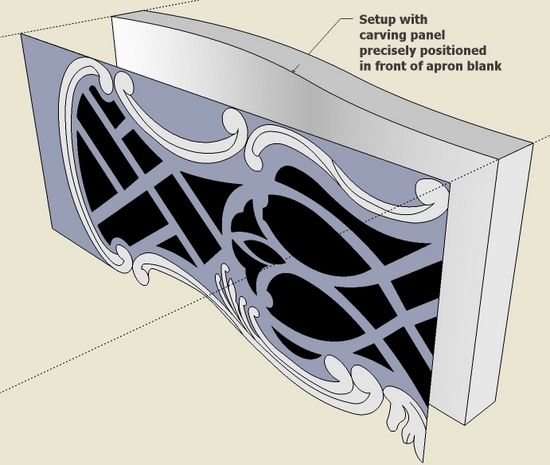
Step 4: Precisely position the traced over panel in front of the undulating apron blank.
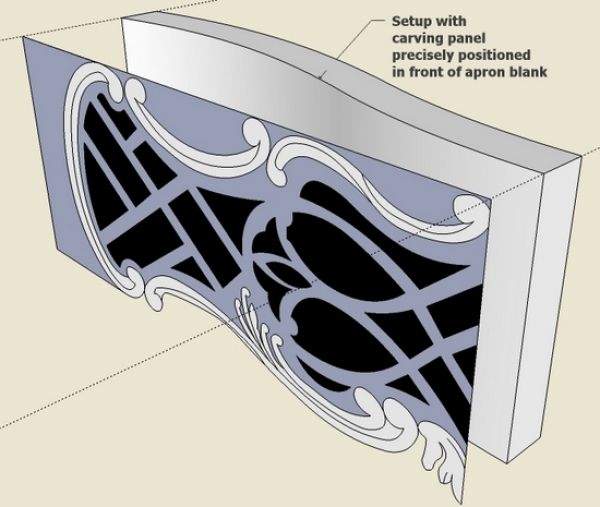
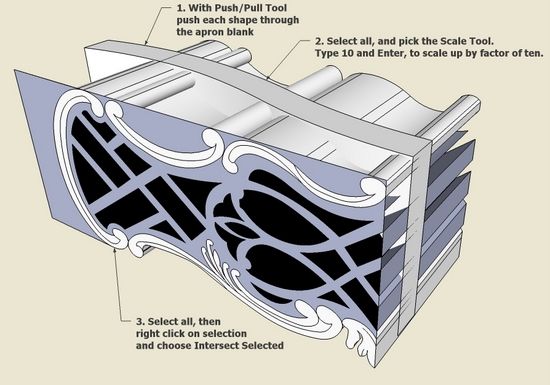
Step 5: To begin the “branding” of the apron blank, use the Push/Pull Tool to push each carving and pierced shape through to the other side of the apron. Since we will be using the Intersect function with many small arcs, use the Scale Tool to increase the size of the components by a factor of 10. Select all, right click on the selection, and choose Intersect Selected from the pop-up menu.
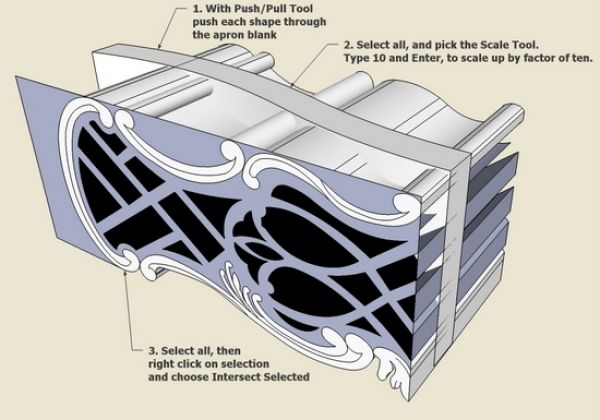
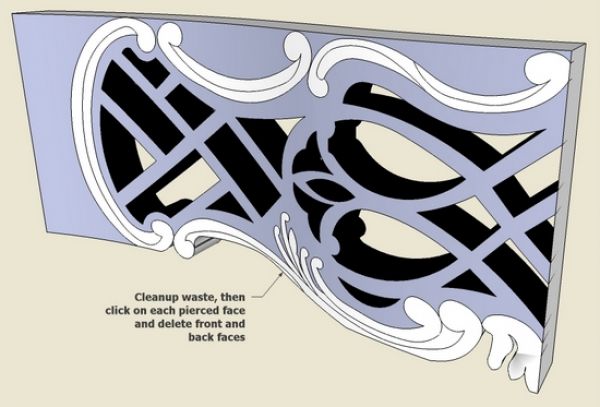
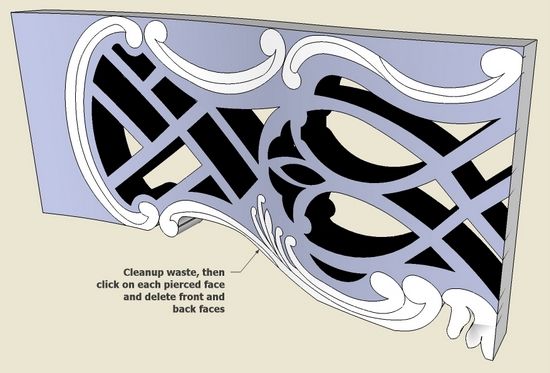
Step 6: Use the Eraser Tool to cleanup the waste. Where the apron is pierced through, delete the front and back faces. With the Scale Tool, reduce the apron back to its original size.
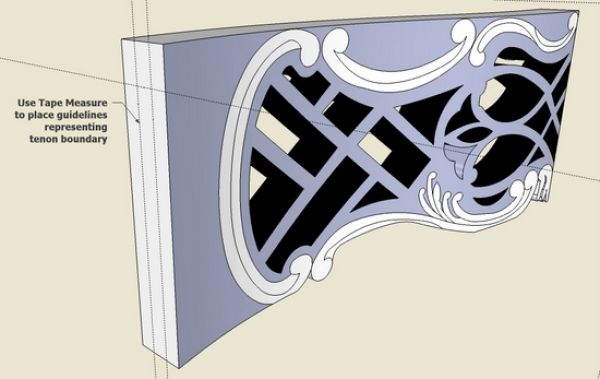
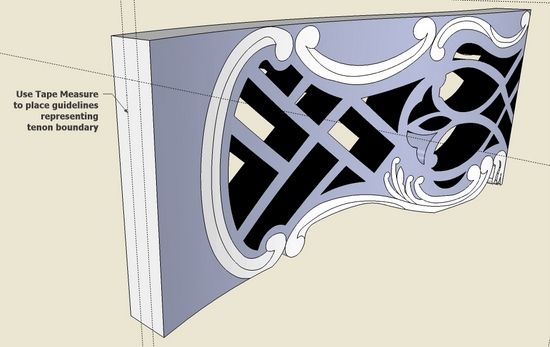
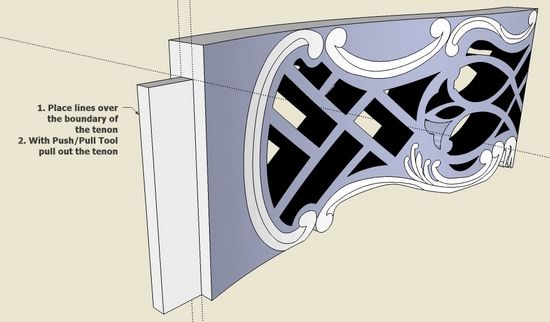
Step 7: A tenon should be created on the apron end. Use the Tape Measure Tool to place guidelines showing the boundary of the tenon.
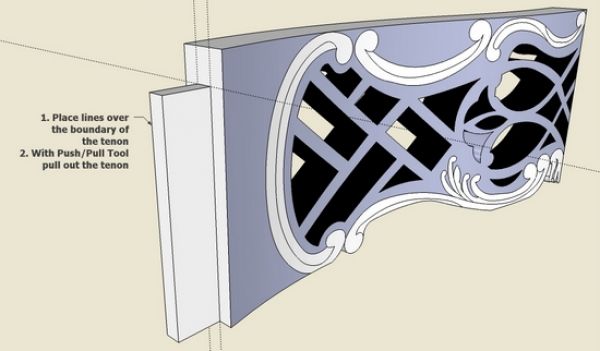
Step 8: Use the Line Tool to place lines over the guideline boundaries. Then use the Push/Pull Tool to pull out the length of the tenon.
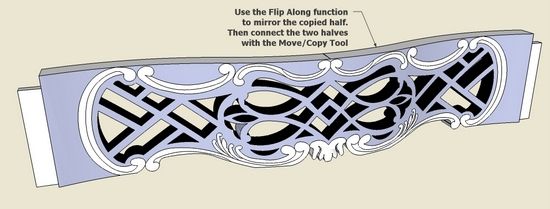
Step 9: We’ve been working with the left half of the pierced apron only. Now it is time to make the full length first by copying the left half and moving slightly to the right.

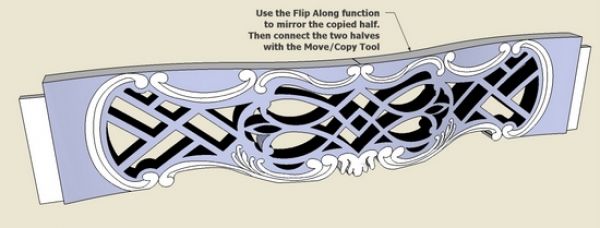
Step 10: Select the copied half, right click on the selection, and choose Flip Along to mirror the copied half. Then use the Move/Copy Tool to connect the right half to the left half. I used the Eraser Tool along with the Shift Key to hide the joint in the middle.
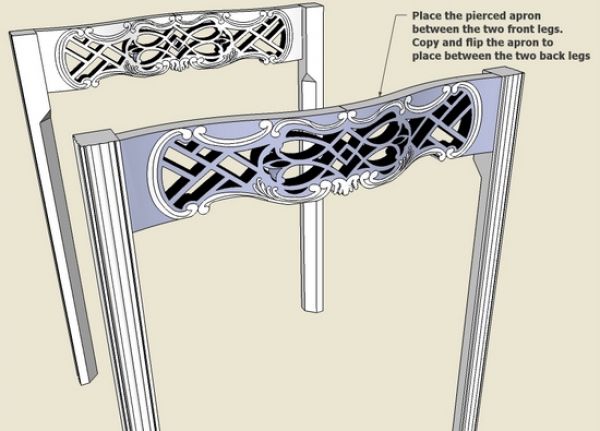
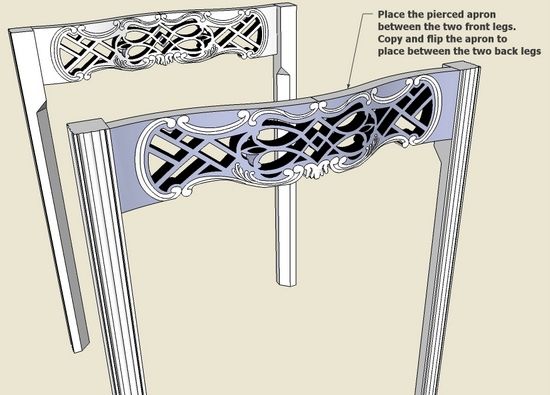
Step 11: Place the finished pierced apron within the framework of the legs which were created in last week’s blog entry.
Next week, I plan to cover the installation of the side aprons which include the wooden hinge for the leaf support.
Tim






Log in or create an account to post a comment.
Sign up Log in