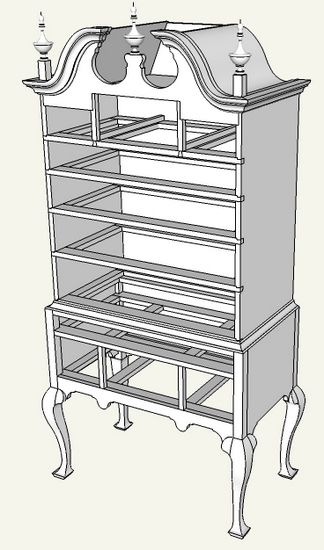
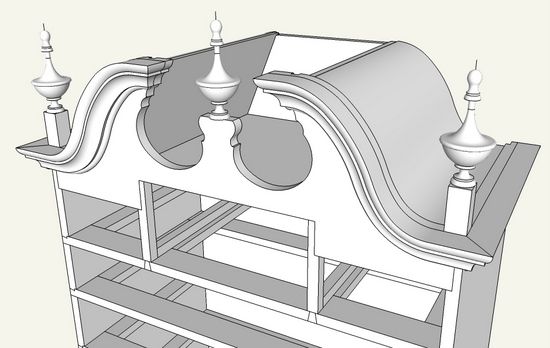
How do you go about creating the bonnet on a highboy which includes that curved molding? The following are steps I used recently. Nothing too unusual for SketchUp, however it requires a few Follow Me and Intersection procedures.
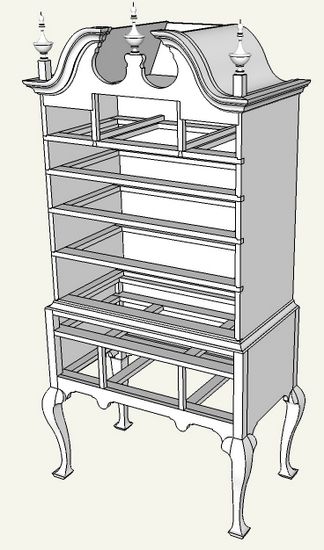
Here is the view of the overall piece, albeit without the drawers.
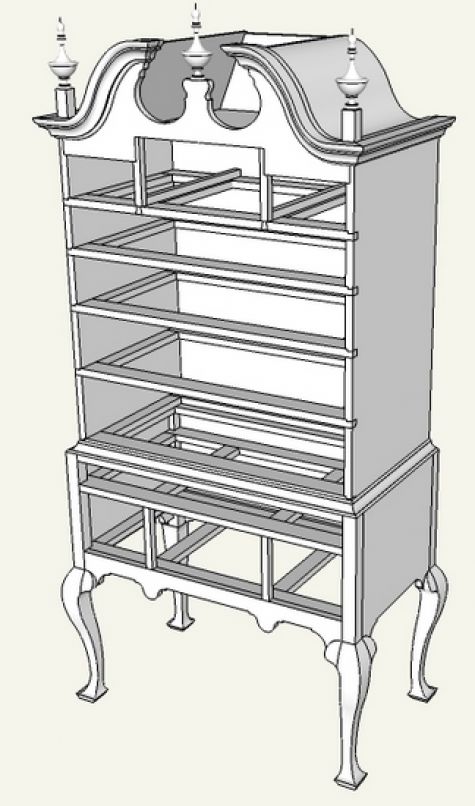
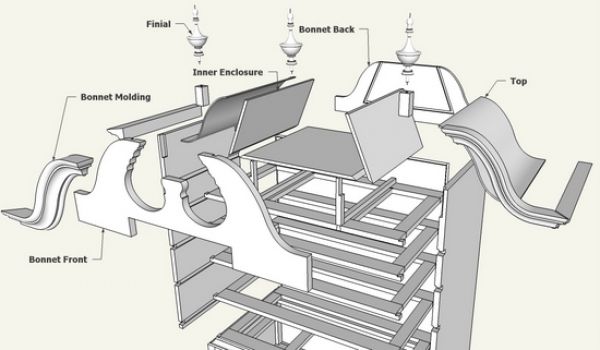
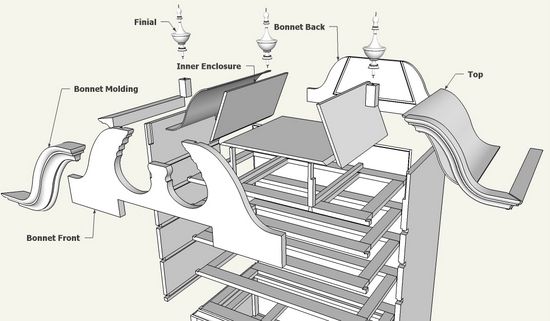
I’ll show a close up view of the bonnet in an exploded view to help with the multiple pieces involved in making the bonnet.
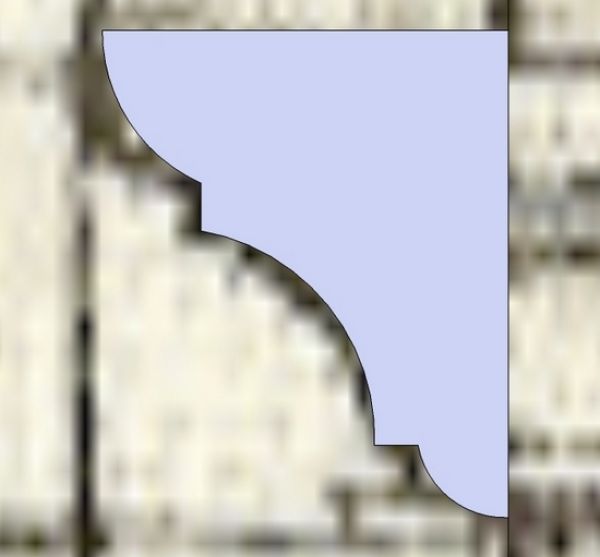
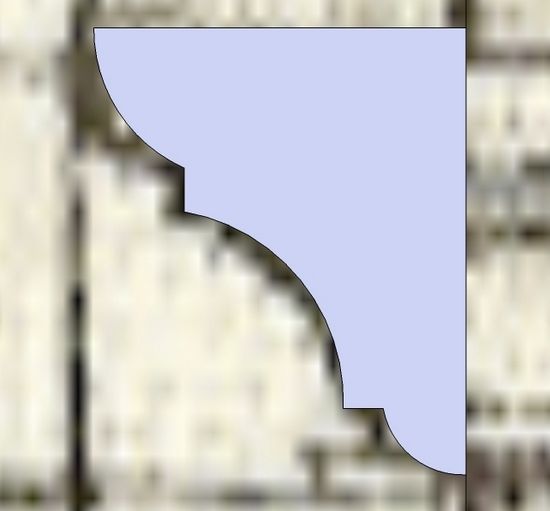
Step 1: Develop the shape of the molding. I was able to scan a drawing and trace over the shape as follows.
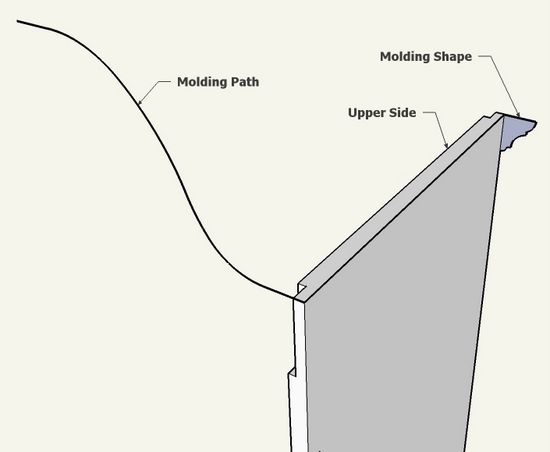
Step 2: Set up the path for the Follow Me. I was also able to trace this path from a scanned image using the Arc Tool. Note that the molding shape created above is connected to the back edge of the carcase side. The path includes not only the curved section but also the outside top edge of the carcase side.
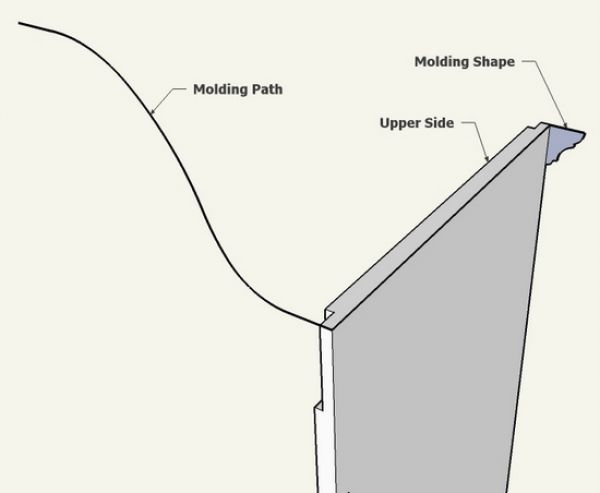
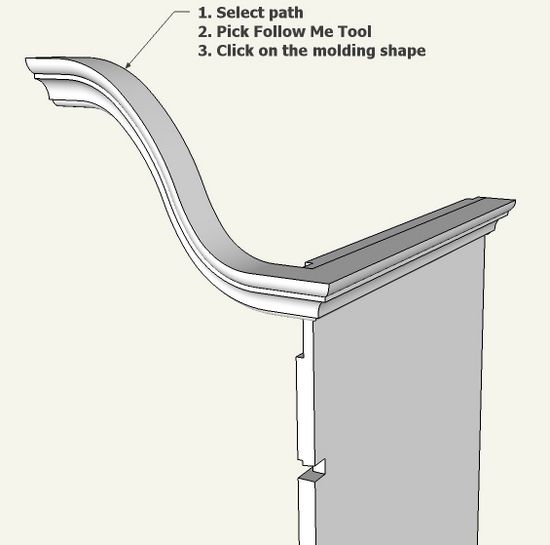
Step 3: Execute the Follow Me by selecting the total path (straight and curved sections), picking the Follow Me Tool, and clicking on the small molding shape at the end of the path.
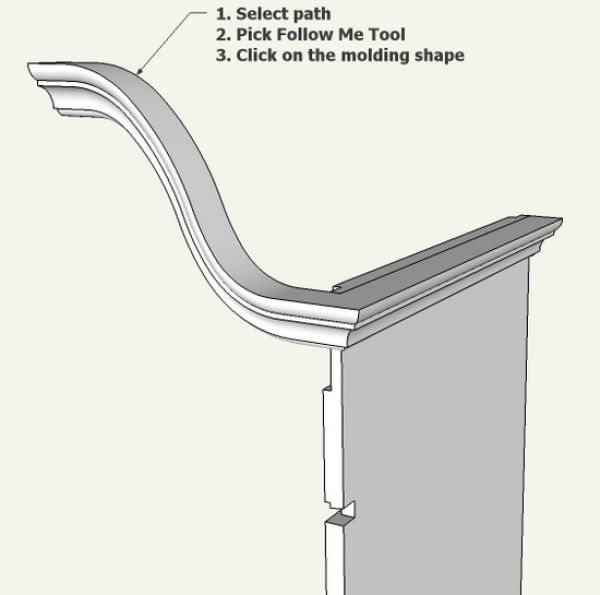
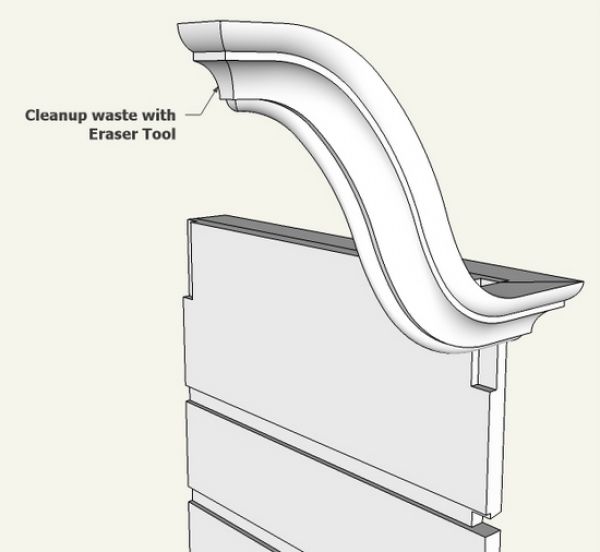
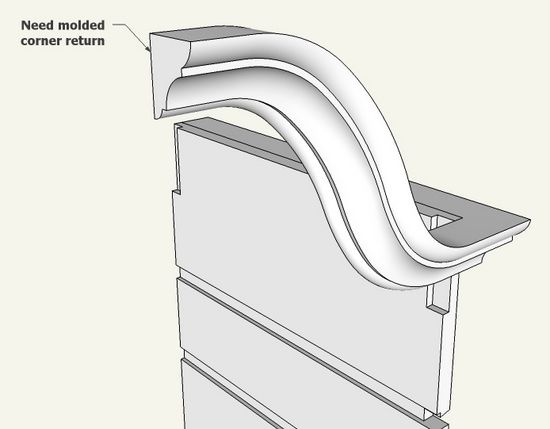
Step 4: The above follow me, creates a flat ended molding at the crest. This requires extra work to re-shape the end to have a molded corner return.
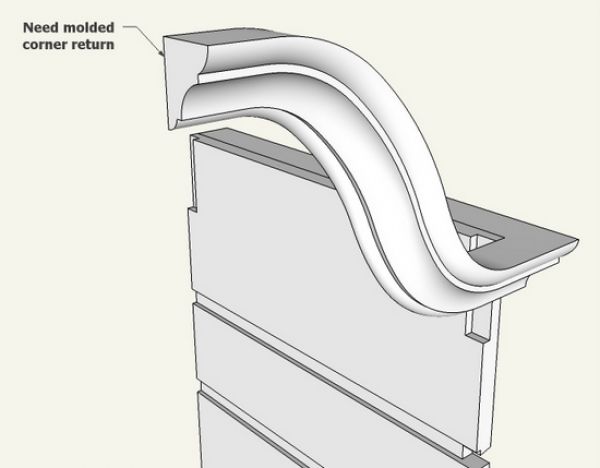
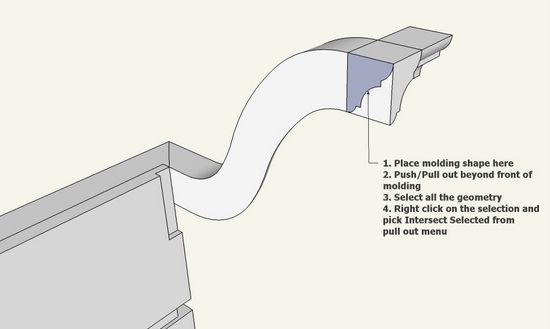
Step 5: Use a copy of the previously made molding shape and place on the back side of the molding as shown below. Then use the Push/Pull Tool (tap the Ctrl Key), and push the shape out beyond the front edge of the molding. Select all the geometry, right click on the selection, and execute Intersect with Selected from the pop-up menu.
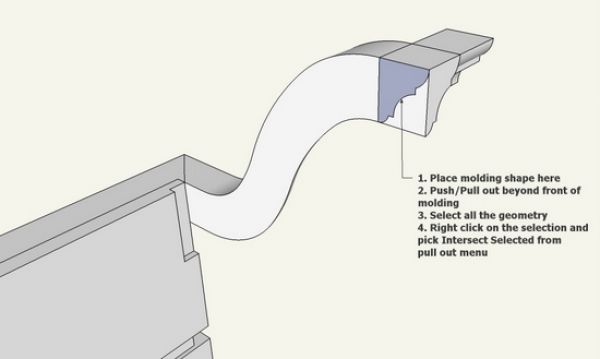
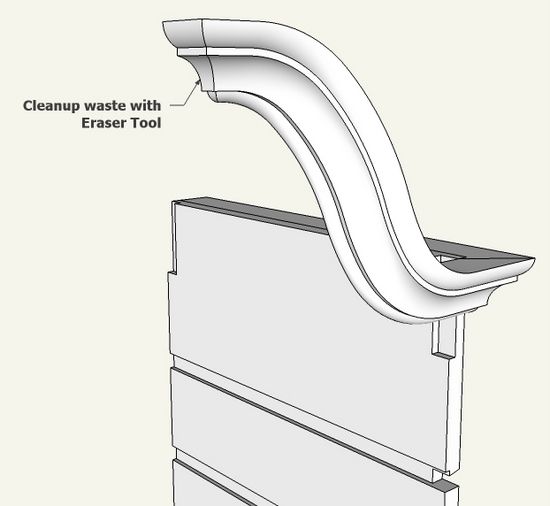
Step 6: Use the Eraser Tool to clean-up the waste from the above Intersection.
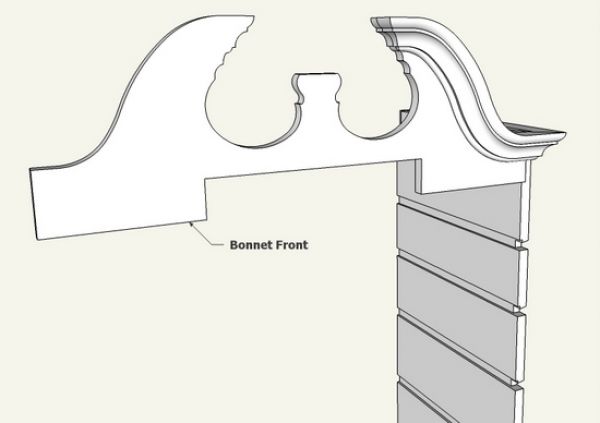
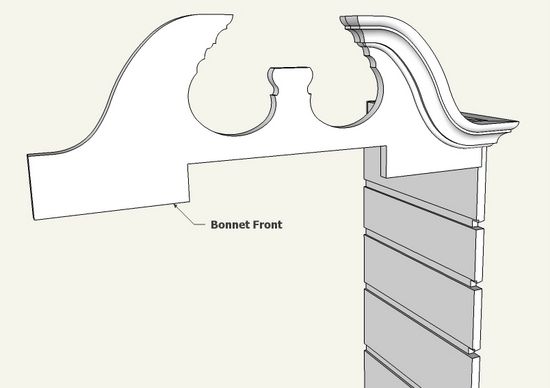
Step 7: Create the Bonnet Front piece. I was able to trace over a scanned image to make the shape of the front piece. However, I again used the molding shape to duplicate exactly the shape that coincides with the curved molding.
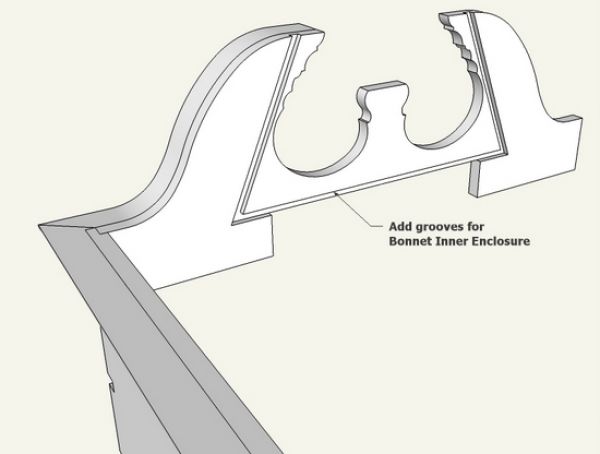
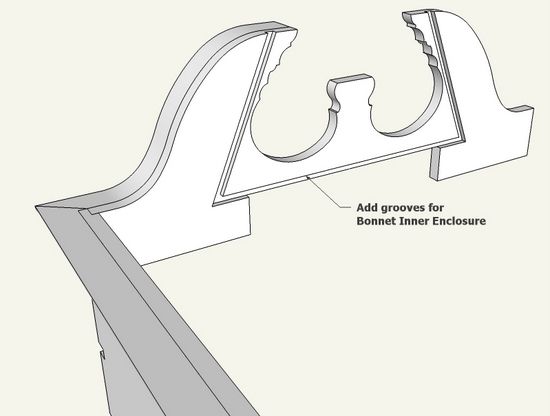
Step 8: On the back side of the Bonnet Front, there are grooves required to hold the Inner Enclosure pieces. Use the Line and Push/Pull Tools to create the groove.
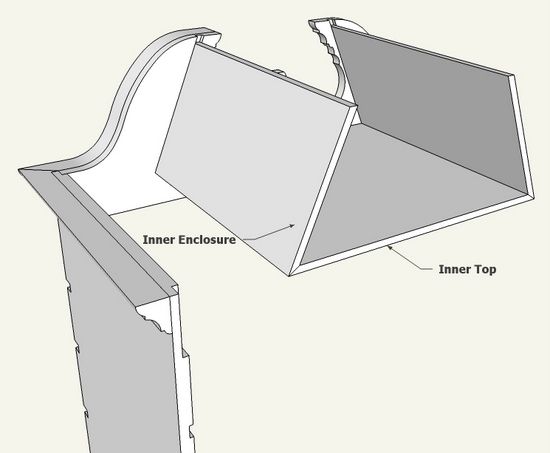
Step 9: Make the Inner Enclosure pieces which insert into the grooves in the Bonnet Front.
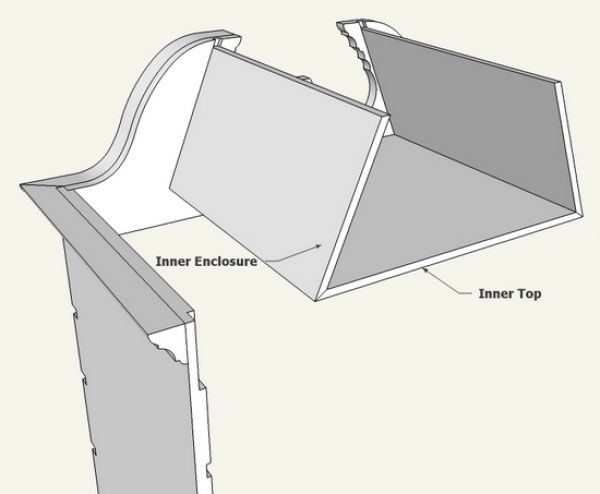
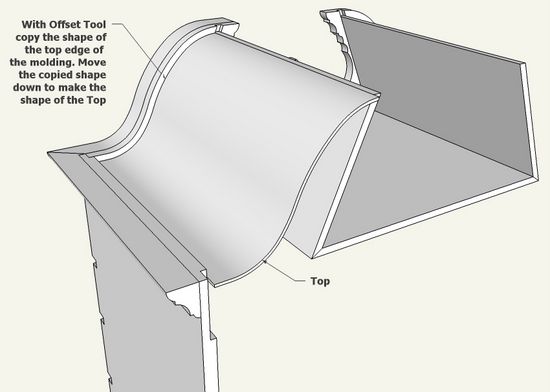
Step 10: I rarely use the Offset Tool, however this is one of those cases. I copied the top edge shape of the Bonnet Front and moved this down about 1/2-in. I then used this shape to create a curved Bonnet Top with an exact parallel shape.
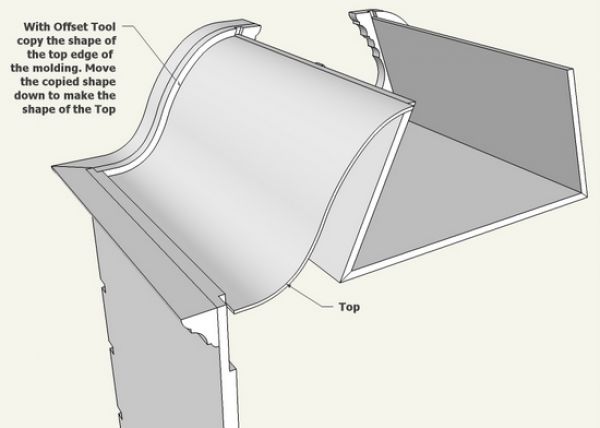
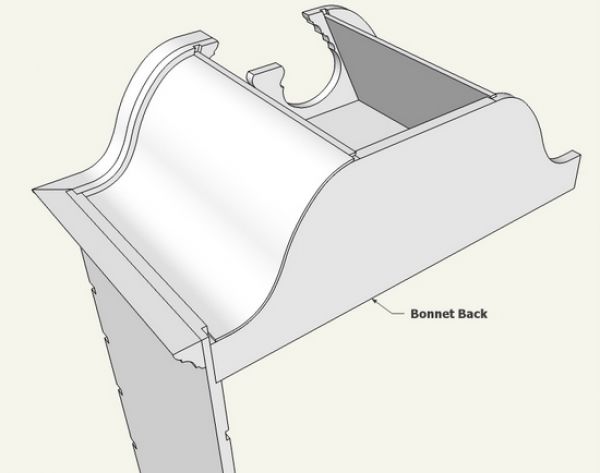
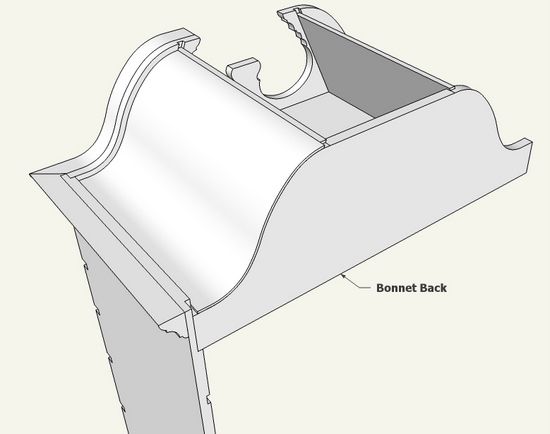
Step 11: Using the Bonnet Front, create the Bonnet Back also with grooves to house the ends of the Inner Enclosure. The curved Bonnet Top is fastened to the top edge of the Bonnet Back.
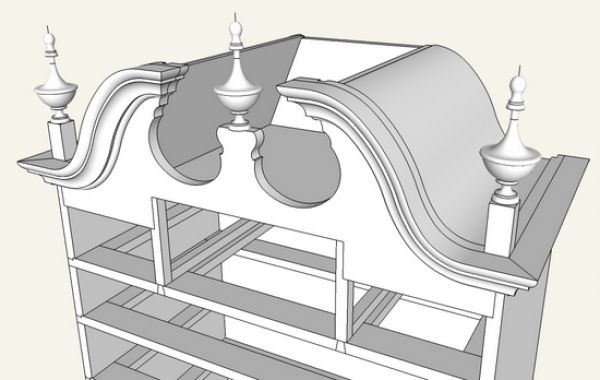
Step 12: I finished the bonnet with the turned finials.


Comments
Thanks, very detailed and even though
I'm not ready to build it I will certainly
use it when I do.
Hi, there,
You guys never cease to amaze me with your knowledge of SketchUp. I have dabbled in it a bit, and it can be a bit "over my head". But, as you said in a previous post, just to jump in. Thanks for your time in providing this excellent information in this subject!
J
Great stuff Tim. Do you sleep? Or just work and make drawings?
Log in or create an account to post a comment.
Sign up Log in