Spalted wood: Optimizing fungal growth
Utilize end grain to get your fungi colonizing faster and remember, sometimes the progression of the fungi can be just as interesting as an entirely colonized piece!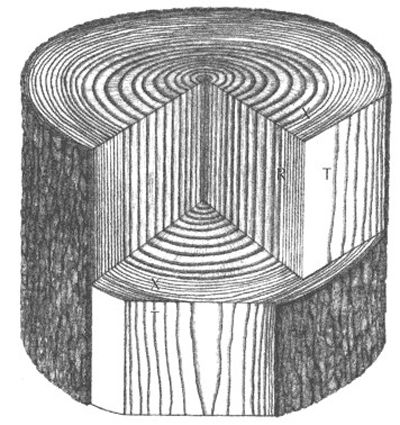
The anatomical directions on wood
I’m going to warn you all now, thars science in this here post! Buckle your seat belts for a little learning before getting to the good stuff (well, I think learning IS the good stuff, but I know others might disagree).
Before I begin a discussion of how fungi grow in wood, I’ll need to cover a little wood anatomy. When people start talking about wood and fungi, the idea of wood anatomical direction always comes up. So lets all get on the same page:
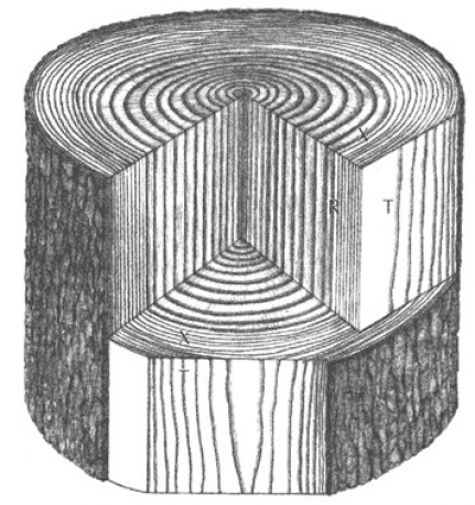
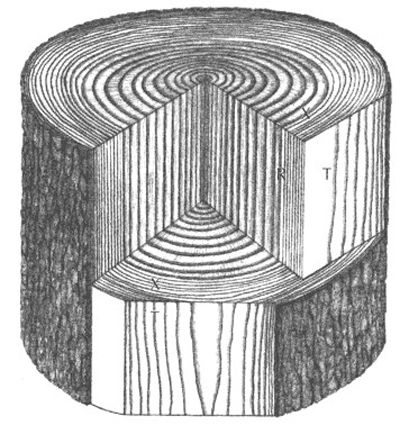
There are two directions of interest here – the long direction, which is up and down the tree stem, and the radial direction, which is ‘in and out’ from the pith to the bark.
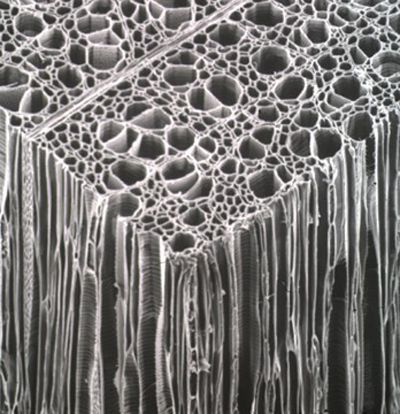
Fungi tend to colonized up and down and in. Primarily, most growth is up and down, since the vessel cells in hardwoods are long connected tubes:
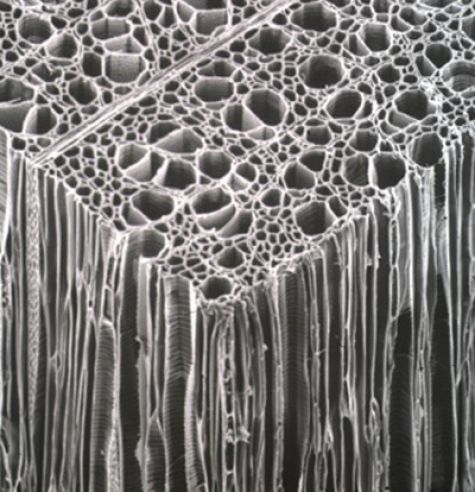
Take a look at the picture above. Fungi, like humans, will take the path of least resistance. And there is a heck of a lot less resistance in a nice, wide-open vessel (the big circles) than any of the smaller cells.
So what is going on here?
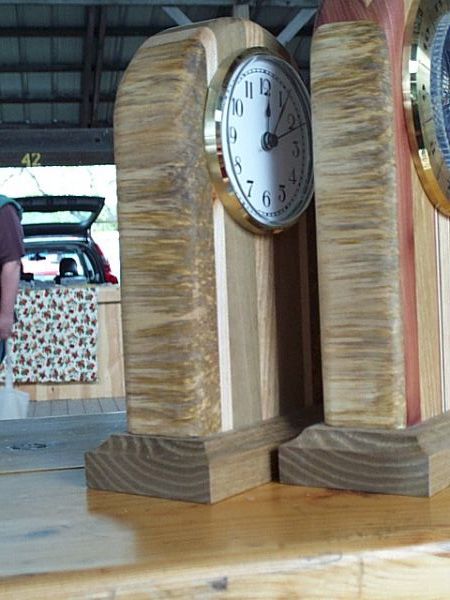
In your spalting tubs, you could just toss in some mushrooms and hope for the best. But why waste time waiting for the fungi to degrade enough cell wall to get to those nice, long vessels? You can save yourself a week or two by breaking open your mushrooms and rubbing the inside on the endgrain of you boards. It makes life a little easier for the fungus. It also makes for nice growth patterns, like this:
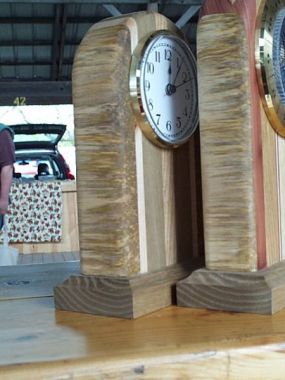
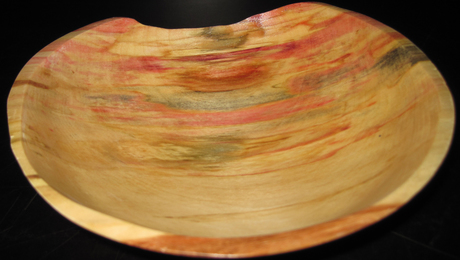
In the photo above you can see the progression of the fungus through the wood. Utilizing the areas of your spalted wood where the growth is progressing can make for very striking effects.
Fungi also grow in
Mmmmm, sugar! Blue stain fungi love it! The cells in wood that go in and out from the pith are call ray cells, and are packed with all sorts of tasty things that fungi love to eat. So ‘weaker’ fungi, like the blue stains, will tend to colonize in and out, getting as much as they can from the rays before someone else gets there first! If you’ve ever seen a wood cookie with blue stain fanning in and out from the center, this is exactly what has happened.
So, go forth and spalt quicker! Utilize end grain to get your fungi colonizing faster and remember, sometimes the progression of the fungi can be just as interesting as an entirely colonized piece!
Seri
Fine Woodworking Recommended Products

AnchorSeal Log and Lumber End-Grain Sealer

Ridgid R4331 Planer

DeWalt 735X Planer








Comments
From your earlier posts I understand that zone lines are where different fungi set up defences against one and other. Therefore although quicker it doesn't seem like introducing through the end grain is going to produce a lot of zone lines - just coloring. Would it be better to rub a bunch of different fungi on the surface of boards if your purpose is a lot of lines?
Peter -
Putting fungi on the surface of the wood generally means that you get a lot of colonization on the surface that takes a long time to penetrate through. For antagonistic zone lines, I'd recommend placing one white rot fungus on one end, an opposing fungus on the other end, and allowing them to grow together. I think you'll find that even if you put spores on the end grain, the mycelium will still quickly cover the surface and give you all those lines you are looking for. However, putting the spores on the end will give you zone lines that run completely through the board.
When I want to be 100% sure of getting internal zone lines, I always utilize the double end grain inoculation method. I have found that just rubbing spores over the surface often produces zone lines that penetrate only a few millimeters into the wood. One quick pass through the planer and they're history!
In terms of pigment fungi - most of them grow radially, so placement of their spores can be on any wood surface. Most of them can't get too deep without a white rot pretreatment though, so if you already zone lined your wood through the end grain, you might as well color it through the end grain as well, as that will be the path of least resistance for the pigment fungi.
Hope this clarifies!
Sarah, I might have missed this on an earlier post...if so I apologize for asking a question that is already answered. My question goes to moisture content of the wood to spalt. I've noticed on some of the woods in the spalting pile that the mold has overtaken the wood. My concern is that there is too much moisture and that the fungus will break down too much material and cause the wood to be soft or break too easily? Is there a rule of thumb on wood moisture content...and on moisture content for the storage environment? Thanks for your wonderful posts and explanation of the science.
I have three questions.
first; I have collected natural spalted wood from the forest floor and remote beaches of the great lakes. I noticed that forest wood when sanded creates the expected dust. However the spalted drift wood has dust plus particles that fall to the floor. Combined with the rapid demise of the sand paper may I assume there is a lot of silica in the lake spalted wood ?
Second; Why does it happen to mostly maple? Although I have spalted sycamore and silky oak from Australia why not American Cherry or Elm , or Ash?
Third; what is your suggestion for obtaining a smooth finish? ie no dry patches in a raking light?
Thanks for your thoughts,
Rich
Reggie -
Moisture content is a tricky thing for spalting. Get the wood too wet and it won't spalt at all. Get it too dry and you have the same issue. But the MC inbetween those two extremes supports a whole variety of fungi.
Excessive mold when spalting can be due to two things - very fresh green wood (high sugar content) or older wood with a MC so high that decay fungi do not want to grow. Since you mentioned this issue with your spalting pile, I'm going to wager that your MC is too high. But, breathe a bit. Mold fungi DO NOT decay wood - they just eat the available sugars. Let all the mold fungi you want colonize the wood (you'll get the startling colors this way too), it won't affect your wood strength (although it might affect the toughness of the wood).
I'm not going to get too much into MC relations here, as I'm planning a future post on it. However, I would generally recommend keeping MC on the lower end to get the decay fungi going, then boosting it for the colored mold fungi.
Is there a rule of thumb on wood moisture content?
Not that I can easily convey without a moisture reader. If you see mold, its too wet for decay fungi. If you see no fluffy white stuff, its either waaay too wet, or too dry.
and on moisture content for the storage environment?
If you're using vermiculite as the spalting substrate, you don't have to worry about the relative humidity of the storage environment. If not, you'll want to make sure that water is condensing on the top of your spalting tub. That keeps MC cycling.
Good luck!
Rich -
"spalted drift wood has dust plus particles that fall to the floor. Combined with the rapid demise of the sand paper may I assume there is a lot of silica in the lake spalted wood ?"
I'm afraid you'll have to be more specific in what you refer to as 'dust particles'. I would wager, however, that what is falling to the floor is remnants of the wood itself. Drift wood is highly eroded and decayed, and the cell walls are in really rough shape. Any sort of pressure, especially with the heat from sanding, will cause the components to fall apart.
Is your sand paper clogging, or dulling? If it is clogging, then the issue is definitely your eroded wood. If it is dulling (test this by rubbing your finger over a used piece, then a fresh piece), then you probably have a lot of sand in there with the wood. Silica occurs rarely in North American hardwoods, so unless you are finding teak driftwood, you problem is either sand from the lake (probably not) or just a very eroded cell wall (likely).
"Why does it happen to mostly maple?"
The thing is, it doesn't happen mostly in maple. The issue is that for scientific research, you need to stick with one species until you really, really understand it. So a lot of my techniques are based on the requirements for maple specifically.
I've been expanding recently into other woods, and find that basswood and aspen are excellent spalters, but only for very specific types of spalting. Your problems with elm and ash (maybe even cherry) are the extractives. The more extra 'stuff' in a wood cell wall, the less likely a fungus is to colonize.
"what is your suggestion for obtaining a smooth finish? ie no dry patches in a raking light?"
That is a huge question that I've been asked several times recently. I'm working on a comprehensive answer. Finishing spalted wood is complicated, as you have no doubt found out. Hopefully I'll have a step-by-step guide up here or in the magazine itself sometime soon!
I very much appreciate your response. I notice that when I sand some spalted wood there is the expected dust that float's only in the air. When i san spalted wood gathered from lake Michigan or lake Superior there is dust that float's in the air however some that vibrates and falls to the floor. It seems that if I sand forest spalt my sand paper has normal wear. When I sand beach spalted wood the sand paper becomes smooth, ie zero grit very fast. Not clogging.
Also forest spalting finishes well while lake spalting is a true nightmare to shape, sand, and finish.
You have to love the challenge of using this wood.
Rich
Rich -
My guess at this point would be that there is sand in your wood from its time in the lakes. The erosion of the surface along with the opening of the cell walls by the fungi no doubt allows more sand in than a sound piece of wood.
I've done some work with driftwood, and seem to recall a similar phenomenon. It is a unique type of wood. I finally resorted to utilizing Finkat sandpaper, since it was the only type that would hold its abrasive edge for very long.
All the driftwood pieces I finished were finished with MinWax water-based polycrylic. As you noted, that driftwood is a real pain to finish. The water-based finishes go on evenly and provide some added protection to the sometimes punky areas.
Anyway, I don't think your silica is naturally occurring in the wood - I think sand is being forced in there while the wood tumbles around in the lake. Regardless, the effect is the same for your sandpaper. Best of luck!
Log in or create an account to post a comment.
Sign up Log in