I’m continually building drawers and never are two the same. In starting a new piece of furniture I will “rob” one of my drawer designs in a previous piece. But then they need to be adapted to the specific sizes required for the new piece of furniture.
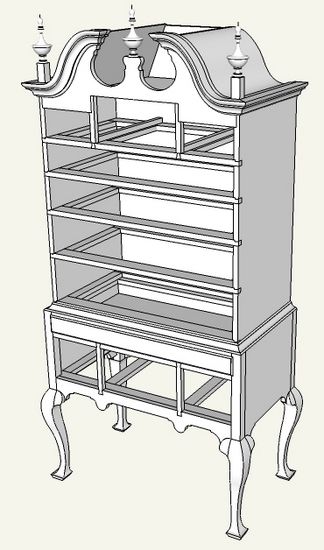
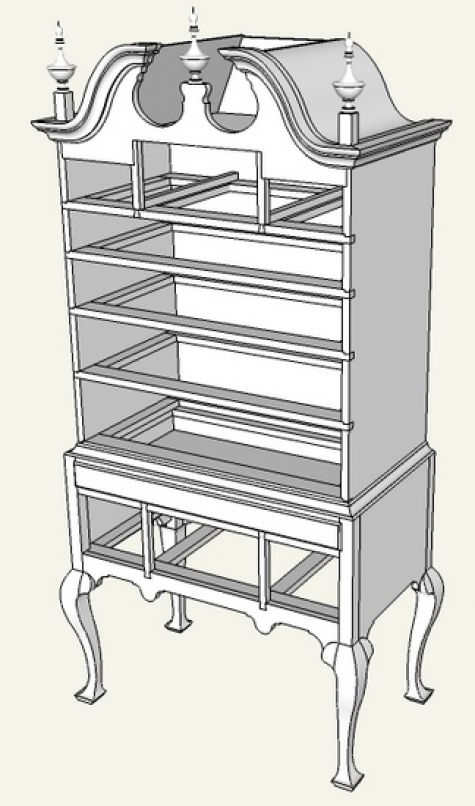
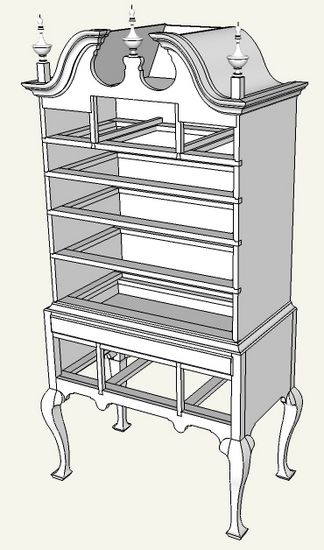
In the Highboy I’m working there are nine unique drawer sizes. Even though these drawers are quite complicated with the thumbnail edge, dovetails, grooves, and bevel-edged bottom, it is quite straightforward and time saving to make all the unique sizes starting from one complete drawer set.
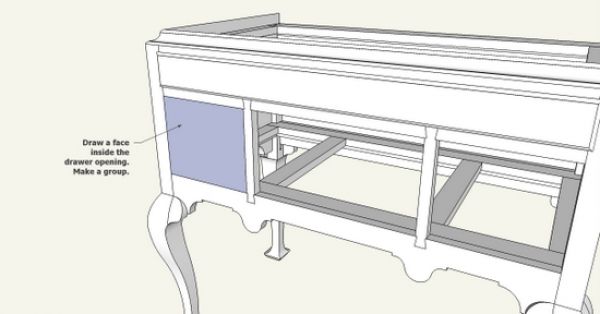
Here is a picture of the highboy empty of the nine unique drawers, two with carvings in the front:
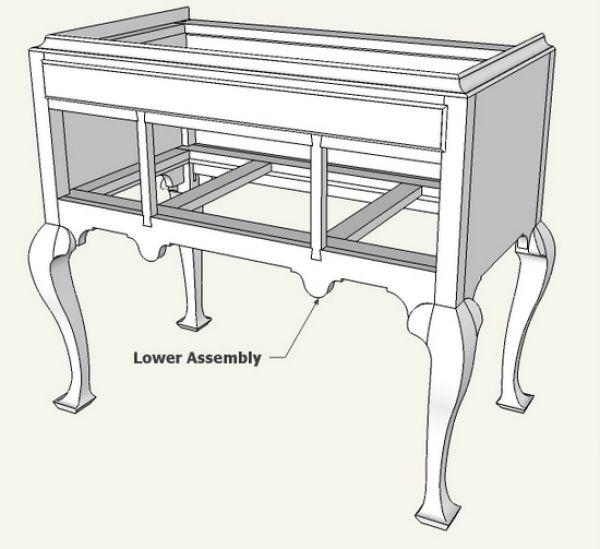
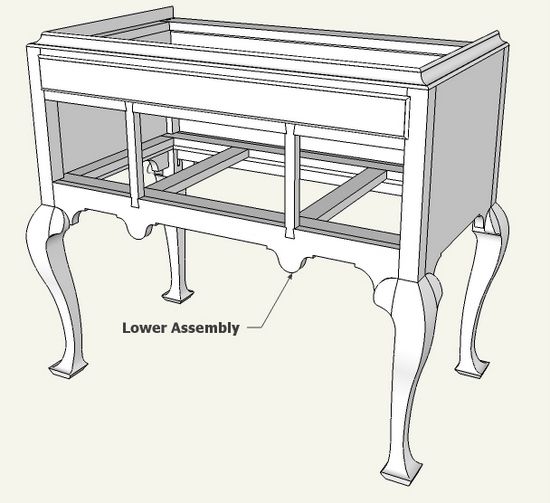
I built one of the drawers in the top of the bottom section as shown. I will show how I use this drawer to make one of the lower drawers.
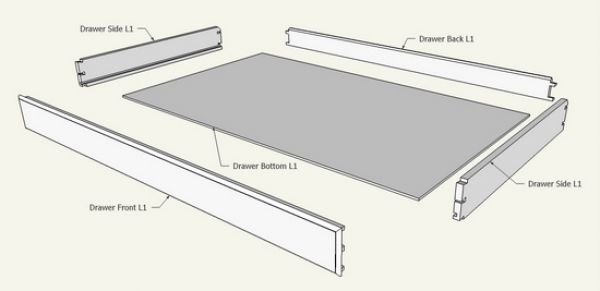
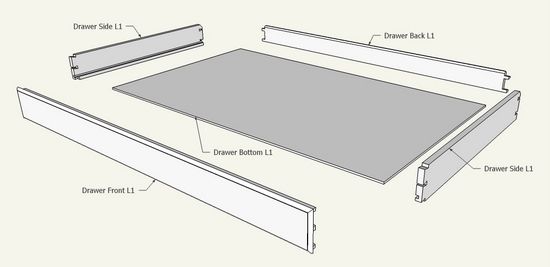
Here is the exploded view of this first drawer which will be used to make the next drawer.
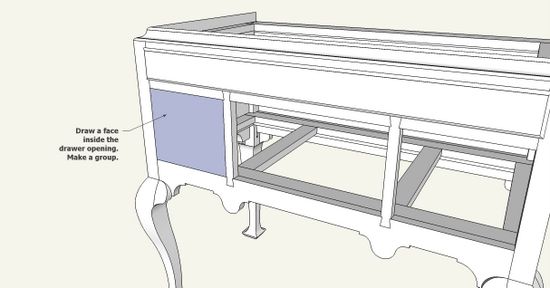
Step 1: As a template for the next drawer size, create a face which is exactly the size of the drawer opening (shown in blue below).
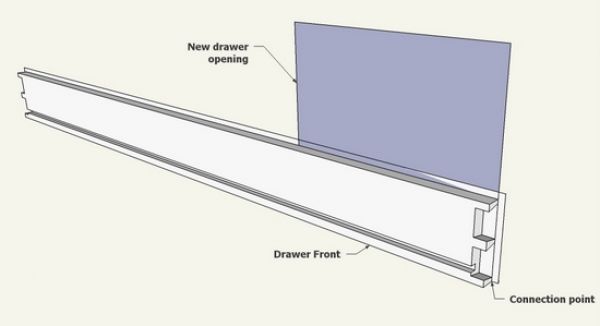
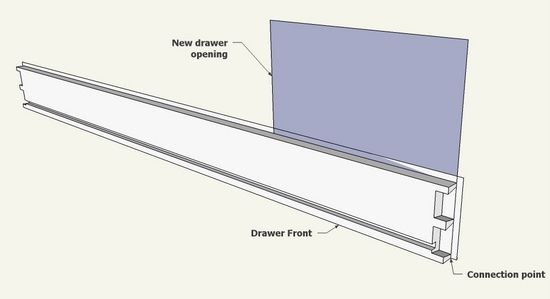
Step 2: Place the existing drawer front onto the template of the new drawer opening.
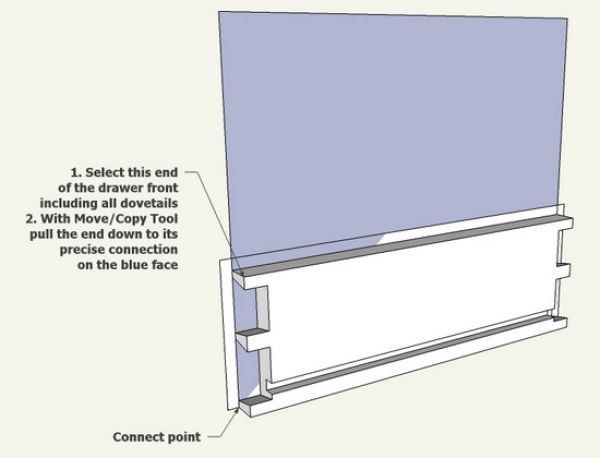
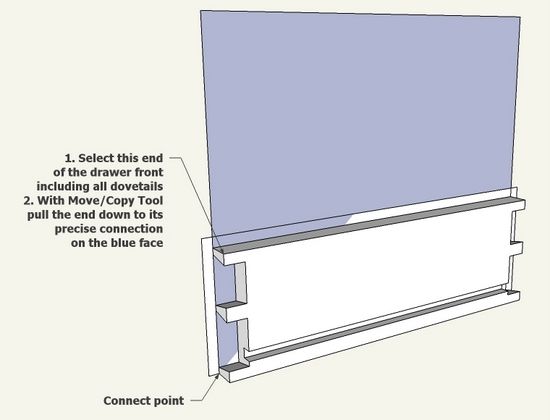
Step 3: With the Select Tool, select the end of the drawer front making sure to select all of the dovetail joint geometry. Then with the Move/Copy Tool, shrink the length of the drawer front to exactly fit within the opening template.
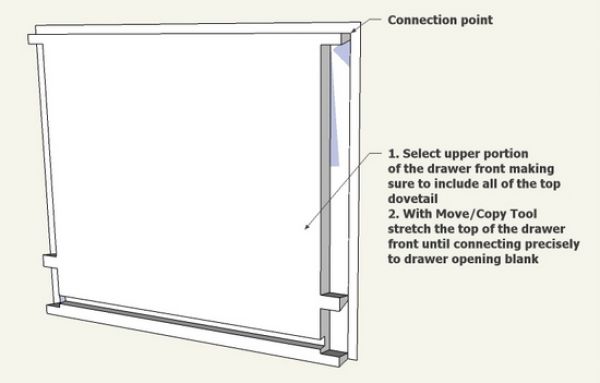
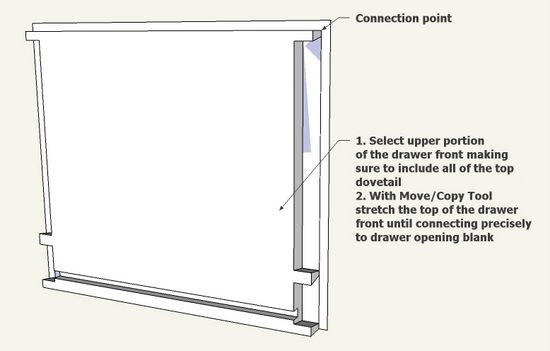
Step 4: Now that the drawer front is the right length, we need to make it the correct height. Select the top edge of the drawer including all of the top dovetail geometry. Again with the Move/Copy Tool, expand the height of the drawer to exactly fit to the drawer opening template. Note that there are missing dovetails, but we will quickly fill that blank space by copying the existing dovetails.
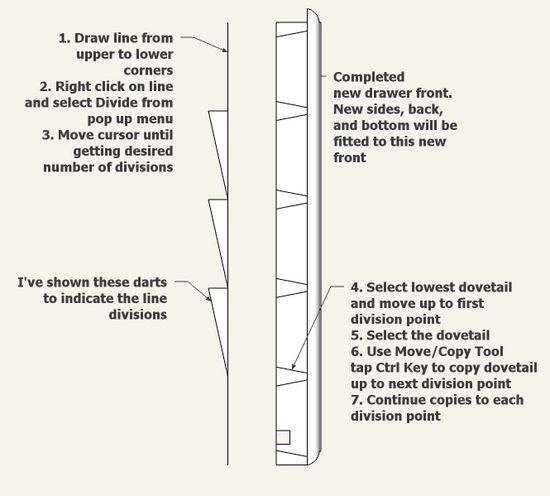
Step 5: Arrange a standard view (Left or Right View) and select Camera parallel projection. Now draw a line from top to bottom of the drawer opening height. Right click on this line and select Divide from the pop-up menu. Divide the line into appropriate number of divisions for the dovetails. I’ve shown some “darts” to show the divisions that I’ve selected in the line.
With the Select Tool, select the lower full dovetail that exists. Note that when you select in this view, the opposite end of the drawer front is also selected. So we will be adding dovetails to both ends of the drawer in these steps. With the Move/Copy tool and tapping the Ctrl Key move copies of the dovetails into their respective positions. I attach my Move/Copy Tool to the midpoint of the dovetail so that it positions precisely to each line division. I use the down arrow key to force the move in the up/down blue axis.
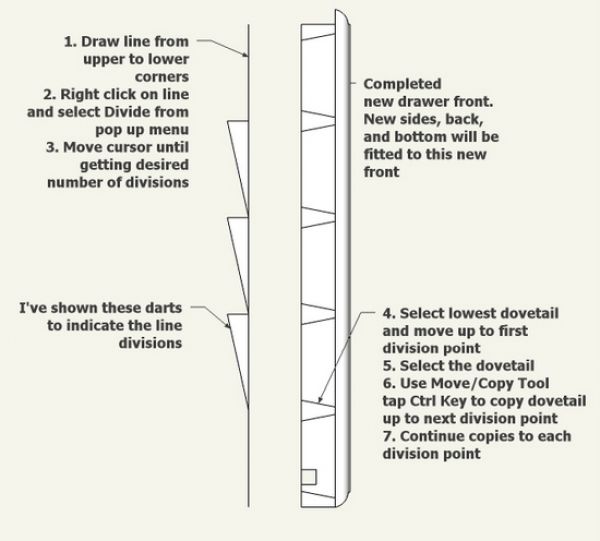
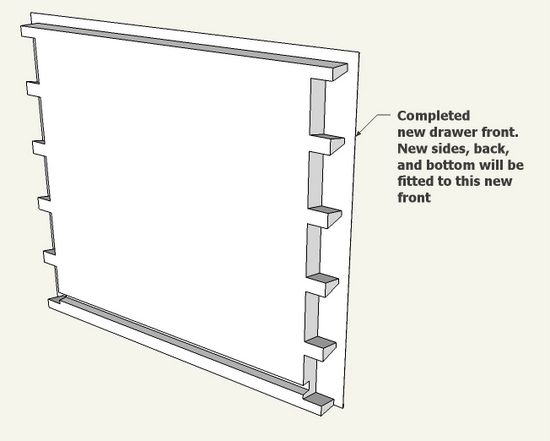
Step 6: With a little touch-up, we have a completed drawer front for the new drawer location.
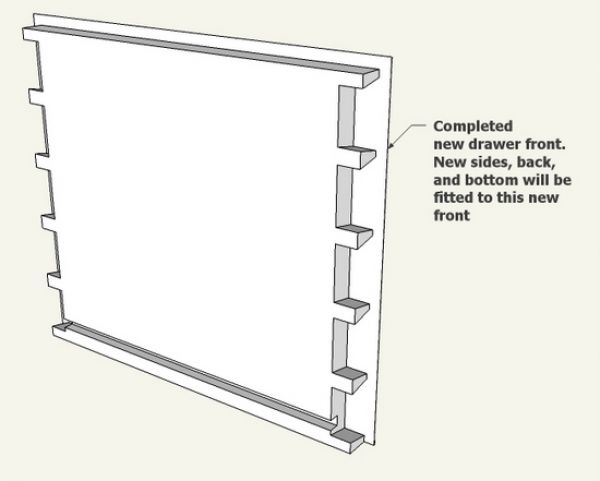
In the next blog entry I’ll show how I will adjust sides, back, and drawer bottom to fit with this newly created drawer front.




Log in or create an account to post a comment.
Sign up Log in