How to Use SketchUp to Get the Most from a Digital Woodworking Plan

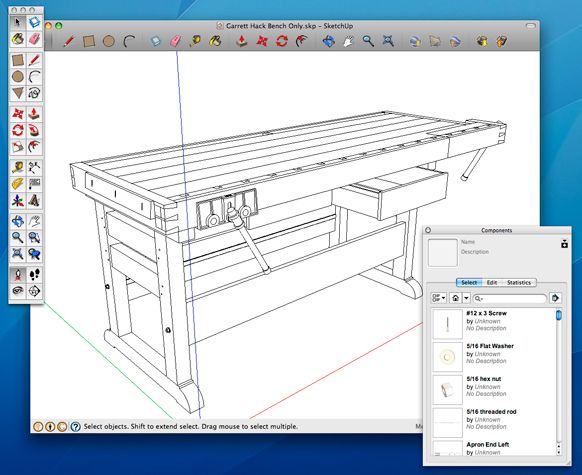
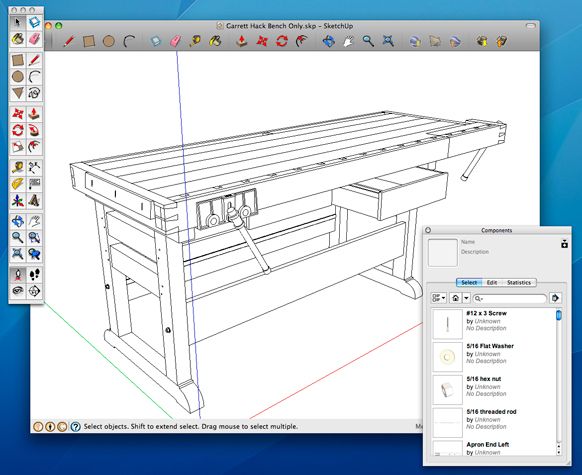
Screenshot of Garrett Hack's Workbench as seen in the free design software SketchUp.
Perhaps you’ve purchased one of the Digital Product Plans offered by Fine Woodworking but have no interest in using the SketchUp file that is a part of the product. After all, there is sufficient information in the multi-page PDF document alone to build the piece in the shop. Why should I turn on the computer and open the file in SketchUp?
No doubt there are customers knowledgeable in SketchUp who welcome having the 3D model file and will use it to enhance and customize the furniture design. The sizing or proportion can be adjusted, or minor adjustments in lumber thicknesses can be made to accommodate materials on hand.
But let’s assume you have not used SketchUp and have no plans or need to develop that skill. You’re interested in getting to the shop and executing the building process with real lumber. The plan will work as it is and there is no need for adjustment, resizing, or modification.
Simple SketchUp Tools
So can SketchUp help you? The answer is yes, and there wouldn’t be much of a learning curve to make it work. Here are some areas where you can use the most simple and basic features in SketchUp to get the most from your digital plans:
- You would like to check a dimension, not shown on the documentation, of a joint or component
- Ditto for an angle
- The view shown in the document is not clear. You would like to see it from another angle or point of view
- The view is too small, and you would like to see a close-up of the joint end of the component only
- You would like to see an X-ray view of the assembled joint to help me see how it fits together
- You would like to print a full-size template
None of these things require a deep knowledge of SketchUp nor an ability to draw 3D parts. However, they will require some practice moving around the model using the mouse.
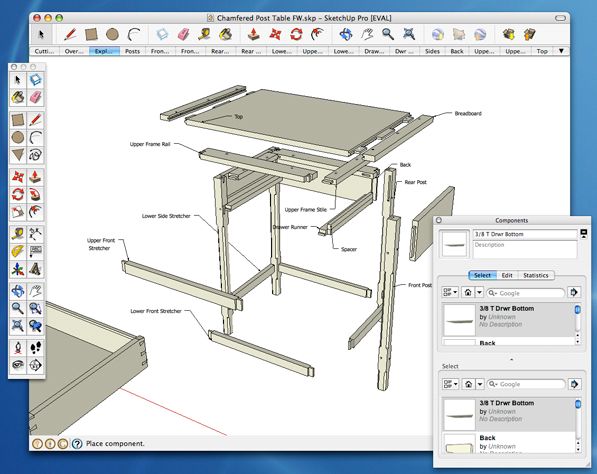
When you open SketchUp files from Taunton, they will have Scenes (multiple tabs) across the top of the page. These tabs have labels such as Assembled, Exploded View, Orthographic, Leg, Top, Side, Stretcher, etc. These are saved views (Scenes) that are used to make up the documentation package. You can use your mouse to click on each of these Scenes to move through all of the saved views. These tabs provide a quick way to select an area or component of your interest.
(I would recommend that you make a copy of the SketchUp file by clicking on File and selecting Save As, and typing in a file name of your choice. Then you can use this copy as your reference file, while protecting the original).
Once you find the area of interest through the tabs, you can now use your mouse to shift your view or zoom in for a closer look. There are three ways to move in SketchUp – Zoom, Orbit, and Pan. There are icons for each of these commands that can be selected from SketchUp’s Toolbar, however, it is much more effective to use mouse movements only, without selecting the icons. (Note: that your mouse should be one with a Scroll Wheel).
To Zoom, simply rotate the Scroll Wheel. To Orbit, hold down the scroll wheel and move the mouse. To Pan, hold down the scroll wheel plus the Shift Key and move the mouse.
Dimensions are also very easy to check. You can use the Tape Measure (one of the icons in the Toolbar) and click on the first endpoint, then move to the next endpoint and read the length In the Measurements Box in the lower right hand corner of the screen.
Alternatively, you can use the Dimension Tool (the icon that looks like a dimension line with a numeral 3). After selecting this tool, click on one endpoint then move to the other endpoint and click again. Now drag the dimension out to where you would like it placed and click the mouse again.
I hope you will give it a try. If you run into roadblocks let us know. We can help you get around them.


Comments
Sketchup Is great tool. As an interior designer ;whom interested in wood working, I use Sketchup for 75% of design and development tasks. It even helps me to cost estimate a milwork or a custom wall design. Sketchup is a magnificent tool and I hope many people get in the habit of using it more often.
Farzad
I'm only new to woodworking but I'm finding Sketch up to be a very valuable andcost saving tool when designing your own pieces. You can create joints, check fits and tollerances all in 3D which must surely save valuable timebr in the long run if it helps you avoid mistakes.
I have a baby cot plan I'd be happy to share if anyones interested?
Cheers
Bruce
New Zealand
Another simple use for sketchup is to change the measures of ae plan from inches to centimeters
I'm a relative newcomer to woodworking and I'm finding Sketchup to be invaluable in helping me try things out before I start cutting up valuable timber. I notice Derval's comment about being able to change the measurements from inches to centimeters but can't find a way of doing this - how do I find out?
Thanks
Jon
Jon, go to Window>Model Info>Units. This is where you'll make the change in units and can adjust precision if desired. If you want keep that units choice for future new models, see Tim's recent post about customizing your template.
Dave
Dello Dave,
Thanks for that info (and the very quick response). My inches have been transformed to cms.
Regards
Jon
Hi Bruce,
I would be interested in your plans for a cot.
email: [email protected]
Cheers
Log in or create an account to post a comment.
Sign up Log in