– A Dedicated Sharpening Bench – part 5 – Shaping the Feet and Finishing the Frame
Fidgen finishes the frame for his sharpening bench. Read parts one, two, three, four, five, six, and seven for more details on this project.
In my last post I finished the leg to bench surface joinery and can now get into the rest of the mortise and tenon joinery to complete the frame work. As mentioned, the stock is 1 1/2″ square so I’m making 1/2″ tenons and mortises. It’s a work out chopping through the Ipe but my mortise chisel is up for the task. Remember I usually bore out the waste with my brace and bit but this wood wreaked havoc on my vintage augers and they only went in about 1/8″. So lots of hammering and sawing and fitting the tenons. One nice thing about the 1 1/2″ stock is the tenons are relatively small so after a few hours of banging around the basement I’ll have the frame complete.
Chopping a Mortise
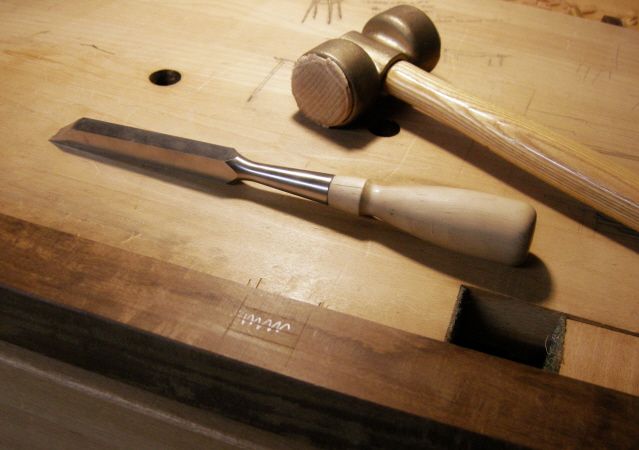
First thing is to establish the perimeter and I do this with some crisp knife lines. In this first shot you can see where I’ve marked the overall size of the stretcher and then in the middle you can see my scribe lines…notice I marked off the center? This would have given me somewhere to register my auger bit but as mentioned, it didn’t quite work out that way.
To begin, I place my mortise chisel at the far end of the mortise area, about 3/16 ” away from the scribe line. I hammer down, taking small ‘bites’ as I go. I’m holding the chisel so the bevel side is facing my body and work my way down the mortise section. I’m careful to stay inside the lines and not to hammer the chisel in too deep…yet!
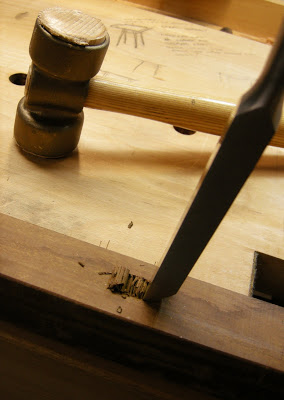
Once I get to the end of the mortise section I stop just shy of the scribe line, again somewhere in the 1/8″ range. I then go back and carefully pry out the small chips and get ready for a second, deeper pass. This time I’m a little harder on the hammer and begin working my way down through the hardwood.
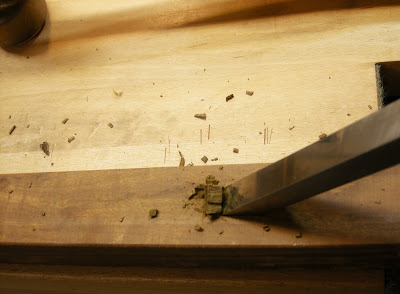
I continue on with this routine until I get close to my finished depth, checking after each pass. Once the mortise is at it’s finished depth I’ll square up the ends. Place your body in front of the work so you can eye the chisel straight down, square into the opening. If you have trouble chopping square then place a square on your bench top, behind the work for reference. Another mortising trick you can try is marking the finished mortise depth on the back side of your chisel with a felt marker before you begin; that way you can make sure you’re not chopping down too deep.
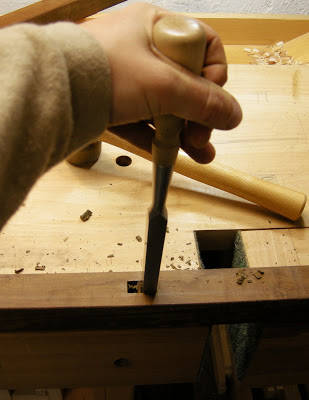
This process is repeated fifteen more times and when complete I’ll begin to saw out the tenons. Refer back to my last post to see my set up for that.
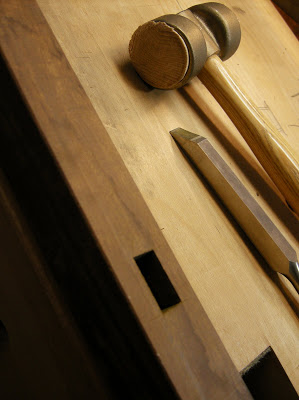
When everything is looking good I go back and re-visit the foot components and shape them.
This being a workbench I could have easily left them square- not like anyone will be looking at them ~ 😉 but I’ve always liked the look of rounded feet on workbenches. I find it gives the bench a traditional look and there will be much less chance of me tripping on them while I stumble around the shop. My own workbench has square feet but I think that taking the extra 30 minutes or so to round them over adds a nice touch.
Shaping the Feet
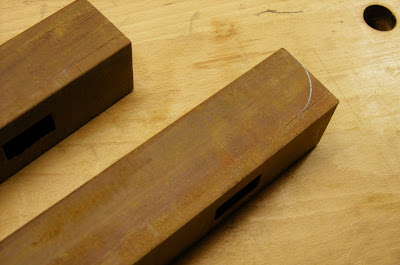
To begin shaping the feet I draw out the arch and scribe the lines to determine the recess in the top of each foot. On my bench hook I’ll make the first cross cut to establish the small fillet down and then I’ll put the stock upright and rip down to remove the shoulder.
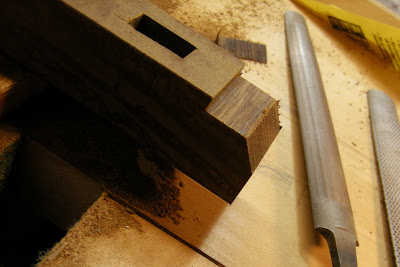
Next, I make an angled cut to remove most of the waste and with some rasps and files I fair out the curve.
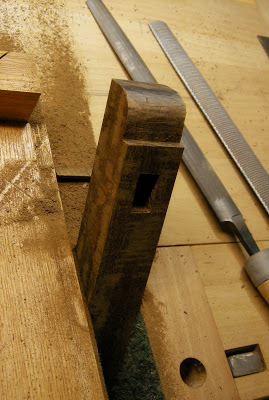
As you may know, my work shop is in my basement and the floor down there is far from flat! With that in mind I decide to remove the middle, underside of the feet to create four contact points where they meet the floor instead of the bench sitting on the entire length of the foot stock. This will make for a more stable bench.
To remove the material I make a series of cross cuts down to my desired depth which in this case is 1/4″.
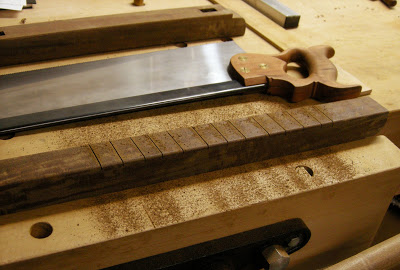
Then I grab my biggest, meanest Japanese chisel and start chopping the waste out between the saw kerfs. I take my time doing this part so I don’t blow out any of the wood grain. Working from the inside of the foot I chop down a little over half way and then flip the board over and now working from the outside, show-side of each foot to complete the cut.
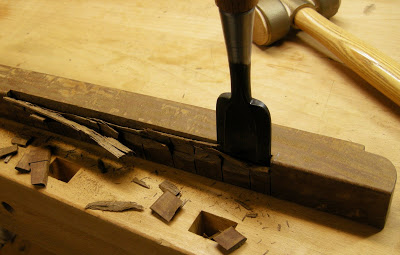
A quick going over with a sharp card scraper and it’s done. When I have the first foot shaped I’ll use it as a pattern and trace the rest of the feet off of it. This will insure they’re all the same without having to measure every time. A bit of sanding and they’re good to go!
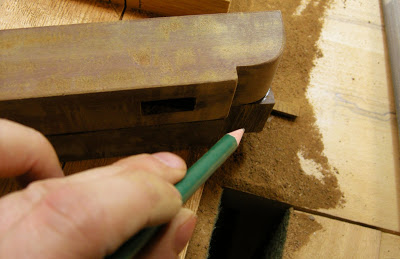
With the feet shaped and the joinery cut I’ll do another dry fit and we’ll call it a day. I begin by laying out the left front and back legs and insert the cross stretcher and foot. I’ll mirror this assembly on my bench top with the right hand side as well.
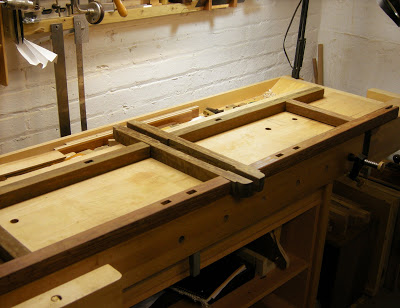
Leaving the frames flat on the bench top I’ll insert the cross stretchers.
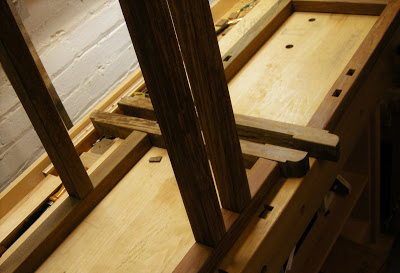
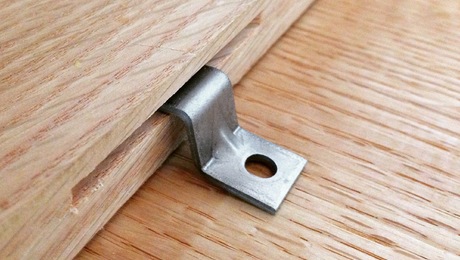
Finally, I’ll peg the right hand frame onto the end of the stretchers and stand the whole unit upright. I’m happy with the results and my joints are looking pretty descent. In this final shot you can see how the work surface will slide down into the front slip joints and sit on the rear stub tenons. When I glue up the frame I’ll drill and peg all of these joints for a bench that’ll probably be around a lot longer than I will…My mortising is done for today but I’ll add another cross stretcher at the top, rear of the frame that will serve dual pupose- it’ll have a dado running along it’s length to peg the drawer holders into as well as another pick-up point for the surface to sit on. This final cross stretcher will be made of oak because I want it to be at least 2″ wide and as you know, the Ipe came pre-dimensioned at 1 1/2″.
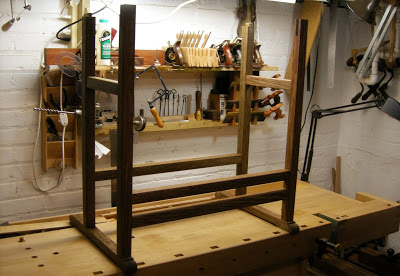
In the next post I’ll cut the giant hole in the work surface top for the granite insert (the horror-the horror!) as well as make the final stretcher and some last minute details before I glue up the frame assembly and build the under carriage that will hold the granite in place…stay tuned.



Comments
I just saw this series for the first time today. Did I miss something? Like, what does this thing look like and function like when completed?
Lots of detail photos, but don't forget the overview!!!! No one else knows where you are going with this project.
tkarlmann-
I appreciate the comment but I'm not so sure that 'no one else knows where you are going with this project' is an accurate statement...
this being the 5th PART of a SERIES you should probably
GO BACK to PART ONE to begin- and then when you do you'll see 'the overview' you reminded me not to 'forget' !!!!
anyone else having trouble following along?
just curious.
I think it is a bit harsh to say that no one knows where you're going as you did provide an overview. But, I think it would be a bit easier to follow along if the overview was a bit more detailed. A bit of text explaining how big the thing is, whether it has drawers etc. would be helpful. A couple more views from different angles would also have been good.
That being said, I like the article and I'm looking forward to seeing the finished product.
Hi Tom,
I've been following along since part one and I think the issue (if there is one) is that you haven't followed the traditional format of showing a photo of the finished product first. I know you included a sketch and that you're likely doing some of your design on the fly. I'm not sure if you're blogging as you build or if you are posting the process after the bench is done but I think it would be a bit easier to follow along if the reader had a good 3D representation of the final product. Don't get me wrong, I'm loving the posts, but have to agree that there is some slight difficulty in following the posts without knowing exactly where you're going. I prefer to think that this adds to the blog since there's always a surprise at the end when you show the progress photo.
Thanks for the comments everyone-
To address the 'overview' issue,
I'm blogging and building as I go- the bench is coming together so I'll have some better pics next time...seeing as I'm doing this on my own, it's difficult to provide 'detailed' plans or instruction. The lead diagram is all I have thus far, it shows the 2D view of the bench with a few dimensions. If this was a magazine article for say a publication like ummmm....say....Fine Woodworking, then they would have their artists and computer guys draw up some 3D plans etc.. etc... This being a blog I'm doing on my own, I don't have that luxury. Hopefully it'll all come together in the next post and you'll be able to get a better sense of what I'm doing over here! ;)
With that, better get back down to the wood shop-
cheers!
Hi Tom, I was wondering if there was anything that can be done for ipe's poor laminating characteristics? From what I understand because of it's chemical properties it wont bond with wood glue. The table by the way looks great.
008-
I too have read about the poor glue properties of Ipe; that said, these tenons are a tight fit to begin and I used Titebond III...I'm also adding wooden pegs through the joints as you'll see in the next post. It seems to have worked very well. Lots of glue. As far as using it for say a panel type purpose I'm not too sure what to say- I haven't used it before this frame and to be quite honest with you I'm not in any rush to use it again !
It's dust really irritated my nose so I think I'll stick with the domestics.
Thanks for the comments. Sorry I couldn't be more help.
If anyone out there in cyber space has used it in a glue up/laminating process, would you be so kind to post a comment?
Cheers!
I do know that with some oily woods such as Spanish Cedar and maybe Teak that it's imperative to wipe the joints down with acetone just prior to glueup. "No smoking!"
Ipe? Dunno!
I started viewing with the "Introduction" first and then "Part One". The intro has a nice picture of the table and then a drawing of the table, later.
I like to scroll down on each "Part", such as "Part 5", to the bottom to see the finished project of the day. Then back to the top and follow along with the project as it emerges.
It gives an insight as to what's going on.
Maybe the Intro was added later after the project was in progress.
[url=http://www.whitstablefolk.co.uk/mobileweb/]www.whitstablefolk.co.uk/mobileweb/[/url] We also are encouraged by how they are conducting these sessions as well, using art, writing and music in their workshops as well as encouraging the teenagers to bring in photos or mementos of the person they are remembering or grieving over. These workshops are precedent setting. Most have usually dealt with children dealing with the loss of a parent.
They meet in a movie theater. She is alone and he spots her from across the auditorium. Then he moves, seat by seat, until he is right next to her. Brooklyn: The other night, I was watching " 2 Broke Girls," a sitcom created by Michael Patrick King of "Sex and the City" fame. The show depicted Italian American women as idiots a la "Jersey Shore." They were owners of a bakery, and one of the broke girls commented that the only way these women could obtain this business had to be mob money. I suppose this is how Fiorello LaGuardia was elected as well, by mob muscle.
The refusal of many states to recognize expatriation became problematic for the United States, which had a large immigrant population. Citizens into the British Royal Navy. Were sometimes held to the obligations of their foreign citizenship when they visited their home countries.
[url=http://www.whitstablefolk.co.uk/mobileweb/?tchid=170]Kids Nike Air Max Sale[/url] Tourists love India travel packages on the grounds that there are such a variety of entrancing things that can captivate them gigantically. It is a fine place that is famous for some of the best conventions, a number of religions, dialects and limitless differences. There is a plenty of alternatives that one can browse throughout their stay in India.
That warning aside, one of the most encouraging parts of the book details the professional life of David Hornik, a successful venture capitalist and unapologetic giver. At one point, when Mr. Hornik was asked wanted to achieve most in life, he said, "above all, I want to demonstrate that success doesn't have to come at someone else's expense." I couldn't agree more, Mr.
The team led by Marcus, who is also the clinical director of the psychiatry division of the U M Depression Center, conducted the survey over a three year period at a range of clinics where pregnant women were awaiting their prenatal doctor's visits. Ninety percent of the women who were approached agreed to complete the survey. Marcus notes that the high participation and completion rate show that screening for depression in the doctor's office waiting room may be feasible across the board.
[url=http://www.whitstablefolk.co.uk/mobileweb/?tchid=107]Cheap UK Air Max 1[/url] Eye health issues are frequently caused by neglect and lack of knowledge yet surveys show that sight is perhaps the most precious sense for people around the world. So I believe that in addition to our mission of finding treatments and cures for eye health diseases and deterioration, we also have a duty to educate about preventative measures. If people around the world took as much care of their eyes as they do of their teeth, we could save so much needless suffering..
There has been considerable work done in this area in the image processing community. From a theoretical standpoint, it seems you want to compute a distance metric that given two arbitrary sequences of points determine how similar these sequences of points (vertices) are. The problem could become much easier if you had a constrained number of shapes you were trying to match against, but you probably have already considered that work..
Once again we decided to celebrated the New Year at the Sirata on St. Pete. Beach! As soon as we arrived it felt like home. Wu et al. Have shown that a bispecific protein recognizing both CD3 and CD20 can be made, but it remains to be determined whether it can be used to target CD3 expressing T cells to CD20 expressing B cells. However, the expression levels and homogeneity of the product made in the isolated cell lines suggest that it will soon be possible to answer these important questions in preclinical experiments..
Log in or create an account to post a comment.
Sign up Log in