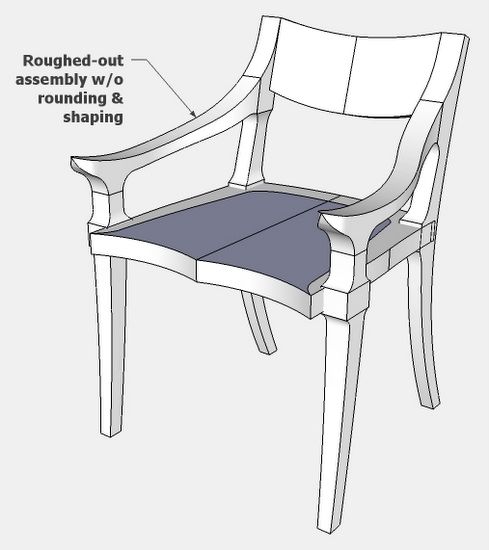
Often I’m faced with replicating an existing piece of furniture, but without detailed information or access to the original piece. In fact, the only information available, may be a couple pictures and overall width, height, and depth dimensions. How do you go about creating sufficient design information to proceed with the shop construction? SketchUp helps me do this and I’ll show you how in the following illustrations.
It is helpful if pictures include front, side, and top views. These straight-on standard views, enable the tracing of component shapes in SketchUp. However, in most cases the pictures are at oblique angles, making it more difficult to duplicate the shapes. There are three ways you can import pictures into SketchUp – 1. Use as Image, 2. Use as texture, and 3. Use as New Matched Photo. The third option is a powerful way to get 3D shapes out of a perspective view picture. However, I find that many pictures don’t work well in this mode, especially when I’m dealing with a non-orthographic piece like a chair. Therefore, I am typically importing “As an Image”.
In the following case of duplicating a Maloof low-back chair, I was able to find two pictures in a book – one side view (but at some slight angle) and another top view which I scanned and imported into SketchUp. Also, in the text of a book, I was able to find the overall width, height, and depth of the chair. With this information, I set about to create the detailed model, full size templates, and construction drawings.
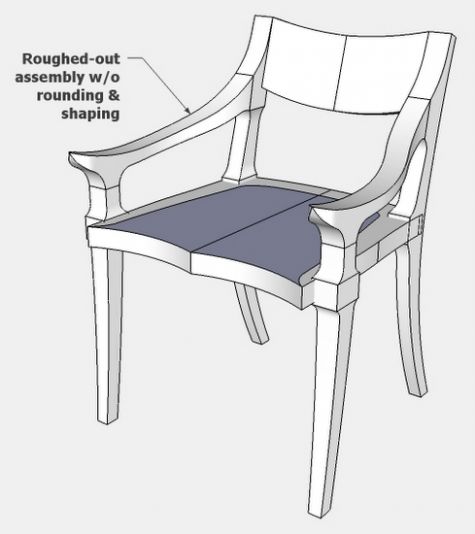
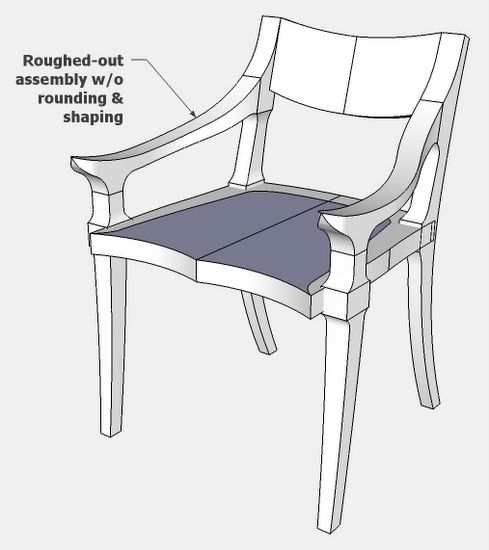
Here is the rough assembled model in SketchUp. This does not include the extensive rounding, sculpting, and shaping so typical of Maloof’s work. Sculpting in SketchUp is not easy to do, and not required for the construction process. What I need from SketchUp are band-saw shapes of components in the form of full-size templates. Also, I need joint details which are created in SketchUp and shown in detailed drawing sheets. I use the pictures to help with final sculpting, but this is an artistic process that is adjusted to personal taste.
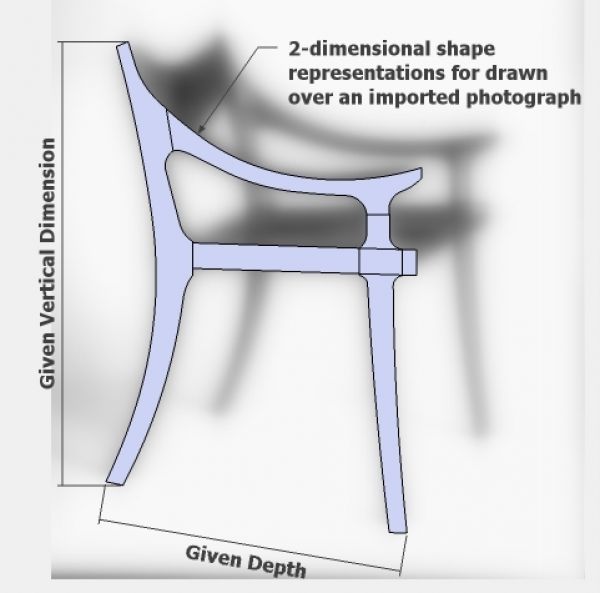
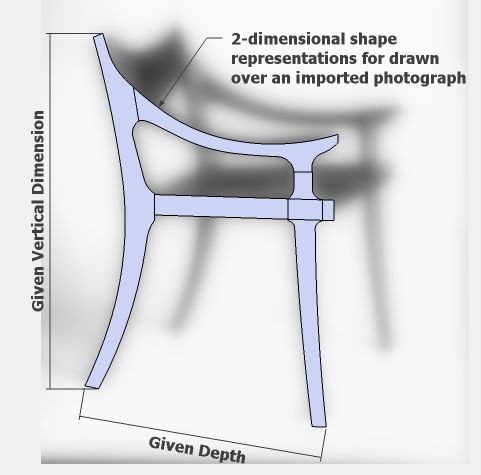
Step 1: Import the side view photo “as an image”. With known dimensions, use the Scale Tool to adjust the size of the photo to actual full size. With the Arc and Line Tools, trace over the shape of the legs, seat, and arm.
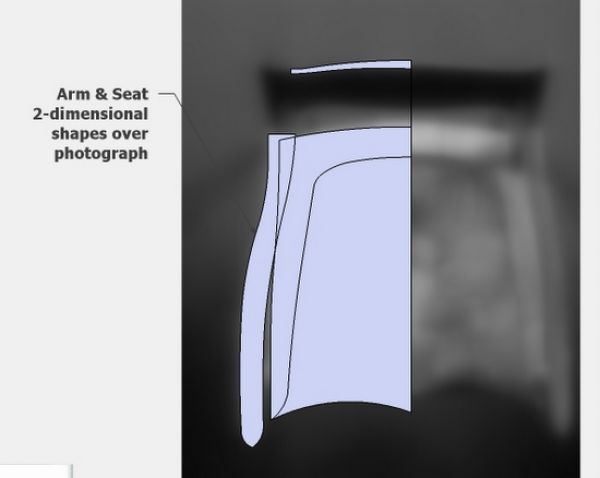
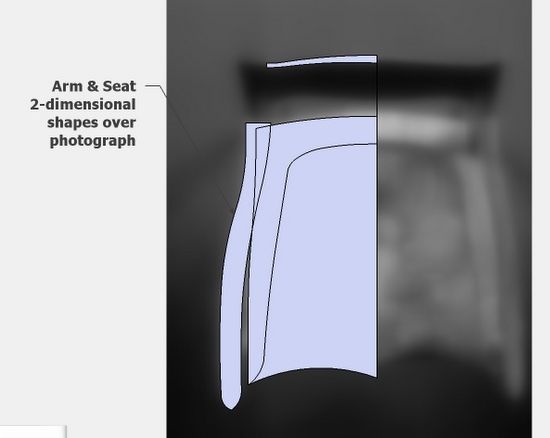
Step 2: Import the top view picture and trace the shapes of the seat, arm, and back rail.
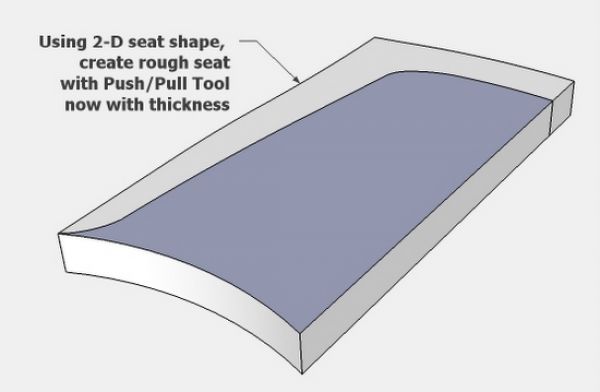
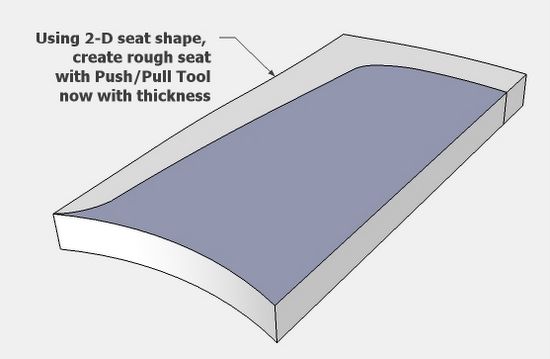
Step 3: From the top view shape, create a half-seat component by using the Push/Pull Tool to make its thickness.
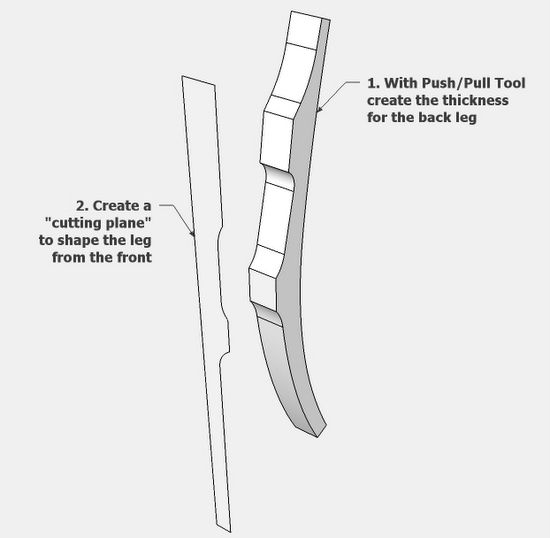
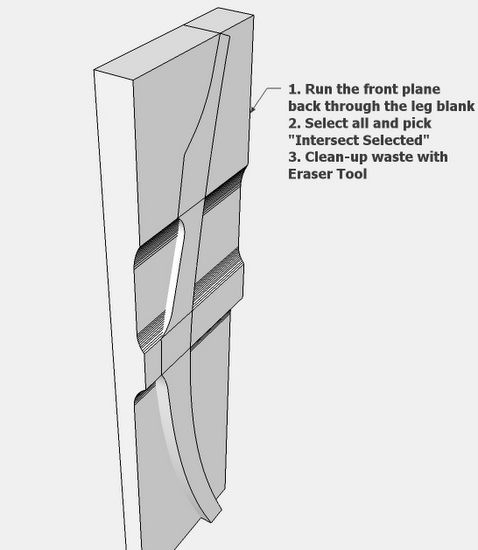
Step 4: Use the back leg shape to create a component with thickness. The back leg also has cutouts and band-sawn shapes from the front view. I created the shape of these cutouts to use as a “cutting plane”.
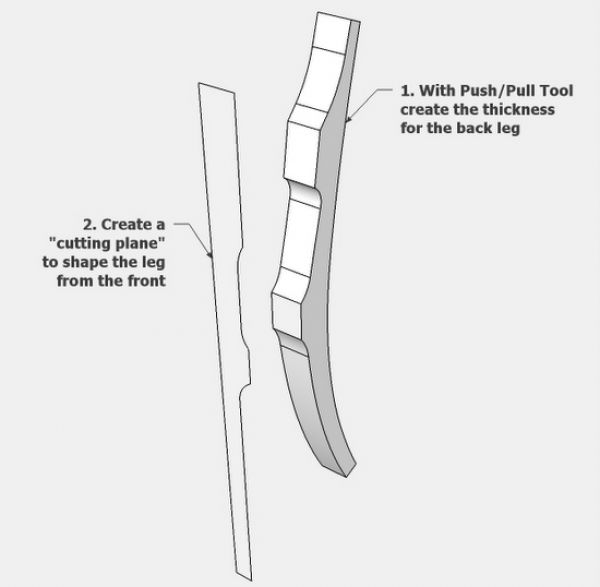
Step 5: The “cutting plane” is pushed through the leg component. Everything is selected, then Intersected.
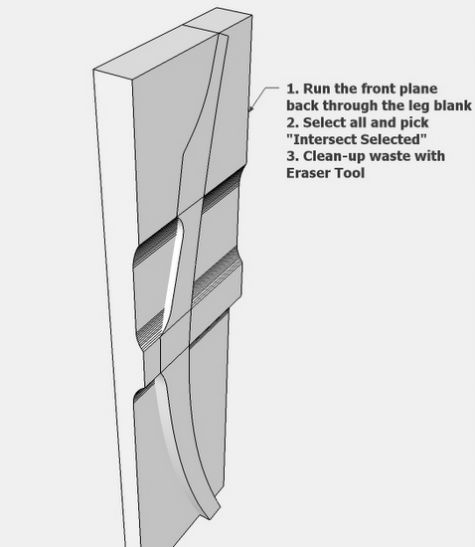
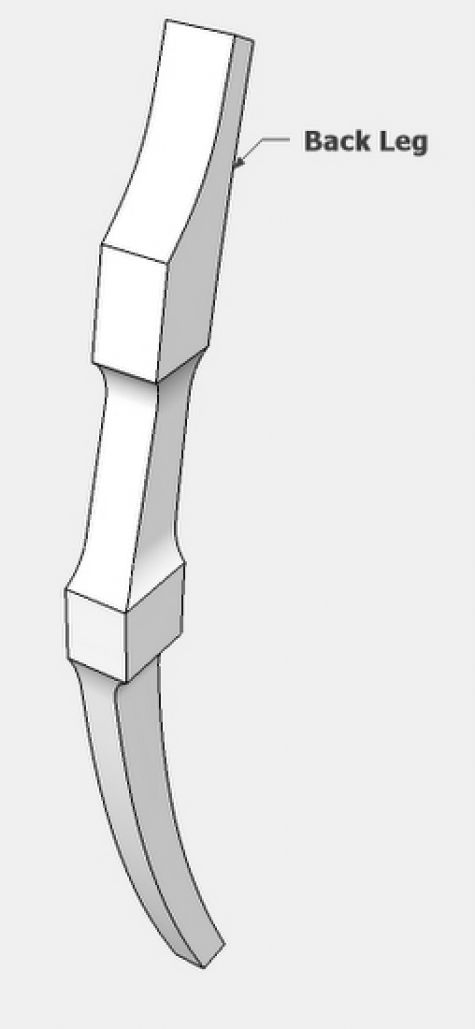
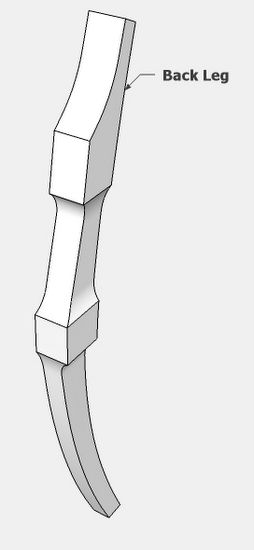
Step 6: After deleting the waste with the Eraser Tool, the resulting back leg is shown below.
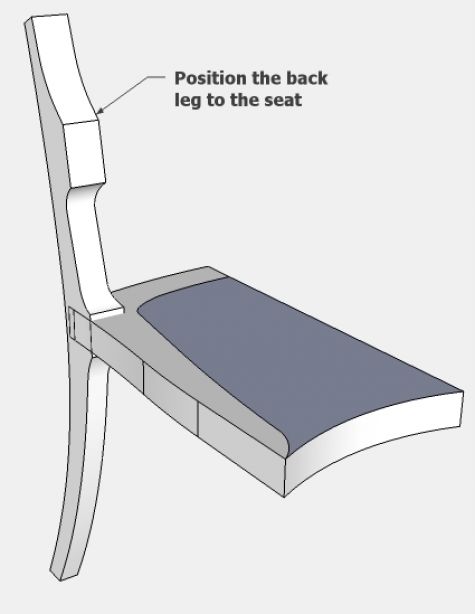
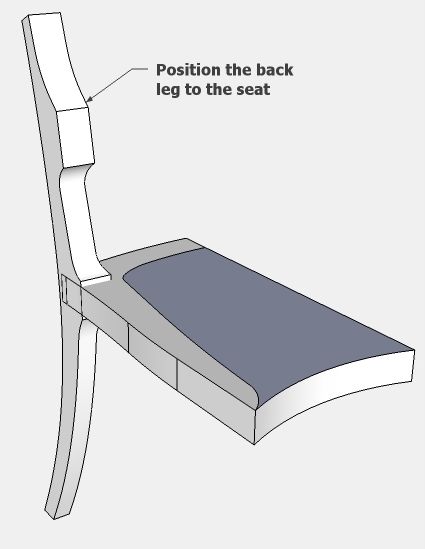
Step 7: Begin the assembly of the chair by connecting the seat and back leg. I will postpone the detailed joinery work until I’m satisfied with the overall assembled components.
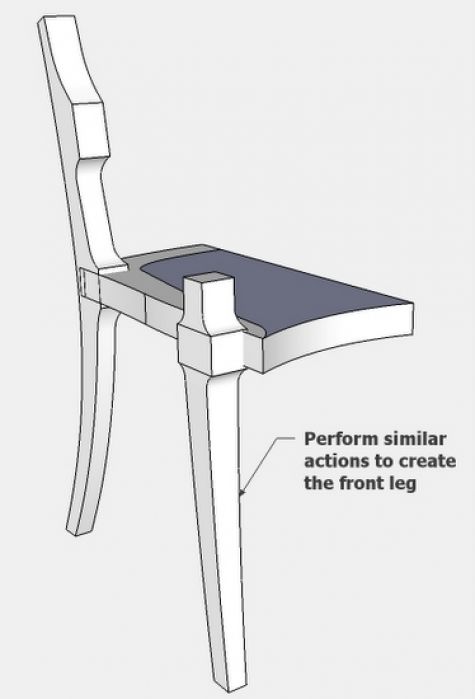
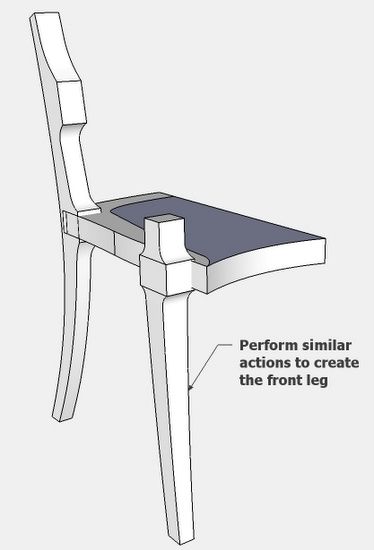
Step 8: The same process is used to create the Front Leg which is now connected to the seat.
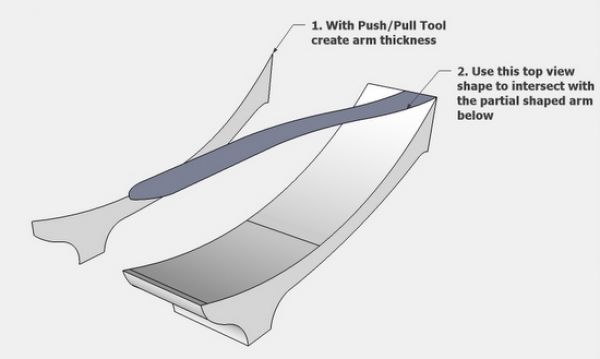
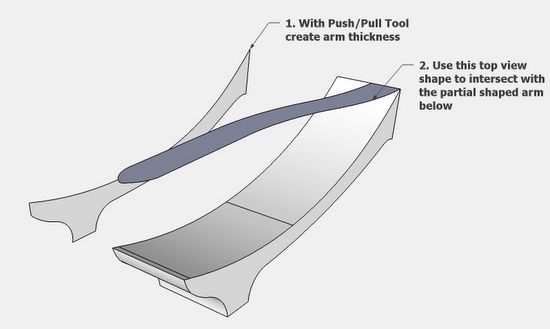
Step 9: There are two shapes for the arm – one side view, and another top view. As performed for the Back Leg, an intersection is done also for the arm.
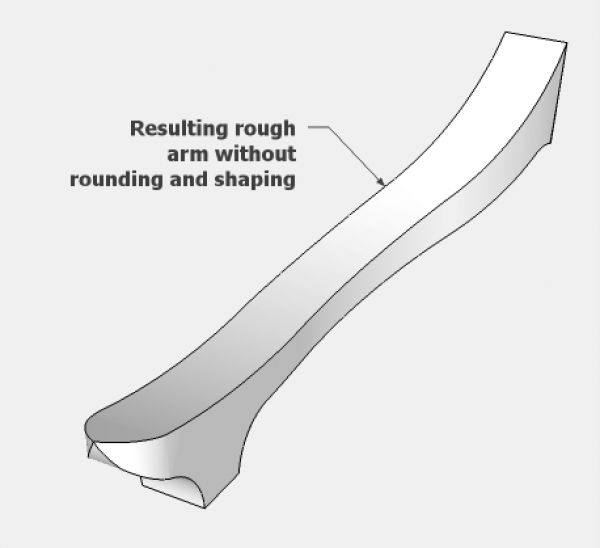
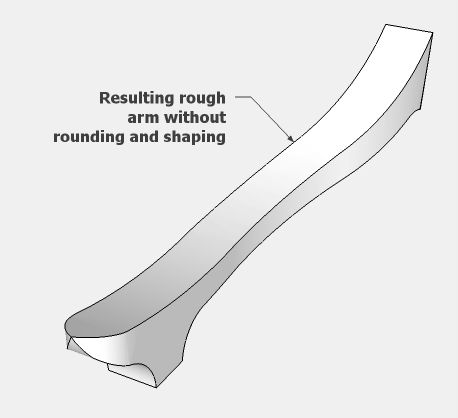
Step 10: After cleaning up the waste with the Eraser Tool, we have a rough shaped arm. Again sculpting and rounding is significant for the arm, but is not shown in SketchUp.
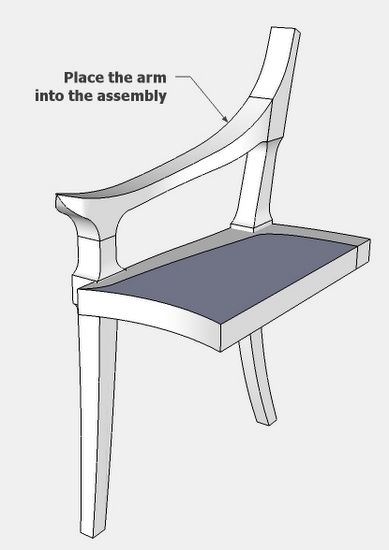
Step 11: Install the Arm component on the assembled chair.
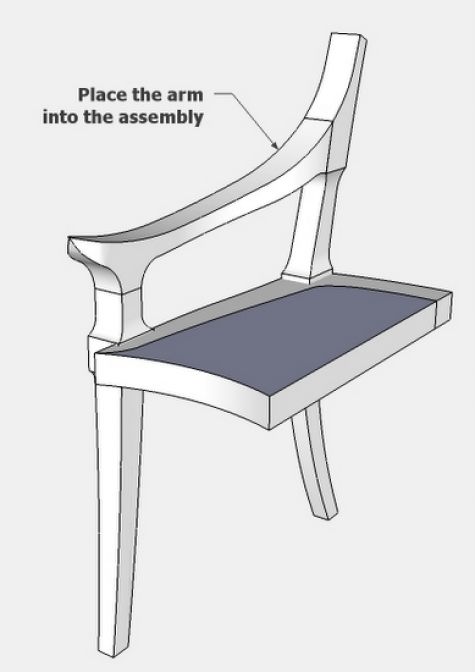
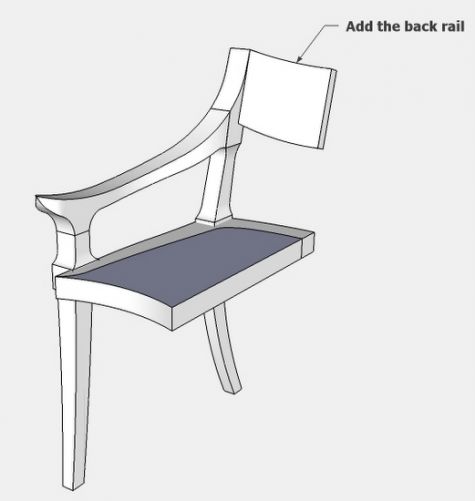
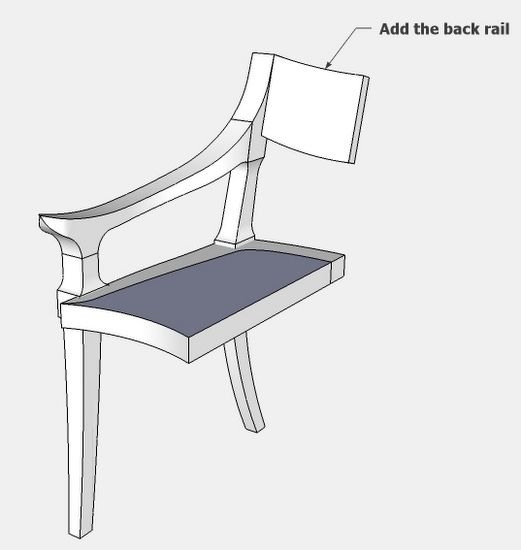
Step 12: Add the Back Rail. Again there are two shapes for this component which must be intersected to create the final shape. Also, the final shape is rotated by the Rotate Tool to fit with the slope of the back leg.
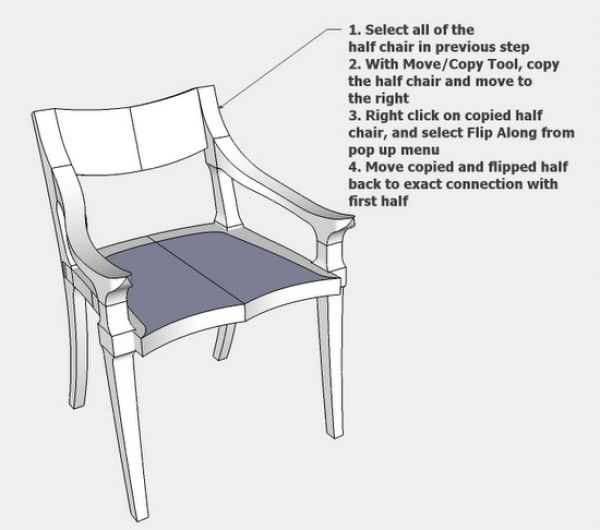
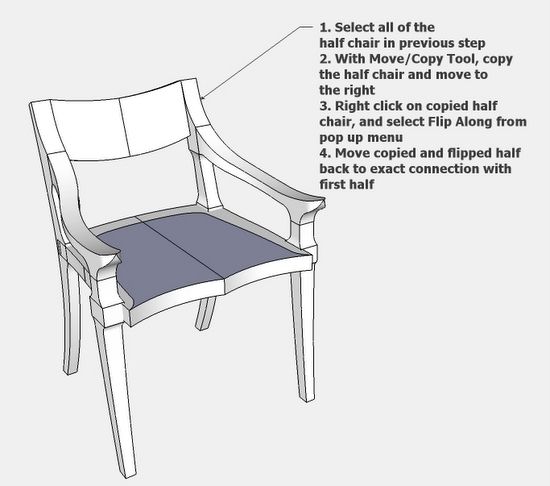
Step 13: Select all of the half-assembly with a select box. Then use the Move/Copy Tool to copy the entire half chair. Move the copy to the right. Right click on the copy, and select Flip Along from the pop-up menu. Then move the flipped copy into position to complete the assembly.
There are a few “tweaks” I’ll do to this rough assembly. Then on to create the detail joints, orthographic views, dimensioned component sheets, and full-size templates.




Comments
Hello
Really nice post I was always waiting for a Maloof Chair post
Is there any tutorial about applying a photo in SketchUp so I can shape the furniture item through the picture.
I try to import the picture and it always come flat I wonder how to work with the picture do you have any previous post in reference to that, https://www.finewoodworking.com/item/22931/replicating-a-maloof-design-from-pictures
Thank You
Meezo
Meezo, please have a look at a Feb 2009 entry on Effectiveness of Imported Image at this location.....
https://www.finewoodworking.com/item/8386/the-effectiveness-of-imported-scanned-images
Tim
Thank you both for your response as I really appreciate it. I tried the photo match. However, when I brought the photo I was faced with the following issues:
I could not align the photo with the drawing axes.
There are four prospective bars; two green and two red. I am not sure on how to use them or what they are four?
I traced the chair within the picture with a line as well as the arc tool. It was challenging and some I connect them together about 20%. Not sure why. Should i use the free hand tool in this situation.
Is there any short video about photo match in how to use the lines and align the pictures.
Thank you for your help. Keep up the extraordinary job.
Meezo
Meezo, there are a couple blog entries on using Photo Match in the Archives. Unfortunately, the Archives are not accessible at this moment. I have notified the responsible FWW staff of this issue.
Alternatively, you can send me an email at [email protected], and I can send you some information.
However, as noted above in my entry for the Maloof Chair, Photo Match is not always effective for me. It depends on the quality of the picture and the type of furniture I'm reproducing.
Tim
Log in or create an account to post a comment.
Sign up Log in