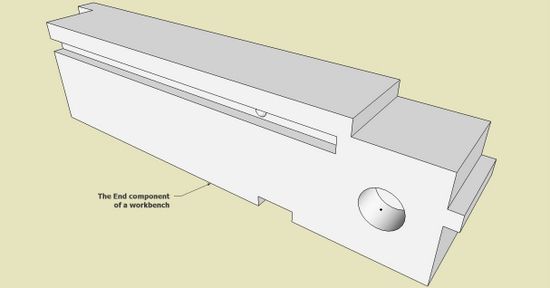
The following article was published in this blog last February. Recently several have questioned the use of the Tape Measure Tool and guidelines. Here is a refresher on that subject.
SketchUp has a rich set of construction lines (temporary layout dotted lines) called Guides. I find these features extremely powerful in furniture design. Guides are created by the Tape Measure Tool – the Protractor creates angled Guides. Interestingly, the Tape Measure creates different types of Guides depending on where you start with it (where you click it). These variable results can be frustrating at first, but with practice you can get a handle on these quirks and increase your efficiency and speed with the Tape Measure.
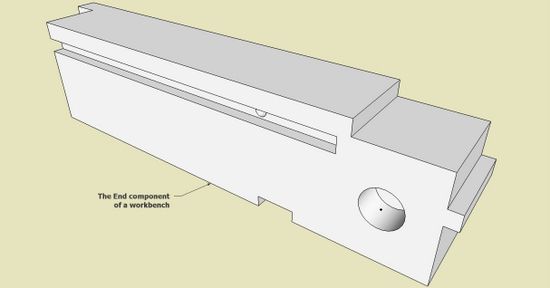
I will use this end component in a workbench design to demonstrate the various ways to use the Tape Measure. In making this component there are cuts, holes, grooves, rabbets, tongues, etc. With the help of the Tape Measure, the layout and position of these features is effected.
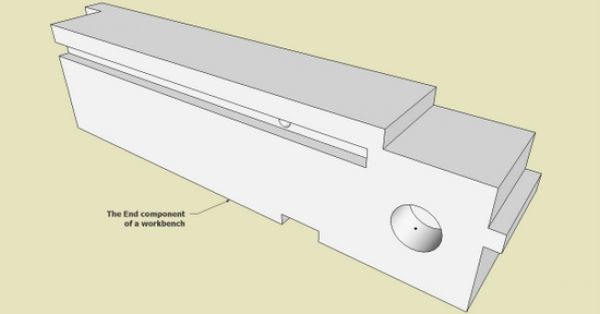
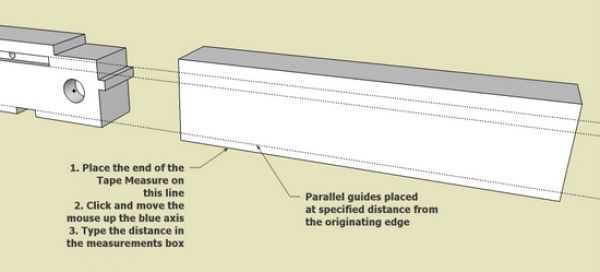
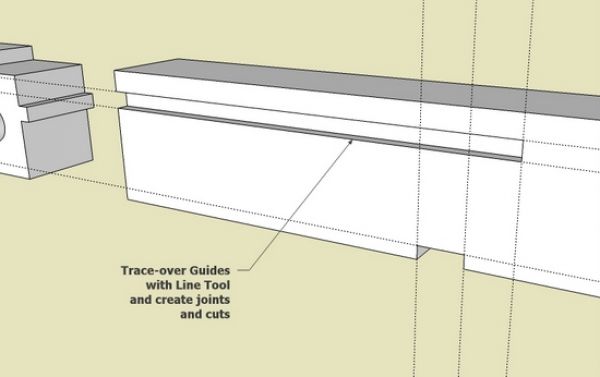
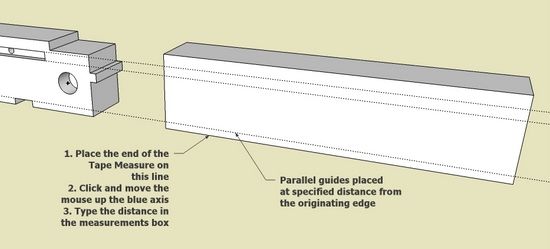
Guide Type 1: This shows how to produce a Parallel Guide Line. Locate the very tip of the Tape Measure on an edge in a component, click, and move the mouse. You will notice a parallel construction line following your mouse. When you click again, the guide is placed. However most of the time, I am typing a distance in the Measurement Box, to place the Guide at a specific distance from the original edge.
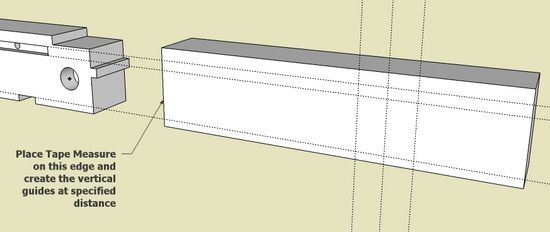
Guide Type 1 (continued): Here I’m placing vertical guides parallel to my starting edge. Many times I’m combining horizontal and vertical guides to outline the location of specific design elements.
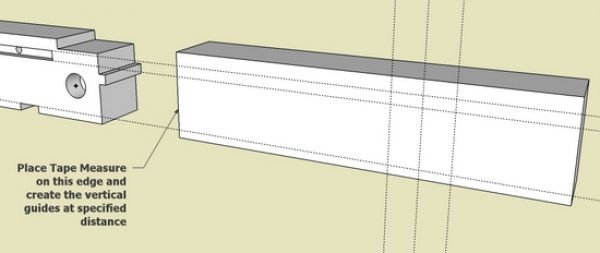
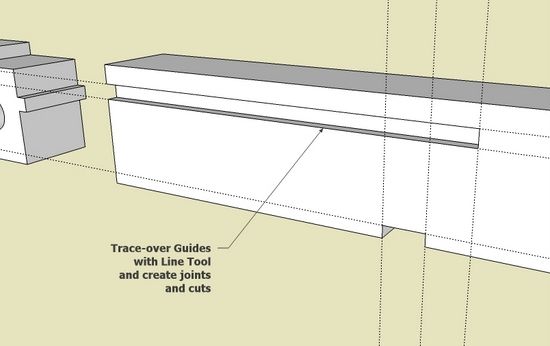
Guide Type 1 (continued): After placement of the Guides, I trace over them with the Line Tool and create the desired cuts.
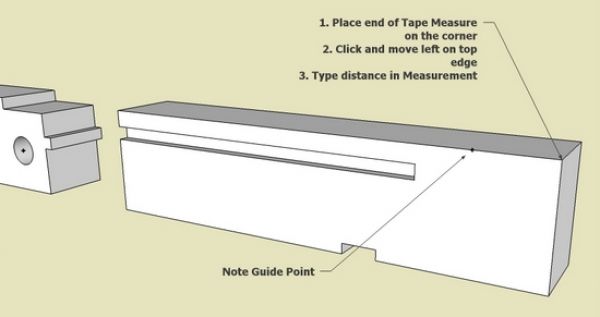
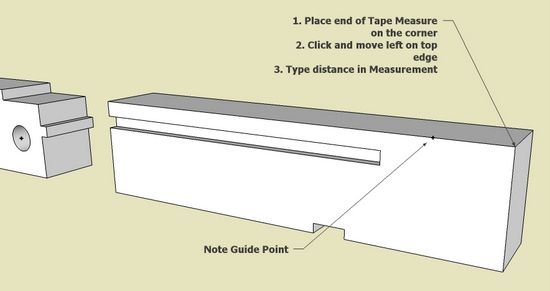
Guide Type 2: This shows the making of Guide Points. If you start the Tape Measure on a corner and move the mouse to a particular position and click, SketchUp creates a Guide Point – it’s a little plus sign. I do not use this feature nearly as much as parallel guides. I find that these points are difficult to delete, while the parallel lines are very easy to remove from the file. However, SketchUp provides an easy delete all guidepoints and guidelines in the model feature with the click of the mouse. Click on the Edit tab in the Menu bar. Then select Delete Guides in the pop-up menu.
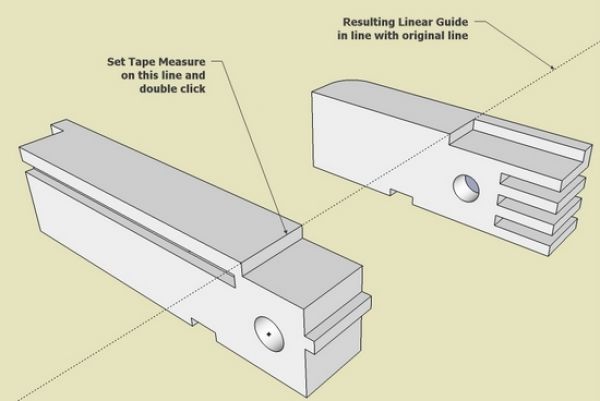
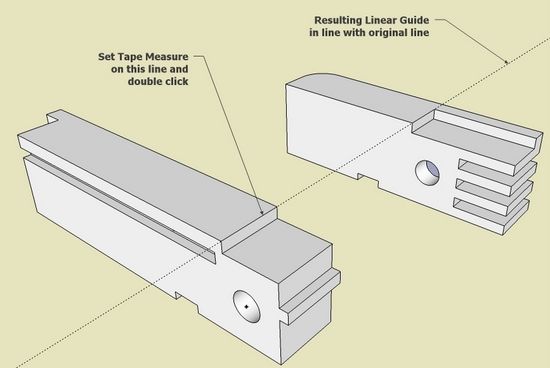
Guide Type 3: You can also create a Linear Guide – one that lines up coincident with a particular line. It only requires a double click of the Tape Measure on a specific line. I use this quite often when trying to line up components or to find the intersection of two angled lines. I also use in Windsor chair design, where I need temporary extensions on the leg and stretcher centerlines. In the case below, I’m trying to line up one component with another.
I often need to locate the centerline of a component. Again the Tape Measure comes in handy. Click on one edge, tap the arrow key (for sticking to the Blue, Green, or Red Axis), move the mouse over to click on the midpoint of perpendicular edge. Now you’ve got a guide running down the center of the component.
Occasionally, the Tape Measure will create a Guide Point when you expected a Parallel Guide Line. Assuming you are on an edge, not on a corner, this can happen when the Tape Measure is sensing an inference to some other corner or feature. Simply shift the location of your starting point on the line where you are free from an automatic inference.
A reader has asked about the placement of Guide Point at the center of a circle. This feature is a useful one, and you will see that I’ve used it in the above illustrations (but did not say how it was done). This feature is not automatic when you download SketchUp, however available by making an appropriate check mark at Window/Preferences/Extensions/Ruby Script Examples. Then to place the guide, select the boundary of the circle, right click, and select “Point at center”.


Comments
One thing I keep forgetting how to do, and had hoped to see in this post, was placing a guide point at the centre of a circle - like the one seen in your images above. The trick is to right click on the circle and select 'Point at center' from the context menu.
NickJW: Thank you so much for reminding me of this very useful feature - that is, placing a Guidepoint at the center of a circle. I had forgotten how to get this to work in SketchUp as it is not an automatic capability. Dave Richards located this and points out that you have to have a check mark in Windows/Preferences/Extensions/Ruby Script Examples.
Tim
This isn't related to this article but I was wondering if you could tell me the best way to draw an arc that is asymmetrical or has a changing radius. The arc tool always seems to draw an arc that is part of a perfect circle and I want to be able to draw "french curves."
When I am laying out a design for an edge treatment, I find an erasable grid quite handy. Is there a way to repeat the spacing of Guide Lines? Or is there a better way to make a grid? The same situation occurs with box joints, so far as repeating the spacing.
Hopefully Tim won't mind me answering a couple of questions.
1bri, An arc drawn with the Arc is always a circular curve. If you want a non-circular curve, you can do several things. One would be to draw an arc and then scale it to fit. You can also use a plugin called bezier.rb or another called bezierspline.rb to create the curve. A second degree Bezier curve will create a parabolic curve.
Bob G, if you want a gride made up of guidelines you can make a linear array as you would with a regular line. Place the first guideline, select it and copy it with Ctrl+Move. If you want a 1" grid, move the copy 1" then hit Enter followed by *n, Enter where n is the number of copies of the line you want created.
If you're drawing a box joint or dovetails that are regularly spaced, you might consider copying the lines for the joint along the edge rather than laying out all those guidelines and drawing each socket individually.
By the way, I find it useful to have a keyboard shortcut for deleting guides so I can clean up the clutter quickly.
Dave
Tim,
I've been reading you tutorials and practicing.
just to let you know...thanks . It's great.
pierre
Tim,
I've learned so much from you folks at FWW. Sketchup is an amazing tool for designing and working out joinery problems. Now maybe I can give back the merest bit... Clicking Edit on the menu and then delete guides works pretty good for getting rid of all guides and guidepoints.
To pvanwa: Thank you for reminding me of this very nice command. That is, all Guide Points and Guidelines can be removed from the model by clicking on Edit in the Menu bar. Then picking Delete Guides from the pop-up list.
I need to update the text of the blog to include this handy feature.
Tim
Log in or create an account to post a comment.
Sign up Log in