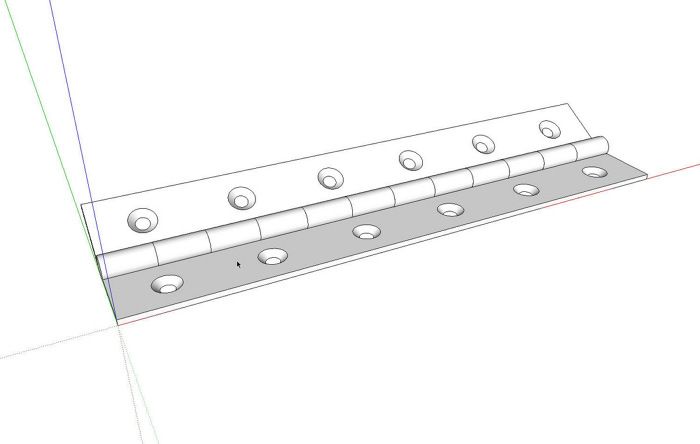
A reader made a request via the Knots forum to see a tutorial on making a piano hinge. Here’s an approach to doing that which leverages components to make for a quick job and results in a hardware component which won’t cause file bloat when added to a model. Although I’m drawing a piano hinge, the same methods can be applied to just about any hinge and a number of the techniques can be applied in other models as well.
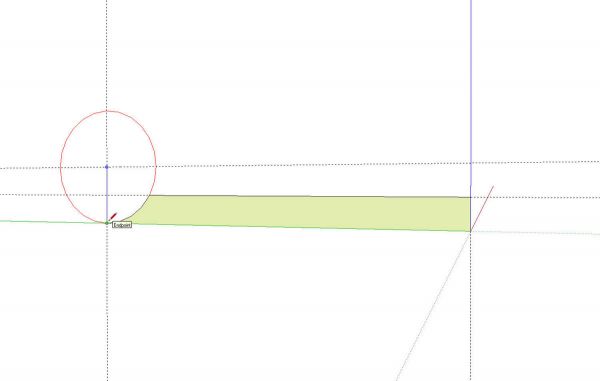
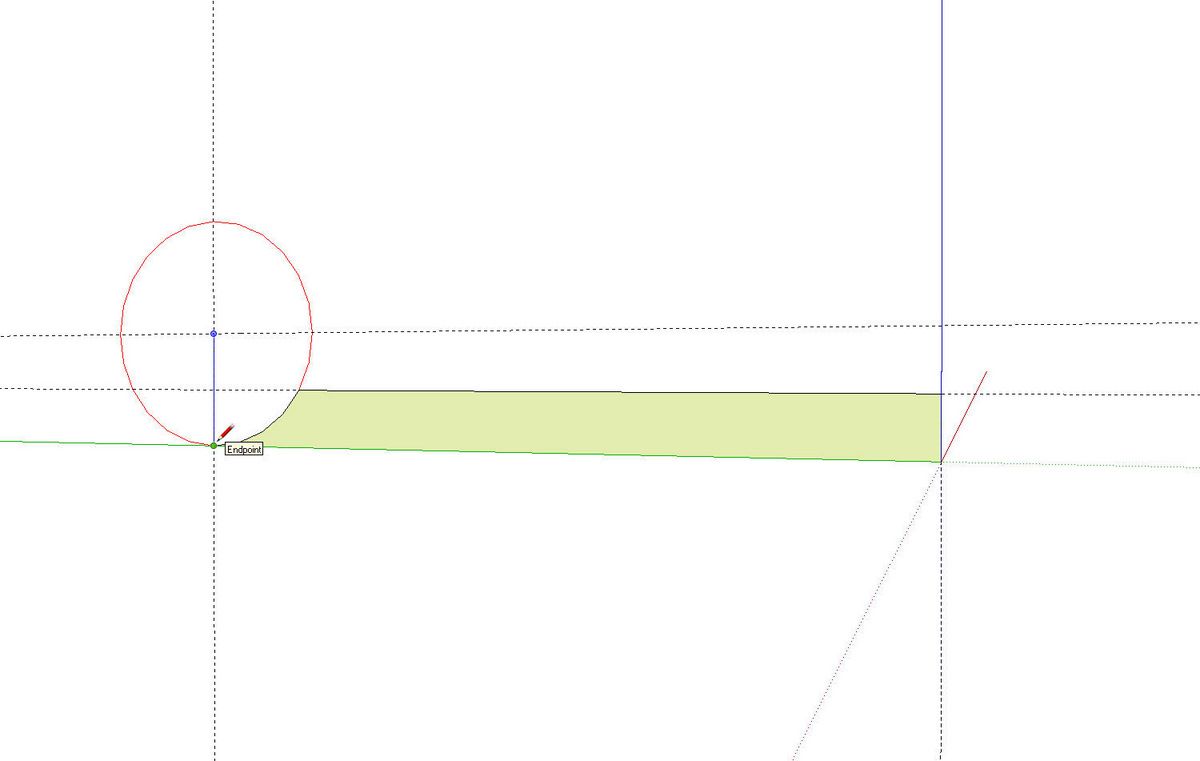
I began with a few guidelines to get me started and added some lines and a circle. Since the pin won’t be visible anyway, I’m not bothering to draw or the hole in the knuckle for the pin. If you want to add those details, you can do so. There’s no much point in it if the hinge is to be a small part of a larger model.
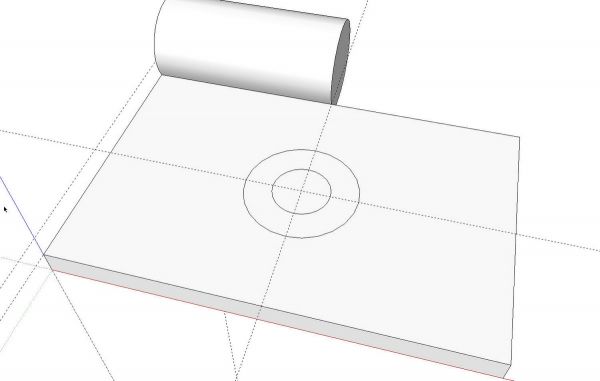
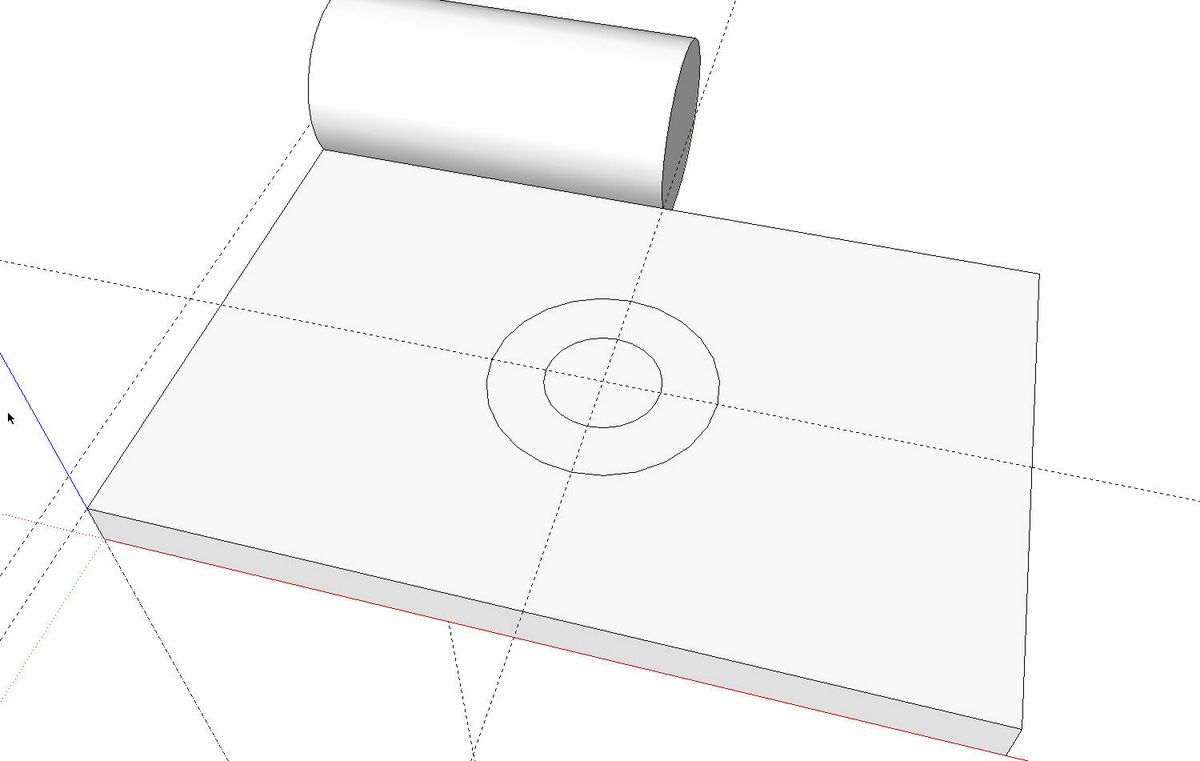
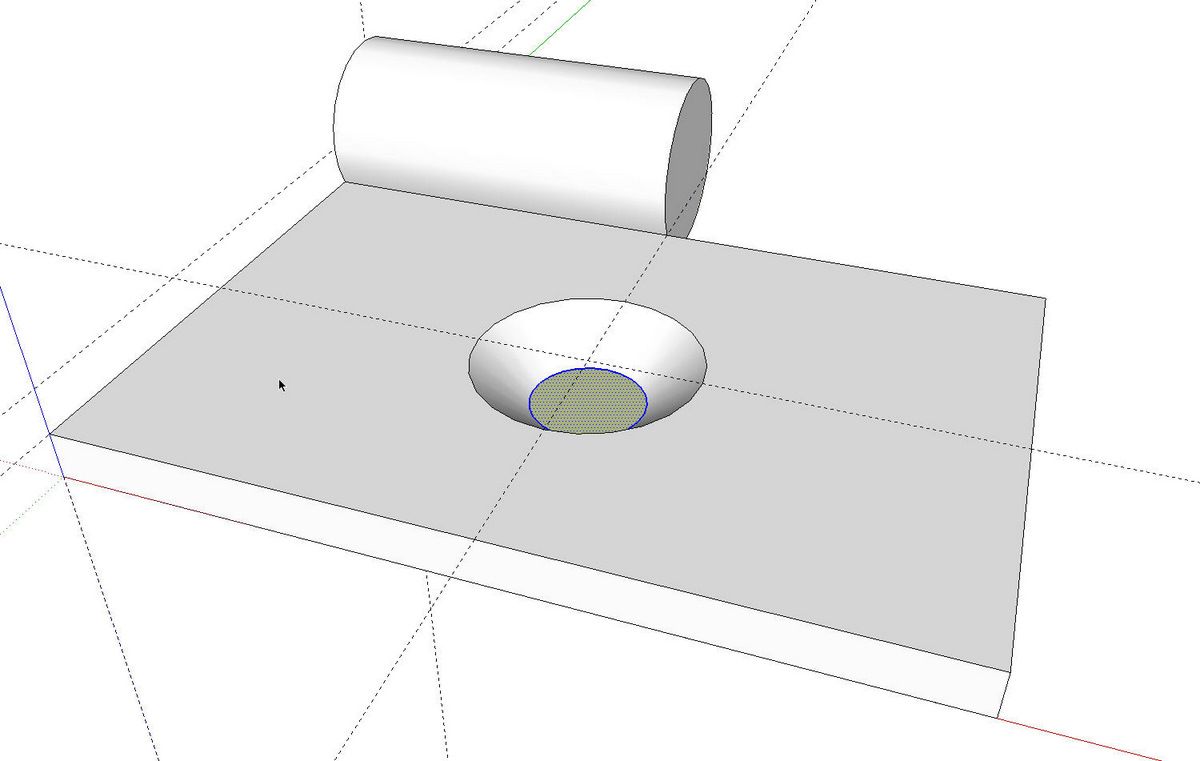
Push/Pull makes quick work of turning the profile into 3D. I’ve broken the hinge down and drawn only a single element. Multiples of this element will be used to create the entire hinge. I’m going to add countersunk holes mostly because I think this is an interesting method to add to your repertoire. The same process can be used for adding chamfers and other some other details in your models. You could skip the screw holes altogether or insinuate the screws with just a circle and maybe a line or two.
In the image above, I’ve added circles for the screw hole. The large one is the large diameter of the countersink and the small one is the diameter of the hole on the opposite side of the hinge leaf.
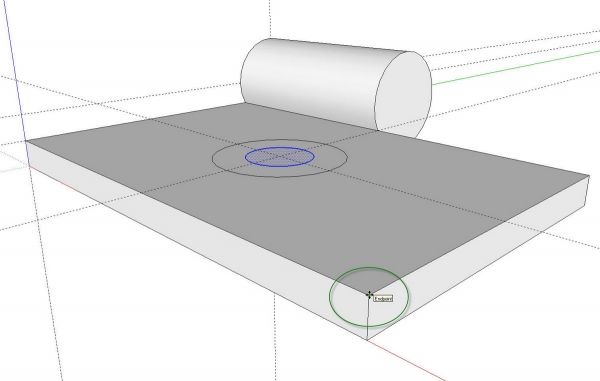
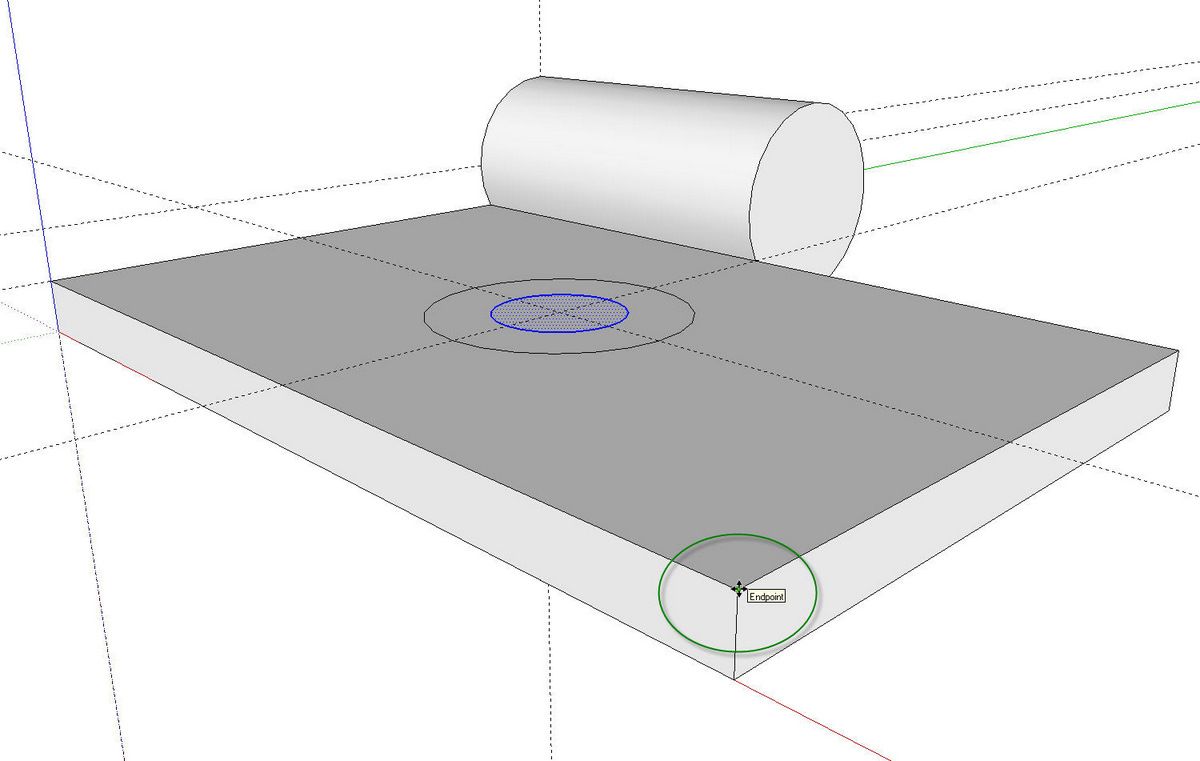
With the Select tool, double clicked on the face of the inner circle. The double click selects both the circle’s face and its edge. Then get the Move tool and, while holding Alt on the PC or Command on the Mac to invoke Auto-Fold, move the center down to the opposite face of the leaf. In the image, I’m using the vertical edge on the corner of the leaf as the guide for the Move. You don’t have to do that but sometimes following an existing edge is easier.
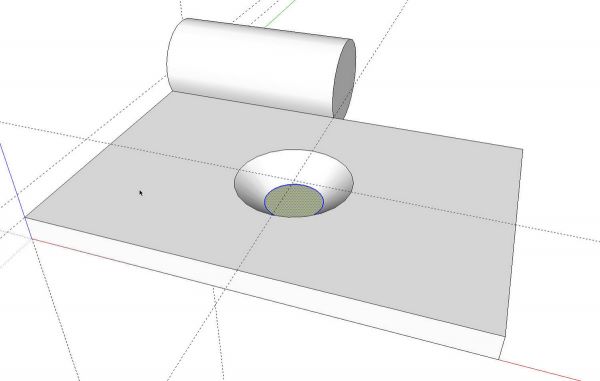
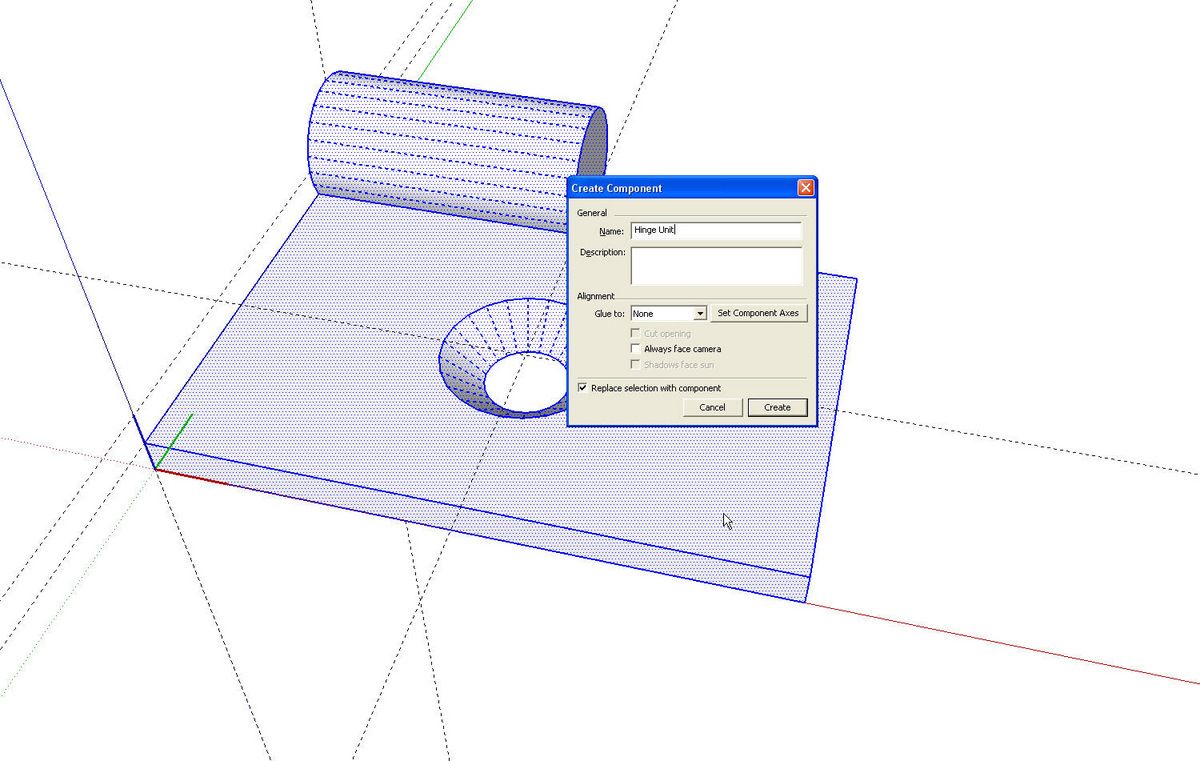
I went all the way through to the underside of the leaf. In reality the hole probably wouldn’t be countersunk that deeply but it won’t really show anyway. Delete the face skinning the hole and this stage is complete. Make a component of the the geometry so far.
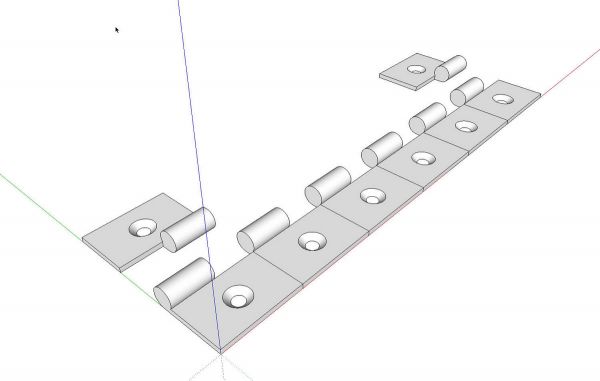
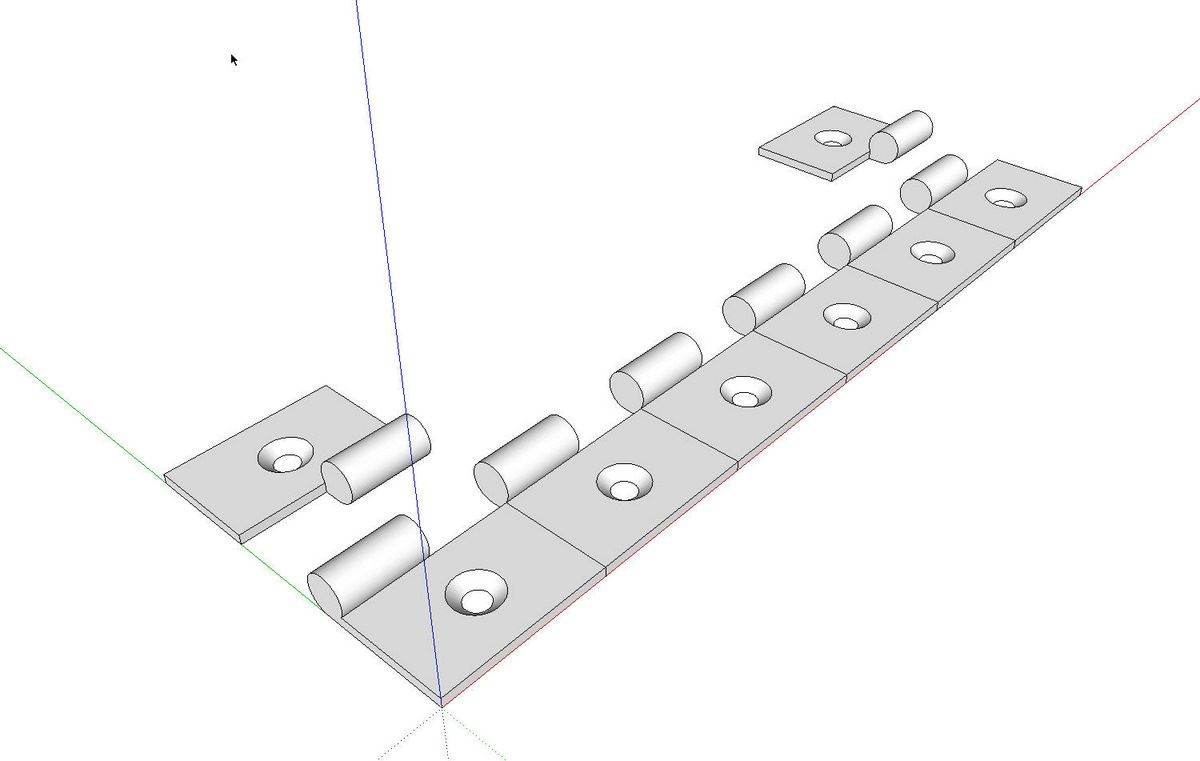
Next, using the Copy function of the Move tool, copy the component along the length of the hinge and make a linear array of them. In this case I made the hinge element 1 inch long so I copied it 1 inch along the red axis, hit Enter and typed *5, Enter. This made five copies plus the original. In an effort to make it clear for this tutorial, I also copied the two end copies over and then flipped each of them individually along both their red axes as well as their green axes. Make each one of the four end components unique by right clicking and choosing Make Unique from the Context menu. This allows the length of those components to be adjusted without affecting the others.
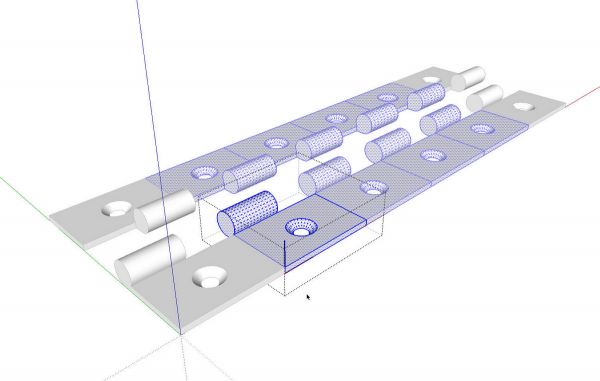
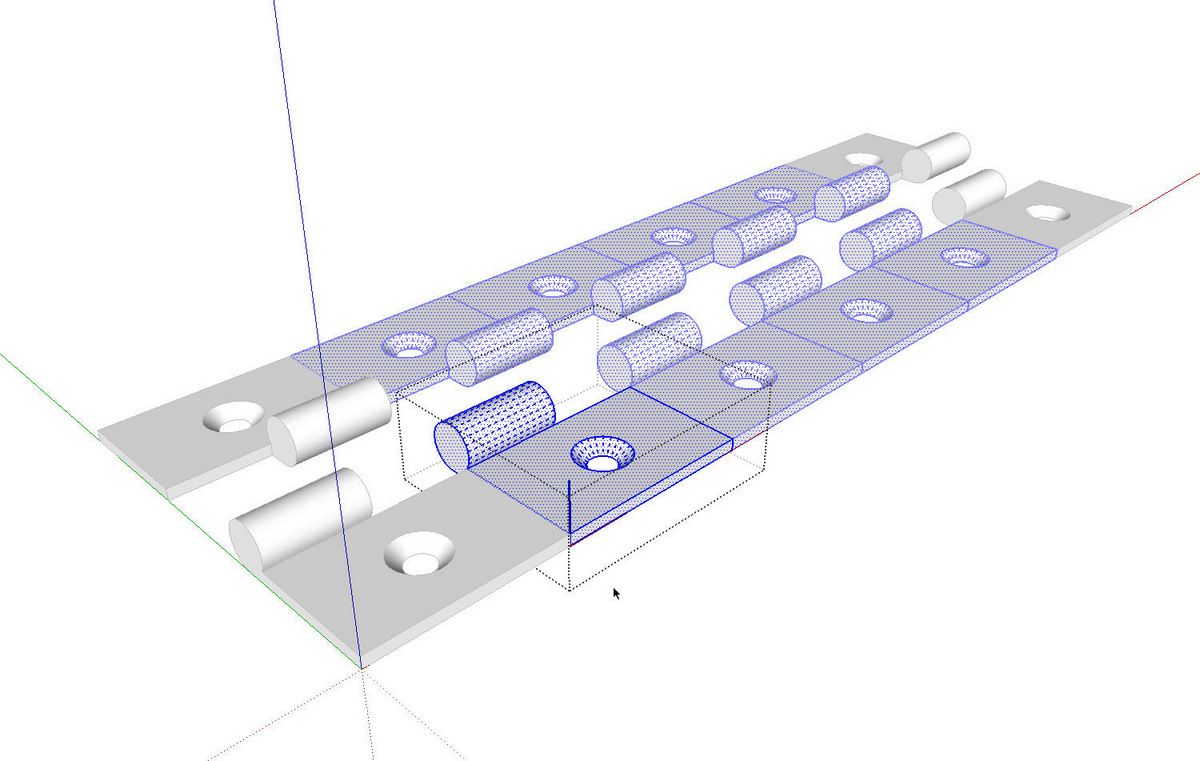
Copy the rest of the hinge element components and flip them as well. These elements can all remain instances of the same component. I’ve selected one of them to show how all related ones are also selected.
To make the hinge leaves look continuous, open an instance of each component in turn. Delete the vertical face on the seam line and then Hide the edges of the seam by holding Shift while clicking with the Eraser tool.
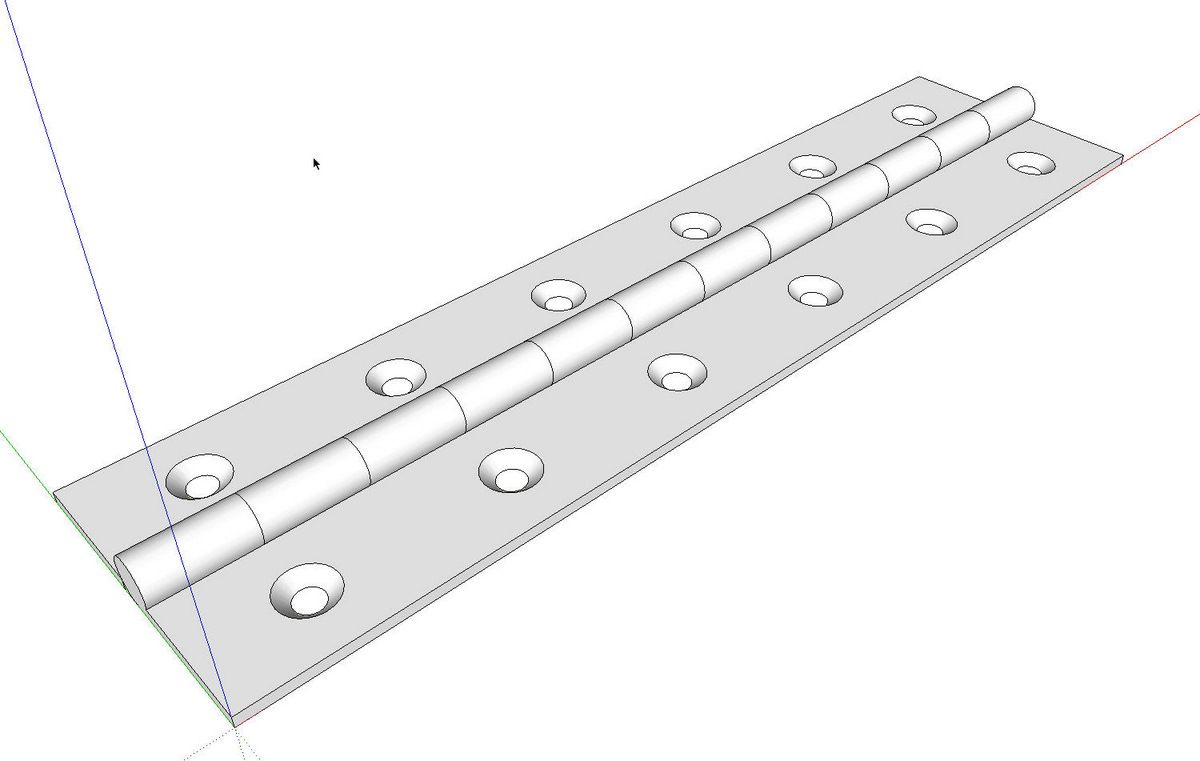
Select all of the elements in the leaf and make a component of that selection. Select both hinge leaves and make a hinge component.
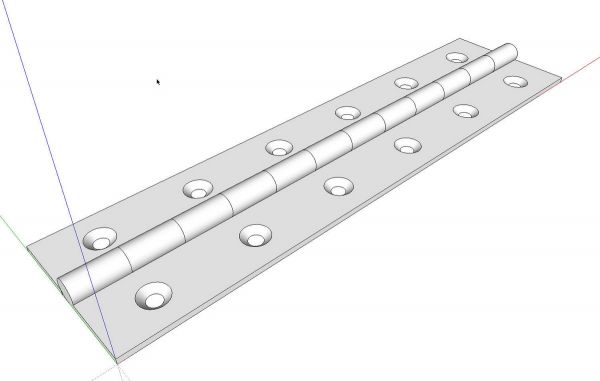
Assuming you want to use this hinge in other models, open the Components browser and open its secondary pane by clicking on the little + icon in the upper right corner of the window. Set the upper pane to In Model and the lower one to the destination folder. Drag the thumbnail of the hinge from the upper pane to the lower pane. Now the hinge will be available for use in other models.
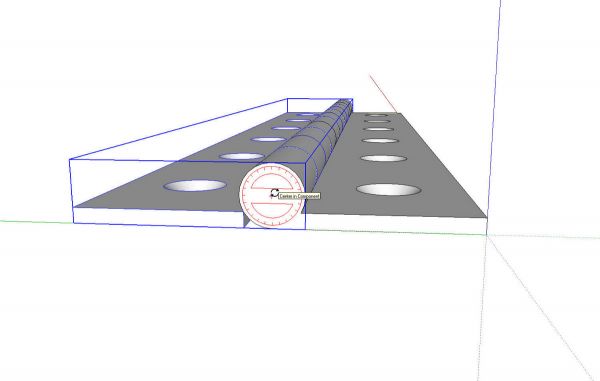
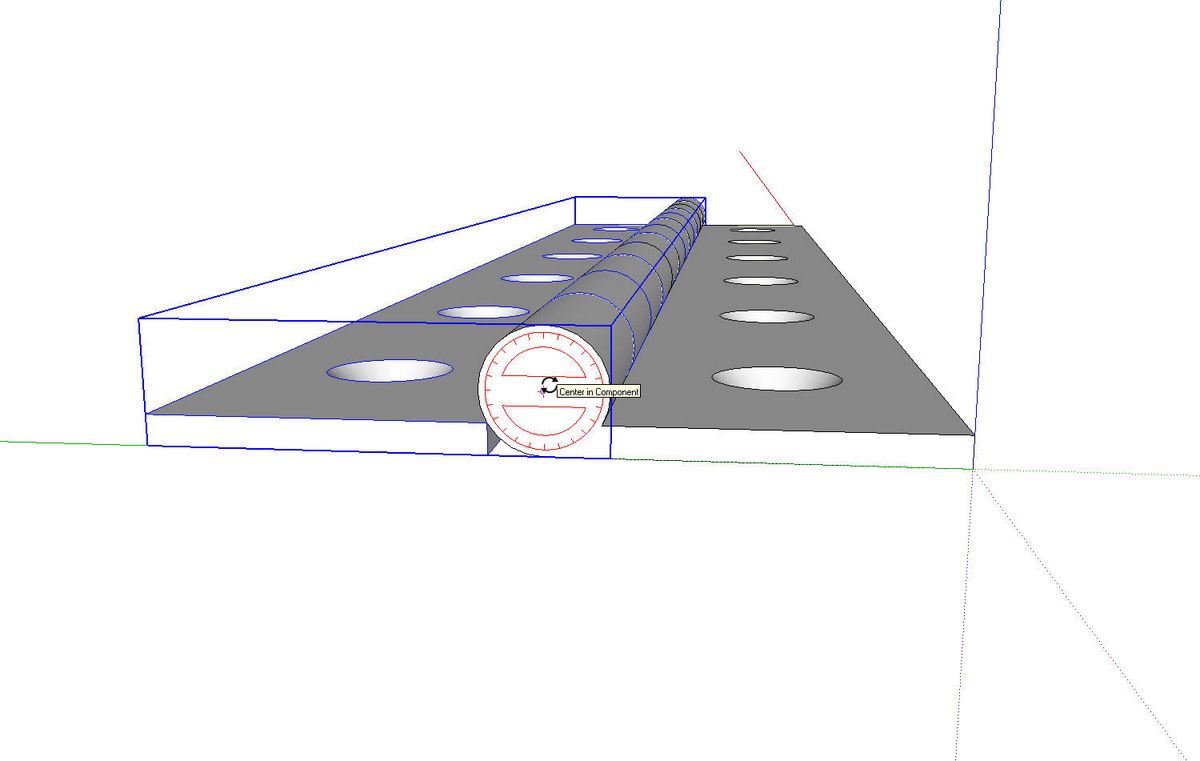
The hinge can be folded along it’s centerline to the desired angle. Select the leaf you want to move and get the Rotate tool. Hover over the edge of the knuckle and then bring the protractor towards the center. the protractor should snap to the center and you can perform the rotation. If you find it easier, you could also add some little cross hairs to use for locating the Rotate tool.
If you want to make the hinge longer, open each leaf for editing, move one end element down and then Move/Copy an intermediate element down to make enough copies to fill the gap. You can also shorten the end elements with Push/Pull. the way the hinge is drawn, length will be added or subtracted to one end of the hinge so there’s no need to move an entire leaf to correct for the change. It is possible to simply flip one hinge leaf and use it for the opposite side. That works out fine if the hinge length won’t change but the little bit of extra work now in making the hinge will save time later when using it.
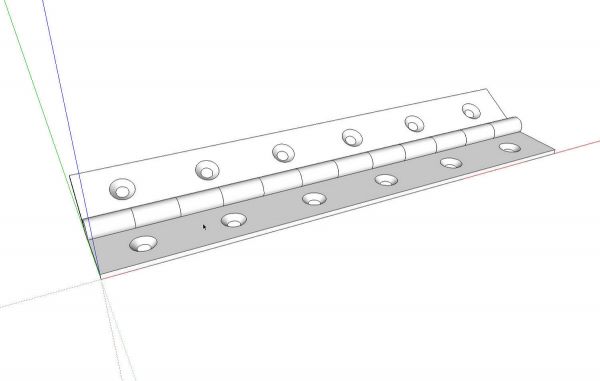
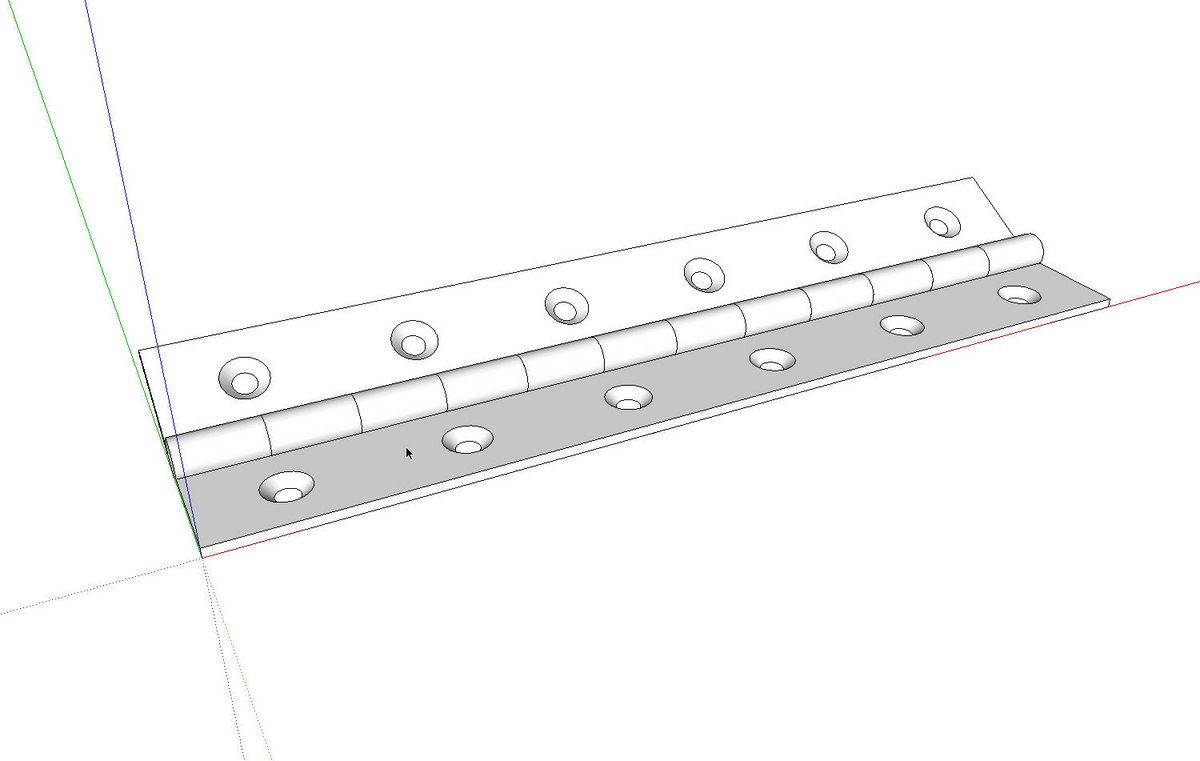
Give it a swing and see what you think.



Comments
This is great and the bonus of how to draw countersinking screw holes makes it even better.
I have to say thanks for not only this tutorial, but all the others too. If it wasn't for Design. Click. Build. and all yours and Tim's hard work I would still be trying to figure out how to draw a box.
Again thank you.
David,
I was going to show you a drawing, but I don't see how to do it here.
I was able to follow your clear instructions, all except the part about making it look continuous.
Instead, I expoded all the bits and intersected them, Erasing lines was then easy.
What did I miss in the instructions? I wasn't getting it right, I guess.
Don
Don, exploding the components and erasing the seam lines works but it makes it a little more involved to edit the length of the hinge if you wanted to do that. I opened the components for editing and then, while holding Shift, I clicked with the Eraser tool on the seam lines. this results in hiding the edges without deleting them. Give that a try and see if it works for you.
Dave
Dave,
Ummm - For some reason that isn't working for me.
After creating the component and copying it so they abut one another, I open each component for editing and use the erase tool with the control key on each seam line. When I'm all done the seams are visible just as they were when I started.
Don
Don, use Shift not Ctrl. Shift hides the edge and Ctrl softens it. There's a bit difference in appearance. Also make sure to delete the vertical face in the seam.
Dave,
As sometimes happens, my eye slipped right past the word "shift", probably because I thought I knew what I was doing.
Thanks for your help, as usual.
Don
Log in or create an account to post a comment.
Sign up Log in