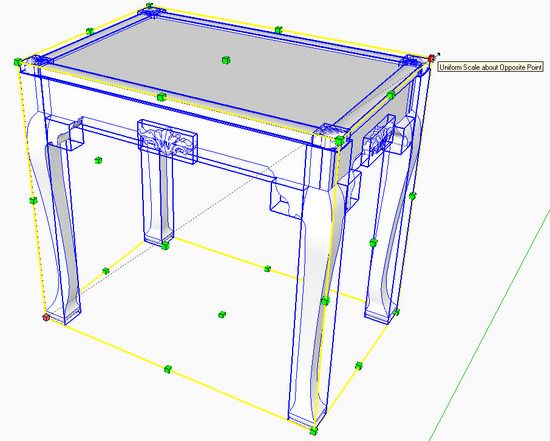
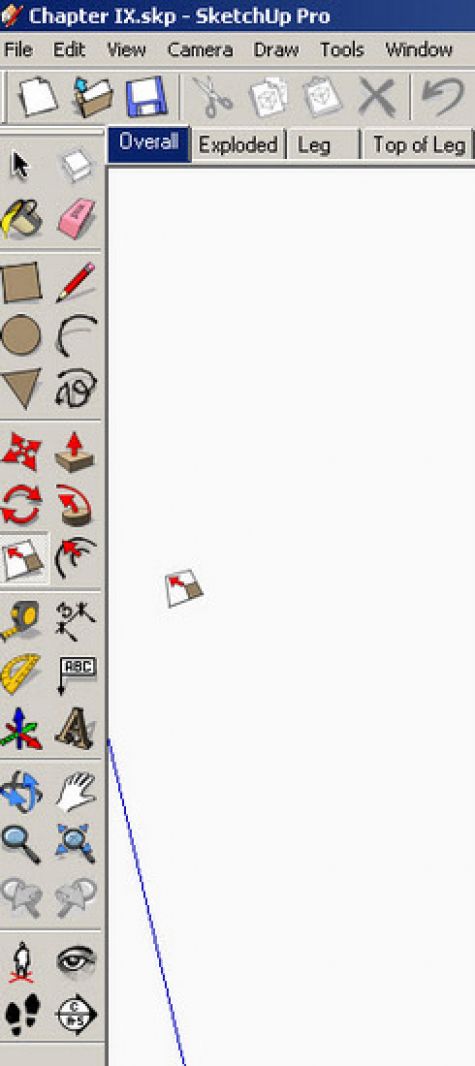
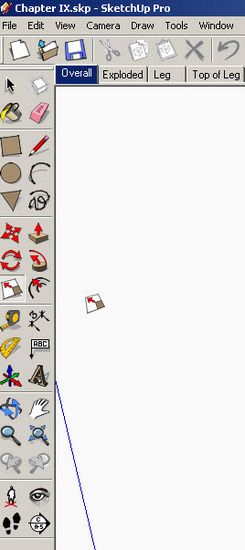
The Scale Tool is quite powerful and useful in specific woodworking tasks. It is shown below in the middle of the large vertical toolset. It looks like a small baseball diamond with an arrow going from home plate to second base.
This tool is not frequently used in my furniture work, however there are a few situations when I find it to be the perfect answer, for example when:
1) Scaling up components in preparation for an Intersection
2) Sizing an imported scanned image so that it is full size and ready for tracing over to obtain shapes and
sizes of furniture pieces
3) Lengthening or shortening turned legs, particularly in Windsor chair design
You may think it would be effective in re-sizing furniture assemblies. For example, say you have an existing model of a table, but you would like to have a smaller table, for example 3/4 size. You could select the table model, pick the Scale Tool, grab the corner grips, type 3/4, and hit the Enter Key. You now have a 3/4-size table with every piece (component) proportionally sized.
However, in this case, all dimensions are reduced by a factor of 1/4, including component thicknesses and joint sizes. I find that this global reduction does not work effectively because of inappropriate changes in lumber thicknesses and joint sizes.
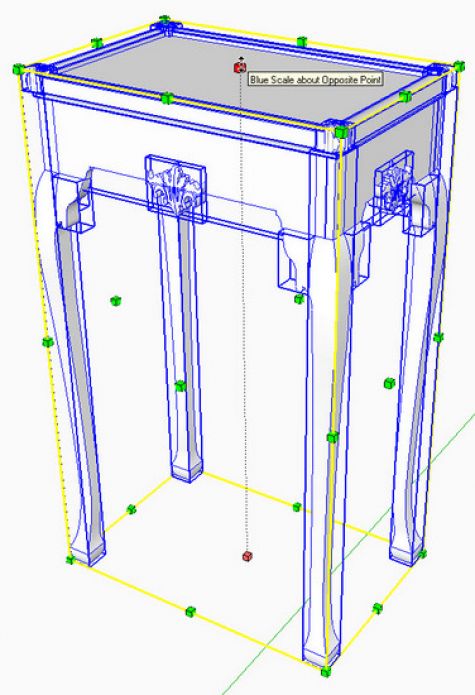
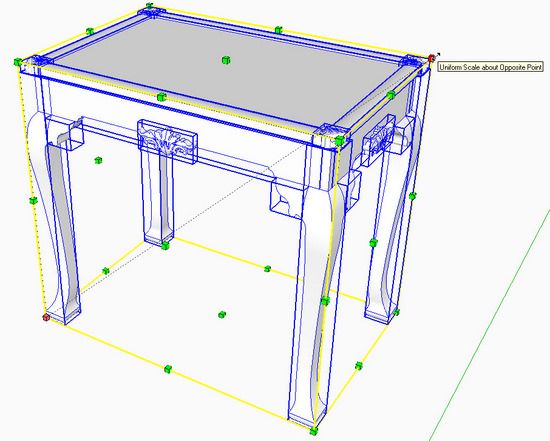
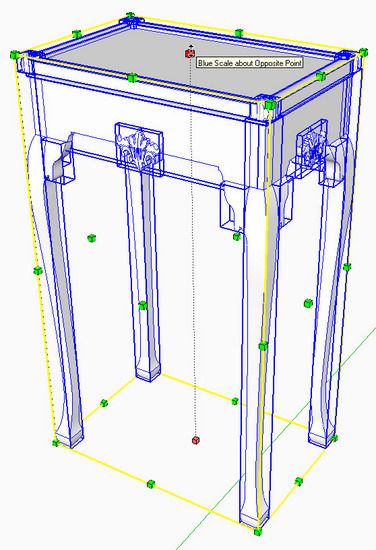
When you apply the Scale Tool to a selection, you are faced with an array of little green handles or grips, 27 in number. In the next illustration, I’ve clicked on the longest diagonal corner grips. Note the change to color red for the grips, and the dotted line between them. When you move the mouse, the size of the table will change in all three dimensions, that is all dimensions (length, height, depth) are changed proportionally.
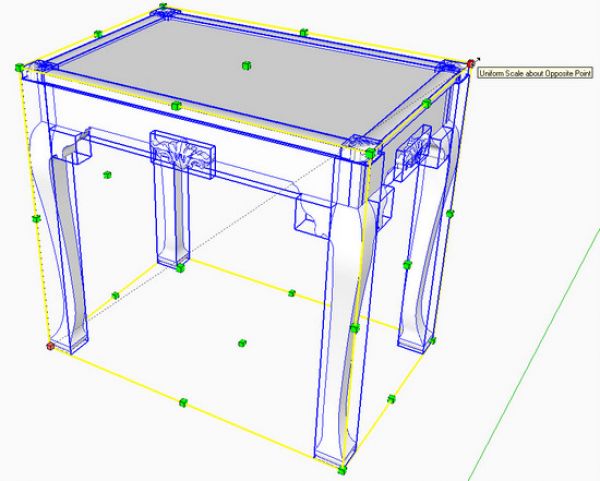
In this case, I haven’t opened components for editing, therefore the original component definition of the leg, skirt, or other components is not changed. I am only modifying the size of these specific copies of
components.
You can select a specific component and pick Edit Component. Now when you apply the Scale Tool, the component definition will be changed. All copies of that component in the file will accordingly change to the new size.
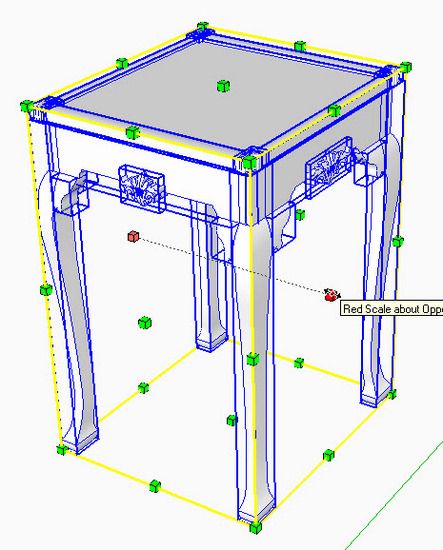
In the next illustration I show the result of using the middle grips along the red axis. In this case only the
dimensions in the red direction are changed, the height and depth are held to the original values.
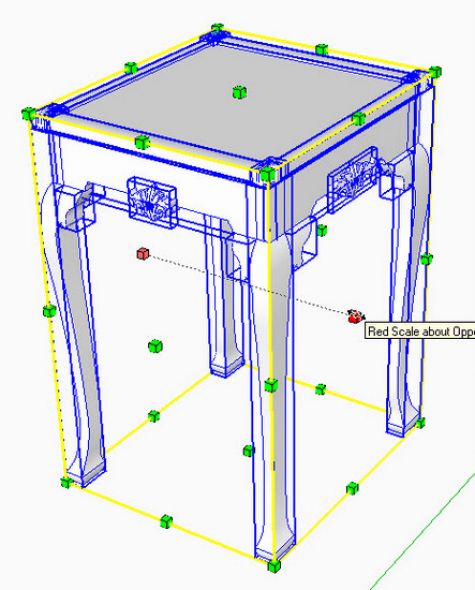
The next illustration shows the result of using the middle grips along the blue axis. In this case only the
dimensions in the blue direction are changed, the width and depth are held to the original values.
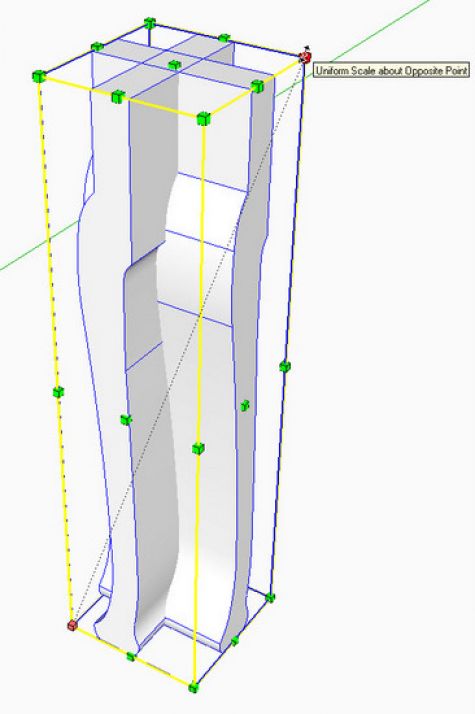
As mentioned previously, better results are achievable in Intersecting by scaling up prior to the intersection. Otherwise, you are subject to having very small facets that will not close. Typically I use a 10 times scaling factor. If the component is very small and has sharp changes in arc shapes for example, you may need to scale by a factor of 100.
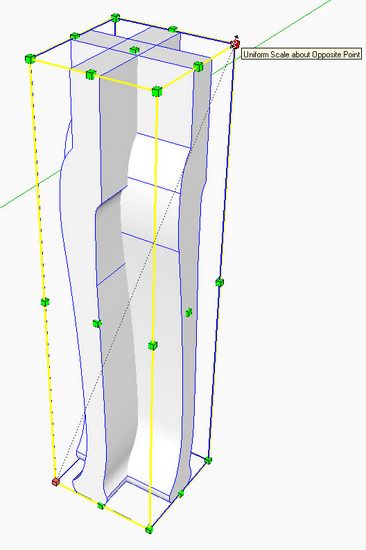
As shown in the next illustration, the cabriole leg intersection is best done after scaling by 10. Select all the graphics to be intersected, pick the Scale Tool, click on one of the corner grips, type 10, and hit the
Enter Key. You’ll have to zoom out to see the enlarged leg, then execute the Intersect.
After the intersection, re-scale the graphics back to normal size, by typing .1.
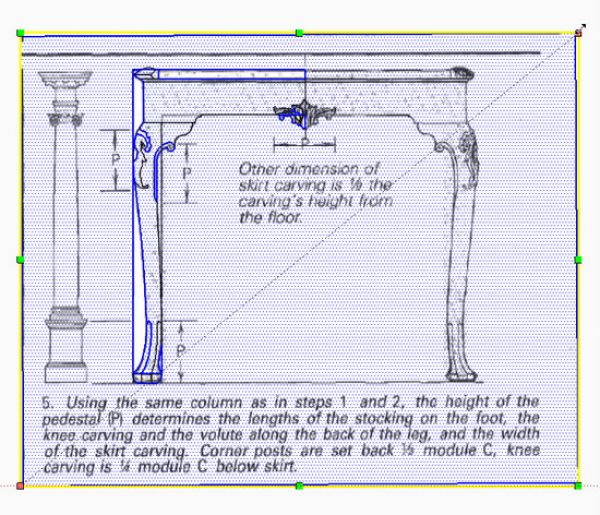
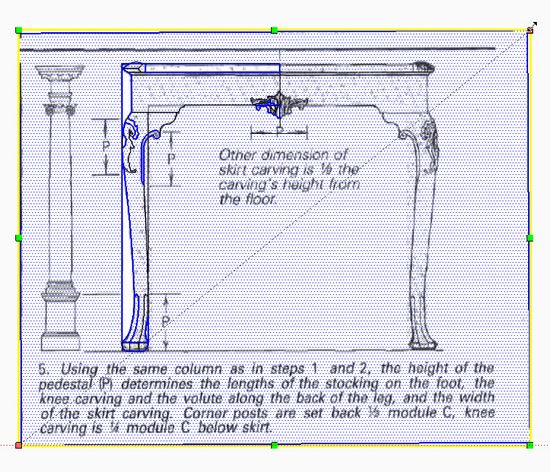
Most of my furniture pieces begin with imported images from my library of books and magazines. The next illustration shows the imported Fine Woodworking magazine image used for my reproduction of a tea table. Usually, I find a dimension on the image that is known, in this case the length of P was provided in the article. After importing, I used the Tape Measure to find the length of P as imported. I could then find the ratio required to scale the image so that the length of P in the model was equal to the given value. Select the image, then pick the Scale Tool and grab one of the corners. Type the ratio determined above. This scaling procedure gives a full-size image on which you can trace over the various shapes and find the sizes of key components.
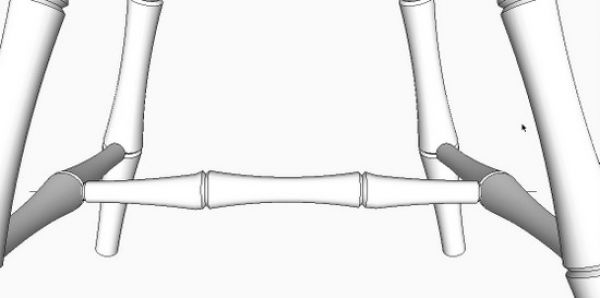
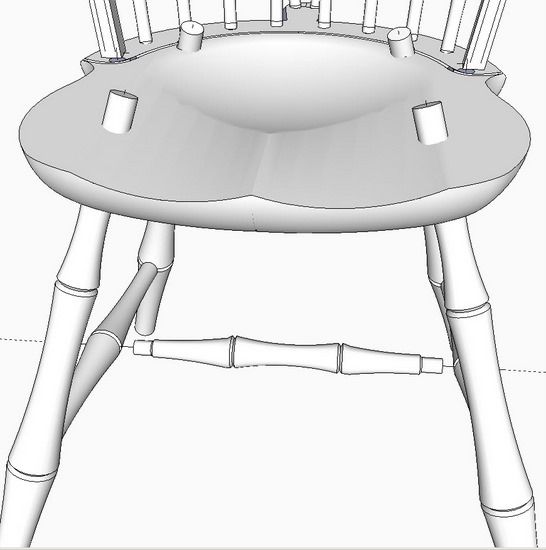
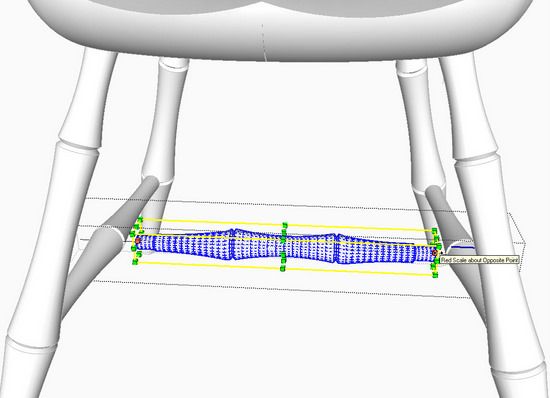
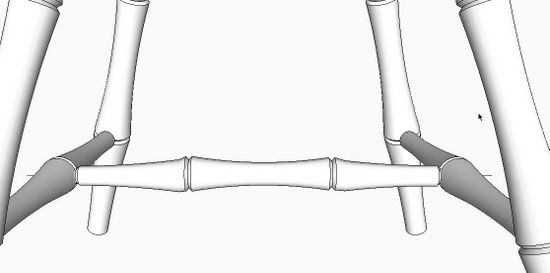
Another use of the Scale Tool involves modifying a dimension of a component to fit within the overall model. For example, the Windsor chair shown in the illustration below has a medial stretcher which is too short to fit between the side stretchers. This is a situation when I’m only needing to change the length – I am satisfied with the turning’s diameter. The Scale Tool adjusts the length while maintaining a proportional location of the original bulges in the turning.
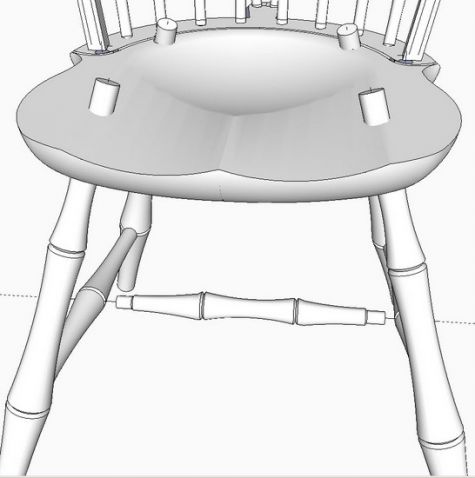
Triple click on the medial stretcher which will edit the component and select all its geometry. Then pick the Scale Tool and grab the center grip along the red axis. Hold the Ctrl Key (Option on Mac) so that the lengthening will be about the midpoint of the stretcher.
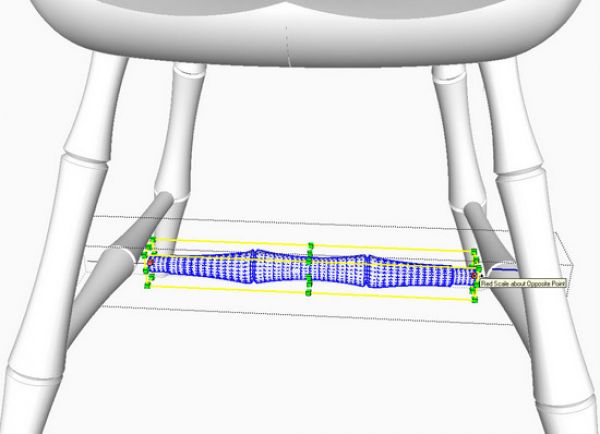
Move the mouse in the red axis direction until the shoulders of the turning are fitted up against the side stretchers. The tenons on the end of the stretchers will also be lengthened slightly. These can be quickly and easily shortened using the Push/Pull Tool.
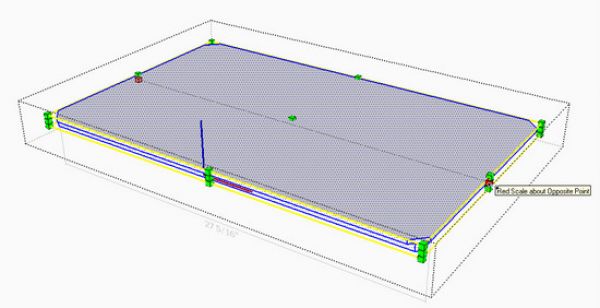
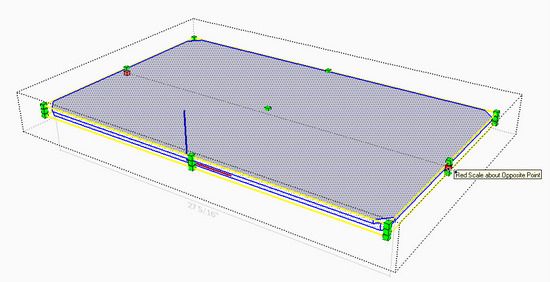
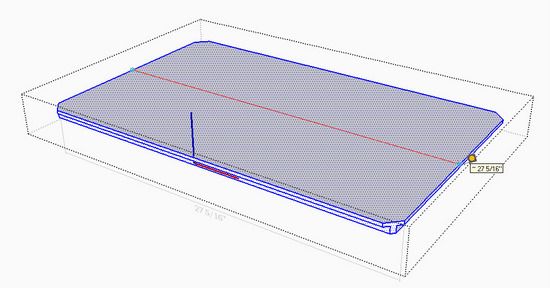
It is also possible to scale to a specific dimension rather than using a ratio. Using a panel or table top as an example, assume you would like to increase the length from 27 5/16-in. to 36-in.
As shown in the following illustration, triple click on the component, then select the Scale Tool. Grab the center grip and stretch out the length of the panel and click to end the stretch – it doesn’t matter how much stretch you make.
Now type 36″ – make sure to include the quotation marks for inches. Hit the Enter Key and the stretching will reset to that specific dimension. Panel thickness and width remain unchanged.
Scaling with the Tape Measure
As an alternative, you can also use the Tape Measure as a scaling tool. You can select any graphics in the SketchUp file to scale – however, you will scale everything in the file unless you perform the operation within the definition of a group or component. So make sure you are editing a component or group if you are intending to restrict the bounds of the scaling. Also, the Tape Measure will not just change one dimension, it changes all proportionally.
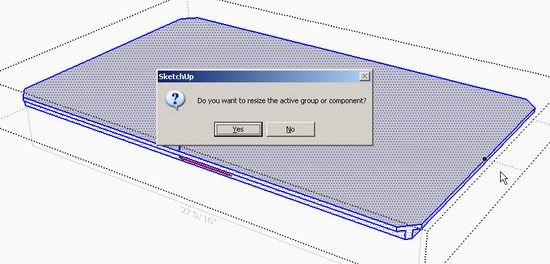
As shown in the following figure, triple click on the component and pick the Tape Measure Tool. Tap the Ctrl Key (Option on the Mac) to effect the measure mode. Click on one end of the measurement, then click again on the other end. Type 36 and hit the Enter Key.
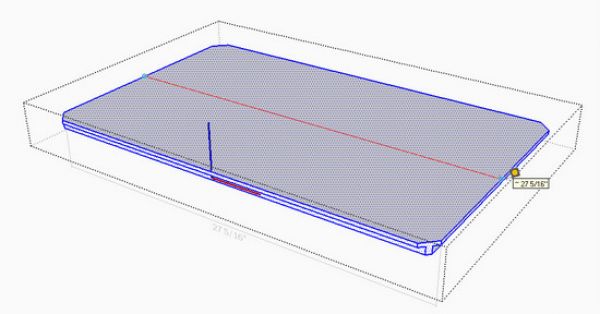
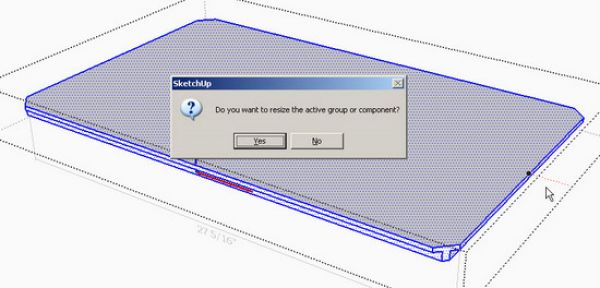
SketchUp will display a confirmation box as shown in the following figure. Click yes and all measurements of the component will change. The length will be exactly 36-in. and thickness and width will increase proportionally.
Therefore, where you want to change all dimensions proportionally, the Tape Measure method can be a substitute for the Scale Tool.
Perhaps you find it useful in other ways. Let us know by commenting below.
Tim Killen
http://killenwood.com


Comments
Tim,
As far as calculating and using the ratio goes, I think there is a simpler way. I just draw a line to the length of P and then using the tape measure I can resize the whole model by setting the dimension of the line to the dimension specified for P.
On your illustration above, I draw the line from the dimension lines. Don't forget to erase the line after you are finished.
And as Dave pointed out, the scale tool can reverse a component by selecting the appropriate handles and applying a scale of -1. You can flip things in place by using the option key on the Mac while you select to scale about the middle.
Ken T
Tim, could you elaborate on your method?
Why does sketchup need to use ratios in scaling? I usually will use the Dimension tool to show the measurement of the line that I am interested in changing. Then using the scale tool I can see the measurement change on the line as I move the scale tool. The problem is that the mouse is hard to control the amount of movement. This is where a nudge tool would be handy or better yet allow a measurement in the scale tool rather than ratios only.
Scaling by ratios is useful if you know what ratio you want to scale too. As Ken mentioned, you can scale a model (or just a component/group) using the Tape Measure tool to measure a known distance and entering that distance in.
You can also use the Scale tool to scale a model to some specific dimension. Start moving the desired scale handle and then enter the desired distance to the opposite scale handle. Type the distance including the units and hit Enter.
If you've got a table that is 48" long and you want it to be 36" long, select the entire table and get the Scale tool. Start pushing on the green scale handle in the center of the end of the bounding box. Type 36" and hit Enter.
Keep in mind that scaling may not always be an appropriate way to resize you model. If you scale in only one or two directions you will change the proportions of the entire model. If you don't want to do that, use the Move tool to resize components that need to have their dimensions changed and simply move the components that need to be placed in a new position.
Dave
Dave
I tried what you said. Drew a board 25" long, grabbed the handle, moved it in the direction I wanted and typed 20" in the box. The second I hit the shift to get to the quote sign the scale tool executes who knows what, not 20". Is it possible this only works on Sketchup Pro?
No Tom, this is not a Pro-only thing. Is it possible you hit a key other than the Shift key? The following is quoted from the Help documentation.
"Entering a scale multiplier value
You can specify a new dimensional length value during or directly following a scaling operation. To enter a dimensional length value during a scaling operation:
1. Select the Select tool. The cursor will change to an arrow.
2. Select the geometry to scale.
3. Select the Scale tool. The cursor will change to a box within another box. Scaling grips will appear around the selected geometry.
4. Click on a scaling grip to select the grip. The selected grip and the opposite scaling grip will highlight in red. Each scaling grip provides a different scaling operation. See Scaling Options section for further information.
5. Move the mouse to scale the geometry. The Measurements Toolbar displays relative size of the item as you scale the item. You can enter the desired scale dimensions after the scale operation is complete.
6. Type the dimensional length value (such as 2' 6" for two feet and six inches or 2m for two meters) in the Measurements Toolbar and press the Enter (Microsoft Windows) or Return (Mac OS X) key.
Okay the key was "after the scale operation is complete". Once I did that it worked! Thank you!! That has been bugging me for a long time. I have read the help manual before and didn't pick up on the detail above. It is those little details that get you.
Thank you for all the feedback and comments. After experimenting further with the Tape Measure, I agree that it is a handy alternative to the Scale Tool. One must be careful to not scale everything in the model, when intending to only affect a piece of the furniture. This requires you to make sure you are in "Edit the Component" mode before scaling.
Also, thanks to Dave for pointing out the way of avoiding the ratio for scaling. I was not aware of this feature. However, it is tricky.... you must complete the Scaling, then do the typing of the length.
Tim
To avoid the "shift" key issue can be avoided by entering "zero apostrophe [number of inches] apostrophe apostrophe". e.g.
0'12.5''
When you come across these problems, assuming the internet is no help, the first step is to assume there is an answer, then consider how someone might expose the feature you are trying to use. This one was pretty obscure, but I found it through this process of ratiocination. (sounds pompous, but I am kinda proud of figuring it out!)
Log in or create an account to post a comment.
Sign up Log in