One of the most important byproducts of using SketchUp is the high quality of drawing integrity – something you can count on when in the shop. However, there are still many things that can go wrong. Just like working safely in the shop requires constant attention, I think there is a need to be attentive in making your model in SketchUp.
There are a few areas where I particularly need to be careful to avoid errors. I’ll show you four of these areas that quickly come to mind.
Error 1 – Dimensions not placed properly
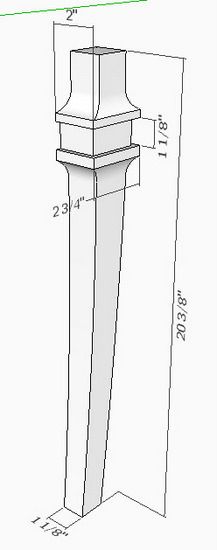
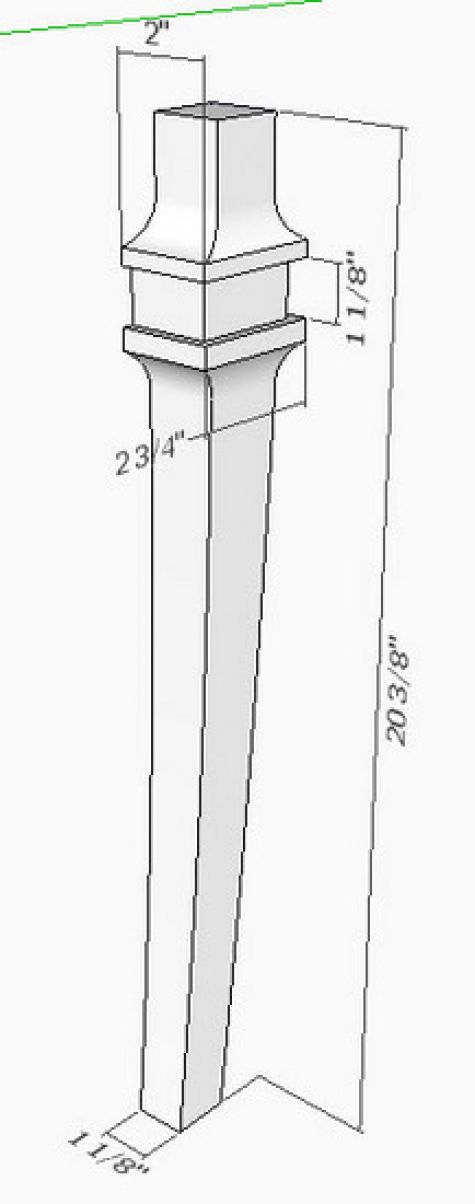
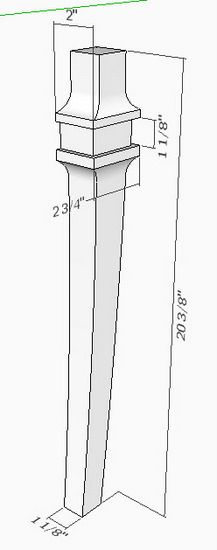
Many of the parts in furniture are complex shapes and non-orthogonal. Dimensioning these complex shapes can be a challenge. It’s easy to snap your dimension to a point that really is not the correct point but one very close by. I find that it is important to zoom in closely when making dimensions to ensure that you are on the proper point.
Also, in the view below, it is easy to create various dimensions of the length depending on how you move the mouse, the camera view, and where you click. Do you mean to show the top-to-bottom dimension along the axis, or is it to show a dimension that is aligned with the shape? It requires some attention to detail to make sure you get the dimension you want. I find that it is important to orbit around the model after dimensioning to make sure I’ve got it right.
Error 2: Getting Wrong Dimensions in the Cut List
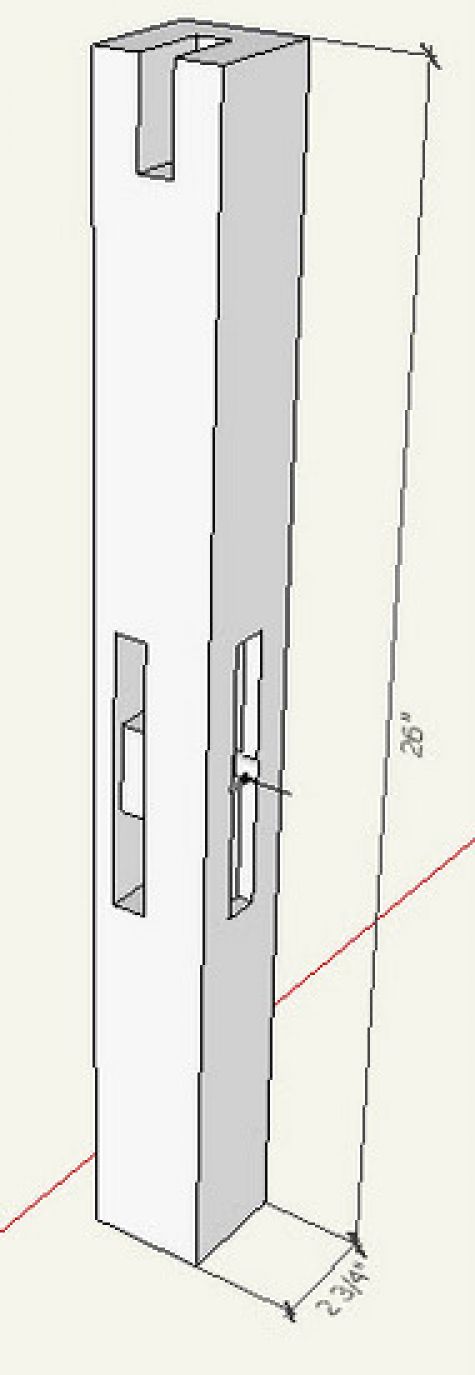
Many of you I’m sure use the plug-in to automatically create a CutList from the model. This plug-in depends on the size of the component definition. If there is text or dimensions or other extraneous graphics in the component definition, you will get erroneous cutlist results.
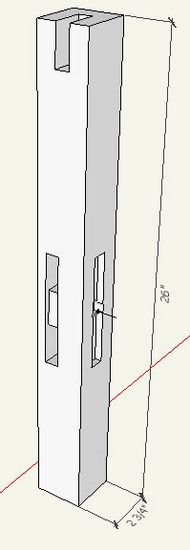
In the view below, I have a centerline coming out of the mortise in the middle of the post. That small line helped me align a bed bolt, however it sticks out beyond the faces of the component and throws off the results in the cut list. So it is very important to check the components for these anomalies and to do a final check on the cut list results.
Error 3: Templates not full size
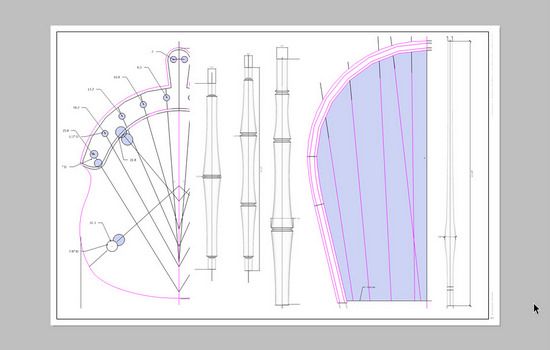
I use Layout and PDF output for most of my full size templates, arranging them on large scale paper. In this way, students and customers can use print services such as Kinko’s to produce the templates. When loading these scenes into Layout, you define a scale as 1 to 1. However, during re-sizing, shuffling, and arranging the various templates, you can inadvertently change the scale. I always find it important to do a final check of the 1:1 status of every template. Click on the template and in the SketchUp Model dialog box on the right hand panel, check the View tab to ensure the Full Size 1:1 scale.
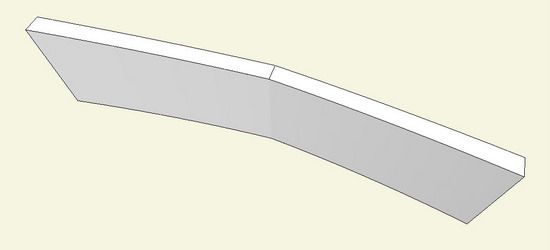
Error 4: Not having a smooth tangent arc
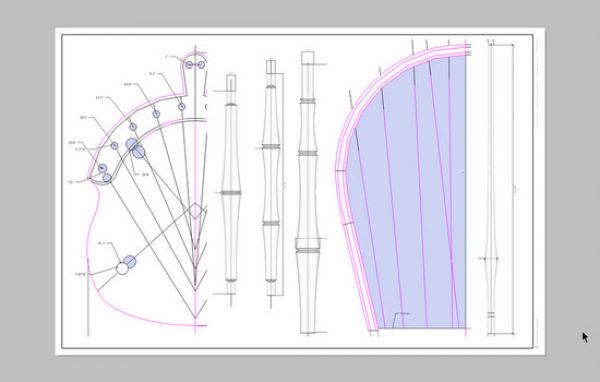
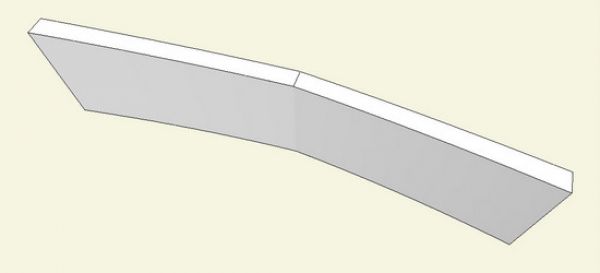
Occasionally in my rush to make a component, I fail to maintain a tangent connection of the arc shape. In the view below I’ve shown a top rail for a chair. The rail is symmetrical therefore, I typically make only half the component, and copy/flip to make the whole. I usually don’t notice the problem until after I’ve connected the two halves. I now watch more carefully in placing that first arc or bezier at the center of the half shape.
Perhaps you’ve found other areas of potential errors. We always encourage your feedback in the comments below.
Tim


Comments
Tim
It's good to know you are not perfect!
An area where I keep coming up with inaccuracies in my drawings is in relation to the use of Guides. I love using them to help in developing my drawings particularly where parts are not at right angles , it is so easy to get an offset with the guide feature . The problems occur when the drawing starts being taken over by guidelines and checking dimensions between guides which look parallel on the screen in certain views , the guides may be parallel but are not in the planar relationship I want and further apart.
Even so I find I cannot stop myself from using lots of guides ( probably a throwback from using pencil guidelines on a drawing board) , my only way of keeping some semblance of control is to regularly use the Delete Guides feature and start over again .
Jonas Mac
Jonas, guides are meant to be temporary and I think it is a great idea to use guides but you should clean up the drawing frequently. I have a keyboard shortcut set specifically to delete guides. It gets used often.
If, like Tim, you find added marks for centers or other landmarks on a component useful, put them in outside the component or nest them so that they aren't in the lowest level of components. The CutList plugin returns the lowest level of components so it won't report the component with the mark.
Dave
Like Dave says...If all else fails, Play dead!.
I use guides all the time and export to Cutlist frequently. In this respect I found that i was getting a lot of lengths shown as "~". Very frustrating considering the use of the guides.
Dave pointed out that the precision in my drawings was not detailed enough to stop the approximations and I had to set it up to 1/64" and turn off the length snapping.
I also come from the drawing board and guides are critical/second nature to me. Changing the units precision got rid of the problems.
Tim's comment on the dimensions is another area that I will now keep an eye on.
Thanks again Dave and Tim.
Ken T
First regarding note from JonasMac - I forgot the item about guideline placement. If I understand your comment, some guides get placed in the wrong plane. I do use my Arrow Keys when placing guides in crowded areas of the model. This ensures that it stays on the intended plane.
On Dave's comment, there are cases when I really want the construction lines in the component definition, since I use it in many different Scenes and copies of the component. In these cases, I just need to remember the impact on the cutlist. By the way, I don't like cutlists and don't use them in my own work in the shop. I think they are very susceptible to error, and are difficult to control. I find that the cutlist is not a necessary tool for work in the shop with SketchUp files and drawings. I think they cause more problems than they solve.
On Ken T's comment, I have not had the problem you state in the cutlist. Also, I generally set my precision to 1/16" and also have length snapping on.
Tim
thanks to all for the helpful comments on my posting re Guides .
I will certainly look to including guides in the component definition which I know will save me time in the future .
Overall I am learning that I need to be more exact at each stage of the drawing process . I will remember Tim's analogy between the vigilance required for safety in the shop and the constant attention required in making models in SketchUp as as a means of staying out of trouble .
Jonas Mac
Hi I'm begining to use sketchup and I'm interested in using, or at least giving a try at the cutlist plug-in. How do I get that Cutlist option?
@ patwreck, take a look at this blog entry: https://www.finewoodworking.com/item/9186/how-much-wood-will-it-take
Tim
From your posting it is clear that in maintaining the vigilance required to minimise errors , frequent zooming in / orbiting is essential. As zooming and orbiting is such a feature of SketchUp I find after a few hours on a complicated this to be very demanding. Your posting gives me a chance to ask a question which I have often wanted to ask .
Do you and Dave have any strategies/ working methods for reducing the amount of zooming while continuing to make accurate models ?
Jonas Mac
JonasMac, I agree on the importance of getting in close to your to your model. One of the difficulties I see in working with new students is the tendency to work from afar (zoomed way out), creating lots of early frustration.
That is also why I'm continually harping on the use of a good mouse with scroll wheel. This is the only way I've seen of making the orbiting and zooming efficient.
Also I take advantage wherever possible of ending push/pulls or other tool actions by clicking on edges in other already placed geometry. This eliminates some zooming and orbiting. Also I encourage use of Arrow Keys to force action along the axes. This also obviates some zooming and orbiting.
Tim
Tim you wrote
"Also I take advantage wherever possible of ending push/pulls or other tool actions by clicking on edges in other already placed geometry. This eliminates some zooming and orbiting"
Could you explain this a bit further ?
Jonas Mac
JonasMac: say you are doing a through mortise on a leg. There is no need to orbit around to the back side to finish the Push/Pull. Simply click anywhere on the back edge of the leg to finish the mortise. There are many operations where I click on existing faces or edges to finish the action. This includes moves and drawing lines. In many cases it helps to use the arrow keys to force the action on a specific axis (not required for Push/Pulls). In that way I'm able to move my mouse anywhere to click on existing geometry to end the action.
Tim
Tim - thanks for the explanation
I now understand where you are coming from and I will try this out in future work.
For me this is such an important posting i.e the use of SetchUp "for high quality drawing integrity " with which you began . Maintaining this approach during each session seems to be the key as it is painful trying to rectify ( or even finding ) mistakes when you are in the advanced stages of producing a model .
Jonas Mac
Log in or create an account to post a comment.
Sign up Log in