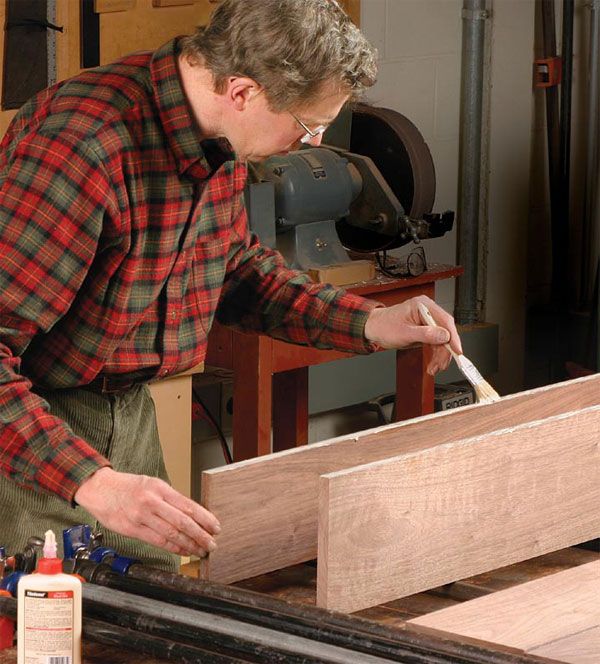
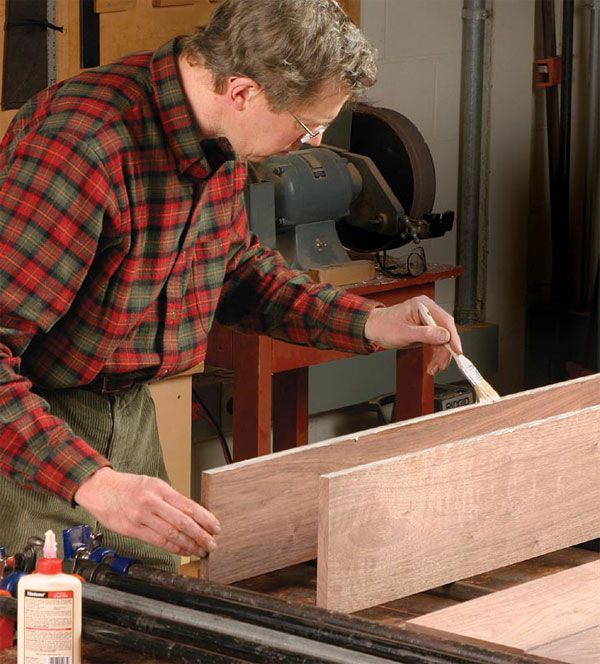
Wet both surfaces. It is important to get even, continuous glue coverage on the surfaces you want to join.
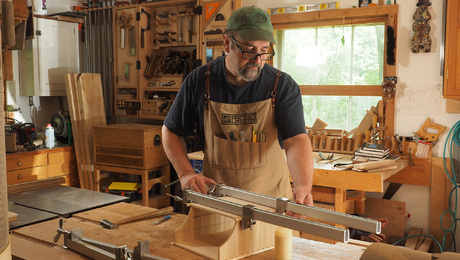
Nothing provokes more stress than a big glue-up. Learning how to properly clamp your work is one of the most critical elements of success. Read more about clamping here. But properly applying glue is also crucial. Here are some tips:
Wet both surfaces
It is important to get even, continuous glue coverage on the surfaces to be bonded, so apply yellow glue to both surfaces when you can. This provides instant wetting of both surfaces without relying on pressure and surface flatness to transfer the glue from one surface to the other. You will, however, have to work fast as the open time for yellow glue can be around five minutes at a temperature of 70O F (21O C) and relative air humidity of 50%.
Clamping time
Now long should the joint be subjected to clamp pressure? The time varies from species to species, with woods that have an even density across the growth rings, such as maple, requiring less time. But in general, the glueline reaches around 80% of its ultimate strength after 60 minutes of clamping. After this, joints can be released from the clamps, but the full glue strength won’t develop for about 24 hours.
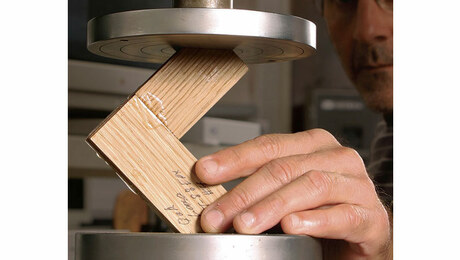
How strong is your glueline?
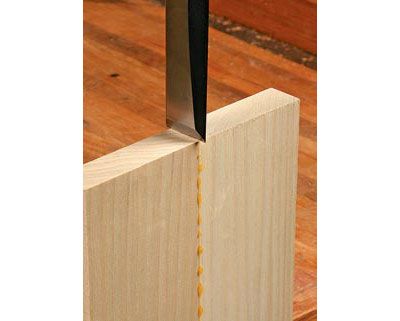
Even if you have used the correct pressure, it is still reassuring to make sure that you are achieving well-glued joints. A simple test is to place a sharp chisel exactly on the glueline, and strike it with a mallet.
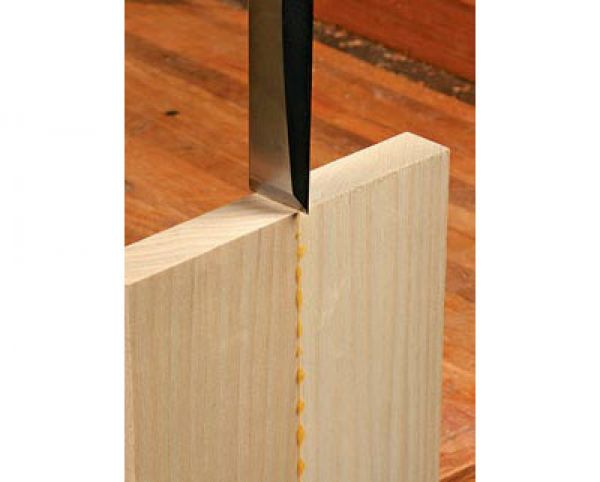
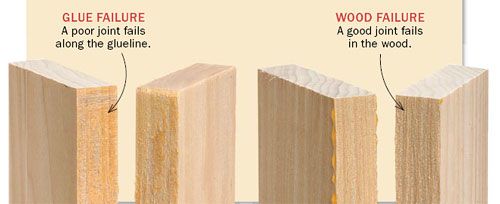
A weak joint will split in the glueline, either because the glue was too thick or the glue didn’t penetrate the wood correctly. The percentage of wood failure will be very low or nonexistent. A good joint will split mostly in the wood adjacent to the glueline.
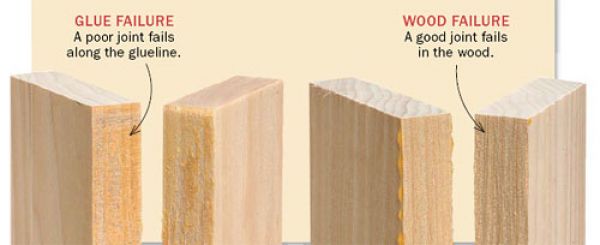
-Excerpt from article on clamping by Roman Rabiej.






Comments
One of my sources of material (wood/hardware) is from old/broken salvaged furniture. It is amazing how many of the really old pieces don't have glue failure no matter how hard you try to break them at the glueline.
Questions that I need help with:
I have seen some people apply a light layer of glue; then they wait a few minutes for it to start to dry and then they apply a second heavier layer.
Does the two layers method gives a stronger joint?
Why or why not?
What is the optimum waiting time between layers?
Thank you!!
Jovenx:
In my limited experience, the 2-layer method of glue application matters mostly in situations where the wood tends to "wick" away the glue, usually only in end-grain glue-ups or rotten wood. Since hopefully you're not spending a great deal of time gluing rotten wood with yellow glue, it'll matter most to you on end-grain joints. I use that method mostly with miter joints and the occasional butt joint. The first layer of glue tends to soak quickly and deeply into the joint, which can starve the glueline nearly instantly. However, the thin first coat that quickly dries will saturate the wood fibers to prevent soaking or wicking, but still provide a bonding surface for your second coat of glue.
Look for these joints in, for example, fast cabinet face frames with pocket-mortised butt joints, or in very small picture frames which might not require stronger joinery such as splines. As you know, end-grain gluelines are far weaker than edge and face joints, but sometimes you will find that full dowels, splines, shaped joints, biscuits, or various other methods are too time consuming for a quick project requiring little joint strength. Use your two layers of glue there.
Also, in most cases I have seen, two layers of glue on an edge glueline is just a liability; the first drier layer of glue is more likely to make bumps and high spots to hold your joint apart than it is to stabilize your glue surface. It just doesn't soak deeply or quickly into edge grain. Indeed, even with the first layer of prep glue on an end-grain joint, I RUB small amounts of glue onto the surface, wiping off any excess to avoid obscuring the actual joint surface, leaving the joint with no glue lying on or above the wood.
And Jov- I too am continually astounded by the integrity of older glue joints. Titebond I yellow glue has been around for about 55 years, II for less than 20 years, and waterproof Titebond III for 6 years. What I've seen of 200+ year old glue joints... wow. I'd wonder how old the oldest known glue joint in wood really is. I'm sure someone out there has the answer, but I won't hazard a guess in this post!!
I'll welcome any corrections, additions, or just plain educated flames to this post, and I hope I've helped answer a little.
-Ben
Regarding the longevity of ancient glue joints: Remember that you have a strongly biased sample: You're never going to see the stuff that fell apart a hundred years ago and was relegated to the dumpster at that time. So I think the take-home lesson is that it's POSSIBLE to create a strong, long-lived glue joint with hide glue, but without knowing how many glue joints were made that didn't survive through the years, we can't even say that it's PROBABLE that a joint made with hide glue will last a long time.
From my own gluing experiences, I think that how well the joint fits before the glue is applied, along with proper glue application technique, are both likely to affect the long-term strength of the joint much more than the kind of glue that was used.
-Steve
Thank you for your posts.
Vince
I was advised a few years ago that when working with wood core plywood, before attaching solid wood edging, to apply a 50% water/50% yellow glue wash to the open edge of the plywood. Allow to soak in 'till dry to the touch and then apply the glue full strength to both surfaces and clamp. It's worked for me.
Interesting; many different opinions on this. Last week I watched the video series on making a hayrake table. The builder only puts glue on one side, uses a bent index finger to spread the glue. If I remember correctly, he feels if several boards are glued, this amount of glue gives longer working time.
I have used this method this week. You get squeeze out, but you know you've got glue in the joint.
Earlier in an article on glue strength, 80% strength in 30 minutes was quoted.
Too much information can cause confusion.
I have come to prefer epoxy glue to regular carpenters glue for most applications;
The main drawback is the extra effort involved in mixing two parts, judging needed amount before hand and being limited by "pot life", time, and somewhat higher expense.
But, once these skills are mastered, the advantages are:
1. Much stronger joints.
2. Weather/water proof.
3. Faster drying time [controlled with temperature]
4. No need for complicated mating surfaces;
Instead of dovetails or other right-angle joinery I simply miter the joint, and glue end grain to end grain. I don't use miter clamps, I simply tape the outsides of the joints with 2" packaging tape.
For instance the sides a drawer can be made by laying the four panels on the work table, end to end, inside faces down. Tape the ends together, except for one joint. Work the tape on very firmly with thumb-nail or other small blunt object. Turn the whole 4-part assembly over enmass. Paint epoxy into the endgrain of the joints. Don't forget the as yet untaped jointing surfaces at the end of the assembly. Go back and hit any dry spots after a few minutes. Mix some left-over epoxy with fine sawdust and apply to one surface of each joint. Lift up and close assembly into a rectangle. Measure diagonals to ensure squareness. All squeeze-out should show on inside of joint. This can be formed into a nice fillet or removed. Best to make a fillet because some of the extra epoxy will probably soak into end grain wood even while it cures.
Substitute a piece of plywood covered with 4 mil plastic for the work table. This can be set out in the sunshine or next to the fireplace to accelerate the curing time.
This is great for many hardwoods, all softwoods and plywood. Resinous wood needs mechanically locked [complex] joints.
Log in or create an account to post a comment.
Sign up Log in