Get Sharp- Fast
Lie-Nielsen's sharpening expert shares a surefire method for getting a keen edge every time
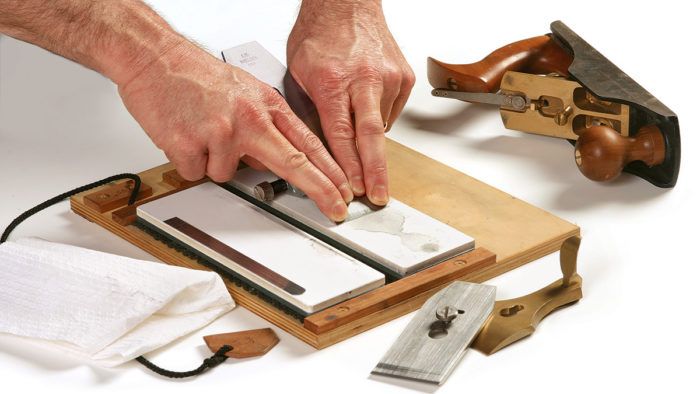
Synopsis: Sharpening doesn’t have to be frustrating and mysterious. You can get and keep a keen edge on handplane blades and chisels and you don’t have to break the bank to do it. Lie-Nielsen’s sharpening expert shares the method he has been teaching at workshops across the country, using a honing guide, sandpaper, waterstones, a ruler, and a shopmade sharpening station.
For many woodworkers, sharpening plane irons and chisels is an intimidating and frustrating task. I’ve traveled the country teaching and demonstrating sharpening and hand-tool techniques for Lie-Nielsen Toolworks for the past nine years, and I’ve met plenty of woodworkers who struggle to get a consistently sharp edge on their tools and are convinced that sharpening is beyond their reach.
Sharpening doesn’t have to be difficult and mysterious. The method I’ll show you combines ideas I’ve picked up over 25 years of working with hand tools. I’ve demonstrated it countless times.
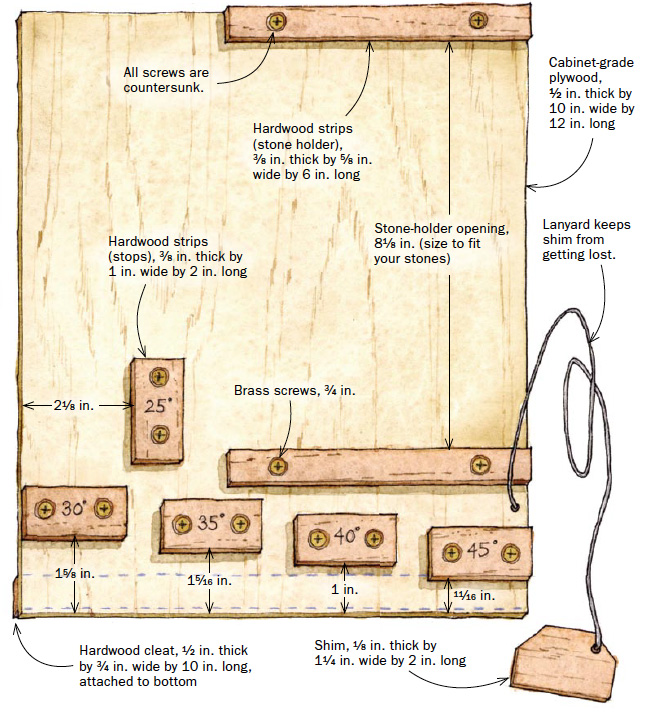
The heart of this approach is a collection of simple tools: a $15 side-clamping honing guide, a supply of sand paper in several grits, 1,000- and 8,000-grit water stones (or a combination stone if you like), a thin metal ruler, and a shopmade stop board that will help you quickly and reliably set the correct honing angle every time. With these tools, you can handle the most common sharpening tasks—honing, grinding, and repairs—for every kind of blade.
Using this method, you’ll get a truly sharp edge, allowing your tools to cut more cleanly and efficiently with less effort.
Start with a time-saver: The ruler trick
Many woodworkers buy a high-end handplane with the idea that their woodworking will get better. It’s true that a better tool makes for a less frustrating experience. But although you may think a new plane is ready to go right out of the box, think again. Even a new tool should be sharpened before you put it to wood.
A brand new, high-quality plane iron should have a flat back. If it doesn’t, or if you’re working with an older iron, flattening is a must. Fortunately, this should take no more than 5 or 10 minutes using the sandpaper technique shown on p. 46. Your goal is not a high polish but simply a flat back with no heavy milling marks running to the cutting edge. This is because, once I have the back flat, I use David Charlesworth’s ruler trick to create a subtle bevel on the blade’s back. The ruler trick puts the honed surface at the cutting edge where it belongs and eliminates the tedium of polishing the entire back.
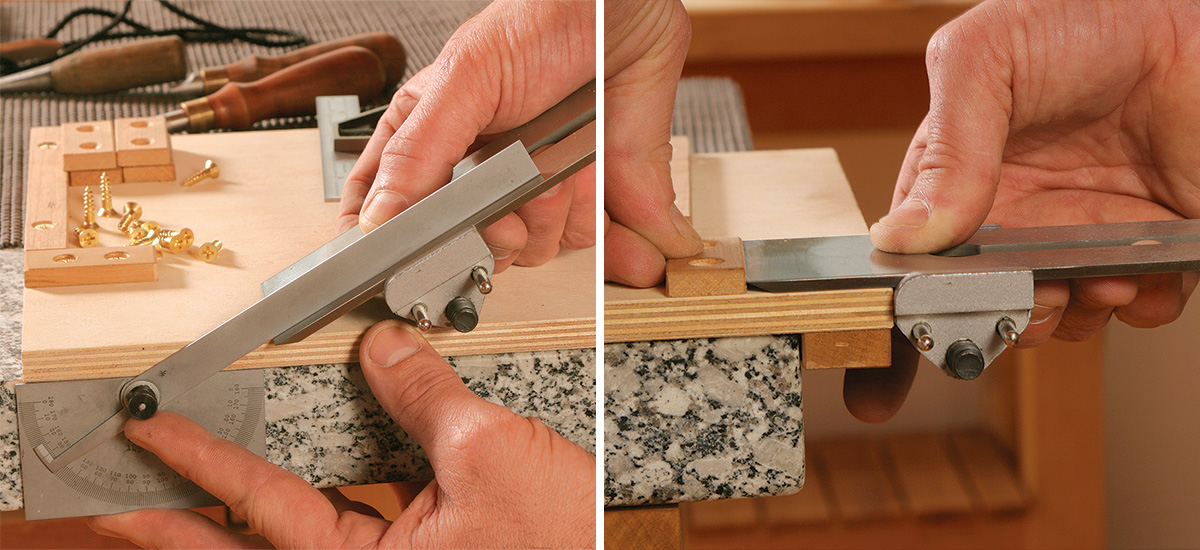
Here’s how it works: Place a thin metal ruler (0.020 in. thick or less) on one side of the 8,000-grit stone. Now place the back of the blade on the ruler and lower the blade’s tip onto the stone. work it up and down until you can see an even mirror polish about 1⁄32 in. wide, from corner to corner, at the edge of the blade. Now you’re ready to hone the bevel.
The typical bevel-down smoothing plane blade comes with a primary bevel of about 25°. There’s no need to hone the entire primary bevel to get a sharp edge, though.
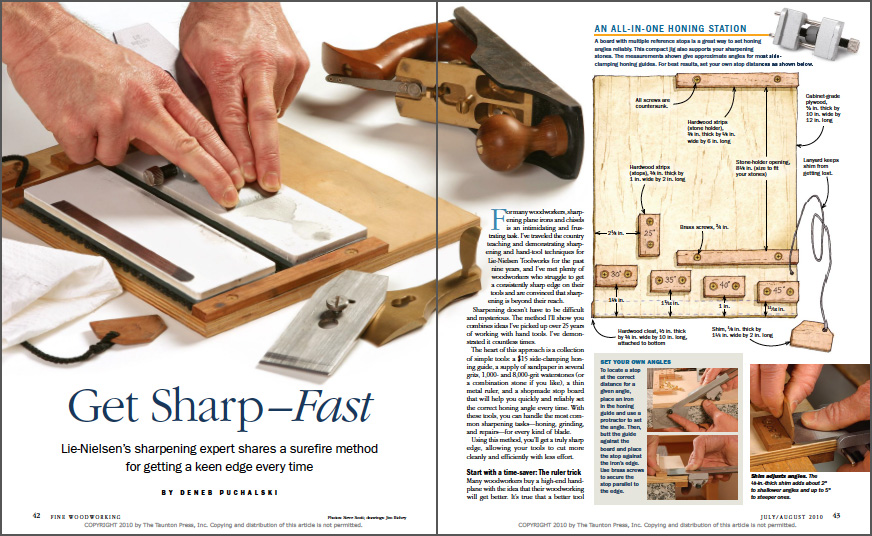
From Fine Woodworking #213
To view the entire article, please click the View PDF button below.
Fine Woodworking Recommended Products
Norton Water Stones

Wen Diamond Grinding Wheel



Comments
Please, please, please include metric measurements in FW diagrams and articles. Imperial measure is Greek to the rest of the world.
Log in or create an account to post a comment.
Sign up Log in