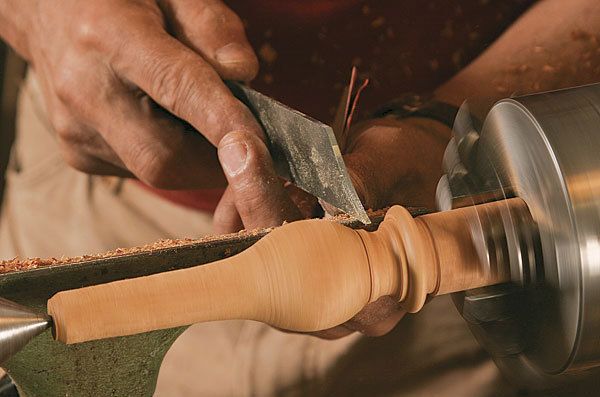
Synopsis: The turned legs on Mario Rodriguez’s Sheraton table look daunting. They start with tight stack of rings, followed by 12 carved, tapered reeds that end in a small ring and reel at the ankle. Below that the leg swells to a smooth bulb and ends in a narrow tip. All these traditional details were intimidating to Rodriguez, who doesn’t consider himself a turner. So he decided to tackle the problem in stages. He broke the legs into three sections, turned them separately, and then joined them together. This allowed him to work on a small lathe and to relax, because any mistake he might make would not ruin the entire leg.
I’m always on the lookout for small but challenging projects, so this Sheraton table caught my eye. It’s a stylish piece, compact and delicate. But it was the turned legs that really grabbed me. The top portion is turned to a tight stack of perfectly formed rings. Below the rings are 12 carved, tapered reeds that end neatly in a small ring and reel at ankle height. Under the ring and reel, the leg swells to a smooth bulb, and finally ends in a narrow tip.
All that turning made me hesitate. I’ve never considered myself a turner, more like a furniture maker who turns a little. So how did I create the four ornate legs you see in the photo? I did it by dividing each one into three separate sections—upper rings, center reeds, and foot—connected by simple mortise-and-tenon joinery. doing so let me make multiple copies of each section, discarding any single part that wasn’t up to snuff without losing the rest of my work.
This safety net also makes the project a great opportunity to grow as a turner. The work can be done on a small lathe, and each section features different details and treatments, requiring a range of skills and techniques.
Straight joints make a straight leg
For this approach to succeed, all the parts must line up correctly: Any misalignment will draw attention to the joints. This means the mortises and tenons must be drilled and turned so they are perfectly straight and concentric with the turned profiles.
For the top and foot, I drill the mortise first and then use it to mount the workpiece on the lathe. In this way, the workpiece rotates around the center of the mortise as the piece is turned.
Mortise the top and foot before turning—I begin with the blank for the top portion. I cut away one long corner of the blank, measuring 3⁄4 in. by 3⁄4 in. When the table is assembled, this recess fits around the corner of the case. For now, I fill in the missing section with a piece of scrap and glue it in with thick paper placed between the scrap and the workpiece. This allows me to easily remove the fill-in piece after drilling my mortise and turning the rings, without damaging the top section.
From Fine Woodworking #214
For the full article, download the PDF below:
Fine Woodworking Recommended Products

Sketchup Class

Drafting Tools

Blackwing Pencils


Log in or create an account to post a comment.
Sign up Log in