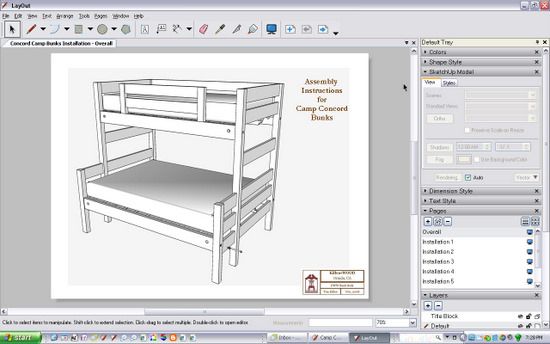
My last entry covered a group project to create bunk beds for a local city camp in the Sierra near Lake Tahoe. We accomplished the goal within our original schedule of four days, delivering two bunks including the finish (a coat of linseed oil). My design in SketchUp was effective to avoid stoppages or rework. As explained in my last post, without SketchUp I would be reluctant to take on these large scale woodworking projects.
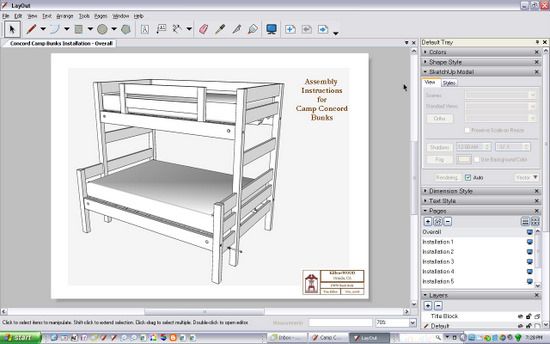
Here is the assembled bunk shown within the Layout application.
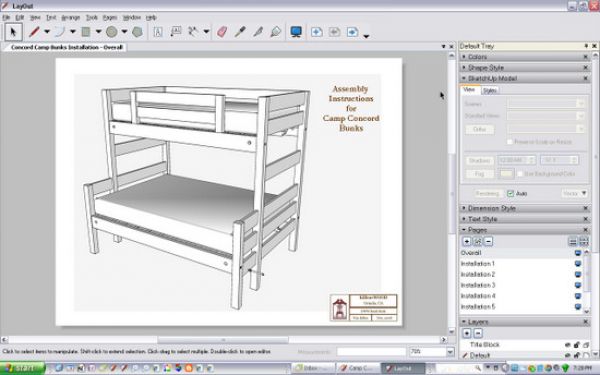
Since the bunks breakdown to enable handling, shipping and installation, we needed a way to instruct the camp administrators on the proper installation sequence and steps. Again SketchUp came to the rescue, but this time relying on the companion program, Layout. With Layout, there is an advantage to applying notes and tags, and also delivering as a convenient PDF.
During construction in the shop, we created several sub-assemblies made up of different components. Some sub-assemblies were permanently glued. In other cases, parts were fastened together with wood screws.
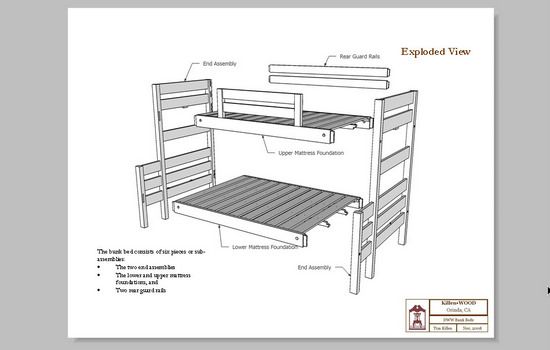
Here are the resulting sub-assemblies (six of them) that the customer must assemble. In SketchUp, I created new components for the sub-assemblies. This helped me copy and move these units while creating the various scenes for installation.
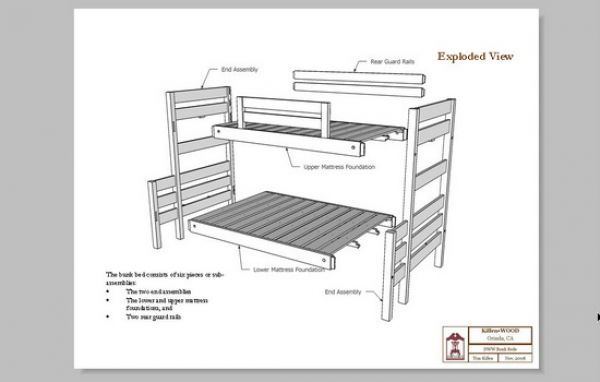
Within SketchUp I created several Scenes of the installation sequence. I used the Hide function to remove subassemblies in certain scenes, only to “unhide” them in later scenes. When using this procedure, remember to save the scene after you hide or unhide particular components.
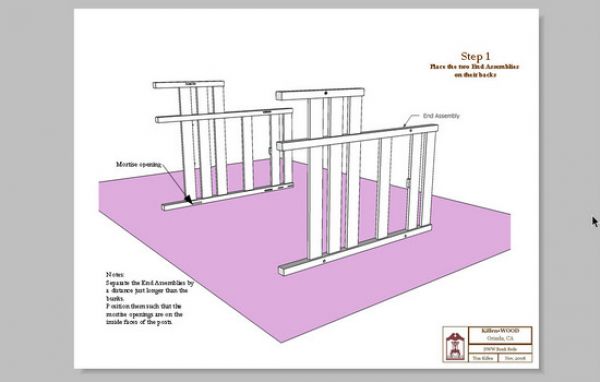
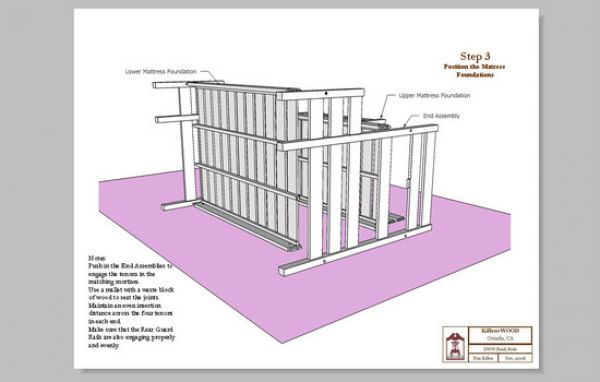
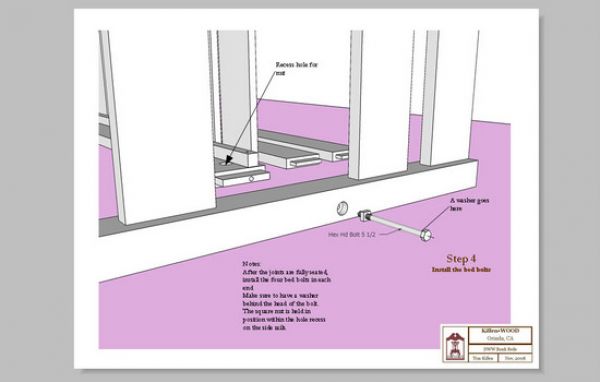
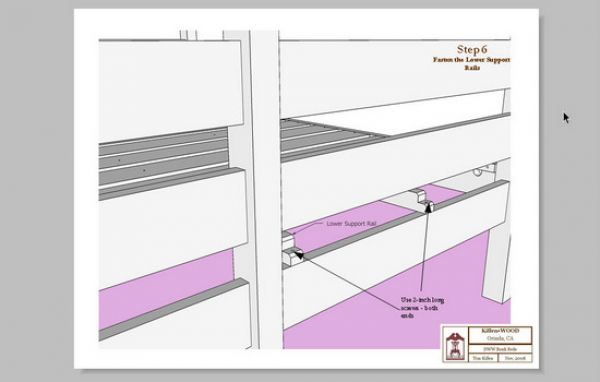
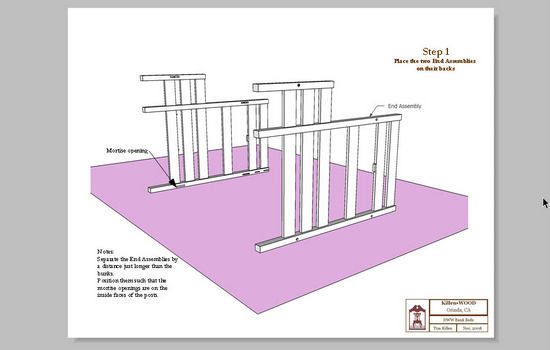
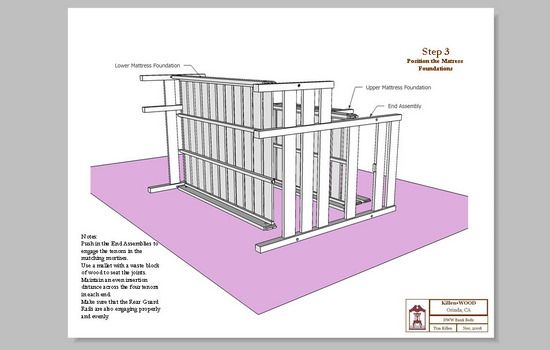
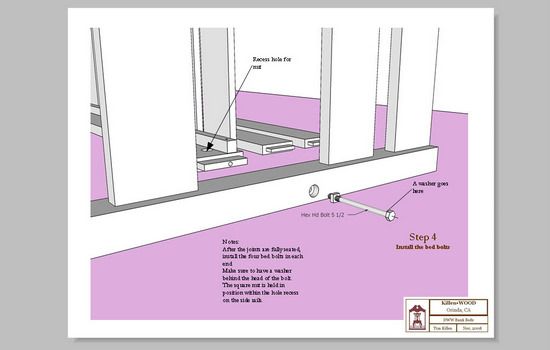
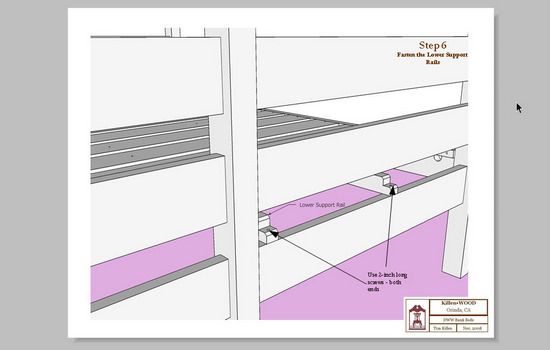
Here are some of the resulting pages of the installation document starting with Step 1.
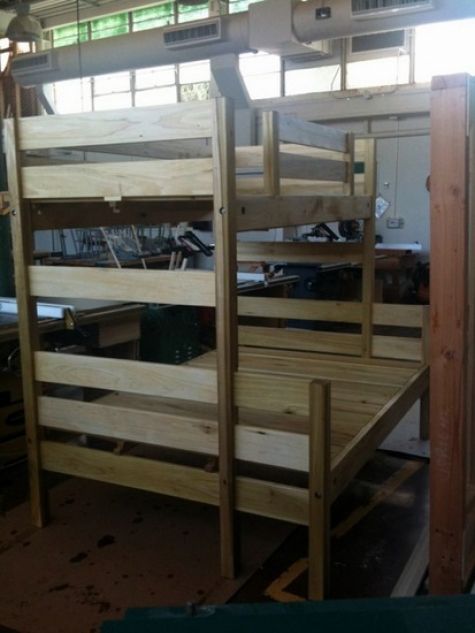
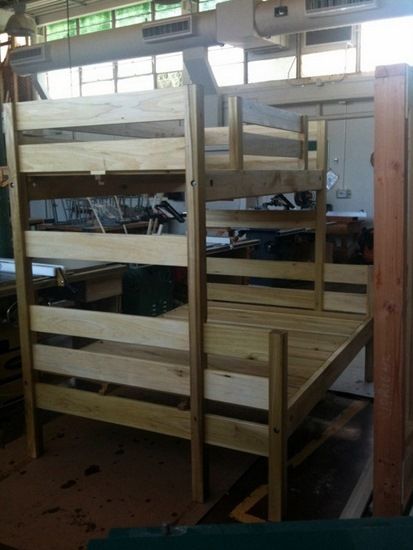
Here’s a photo of one of the finished bunks in the shop.


Log in or create an account to post a comment.
Sign up Log in