A reader had difficulty creating a Shaker drawer knob. In particular, she found it difficult to place the path for the Follow Me. Also she could not get Follow Me to work with the turning profile (the flat half-face shape) as a component. Additionally, she found holes and gaps in the final turning.
I’ll show my method for turning this knob in a few steps. First, here is the model of the final turned knob.
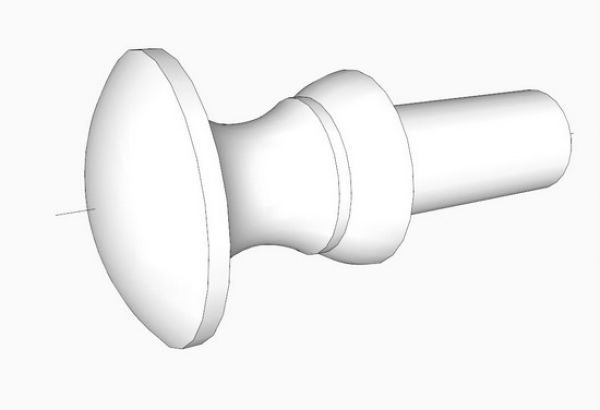
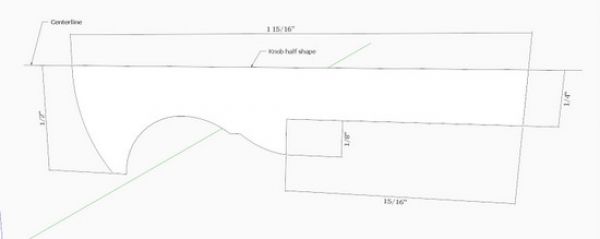
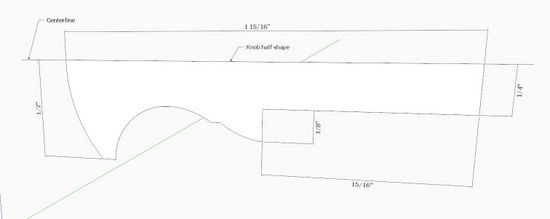
Step 1: Create a rectangular face as a background (or “piece of paper”) on which to make the shaped profile. Using the Line and Arc Tools, create the flat face or profile for the turning. You only need one-half of the shape as shown below. Note that I’ve include an extension of the centerline on both ends of the shape. This will come in handy later in the process.
For reference, I’ve created the face on the red-blue axis, so the centerline follows along the red axis.
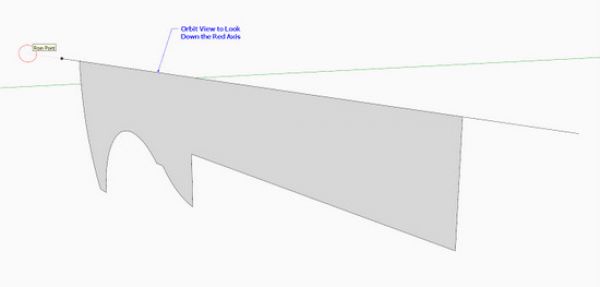
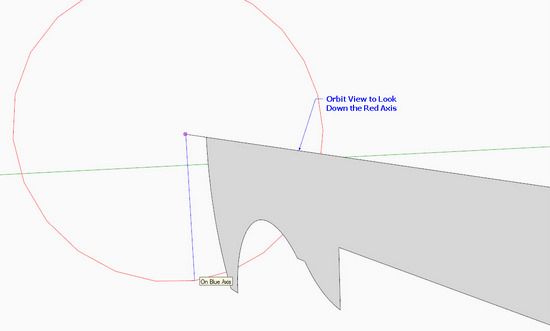
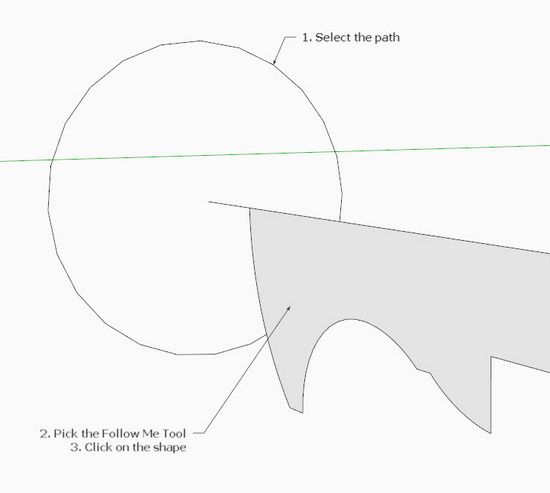
Step 2: Now we need a “path” for the Follow Me Tool. The circular path needs to be placed such that its center of rotation is the red axis. Pick the Circle Tool and bring the mouse icon toward the profile. The circle icon needs to be red as shown below. This is the proper orientation of the circle. If you have a green or a blue color, use the mouse scroll wheel to orbit the view slightly so that you are looking more toward an alignment with the red axis (see the orientation below).
Step 3: Attach the Circle Tool to the end of the centerline and click the mouse to start the circle. Move the mouse such that the radius is on the blue axis, so that the circle facets are aligned with the profile face. Make sure your circle is still red in color. Click the mouse to end the placement of the circle (size is not important).
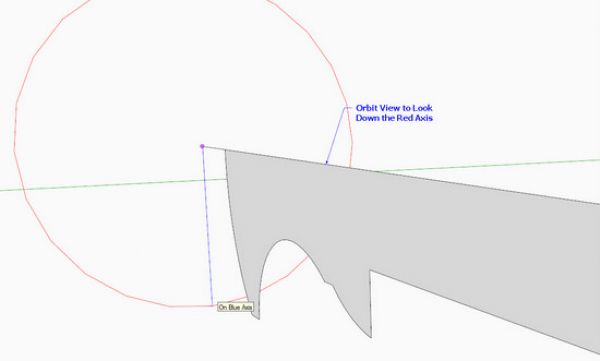
Step 4: With the Select Tool, click on the circular path (I often delete the face of the circle, but there is no requirement to do this). Pick the Follow Me Tool and move the mouse icon over the profile face. You should see the face light up, then click the mouse to start the “turning”.
If you’ve made the profile a group or component, then the Follow Me will not work unless the path is also included within the group or component. Both the profile and the path must be in the same context.

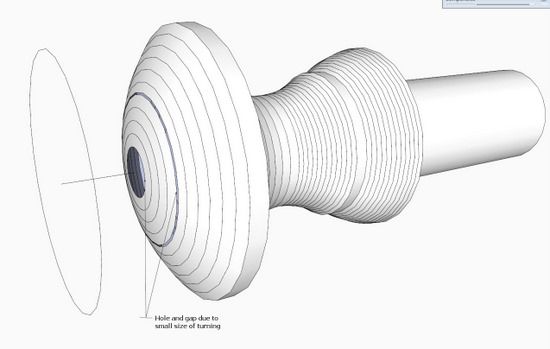
Step 5: As you can see below, the resulting turning is not complete, as there is a hole in the top and another thin gap in the upper rounded surface. SketchUp sometimes has difficulty with small shapes and facets. To get around this limitation, you must temporarily scale-up the profile and path.

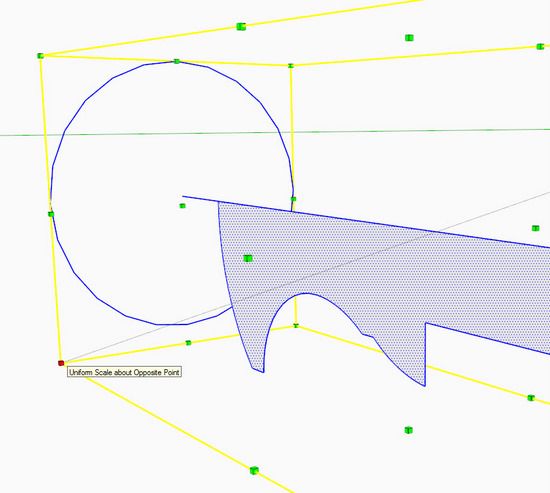
Step 6: Select the path and profile, then pick the Scale Tool. Grab a corner grip and move it outward to expand the size of the model. Type 10 (which will show up in the Measurements Box) to multiply the size by a factor of ten.
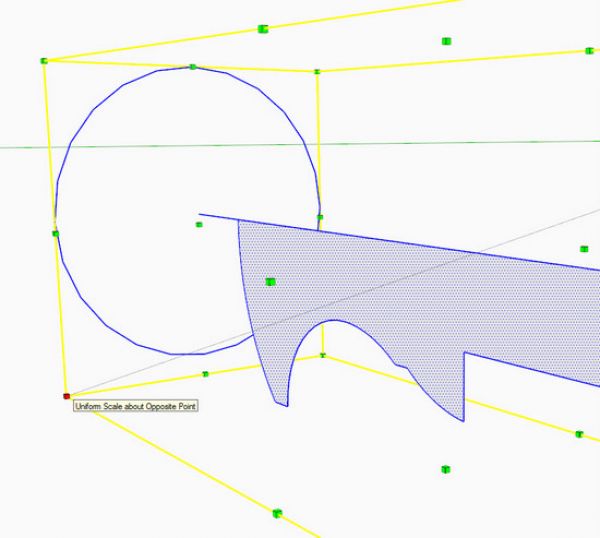
Step 7: After turning the scaled-up shape, use the Scale Tool to reduce back to the original size. The type in factor should be 0.1 or 1/10.
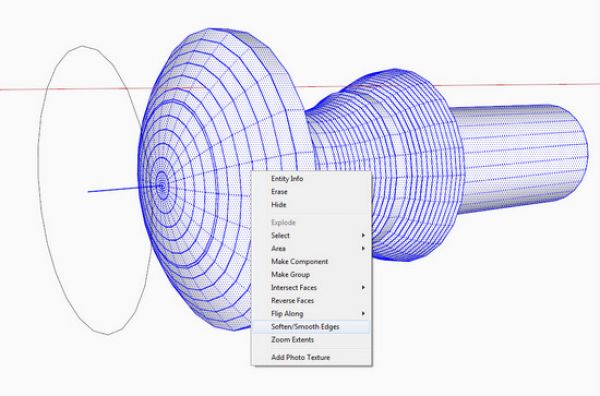
There is one more step required to remove all the extra lines. Double click on the turned shape to select all the edges, lines and faces as shown below. Right click on the selection and choose Soften/Smooth Edges from the pop-up menu. This will clean-up the turning.







Comments
The holes problem is a royal PITA and shouldn't happen. Please vote for the suggesation that I made on the Google site that they should address this isue. You can find the question here: https://www.google.com/moderator/#8/e=24a7a
Also please spread the word.
Thanks for the workaround on the holes. However, you've set me straight with a problems I've had understanding why I could not ALWAYS get the follow me tool to work. I was not selecting the path BEFORE I clicked on Follow Me. I know, not your intention, but it helped. Thanks! :)
Log in or create an account to post a comment.
Sign up Log in