Build a Shaker Lap Desk – Part II
Learn how to construct a delicate inkwell drawer in part II of the modern Shaker Lap Desk.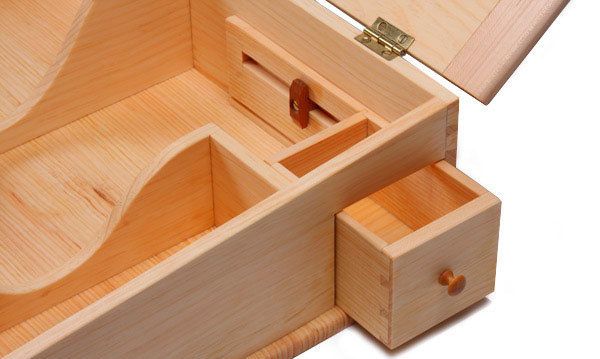
In part I of the Shaker Lap Desk project, I focused on constructing the carcase and using the proper wood species for cross grain gluing of the bottom to the frame. Now in part II, lets switch focus and concentrate on the desk’s delicate inkwell drawer.
A Digital Inkwell Drawer
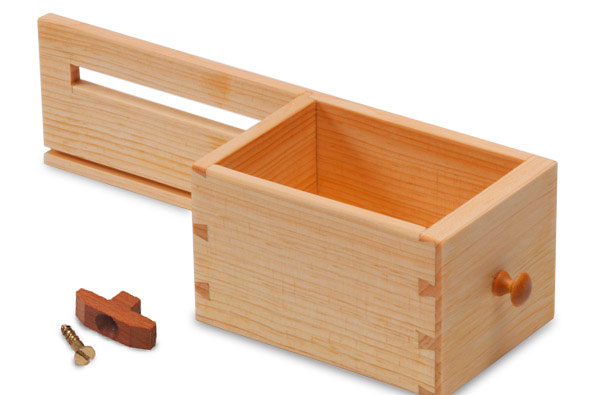
Now for the fun part: the tiny inkwell drawer. With a front that’s only 3/8-in. thick and sides made from 1/4-in. stock, the drawer’s small scale makes for a challenging joinery exercise. The smallest chisel in your arsenal—an 1/8-in. or 3/16-in. one will work well—and a good set of eyes will be required for these smallest of dovetails. Despite its delicate proportions, this drawer is anything but weak. While the left side measures in at only 3-7/8 in. long, the right side is about 9-1/8 in. long and acts as a full-length glide. The actual stop is made from a small scrap of maple, 5/16 in. thick by 1-1/4 in. long by 5/8 in. high. A single brass screw holds it in place. The full-length glide, coupled with a hardwood stop block, makes for a drawer that functions flawlessly, feels firm, yet appears delicate.
 |
|
The tiny drawer features half blind dovetails on the front, a full dovetail on the rear-left side, and a simple rabbet on the rear right. Built of maple, the drawer stop is held in place with a single brass screw. |
The drawer front is attached to the sides using half-blind dovetails. On the back end of the drawer, the joinery changes a bit. The left rear corner is joined using dovetails but the right side is rabbeted and fits into a dado cut into the mating side. Behind the dado, I cut a 3/8-in. stopped slot that extends to about 3/4 in. from the end. Cut the slot at the router table and square the ends with a chisel.
Built from 1/4-in. stock, the drawer bottom fits into a 1/8-in. sawkerf cut along the inside of the two sides and the drawer front, while the back is trimmed to fit just above the sawkerf. Be sure to take that 1/8-in. sawkerf into account when cutting your drawer bottom to size. Once it’s slid into place, a small brad pins it in place on the back side of the drawer.
 |
 |
|
The drawer stop rides within a simple groove cut into the longer drawer side at the router table. |
Dovetailing the drawer will require a steady hand, sharp eyesight, and the smallest chisels in your arsenal. |
A Flush Fit Depends on the Stop
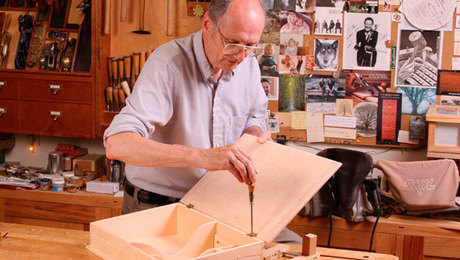
A perfectly flush drawer will depend largely on how accurately you install the small hardwood stop block. Begin by test-fitting the drawer, making sure that the drawer is flush on the outside as well as with the divider in the back. Now position the stop in the groove, flush with the drawer back, and drill and screw it into place. Once you’ve installed the stop, pull the drawer open to verify that it extends fully. If not, make the slot a bit longer to allow for full extension. Be sure your drawer front sits perfectly flush, sanding it to a perfect fit.
Read the Entire Three-Part Series
CLICK HERE to download the hand-drawn project plan.






Comments
The Part Three link does not work!
Fixed.
Log in or create an account to post a comment.
Sign up Log in