
Sometimes it is useful to add a watermark to your SketchUp drawings. Perhaps you want to add a notice of copyright or you’d liked to mark the images as drafts. You could do this in some image editors such as Photoshop or dedicated applications for adding watermarks but you could create a style in SketchUp. If you make the SketchUp style, you can use it on any model and apply it to all the images at once. Here’s a way to create a watermark almost entirely in SketchUp.
For this example I am creating a notice of copyright. To get the copyright symbol on the PC, I opened the Character Map which is usually found under Program Files>Accessories. You click on the character you want and copy it so it can be pasted later however many special characters can be typed using Alt and the number keypad. To get ‘©’, hold Alt and type 0169 on the number keypad.

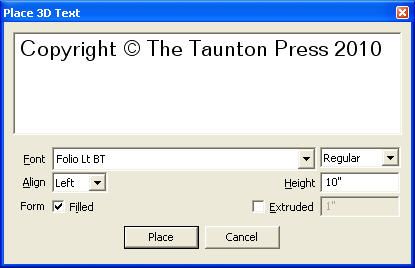
So now we have the copyright symbol now open SketchUp. I’m doing a flat watermark but you could make a 3D watermark if you wish. I chose Top and set the camera to Parallel Projection. Next click on the 3D Text tool or get it from the Tools menu. Choose the desired font. The height isn’t important but if you want flat watermark text, uncheck the box for Extruded. Then type your text and click on Place.
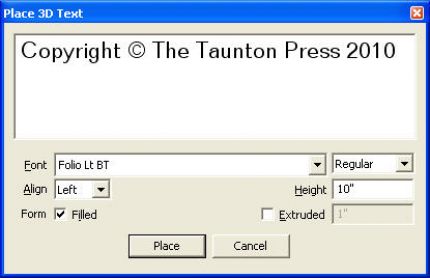
Place the text component in the model. I just clicked on the origin to set the text. Then use Zoom Extents to make the text fill the window. If the text is flat, it will appear with its back faces up. Normally I advocate keeping front faces out but for this exercise it won’t matter.

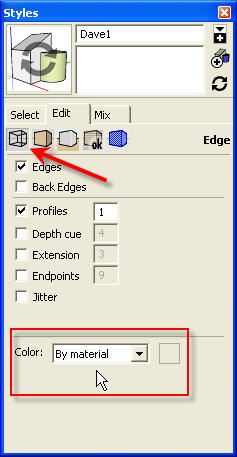
Open the text component for editing, select all of the faces and edges with a selection box and apply a color. I used a dark gray. In the Styles dialog box, click on Edit and choose the wire frame cube icon below the Select tab and then change the Edge color to By Material.
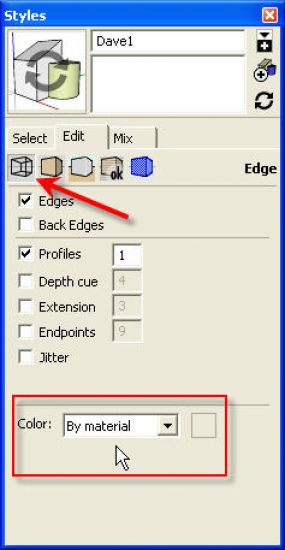

Now export the image as a JPG or PNG file. I exported the image at 4000 pixels wide. Then open the exported image in an image editor, I used Picasa, and crop it tightly to the text. Save the changes. You could actually avoid this step by resizing the SketchUp window so the text just fits but when you restore the window to its previous size, you’ll need to reset the toolbars.
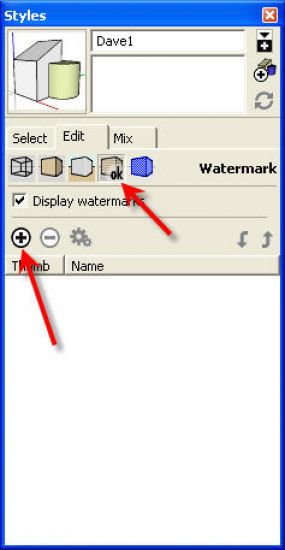
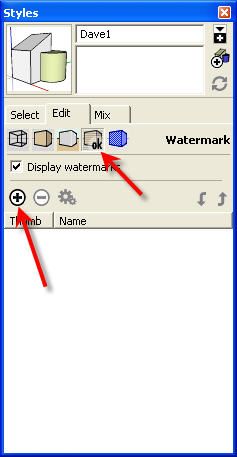
Now start a new file in SketchUp. Go to the Styles dialog box, click on Edit and choose the Watermark button. Click on the plus sign in the circle to add a watermark image. Navigate to the image you’ve just made and open it.
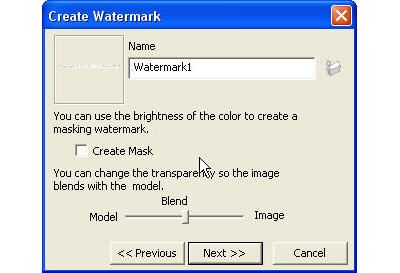
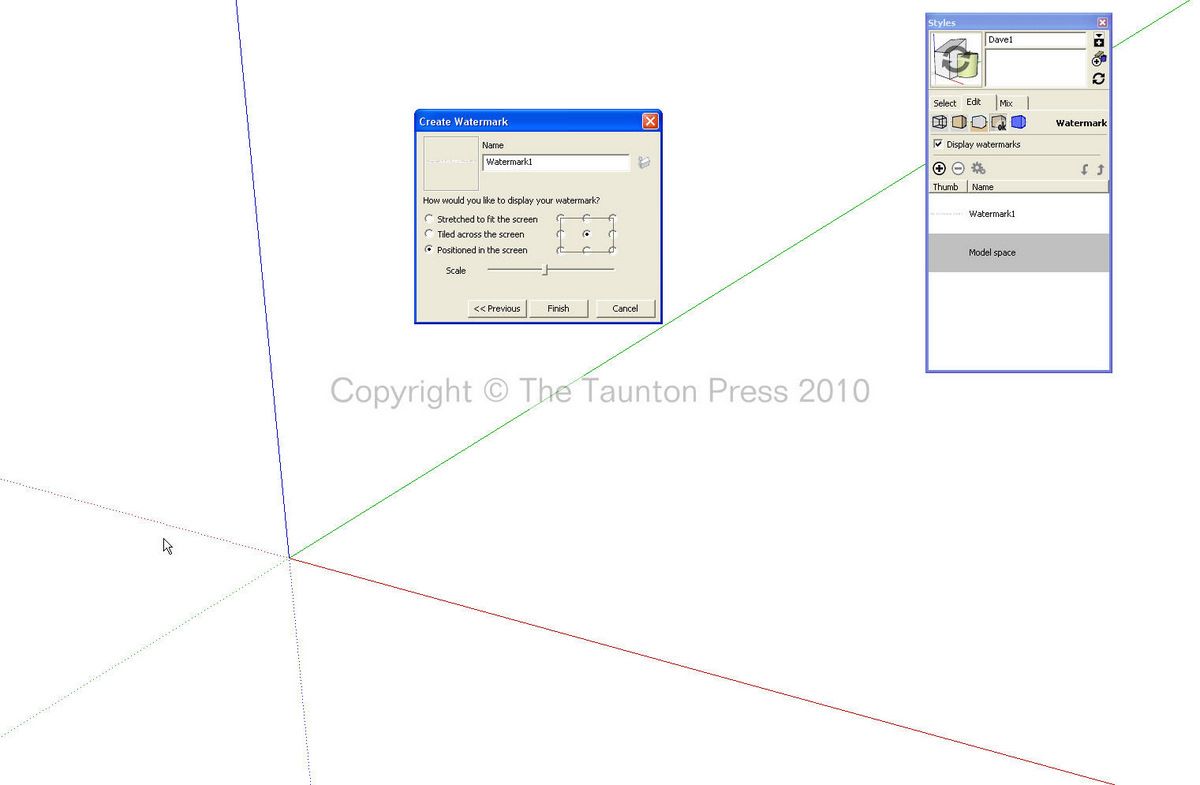
After opening the image, it will be placed in the model window and a series of boxes will give you options for adjusting the appearance of your watermark.
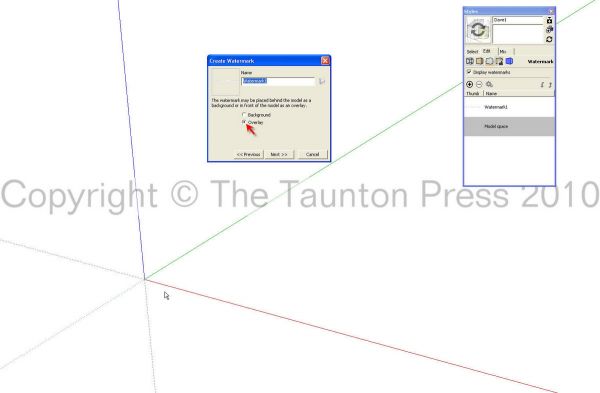
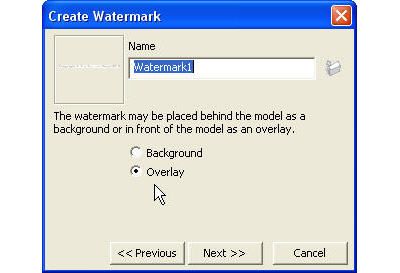
In this case I am going to create the watermark so it overlays the model.
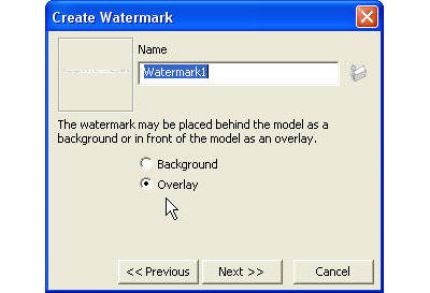
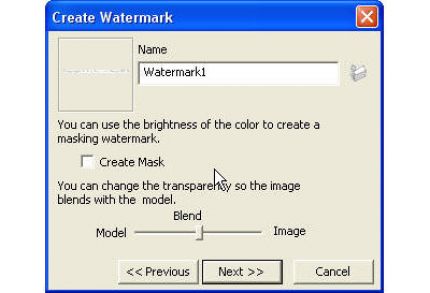
You can adjust the transparency of the watermark with the slider. You can also change the name of the watermark if you wish.
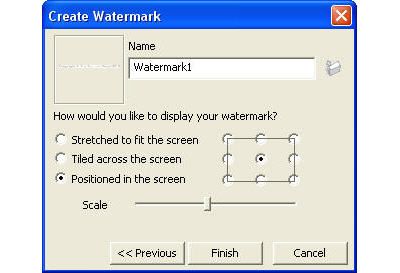
The final option box gives you sizing options. I’ve chosen to position the watermark image and adjusted the size with the slider. The grid of radio buttons on the right allows you to choose where on the screen the watermark will appear.
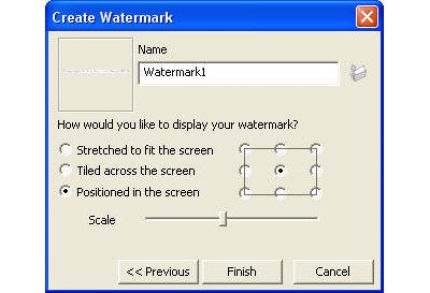
Finally hit Finish and your watermark has been created.
If you need to modify the watermark later, you can highlight it in the list and either double click on it or click on the gears icon to get to the options for changing it.
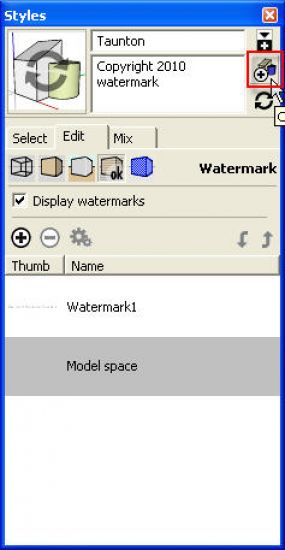
At this point you have modified your template style in the current model but the watermark style isn’t available for other models yet. To make it available for later use, follow the next steps.
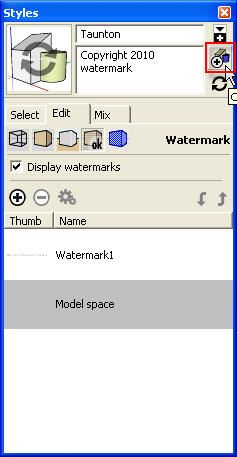
Go to the Styles box. At the top, type a new name for the style and add a description if you wish. Then click on the “Create New Style button. This is the icon on the right with the plus sign in a circle. Now you have a new style in the In Model style library. Click on the icon above Create New Style to open the secondary selection pane. The icon will change to a minus sign when the secondary pane is open. Set the upper pane to the In Model library and the lower pane to the destination library for your watermark style.

Click on the thumbnail for your watermark style and drag it down to the lower pane.

Now the style will be available for use in other models. To use it, go to the library in which you saved it and click on the thumbnail to apply it.
If instead of changing the style you are using in your model, you’d rather just add the watermark to it, click on the Mix tab. Set the selection pane at the bottom to the library in which you saved the watermark, click on the icon and drag it to the box labelled Watermark Settings. This will apply only the watermark to the current style.

Note that the style thumbnail in the upper left shows the circular arrows. This indicates the current style has changes to it. If you want to update the current style to include the watermark, click on the thumbnail.

With the style updated for the model, any scenes using that style will display your watermark. I’ve used the watermark on the drawings of Jeff Miller’s Cherry Bookcase which is featured right now in the Video Workshop. the plans and SketchUp model for this bookcase are also available from the Digital Plans Shop.








Comments
Thanks for all that great and detailed info.
I am having a great time uncovering all of the in's and out's of Sketchup. Looks like I've got another thing to work on.
Keep up the great tips! Thanks.
Jason
Log in or create an account to post a comment.
Sign up Log in