This isn’t strictly a woodworking project. I just wanted to get you thinking outside the box a little.

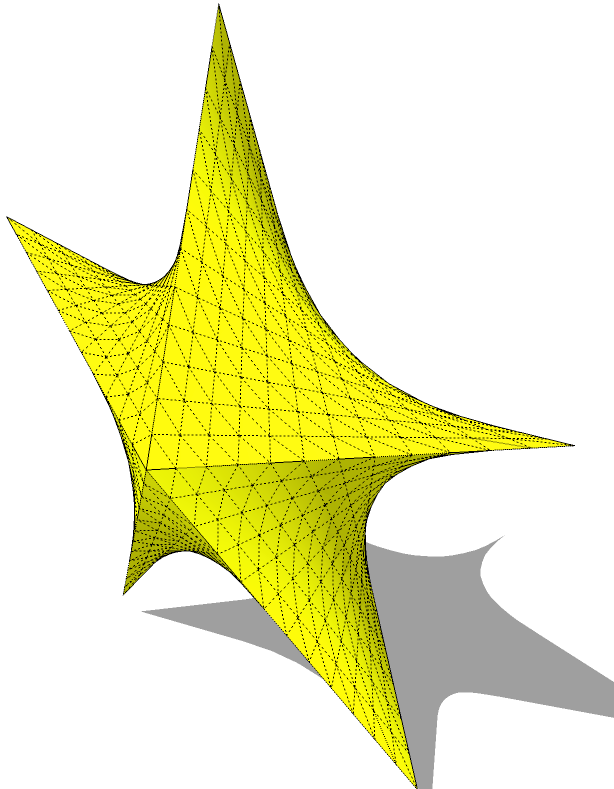
This star is much more simple to draw than it might appear. I used the Weld plugin along with Extrude Edges by Rails.
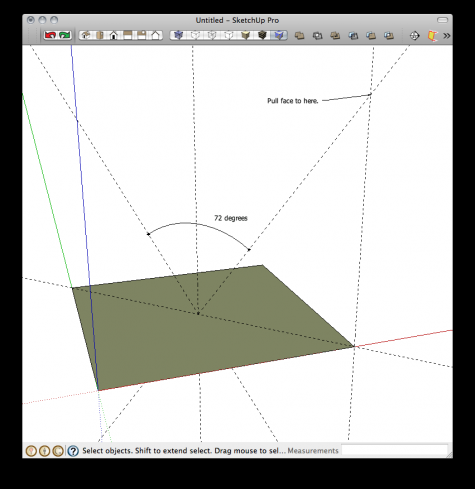
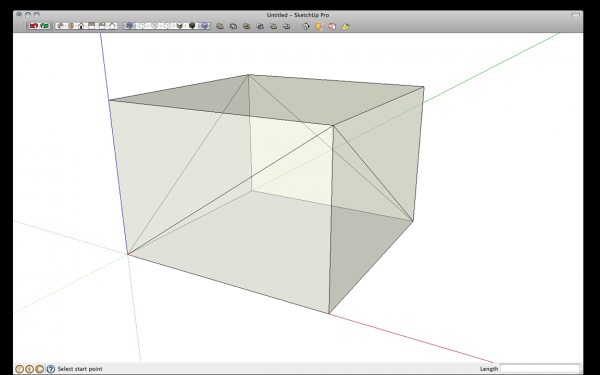
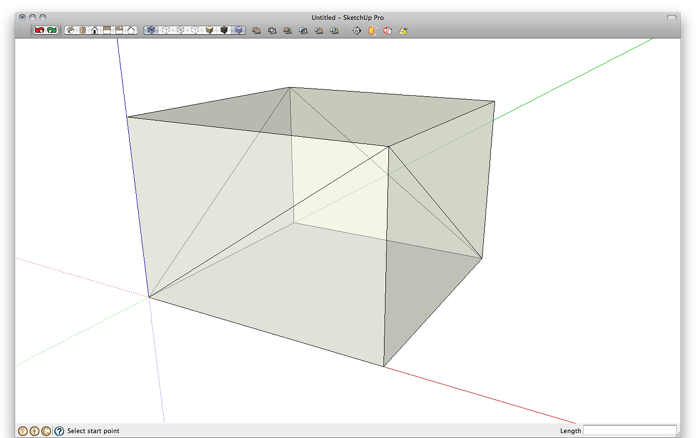
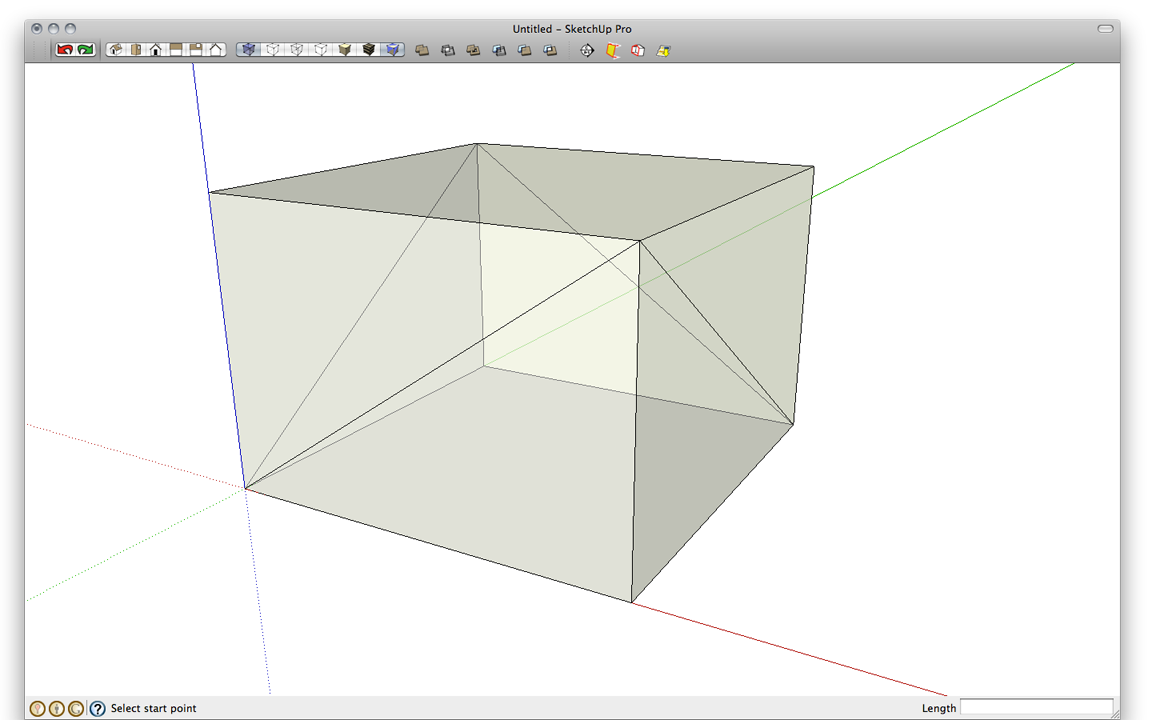
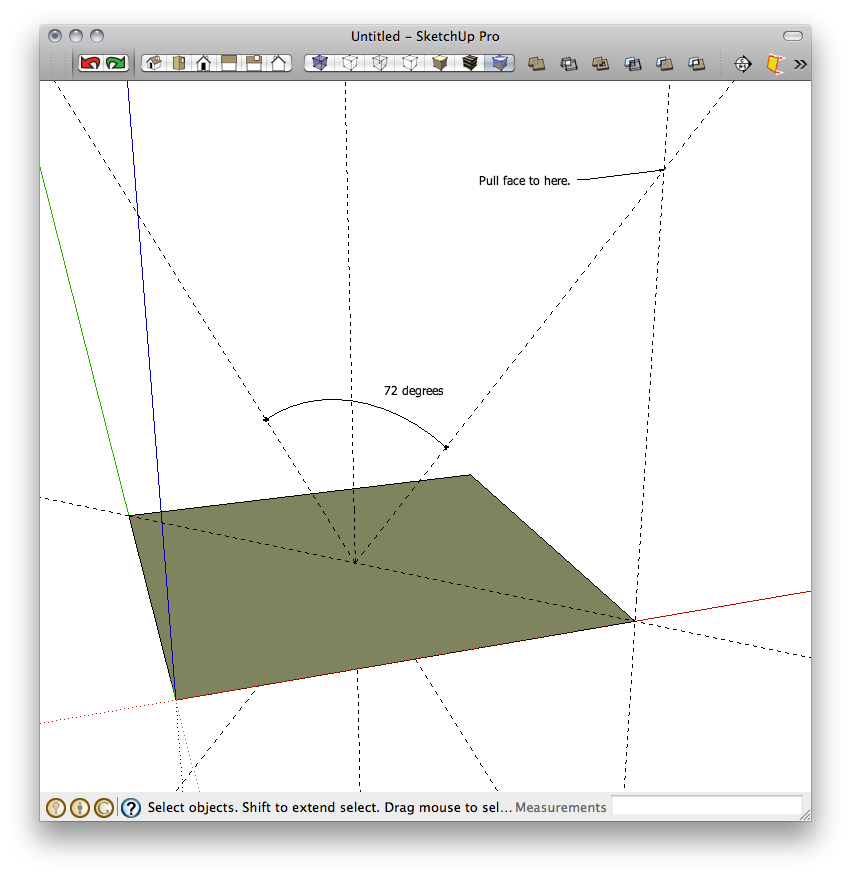
To start with I drew a box to aid in laying out a section of the star. I started with a square on the ground plane. Then, to figure out the height of the box, I used some guidelines. I set a couple of them at 36 degrees off vertical toward diagonally opposed corners. the 36 degrees is because there’s 72 degrees between points on the five-pointed star. I pulled the square up so that the top corners intersect the angled guidelines. Then I drew the diagonals you can see in the image, above.
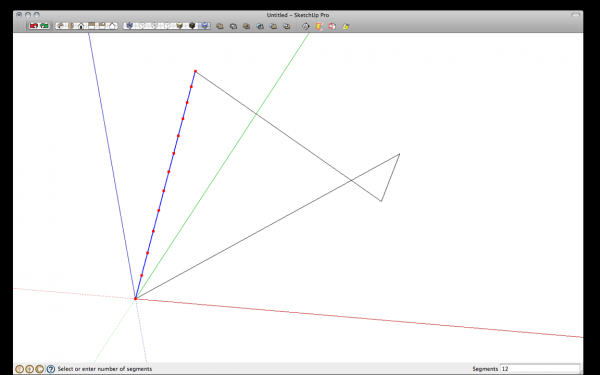
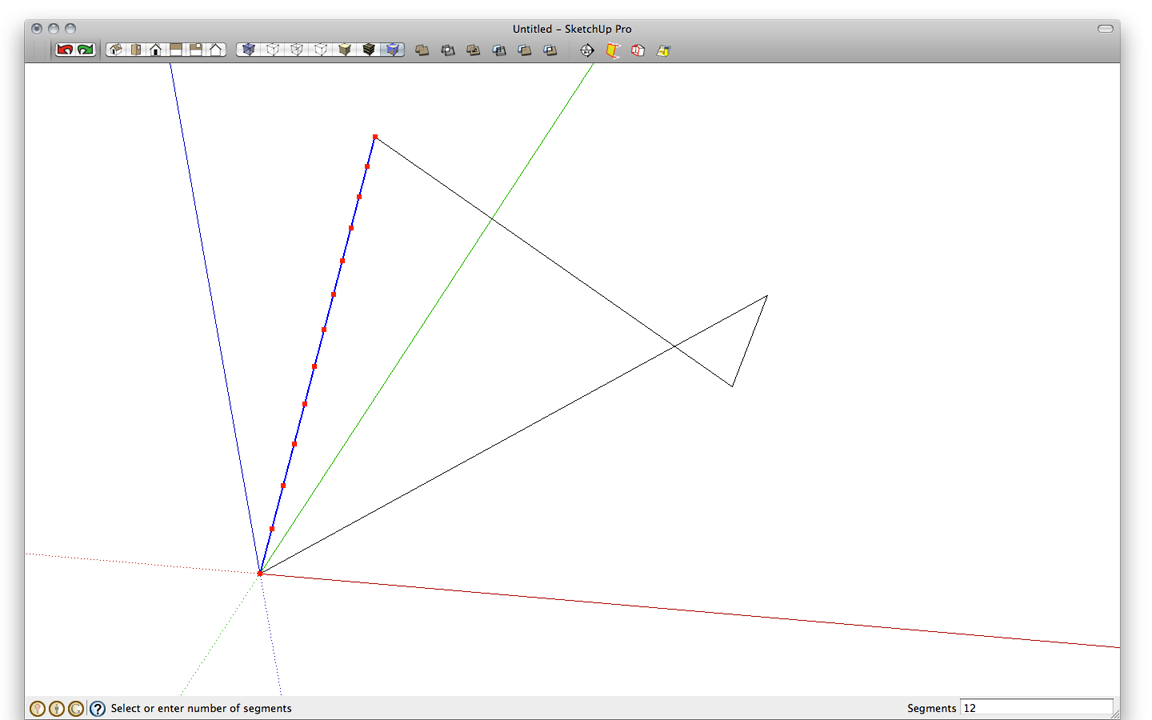
After deleting the edges that aren’t needed, I prepared for running Extrude Edges by Rails by dividing each remaining edge into 12 segments. Select one edge at a time, right click on it and choose Divide. then type 12 and hit Enter. Immediately after dividing the line and while it is still selected, weld the line and choose ‘No’ to the questions of closing the shape and finding faces.
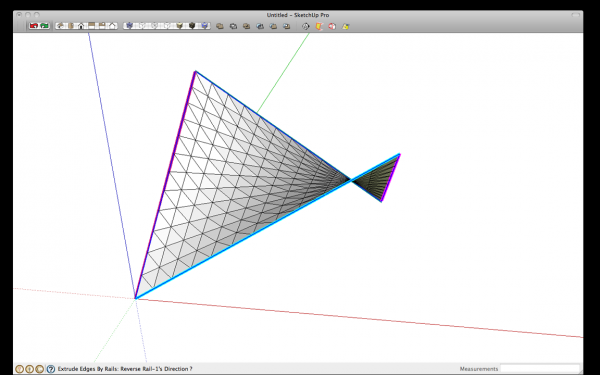
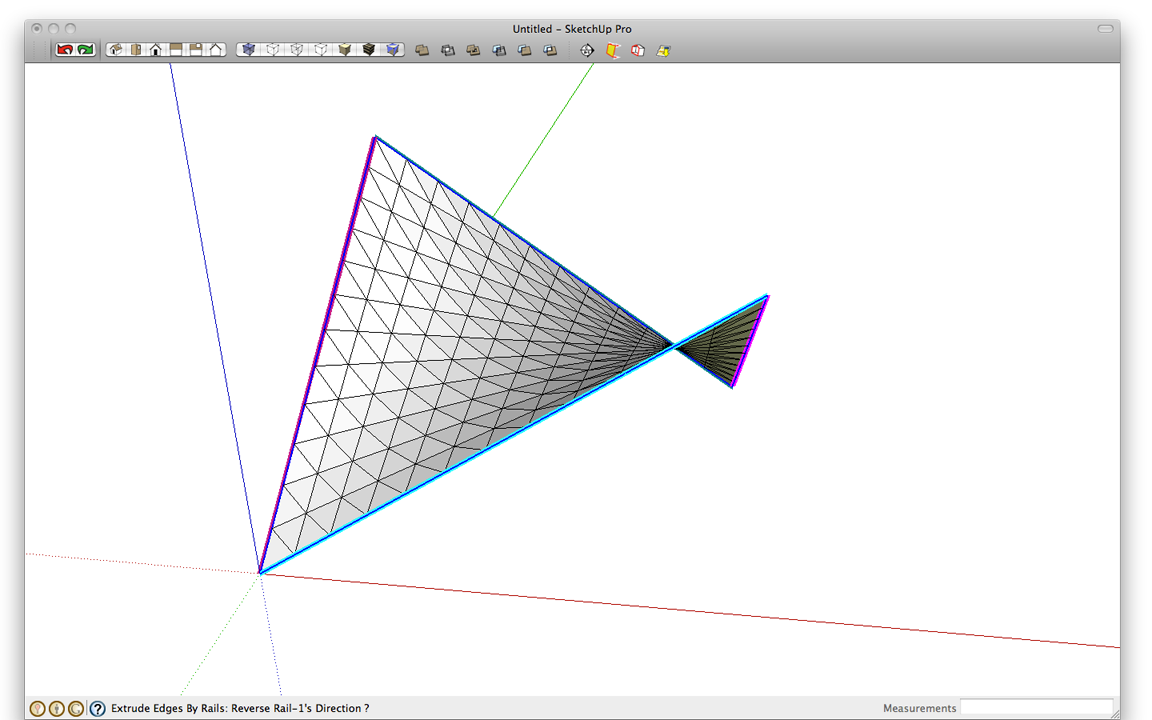
Start the Extrude Edges by Rails tool. Select one edge (shown in blue) as the profile then select the two edges as shown in purple as the rails and select the fourth edge as the melding profile. the plugin will generate the saddle shape and you’ll be asked a number of questions. For most of them you can answer no but correct face orientation if needed, soften edges and delete the original edges.
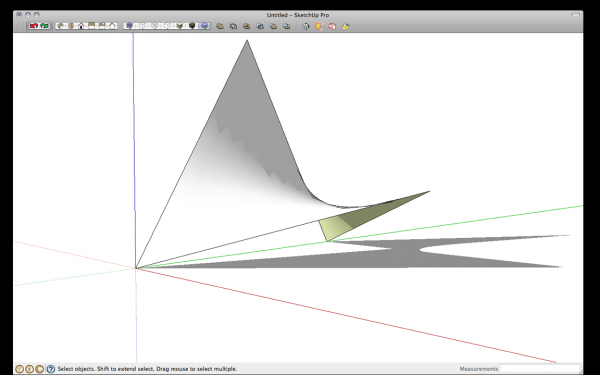
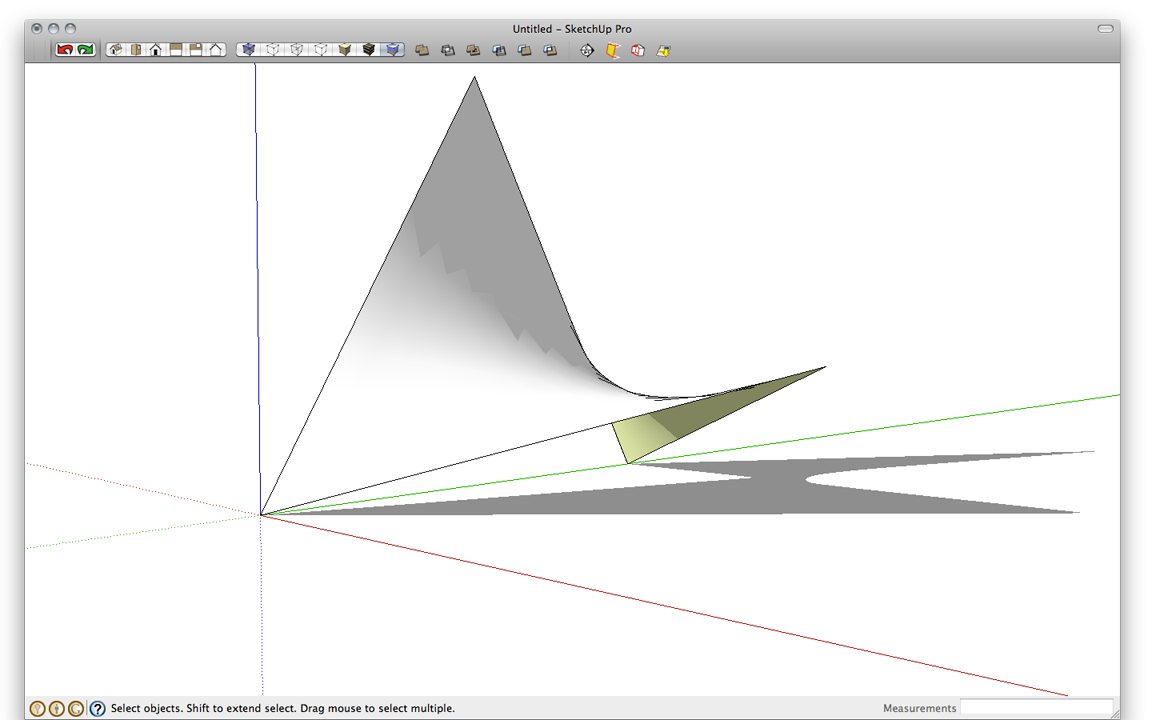
the result should look something like the above image. the plugin makes a group. I converted it to a component. Then I rotated it so its lower points are on the green axis.
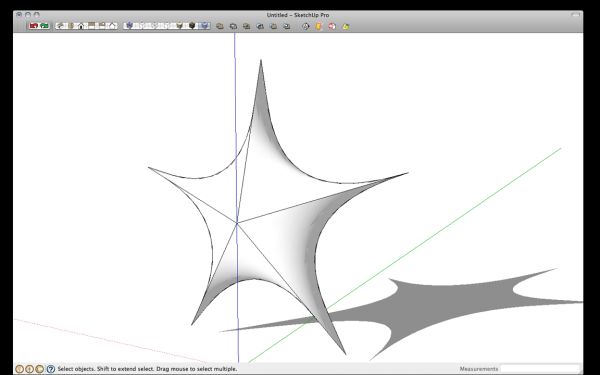
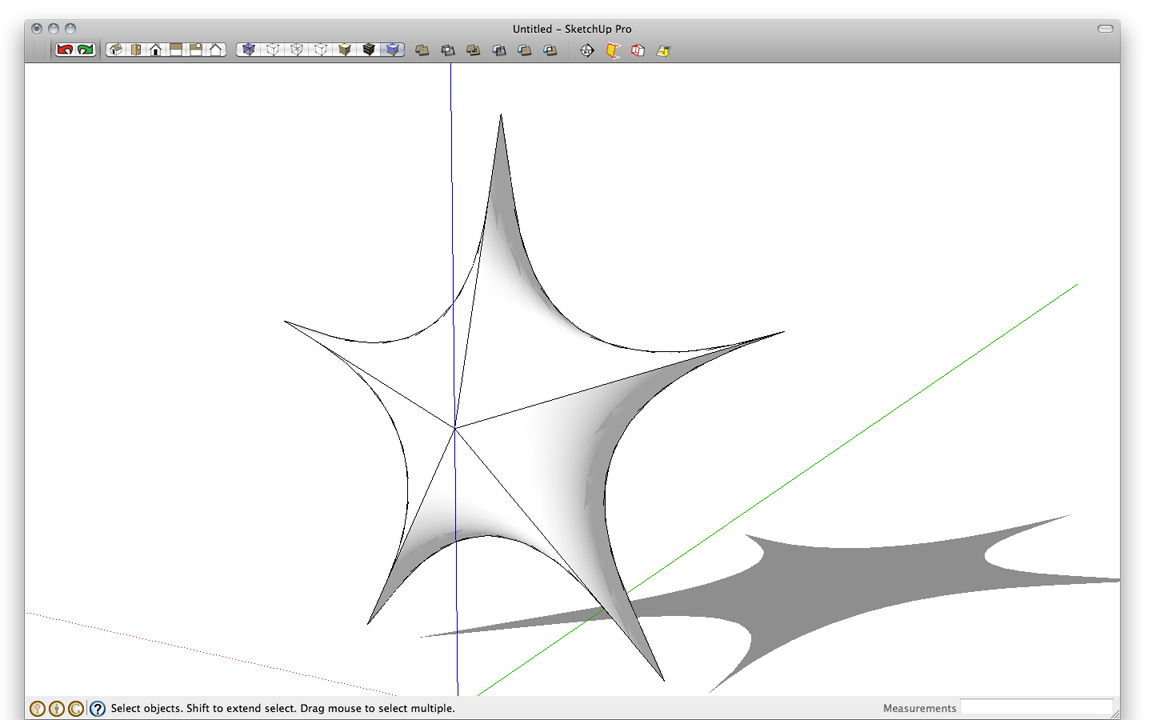
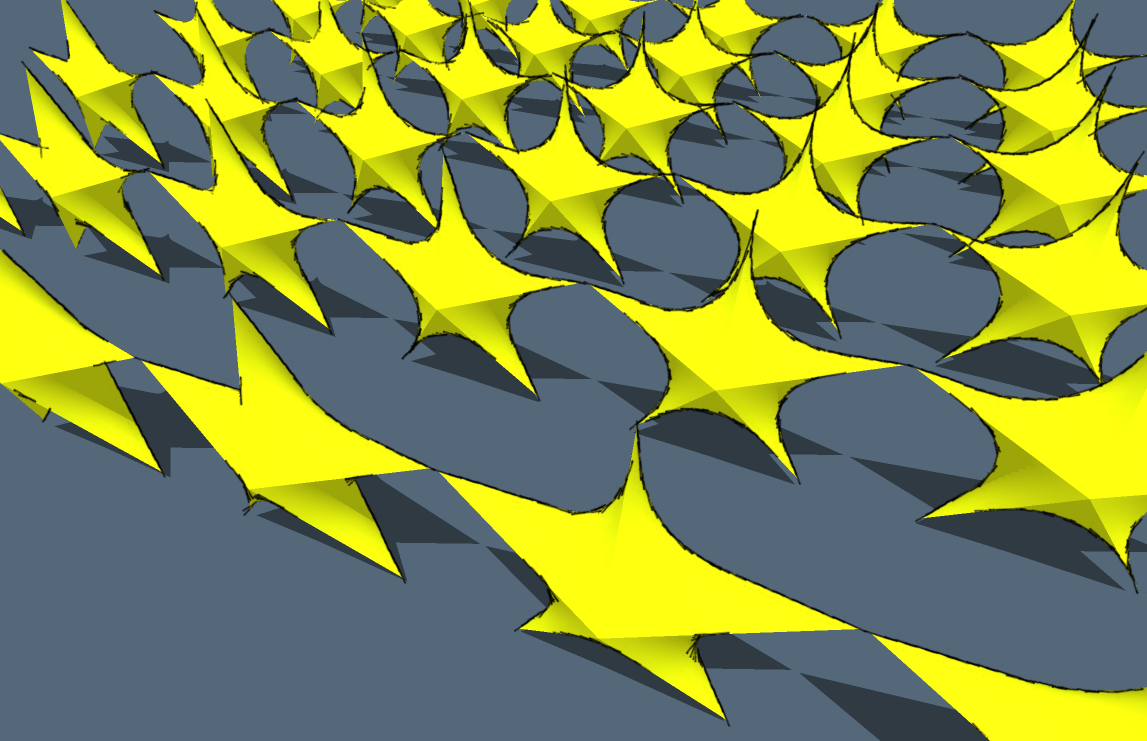
To finish up the star, Rotate/Copy the shape 72 degrees and make 4 copies.. Select all of the copies and choose the Scale tool. Push in on a scale handle over the center of the star to flatten it.
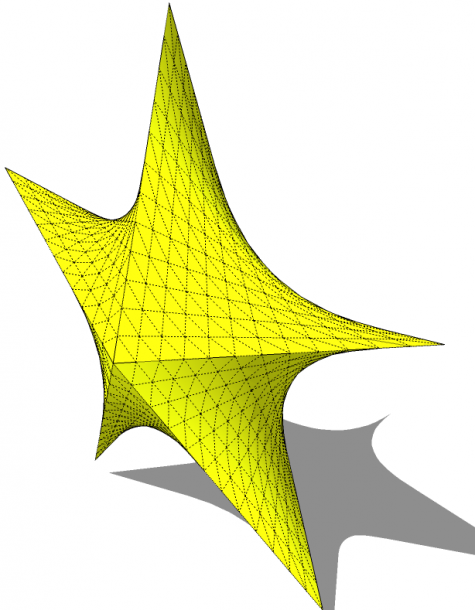
Open one of the components for editing and hide the edges. In the above image I’ve got Hiiden geometry turned on so you can see the shape of the surfaces. Add a material if desired and the star is complete.
The star itself may not be something you’re interested in drawing but I hope it would give you a jumping off point for drawing some sorts of complex surfaces. If nothing else, give the star a try just for the practice.




Comments
Is it just me, or are the screenshots not visible?
Hi, same for me, not visible.
Sorry Dave I can't see pics either.
Sorry folks. I don't know what is wrong. They were visible when I posted the blog. I'll look into it and see if I can fix it.
Dave
Oh, it's working now, thanks! But "exercise" in the title is still misspelled ;)
I wonder if anyone else has tried this? I followed the steps above and didn't get the correct sized "portion" of the star. I suspect it's something I did, but wanted to see if anyone else had difficulty?
mrossk, thanks for the spelling correction. that's what I get for doing the blog post on my tiny Mac screen.
Perhaps I described the set up for the lines poorly. I added a new image up at the top. For a five-pointed star you'll need 72 degrees between points. The angle is measured between the points on the diagonal of the square. I hope that image clarifies it.
Dave
Hi Dave- Yes, that takes care of it! Originally, I was setting diagonal guidelines "orthogonally" , on what will become the face of the square you extrude. After wrestling with it for awhile myself I came to the above sort of realization and got a good result. And fyi, I used the "curviloft" plugin and didn't need to do the "divide line segment" and "weld" to get a decent shape. saved a couple of steps. But, as usual, thanks very much. A great exercise!
Michael
Log in or create an account to post a comment.
Sign up Log in