Playful Furniture That Breaks the Rules
Unorthodox construction brings cabinets to life
Synopsis: If you want to make an “exploding” dresser or a chest of drawers that stands with a “hands-on-hips” attitude, you’re going to have to take a page from Judson Beaumont’s book and abandon traditional furniture-making techniques for a while. Instead of traditional construction, Beaumont creates his often-whimsical designs using techniques inspired by aircraft construction and the human body. He begins by assembling an internal skeleton using a nail gun, skins it with thin sheets of plywood, and then adds veneer or paint. This technique allows him to make virtually any shape, from dramatic curves to human postures. And every single piece of Beaumont’s furniture is completely functional.
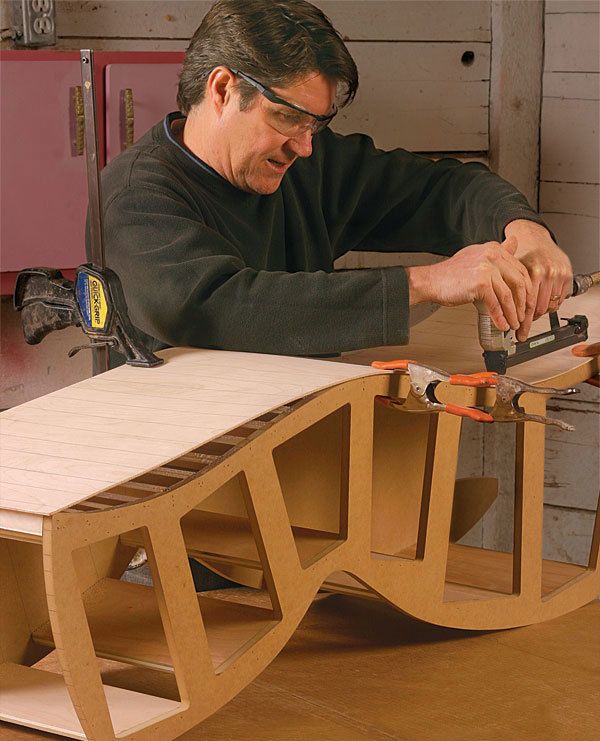
Of all the furniture I design and make, the Cindy dresser is the most popular. Like most of my furniture, it is curvaceous and playful. It also is completely functional, as furniture should be. However, to make it I had to forego traditional methods of furniture construction, relying instead on techniques inspired by aircraft construction and the human body. I begin with an internal skeleton, assembled with a nail gun, and then skin it with thin sheets of plywood, which in turn can be either veneered or painted.
My technique can be used to make just about any shape, so I can design furniture with dramatic curves, exploding or compressing parts, or distinctly human postures. The possibilities are truly unlimited. That’s why I’m sharing my methods with you—your designs should be limited only by your imagination, not by the traditional techniques of furniture making. Some of you will be offended, I’m sure, but I hope that most will be inspired.
I start with a drawing and templates
I spend a lot of time sketching out my designs. When I’m happy with a design, I do a full-size drawing on paper, standing back to check that everything works at full scale. Only then do I begin building.
I first make a template of the front, including the drawer pockets, and every drawer front and back. I use the template of the front for the back, too. I make the templates from 1⁄4-in.-thick MDF. I cut them out with a jigsaw and smooth the curves with rasps and files, trusting my eye and hand to tell me when they’re fair. I’m constantly stepping back and checking that the lines flow nicely.
Then I build the skeleton and add the skin
After I’ve finished the templates, I get to work on the bones of the cabinet, using the templates to make the front and back from MDF, and the drawer fronts and backs from plywood. Then I use plywood ribs to connect the front to the back.
From Fine Woodworking #217
For the full article, download the PDF below:
Fine Woodworking Recommended Products

Stanley Powerlock 16-ft. tape measure

Drafting Tools

Sketchup Class


Log in or create an account to post a comment.
Sign up Log in