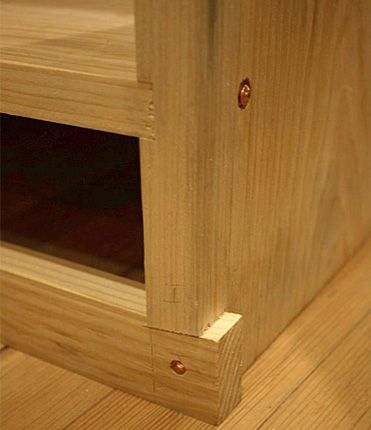
Last Sunday afternoon, my wife and I were talking about the need for more storage in our small kitchen. I still hadn’t finished our lower kitchen cabinets and after they’re done, a chimney cupboard will be next on the list–mostly for storing large pots and pans. After the holidays, and another generous culinary gift from her parents, my wife was having a hard time finding a place to put things away. I figured I would head out to the shop and build something to fill the eventual chimney cupboard space with the time I had before dinner. This project turned out to be a great lesson in why woodworking is so fun, and useful.
|
More on Rustic Furniture |
Building the 3-Hour Cabinet
• I began by running three 1-in. thick by 12-in. wide rough-sawn hemlock boards through the planer, just enough to get rid of most of the sawmill marks.
• Next, I brought one of the boards back into the house and placed it where the cupboard would stand. Satisfied with the height we wanted (65-1/2-in. tall by 16-in. wide), I headed back into the shop.
• After laying out the shelf locations on the (7/8-in. thick) sides, I thought thinner shelves would look better, so I ran one of the three boards through the planer down to 3/4″.
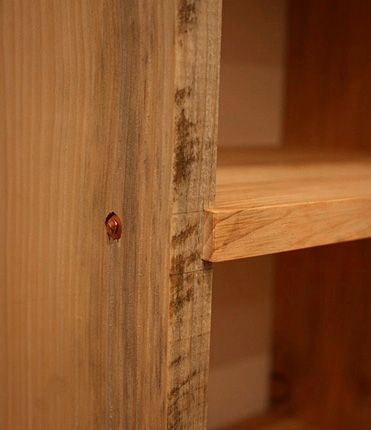
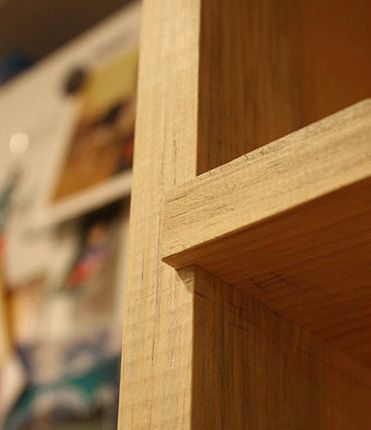
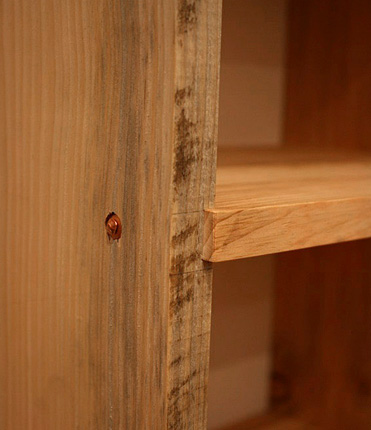 Shelf detail. |
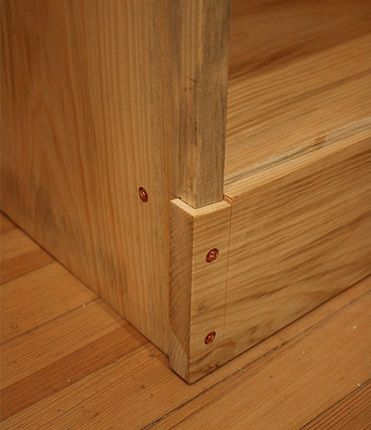
• Next, I cut 1/4-in. deep dadoes for the shelves at the tablesaw. The shelves were later secured with copper nails. I chose to leave the visible jointer marks on the edge grain. |
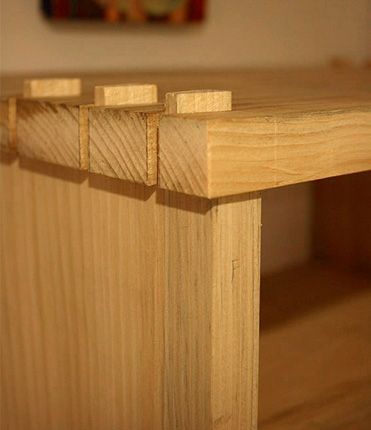
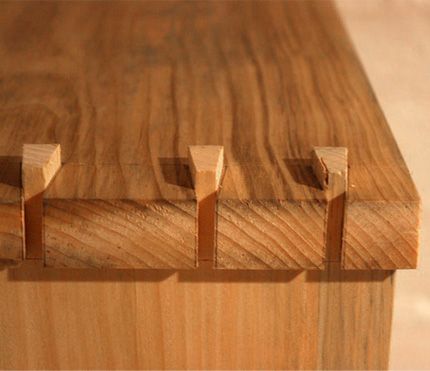
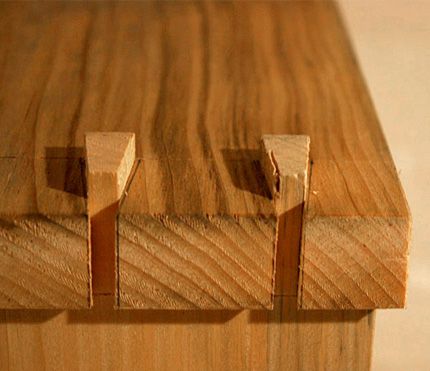
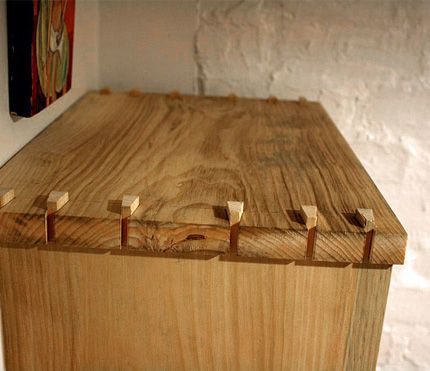
 Dovetailed top. |
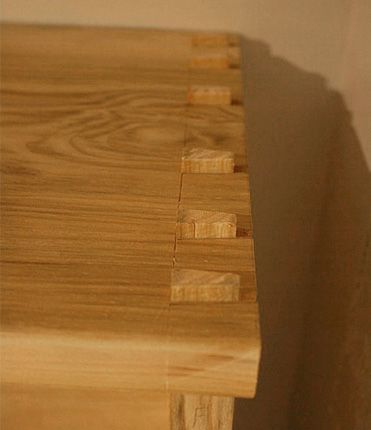
• I hand-cut dovetails to fit the top as well as the front kick board. Again, I didn’t plane down the exposed dovetails but rather, left them rough. |
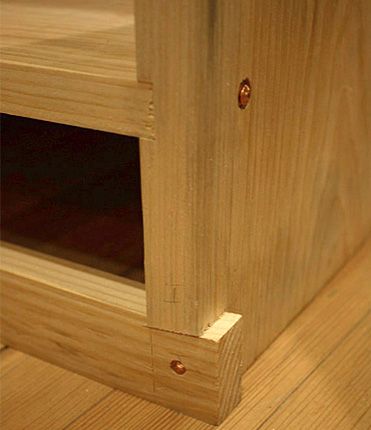
 Rear bottom rail. |
• Finally, I added a bottom rail to the back and also a rail under the top shelf to prevent racking. The rail under the top shelf will also allow the cabinet to be screwed to the wall if necessary. |
Construction is done. I made it a point not not to clean up a thing–no sanding to remove layout marks, no planing edges to remove milling marks, and no chisel work to fit the dovetails.
Time for Assembly
When it came time for assembly, I nailed the shelves into their dadoes, nailed the kick board on the front and railes in the back, and tapped the dovetails home. Notice how no glue was used anywhere. This was done in part to keep with the spirit of the piece but also because my garage shop isn’t heated. At 20 degrees, glue simply wasn’t an option, neither was finishing for that matter.
This was one of my favorite projects to date. There is something freeing about building for utilitarian use only. It took deliberate effort to not clean up edges, or chamfer proud dovetails, but doing so shows the honest construction and allowed me to have the “finished” piece back in the house in about three hours. It turns out it’s one of my wife’s favorite pieces also, since it could so quickly be put to use.






Comments
Well done, John. It would take me at least 3 days, never mind 3 hours.
I'm gonna try that. But I'll do the joinery with dry (unglued) miller dowels instead of nails. Looks a little bit better and becomes knock-down.
I agree Stew. Anything with the word dovetail in it, takes me out of the 3-hour window. Nice work though. It came out well.
In todays busy, busy world it is quite must bring a great deal of satisfaction to complete a worthy project in a short time. Well done!
Sure. Where am I going to find Hemlock anywhere in Wichita, KS.
Or anywhere in the whole state for that matter? I doubt if any one of the surrounding states have a source either.
Thanks!
Bob
I guess you could convert that design for plywood. Not much for different woods in our stores here. Pine is about it.
Bob,
I happen to have hemlock from a friend who cleared a few trees in his yard in MA. It's the first time I worked with it, but if I didn't know where it came from, I would have thought it was pine. It worked just the same. A pine 1" x 12" from any local store would be perfect for this project. Thanks!
John
Very nice design and I have the perfect place for it. The design is key - not the wood; although free wood is great no matter what the species. Unfortunately in Miami Fl the free roadside wood is mostly bamboo and palm - try to make something out of that!
Also it's nice to know that everyone has a project to be finished. I told my wife that the first thing she says to me in the morning should not be a list of backlogged projects - she just can't help it though, especially when navigating through piles of materials.
Remington, I think your comment comes across a bit pretentious; John clearly used the copper nails on purpose, and he didn't need this to be "knock-down." And since he used no glue, it's "knock-down" anyway; it just won't go back together neatly. But since it's a placeholder for an eventual permanent cabinet, it doesn't need to be portable. I just don't go for comments that tell someone how their work would "look better" the way YOU would do it. Sheesh...
Through dovetails in 3 hours in a 20-degree shop? Hat's off, John. And I complain when mine's not quite 60 in the morning...
I like how you left things proud , it gives a different look to the piece . Some of us woodworkers( me being one of them ) are so concerned about all the details being right, it can be stressful at times . I'm sure this style is very freeing in the whole building process . Thanks for sharing the build with us and for opening my eyes just a little more .
I think this Quickie project was great!--last year someone asked me to make them a very rough "hutch"--everyone was pleased with the results and i found it very challenging to do--you really should try some rustic furniture it will free you AND educate you.
I think you did a wonderful job...I love the fact that you kept the cabinet simple, the detail is still there but not over done. To many times we try to make our pieces have a wow factor and we go over board and it's just way to much. The color of the cabinet goes well with brick wall. Very impressed for 3 hours of work!
very nice! 3 hours, that's how long it takes me to set up!!!
cool use of hemlock.. I may have to try that.. we have lots of hemlock in my region, never thought of building furniture with it...good work
Pabs
Why is it when I try to print a copy of the article, I get only
one page? How Can I get a print of the whole article i.e the 3 hour cabinet.
"have nothing in your home that is neither beautiful or useful" Nice piece - it qualifies.
This is what's so great about woodworking -- you can go in so many diverse directions. Jewelry boxes, fine detailed inlays on entry tables, carving, diverse finishes, contrasting woods, rustic furniture and sapling chairs, hand tool techniques, skill saw projects and green bowl turning ... there's no end to the adventures awaiting the woodworker. This is one fine example, John. I try to master, but will never achieve, your 3-hour capability. It was great fun reading about your project. You've given me the incentive. I think I,ll shift gears for a little while and try some rustic projects!!!
John- A really nice job done with often problematic wood.
Hemlock is quite common where I am in the mountains of Upstate New York. Hemlock costs about as much as White Pine maybe a little less. Our local mills have both for about $.55 a board foot rough surface.
The wood is more brittle than White Pine and does have a tendency to split, especially when screwing into the end or on the flat close to the end of a board. Hemlock is a bit stronger than pine and will finish well with a shellac sealer prior to painting or a very light (1/2 # cut) shellac prior to staining. I've had better luck with the combo stain/poly finishes.
It can be stained of course without sealing but the results most likely be a surprise- Not what was expected.
Definitely a wood experience.
Log in or create an account to post a comment.
Sign up Log in