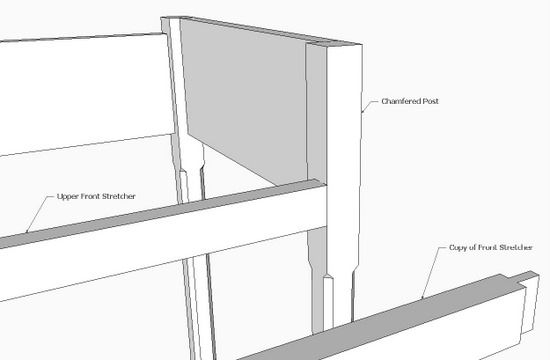
Several readers of my book are having difficulty making the mortise on the Chamfered Post Table. The reference is “Create the Leg Mortises”, Step 19 on page 50. In this section of the book, I showed my standard procedure of using the stretcher’s tenon as a guide in creating the leg mortise – in X-ray view.
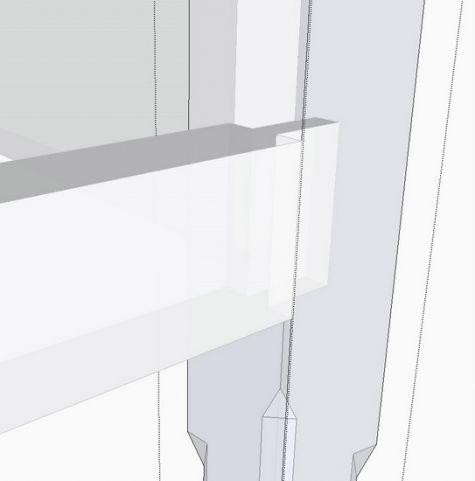
I must admit that it is sometimes difficult to see the tenon’s boundary after placing the leg component into edit mode. SketchUp fades out all other graphics when placing a component into edit mode, so the tenon can be hard to see. After putting on my glasses, I orbit and zoom to get a better view of the dimmed tenon. This works for me, but there is an alternative you can employ.
SketchUp provides an adjustable setting which can be modified to improve visibility of the tenon. This is done by changing a slider bar in a SketchUp dialog box. Here is the process to do this:
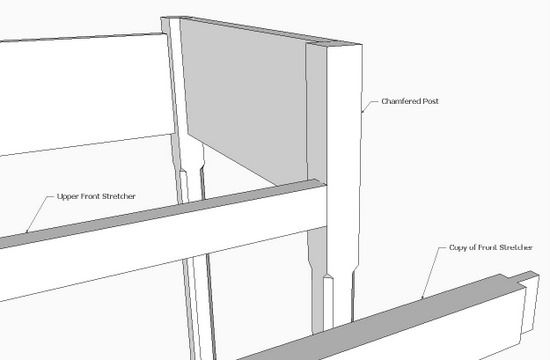
Step 1: Here is the mortise & tenon joint in the Chamfered Post Table. I’ve pulled out a copy of the stretcher to show the tenon. The next thing to do is to make the corresponding mortise in the leg or post. You could pull a copy of the leg, then layout the mortise using guidelines. However, I find this to be more difficult – it takes longer, and increases the chance for error.
Making the mortise by referencing off the tenon in the assembled joint is a preferable method.
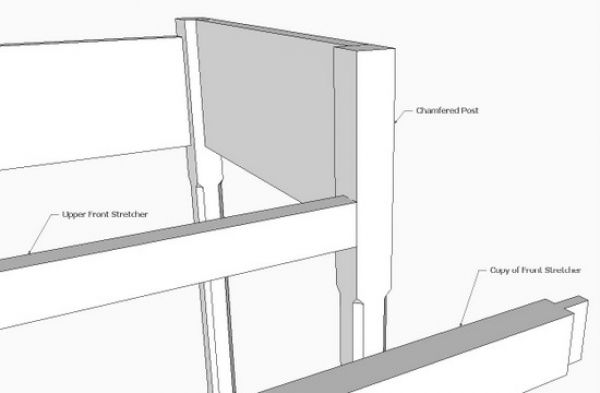
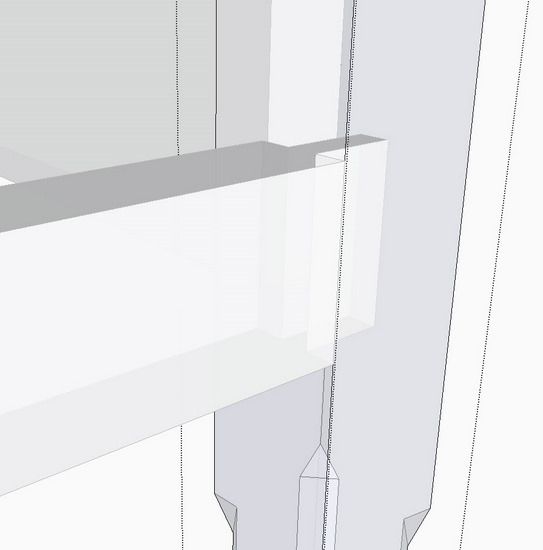
Step 2: Here’s a close-up X-ray view after the leg is placed into the edit mode. It is important to be able to see the boundary of the stretcher tenon as it connects to the leg. With the Line Tool, you trace over this boundary, then use the Push/Pull to make the mortise depth.
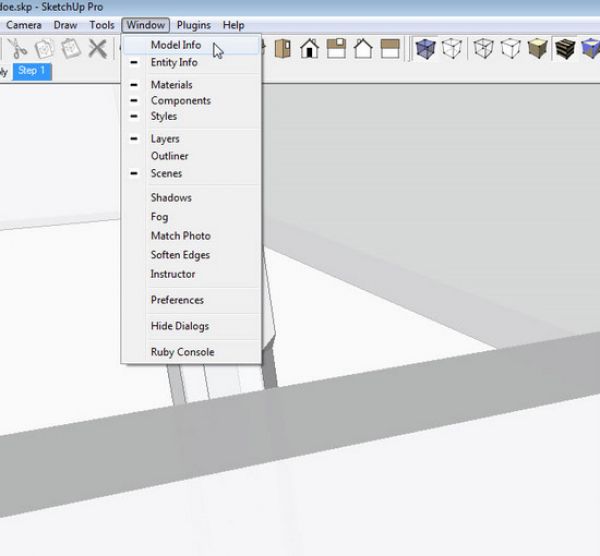
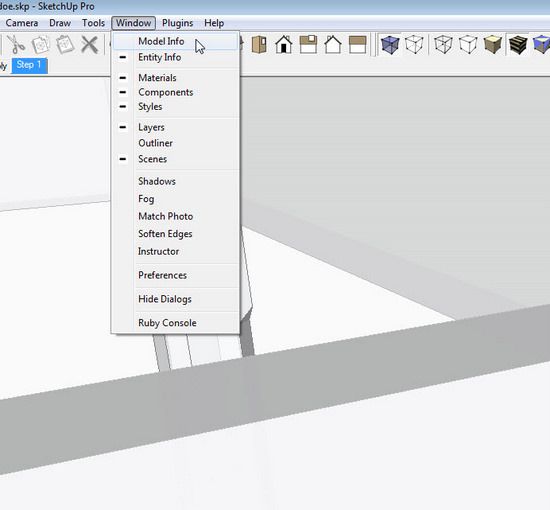
Step 3: If you are having trouble seeing the tenon boundary, click on Window in the Menu Bar as shown below. Select Model Info in the menu.
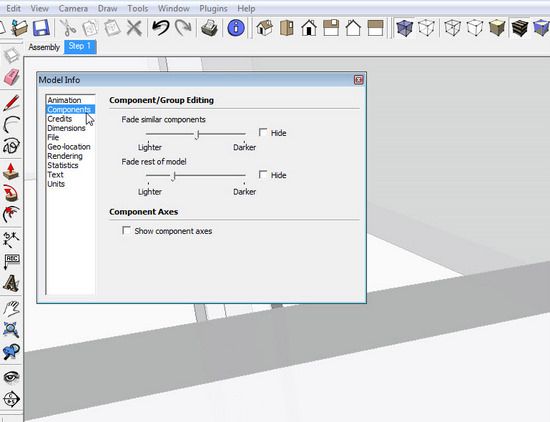
Step 4: In the Model Info dialog box, click on Components, and you should see the following slider bars.
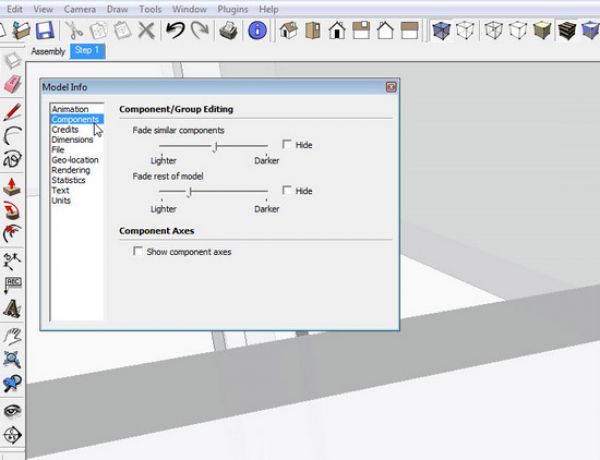
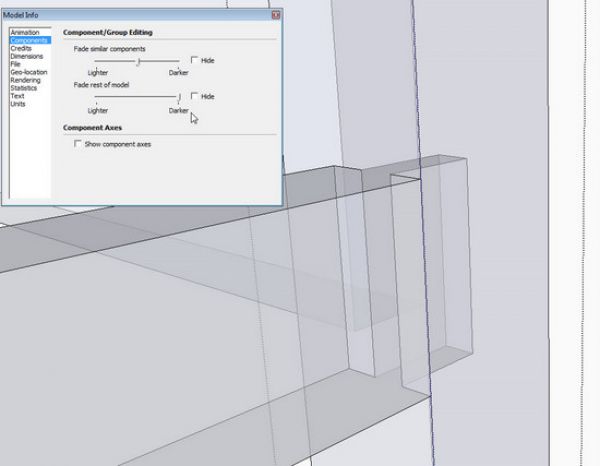
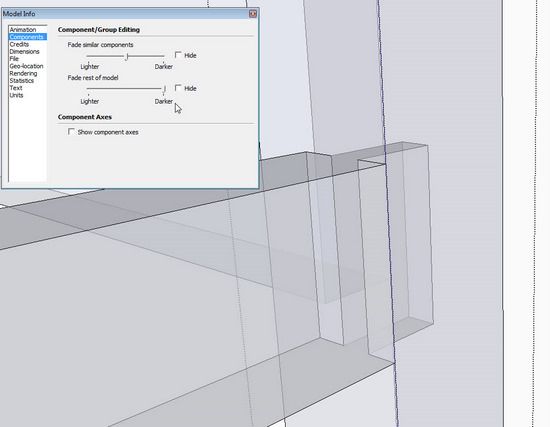
Step 5: Move the “Fade rest of model” slider bar to “Darker”. Note how the stretcher graphics are made more visible, even though the leg is still in Edit mode.
Here is the darker view of the tenon with the slider moved all the way to the right.


Comments
Another thing to keep in mind is that SketchUp will be able to find the endpoints "outside active" even if they aren't easy for you to see. If you can get the Line tool close to where the corner of the tenon/shoulder interface is, it will snap to the point. The closer you've zoomed in, the easier it will be for SketchUp to find the point with inferencing because you limit the possible points from which it can choose. Watch the line as you draw it to make sure you're drawing parallel to the correct axis, too. If you use the Rectangle tool instead of the Line tool, you only need to find two corners instead of all four.
Log in or create an account to post a comment.
Sign up Log in