Draw Ogee Bracket Feet with Perfect Proportions
Nail the design without math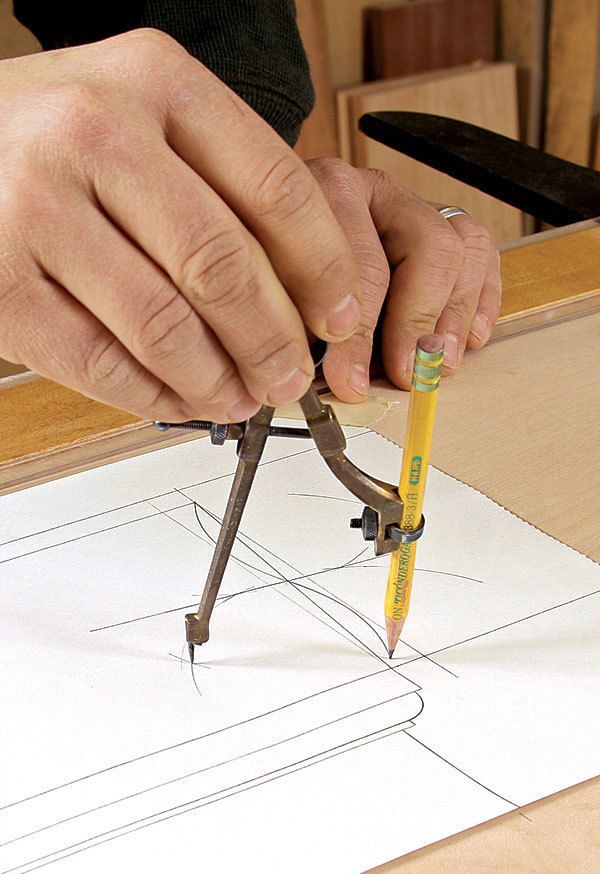
Synopsis: Making ogee bracket feet is a pretty straightforward process, as explained in the article in this issue (FWW 220). But it’s important to get the details of the design right. Dan Faia demonstrates how to use simple geometry and drafting techniques to get the right proportions and shape.
From Fine Woodworking #220
Ogee bracket feet are one of the most recognized forms in period furniture. They are to the Chippendale period what cabriole legs are to the Queen Anne period. The design can trace its roots back to classical Greece, but first appeared on English pieces during the Walnut Period in the late 17th and early 18th centuries.
Their popularity increased with the publication in 1754 of Thomas Chippendale’s book, The Gentleman & Cabinet-Maker’s Director. The new designs were taken up by American woodworkers, who regularly used the ogee bracket foot as an alternative to the ball-and-claw foot when the furniture forms had shaped drawers and cases.
Making ogee bracket feet is a pretty straightforward process. My method combines hand and machine tools (see pp. 76- 81). But you need to nail the design first; otherwise, the whole piece metaphorically falls down. The most glaring error is to design the S-curve either too flat or too severe. I’ll show you how to avoid those pitfalls using some simple geometry and drafting techniques. With this method, you’ll get the ogee shape and proportions right every time, no matter what size foot you’re making.
Divide and conquer The key to getting the shape and proportions correct is using a compass to make a pattern with 60° equal arcs. Lay out the height and projection of the foot from the bottom of the case. Draw a line parallel to the baseline, indicating the height of the flat area, or pad, of the foot.
Draw a diagonal line from the top of the foot to the top of the pad. Use a compass to divide that diagonal in half and then set the compass to that distance. This setting will result in arcs of equal length and shape. Swing intersecting arcs from each end point and from the center point. Now, without resetting the compass, use those intersecting points to swing arcs for the ogee curve on the face of the foot. That’s it. The result is a pleasing curve of good proportion that flows across the pattern.
For the full article, download the PDF below:
Fine Woodworking Recommended Products
Bessey EKH Trigger Clamps
Bessey K-Body Parallel-Jaw Clamp




Log in or create an account to post a comment.
Sign up Log in