How to Soup Up Your Crosscut Sled
Fresh faces and smart stops make a big difference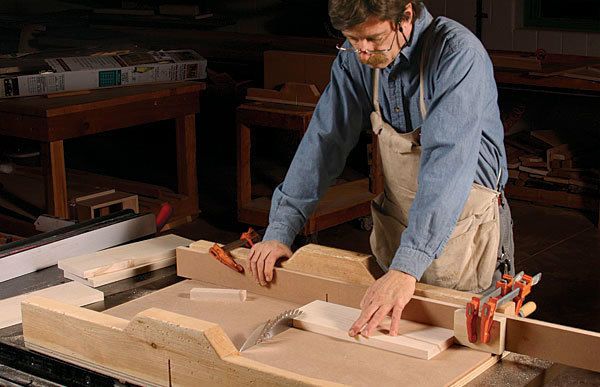
Crosscutting furniture parts to length seems like an easy job, but—as with the entire milling process—small inaccuracies can lead to complications like openings that aren’t square or joints that won’t close. Most furniture makers make their critical crosscuts on the tablesaw, using either a miter gauge or a crosscut sled. I showed how to get more from your miter gauge in FWW #205, but the best tool for precise crosscuts is the sled. A well-made crosscut sled carries the workpiece and controls tearout. It can handle much larger workpieces. And with a variety of stop blocks, it’s also great for producing matching multiple pieces.
Once you’ve built a sled (see my version in Rules of Thumb: “Tablesaw carriage jigs,” FWW #160), you’ll be on your way to making clean, accurate crosscuts. But there is more to the story.
How to tame tearout
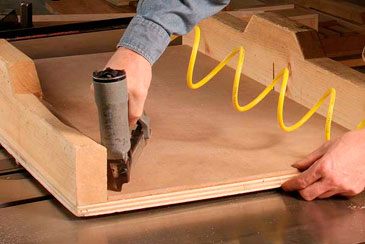
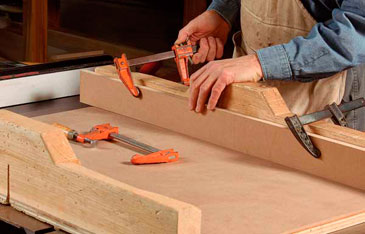
For any crosscut you make on the sled, there are a couple of steps you can take to reduce tearout dramatically. Because of the way the blade spins, tearout happens on the rear and bottom faces of the workpiece. So you need to ensure that the blade opening in the sled’s deck and rear fence fits snugly around the blade that you are using. If the blade opening is worn at all, or if you’ve switched to a narrower blade, attach a rear auxiliary fence made of 3⁄4-in. MDF and a new deck made of 1⁄8-in. or 1⁄4-in. MDF or plywood. I attach and replace these auxiliary pieces as needed to ensure the best cut. Cut a fresh kerf through them and the sled will virtually eliminate tearout. But just to be safe, try to position workpieces so that the most important surface is on top. For example, cut drawer fronts face up.
Learn how to get accurate crosscuts on the tablesaw, even when you don’t have time for a percise set up.
Cutting a single piece to length
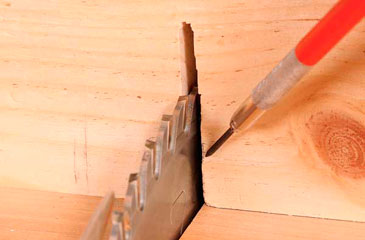
When crosscutting a single piece, I follow one of two strategies to locate the cut. If the kerf slot on the sled’s auxiliary fence still closely fits the blade I’m using, I’ll use the slot as a reference point for the cut. After squaring one end of the stock, make a pencil mark on the top back edge of the workpiece and line it up with the edge of the kerf slot. After any crosscut, slide the workpiece away from the blade before pulling the sled back to you.
If the kerf slot is worn, I often make what I call a “sliding cut.” After squaring an end, mark the length on the lower front edge of the stock where the blade will make first contact. Start the cut to the waste side of the line and make a shallow cut with the carbide tooth tips so that you can just see stock being removed. With the teeth still in the cut, slide the stock until the cut lines up with your mark; then complete the crosscut.
Cutting multiples: The magic stop block
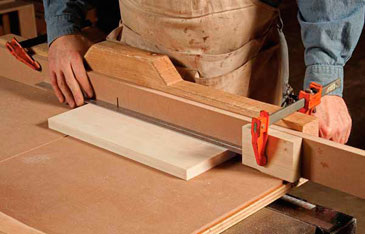
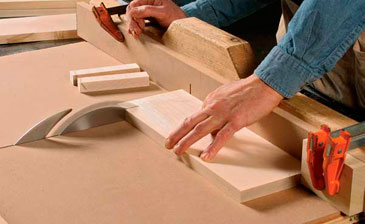
The idea when cutting multiple pieces to the same length is just that—making sure that each piece exactly matches its mates. Cut that second rail just a fraction of an inch too short, and your door frame will not go together squarely. Clamped securely to your sled’s fence, a stop block holds the squared end of each workpiece at exactly the same distance from the blade, ensuring precisely matched parts.
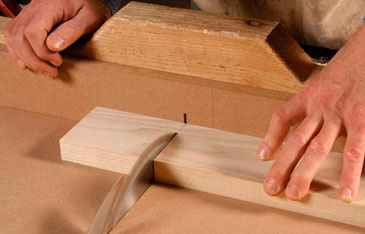
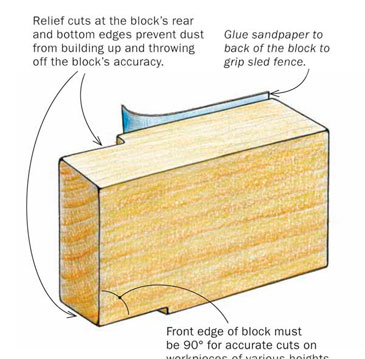
It might seem like any piece of scrap would work as a stop block, but once again, the details matter. The block should come from milled stock, with flat faces and square edges and corners. It should be no taller than the sled’s fence and wide enough to accommodate a couple of clamps. Make the block thick enough (3/4 in. to 1 in.) to provide a solid stopping surface. Relief cuts at the rear and bottom corners prevent dust buildup that could throw off a cut’s accuracy.
Also, check that the block’s stopping surface is square to the sled’s deck. An angled block can give you an inaccurate cut, especially if you are cutting workpieces of varying thicknesses.
To help make sure that the block stays put, cover the back with adhesive-backed sandpaper. This helps the block bite into the sled’s fence and resist sliding. Second, use two clamps to secure it to the fence. This limits any tendency for the block to slide or pivot, important when cutting large numbers of pieces. Last, remember to gently slide the workpiece into place against the block. Don’t bang it home or you risk altering the length of the cut.
To set the block in the right place, use a steel rule if possible (a tape is less accurate) to find the appropriate distance from the blade’s teeth. When you have many workpieces to cut, make sure you organize them in a way that helps you keep track of the work. I always stack the workpieces to my right, with the squared end away from me. I re-stack the cut pieces to my right but farther away than the working stack. You might organize your work differently. The point is to make your system consistent, so you can rely on it.
Special stop blocks: the long and short of it
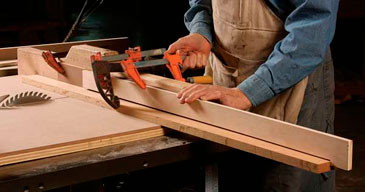
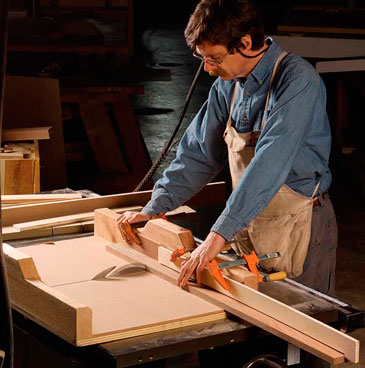
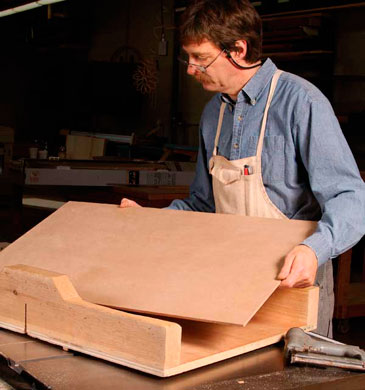
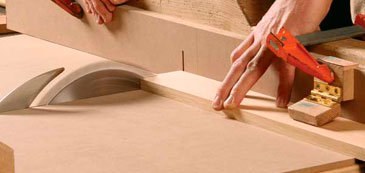
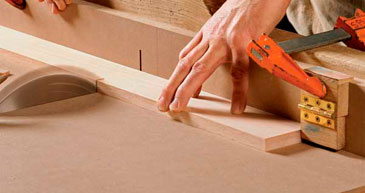
Sometimes you need to cut a workpiece to a length that is longer than your sled’s width. This leaves you with no place to attach a conventional stop block. The solution is a hook type of block designed to extend beyond the sled’s reach. The block, which can be cut on the bandsaw from 1/2-in. or 3/4-in.-thick plywood, is notched at the far end to hook over the end of the workpiece.
To locate the block, lay out the cut on the workpiece, align the mark with the kerf, and secure the work temporarily by clamping it to the sled’s fence. Now set the stop block in place and use a pair of clamps to hold it fast.
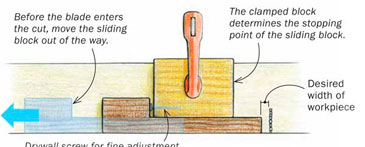
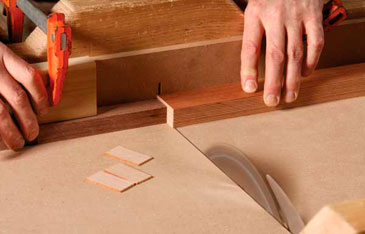
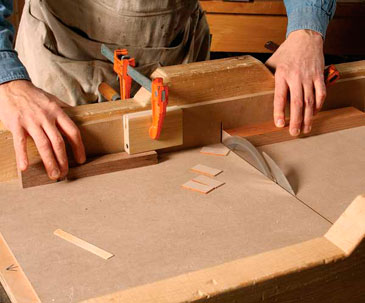
I use a different type of stop block when doing certain types of small work—cutting material for bandings, for example. For this type of work, the block acts to precisely control the length of the offcut without trapping it next to the spinning blade.
To accomplish this, I use a stopping jig on the right side of the blade. This jig lets me slide a stop block precisely into place while locating the workpiece and then slide it back out of the way before beginning the cut. With this jig, I can make multiples of very thin pieces.
|
A long stop block for long work |
 |
|
Hook-style block. Two clamps hold this block in place. Latta adds a deep-reach clamp to help hold the long workpiece against the sled’s fence. |
 |
Fine Woodworking Recommended Products
Incra Miter 1000HD
MicroJig Matchfit dovetail clamps
Double Sided Tape





Log in or create an account to post a comment.
Sign up Log in