Climb-Cutting: Don’t Believe the Naysayers
Learn how to safely and effectively climb-cut with a handheld router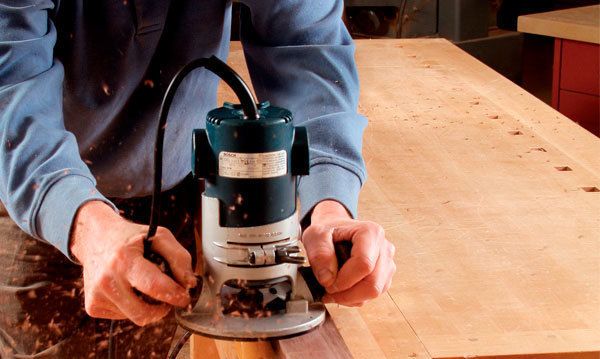
Climb-cutting sounds like an X Games sporting event, but there’s nothing extreme about it. The technique, in which you move the router in the same direction that the bit wants to pull it, gets a bad rap as being unsafe. But it’s a legitimate practice that every woodworker should use—in the right places.
The biggest benefit of climb-cutting is that it prevents chipout and tearout when routing along an edge. For some cuts, it also lets you set the bit to cut full depth and just whittle away until you get close, a real time-saver.
Climb-cutting is no more dangerous than any other machine technique. But to do it safely, you first need to understand when to do it and how the router will behave during the cut.
Push-cutting vs. climb-cutting
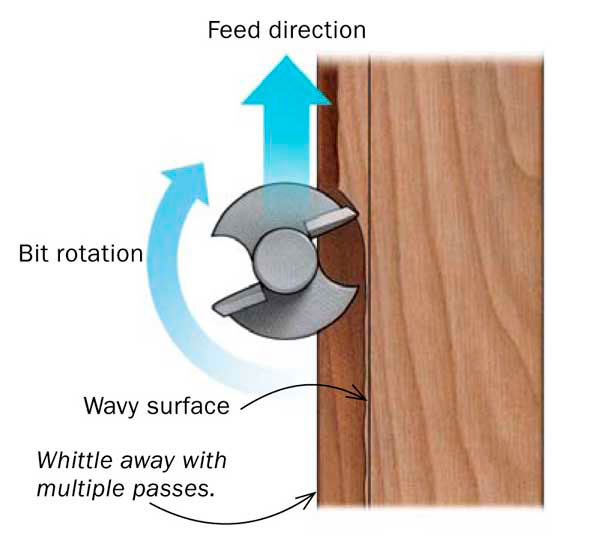
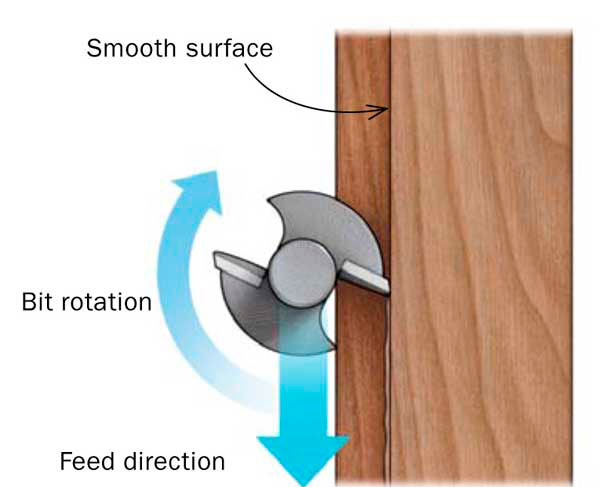
In a push cut, the router is moved against the rotation of the bit. The counteracting forces make it easier to control the tool, but the technique is more prone to tearout. A climb cut eliminates tearout, but because the router moves in the same direction as the bit’s rotation, the tool will want to take off on you.
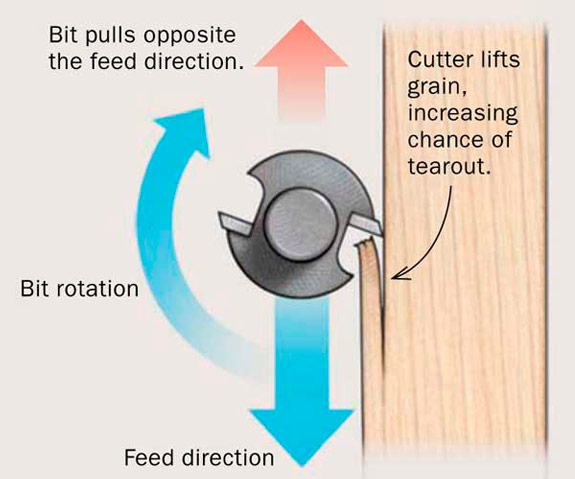 |
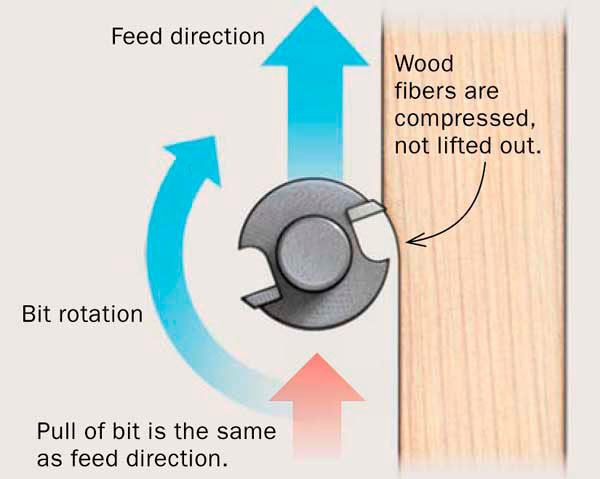 |
| A push cut is easier to control but prone to tearout | A climb cut is tearout-free but requires a firm gripWhat makes the climb cut tricky |
Many woodworking instructors tell their students they should always rout against the rotation of the bit, often called a push cut. Push-cutting does provide maximum control over the tool, so it’s considered safer and is the reason why beginners are taught to rout this way. But push-cutting can cause the unsupported wood fibers ahead of the bit to tear out (see drawing below). That’s where climb-cutting can help.
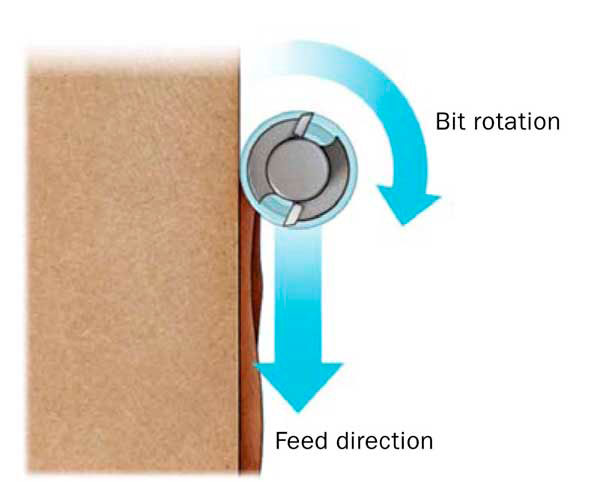
Climb-cutting cuts the wood on the entry stroke, which compresses the wood fibers rather than lifting them. Each pass will be tearout-free, but be careful. Climb-cutting has more of a tendency to make the router “run” forward, so controlling the tool is job number one.
When climb-cutting, use a broad, stable stance, like a boxer, holding the router firmly with both hands. Don’t force the tool against the workpiece while climb-cutting, because this will make the router take off on you. Instead, start the router and engage the workpiece with a light touch. Once it contacts the workpiece, pull the router toward you, using your arms to control the tool. When profiling, take multiple, light, controlled passes until you reach full depth.
Rout perfect edge profiles
Large profiling bits are notorious for tearout. The solution is a climbcut. Set the bit to its full cutting depth and whittle away material. Finish with a push cut to eliminate any waves left by the climb cut.
Climb-cutting eliminates tearout, but it leaves a somewhat wavy surface in its wake.
To clean up the wavy edge, make the last pass a light push cut.
When climb-cutting is a no-no
Never when tied down
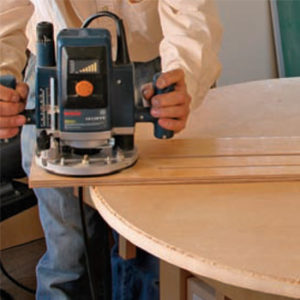 |
Do not climb cut if the bit is trapped or tethered in some way and can’t climb out of the cut, such as when using a circle-cutting jig. |
Not on a router table…
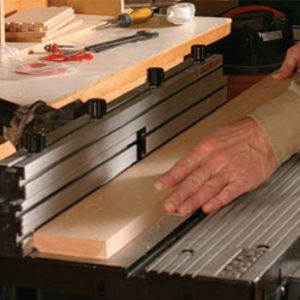 |
Use a push cut when feeding stock by hand. If you climb cut, the stock can be ripped from your hand, drawing your hand into the cutter. |
…Unless you use a jig
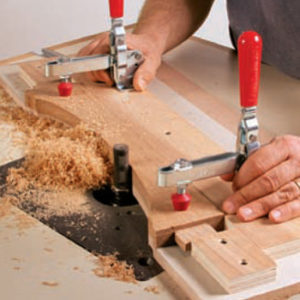 |
If your workpiece is large, or locked into a heavy jig or sled of some kind, a climb cut on the router table can be made safely. |
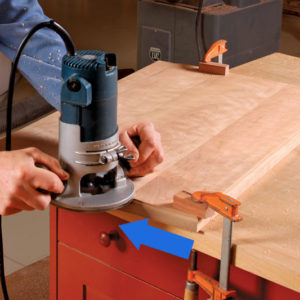
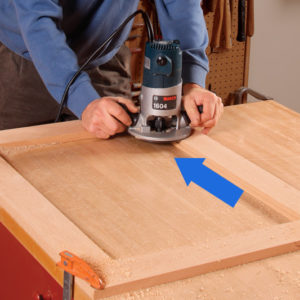
Climb-cutting on panels: Move clockwise
 |
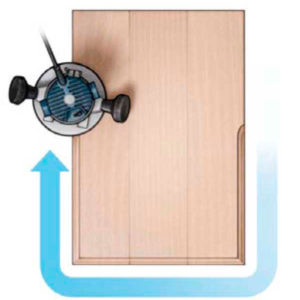 |
With a handheld router, you generally move right to left to climb-cut. On a panel, this means moving the router clockwise.
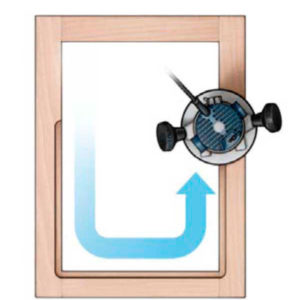
Inside frames: Go counterclockwise
Inside a frame, however, you need to move in the opposite direction.
 |
 |
Roughing out mortises
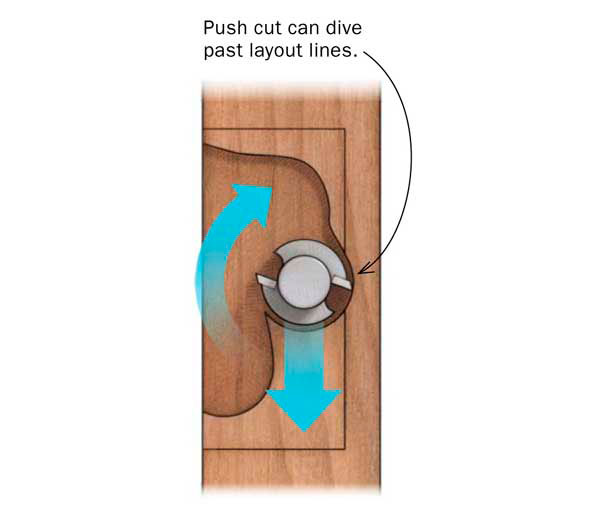
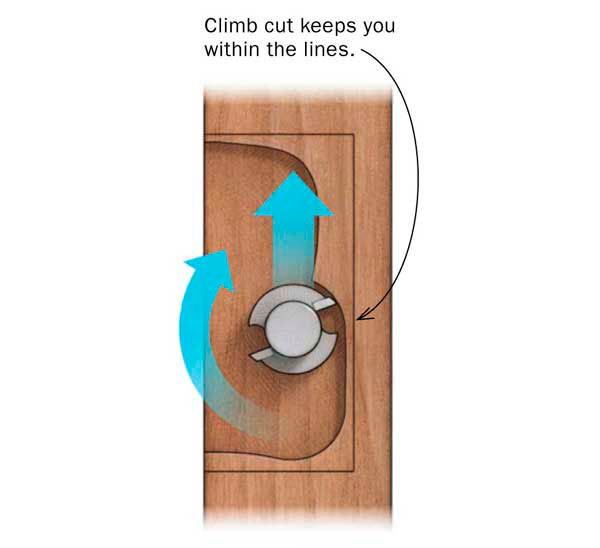
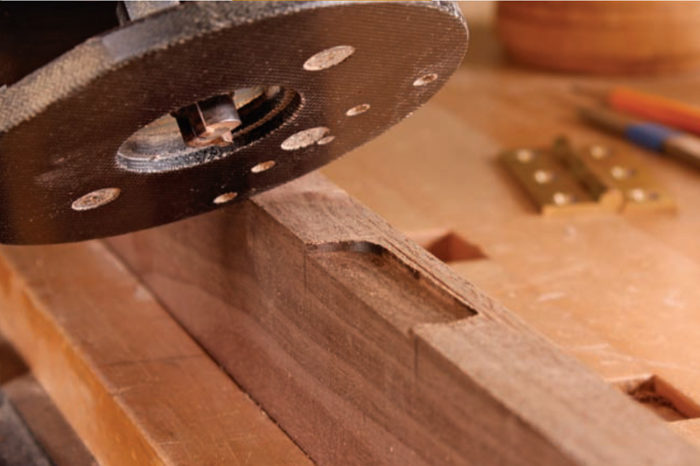
When doing inlay or installing hinges, it’s often easier to rough out the mortise with a router. In these cases, a push cut can be ruinous. With no bearing to anchor the bit, the router can stray beyond the layout line if you’re not careful. For more precision, use a climb cut, which will push the bit away from the layout lines. When you get close, finish the mortise with chisels.
| The problem with a push | The fix is to climb |
 |
 |
Jointing veneer
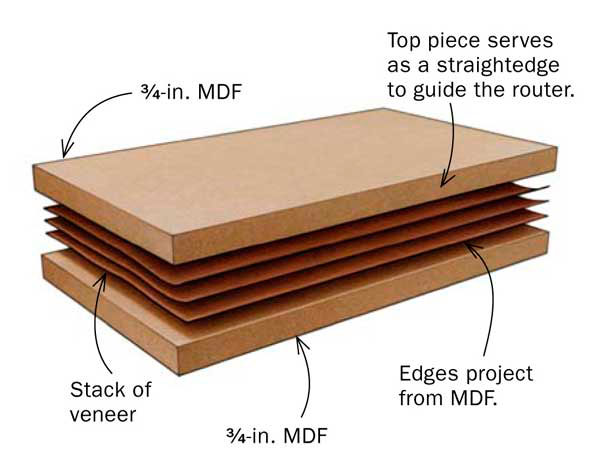
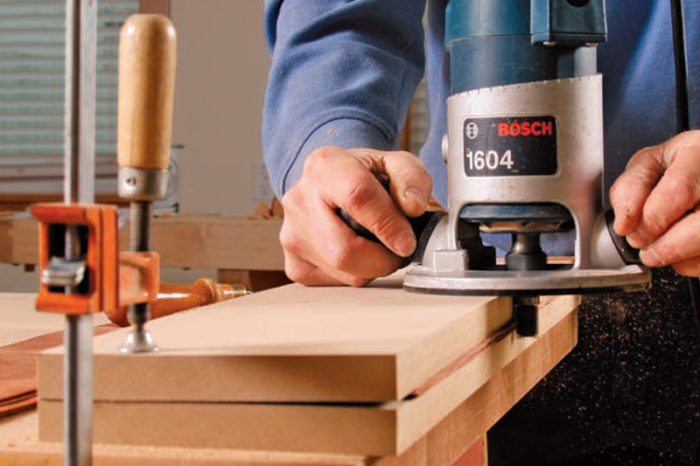
To join pieces of veneer, you need crisp, straight edges that are hard to get on such fragile material. For the cleanest results, stack and squeeze the veneers between two pieces of 3/4-in. MDF and joint the edges with a climb cut and bearing-guided bit. Make a final, light pass with a push cut.
| Stack the veneer | Joint the edges |
 |
 |
Rout smooth curves
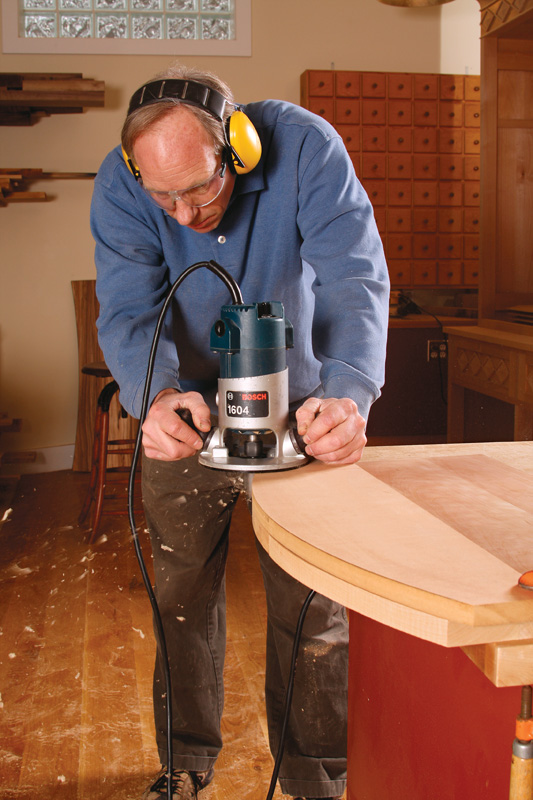 |
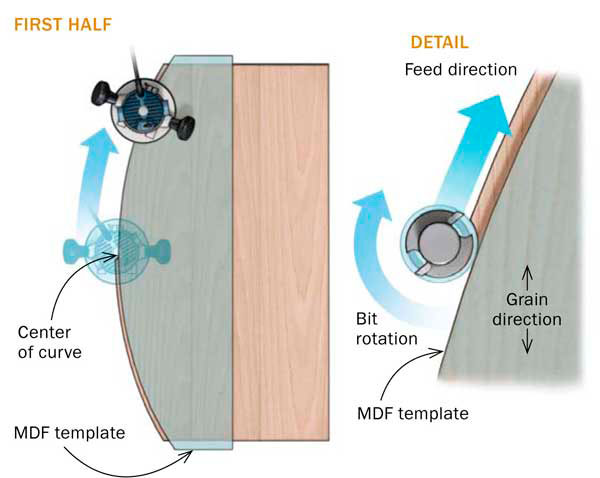
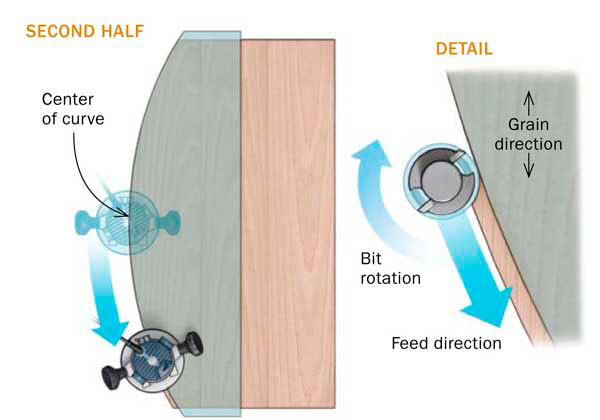
On most curves, whether concave or convex, the grain changes direction at some point, usually near the middle of the curve. So trying to rout the entire arc with a push cut will cause tearout when the grain reverses. The best approach is to combine a push cut and a climb cut.
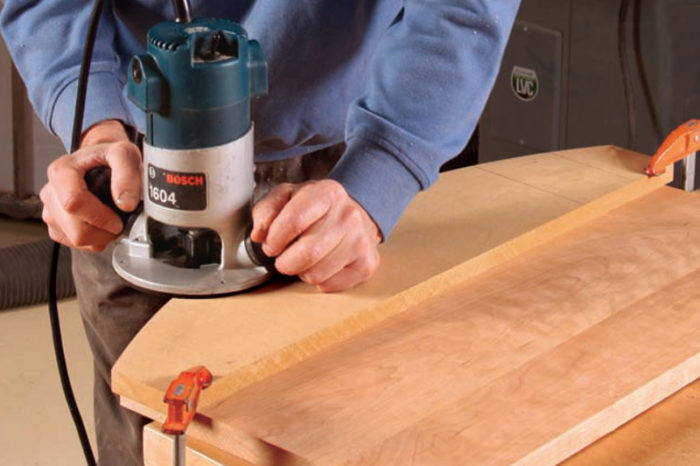
When routing the edge of a curved panel, say for a demilune tabletop or curved apron, use a climb cut on one half of the curve (left illustration), starting near the top, or center, of the curve, where the grain is straight. |
Climb cut here
Push-cut here
After climb-cutting on one side, use a push cut on the other. As before, start the push cut at the center of the curve.
After climb-cutting on one side, use a push cut on the other. As before, start the push cut at the center of the curve.
For the full article, download the PDF below:
Fine Woodworking Recommended Products

Festool Rotex FEQ-Plus Random Orbital Sander
Bosch 12V Trim Router

Festool DF 500 Q-Set Domino Joiner






Log in or create an account to post a comment.
Sign up Log in