Another Way to Bevel Curved Panels
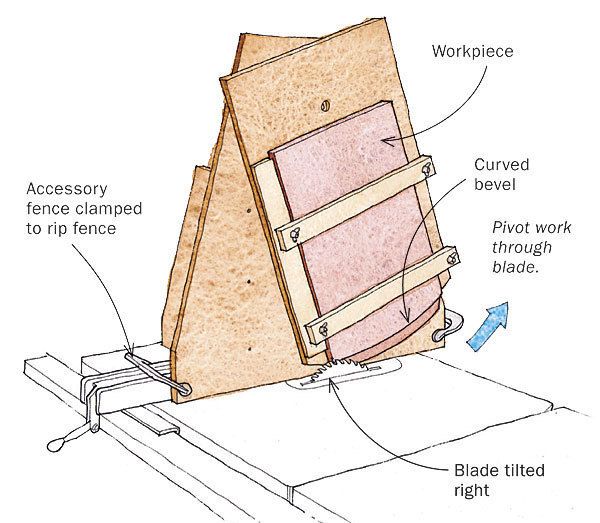
Here is an alternative to the jig Geoffrey Carson constructed for his article “Curved Bevels Made Easy” (FWW #217). My jig is easier to make and use, and is adjustable. It pivots the stock and allows you to make continuous curved beveled panels that require little sanding, rather than segmented ones.
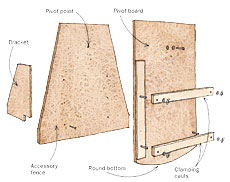
Note the direction your blade tilts. If it tilts to the right, the jig will look like the one in the drawing. If it tilts to the left, it will be a mirror image and attach to the left side of the fence.
First, build a tall accessory fence from 3⁄4-in. plywood or MDF. To stabilize the jig, add brackets to the back that straddle the rip fence. For a one-time-use jig, measure from the bottom and mark the center of the radius of the arc you wish to bevel and drill a 1⁄4-in. bolt hole. Drill a matching counterbored hole in another board (the pivot board) whose bottom end has been rounded an inch short on the bandsaw. Join the two boards with a carriage bolt, washer, and nut. Tighten the nut until the boards mate, but can still pivot. Add a side stop and clamping cauls to the pivot board to position and hold the work securely.
You can make the jig adjustable for different radii by making a series of matching holes in both boards spaced along the vertical axis, or you can add a sliding pivot strip to each piece.
Before using the jig, cut the workpiece to size and round the end to the desired radius. Now clamp the beveling jig to the saw’s rip fence so the pivot is centered over the blade arbor. Set the blade height and tilt and the fence spacing. Swing the pivot board toward you and away from the blade arc and clamp the work to it. Finally, carefully pivot the work through the blade.
Jim Richey
Fine Woodworking Recommended Products
Incra Miter 1000HD
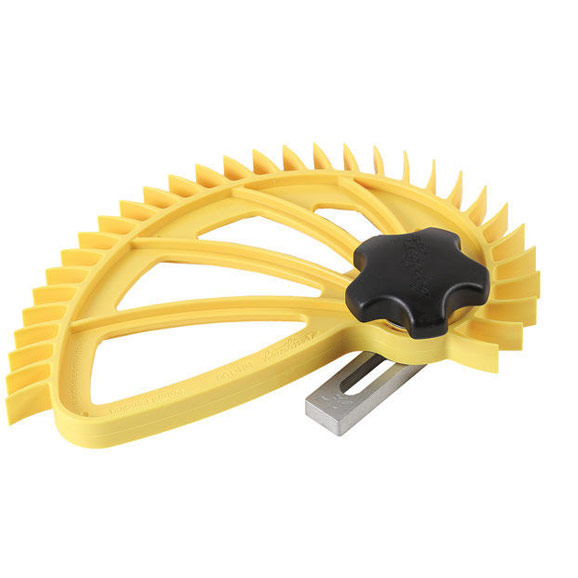
Hedgehog featherboards
Double Sided Tape







Log in or create an account to post a comment.
Sign up Log in