Beautify Your Home with a Shaker Built-In
Build it in place, and the work goes surprisingly quickly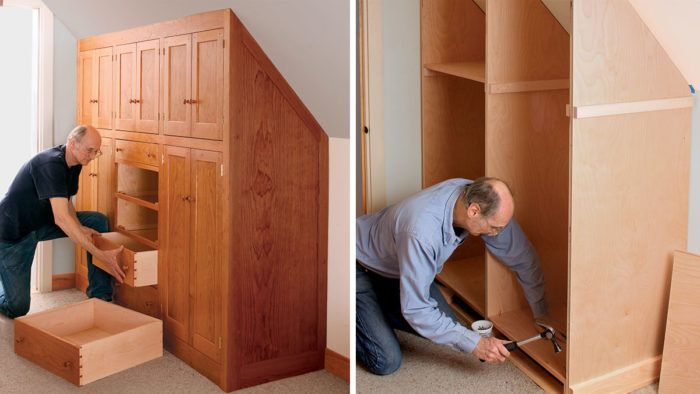
Synopsis: Built-in furniture was a staple of Shaker life, and these skilled furniture makers elevated the built-in to an art form. This one by Christian Becksvoort was constructed in place, as the Shakers used to do, but uses plywood partitions and shelves where the Shakers used solid pine. Solid-wood face frames and doors add a furniture-maker’s touch. Becksvoort’s piece was designed to fit a special space in his house, but he gives you all the tools and techniques you need to design and build your own, wherever you may need it.
I’ve grown used to the pleasure of working solid wood at the workbench, so it takes some persuasion to get me to leave the shop, haul sheets of plywood, and get on my knees to scribe along crooked walls. But in my younger days, I built my fair share of kitchen cabinets, commercial fixtures, and built-ins. And recently, my most discerning client, my wife, convinced me that we needed a built-in. So out of the shop I went.
Early homes tended to lack closets and storage space, so wardrobes and built-ins were common. The Shakers added built-ins wherever possible and turned them into an art form. Most, if not all, the built-ins made by the Shakers were constructed in place. I did the same, except I used plywood partitions and shelves where the Shakers used solid pine (or poplar in the South). I used solid cherry for the face frames, doors, and drawers.
The best part of a built-in is its versatility. You can design it to function for your particular situation. Mine has a middle bottom section for drawers. The right bottom section has a closet rod, while the left bottom section has adjustable shelves.
In our case, the location was under a roof and knee wall next to a doorway. A lot of homes have areas where a slanted ceiling makes the space unsuitable for almost anything else. I started with a rough sketch, consisting of three sections of doors and drawers that would be built in place into a single unit. This built-in navigates the knee wall, but the techniques and order of operations is exactly the same as for a straight built-in. The keys to success are keeping everything plumb and level and having a lot of patience while you go back and forth between the site and the shop.
Troubleshoot the site
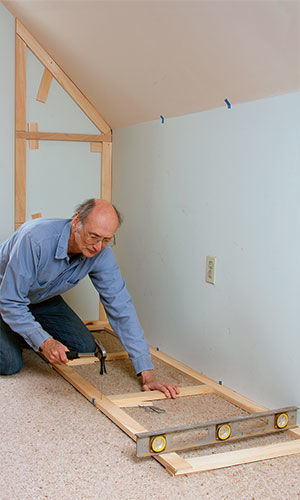
The more sound, plumb, and level the location, the easier your built-in construction and installation will be. The first thing to do is survey the site. Note where the walls aren’t plumb and the floors slope. If your walls and floors are old, warped, sloped, and out of square, then make leveling frames to fit the wall and the floor. Anything more than 1/8 in. is too much out of whack and you should correct for it. It takes some time and patience to get things just right, but the effort will be repaid with an easier construction and a straight and square finished product.
Mark the locations of your wall studs and use a level and shims to make sure the frame is plumb and flat.
For the full article, download the PDF below:
From Fine Woodworking #221
Fine Woodworking Recommended Products

Blum Drawer Front Adjuster Marking Template




Comments
Thank you, Christian, for this article. I’ve been thinking about doing a Shaker built-in for a few years now. While on an extended New England camping roadtrip last fall, my wife (also my most - and only - discerning customer) and I were able to visit both Canterbury and Enfield Shaker Villages.
That inspiration combined with your expert guidance will get me going on this project!
Log in or create an account to post a comment.
Sign up Log in