I’m building a trestle table out of maple, and the mortise and tenons in the trestle assemblies are pinned. I’ve used square pegs in the past for the job, but this time I wanted to use dowels for a change.
I didn’t need a lot of them-just four for the trestle base, and six to pin the breadboard ends to the top-so I didn’t want to buy a bunch of dowel stock and have leftovers sitting around my shop bending like Twizzlers in summer. Instead, I decided to make my own out of walnut, which creates subtle points of contrast amid the light maple.
Making dowels is easy to do, and it allows you to use scraps of any material you have on hand. The last time I did it I ripped a thin, square strip on the tablesaw and then rounded it over using a block plane, rotating the workpiece after each series of passes. It worked OK, but it was time-consuming and not completely accurate or round. A better method is to use a dowel plate, which lets you make accurately sized, perfectly round dowels in no time.
I borrowed a dowel plate from a colleague, but you can buy one from Lie-Nielsen ($50 for either imperial or metric). It sounds expensive, but the tool will more than pay for itself over time. (For more on pegging joints, see Matthew Teague’s article in FWW #191: “The Pegged Joint, Exposed”.) Here’s how to use the plate to make a dowel.
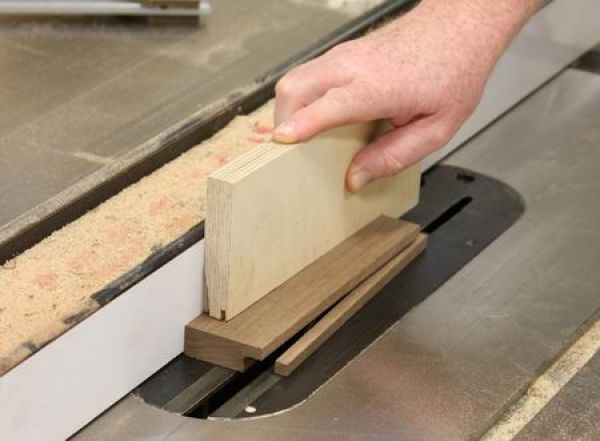 |
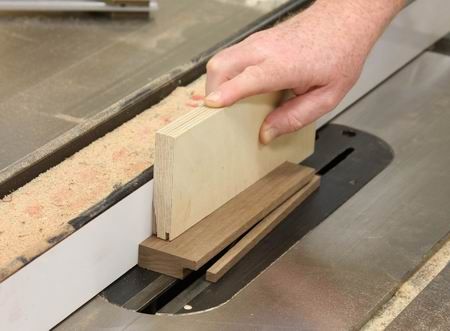
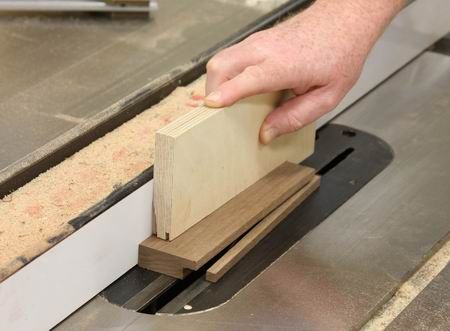
Rip a stripStart by ripping a strip of the dowel stock on the tablesaw. Size it as close as possible to the finished dowel diameter. In this case I was making 1/4 in. dia. dowels, so I cut the strips a hair over 5/16 in. square. |
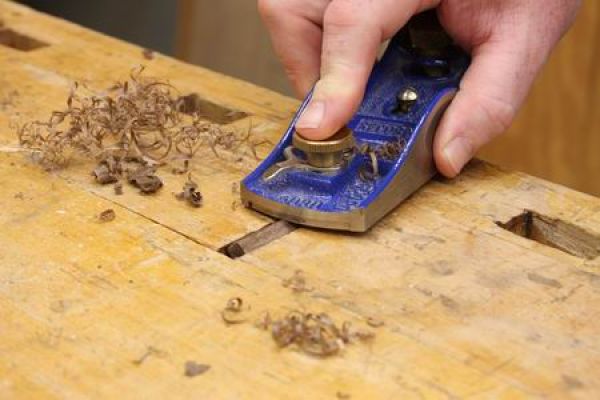 |
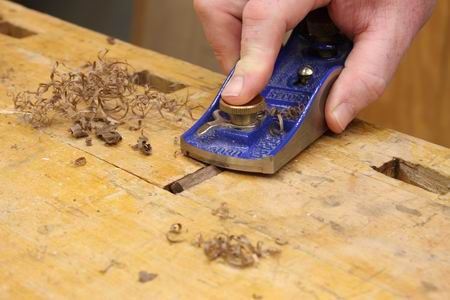
Cut off the cornersNow use a block plane to remove the hard corners. No need to be exact here. You want to remove just enough material to be able to get it through the hole in the dowel plate. |
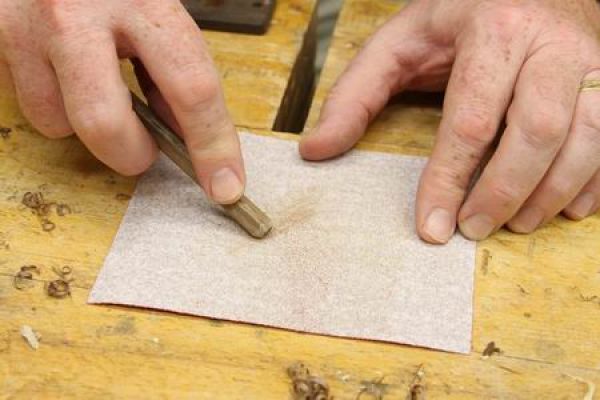 |
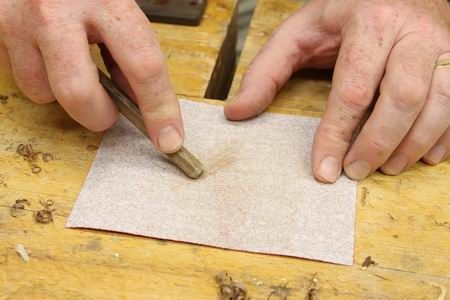
Round the tipRub the stock on rough sandpaper to chamfer the tip. This will make it easier to start the strip in its hole. |
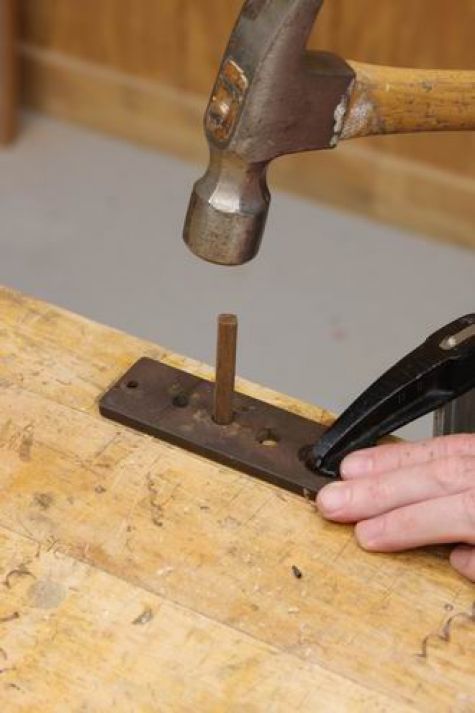 |
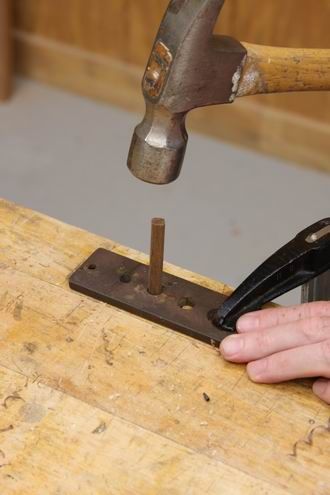
Pound it throughHere’s the fun part: hammering the strip through the plate. Cut the strip to about 6 in. long or under. Anything longer tends to flex the thin strip as you pound it it through, which makes the job tougher or breaks the stock altogether. Longer lengths also tend to clog the hole with material, which also makes the job tougher. By the way, in this photo the dowel hole is over a benchdog opening. |
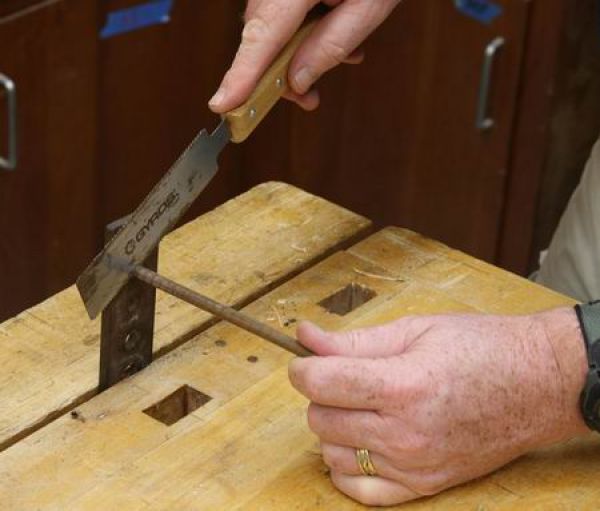 |
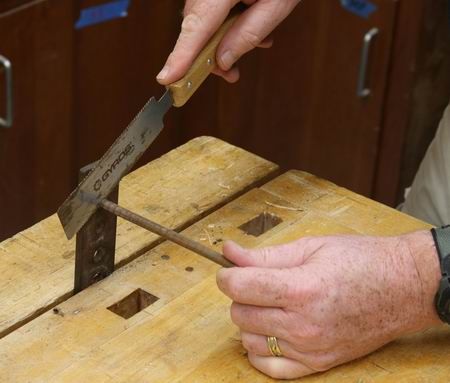
Cut it offWhen you near the end, cut off the material while the stock is still wedged in the plate. |
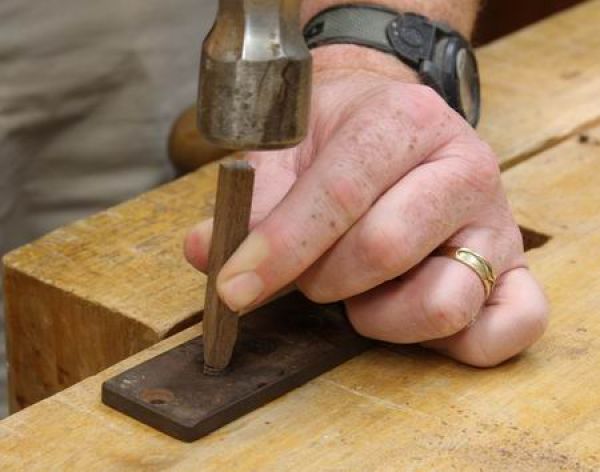 |
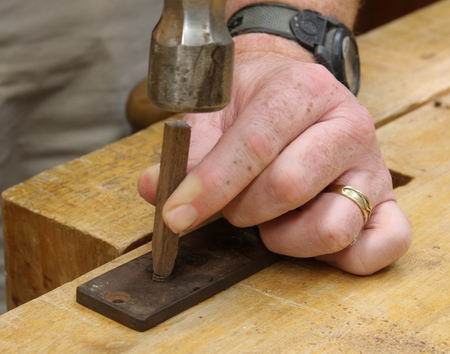
You can remove the mushroomed end left in the plate by pounding it out the opposite direction, using a short, blunt stick that’s narrower than the hole diameter. |
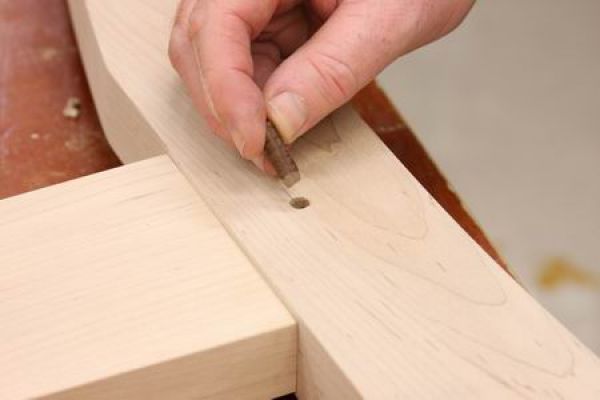 |
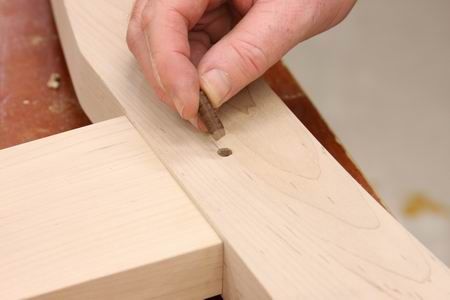
Drive it homeNow cut the dowels to length and then put a slight chamfer on each tip by rubbing it on sandpaper. This will make it easier to start the dowel in its hole. |
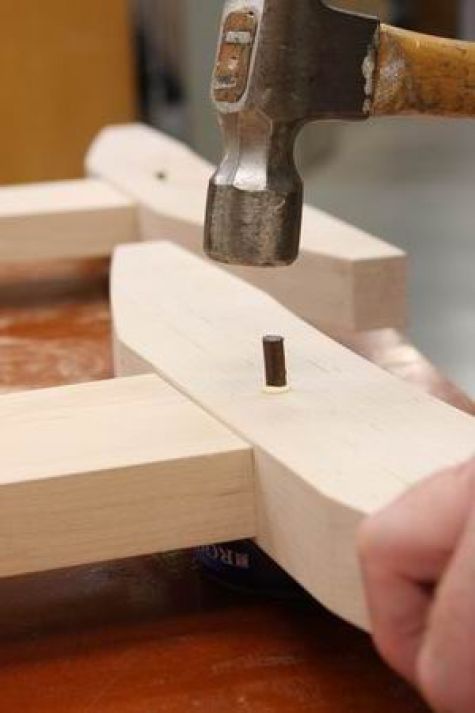 |
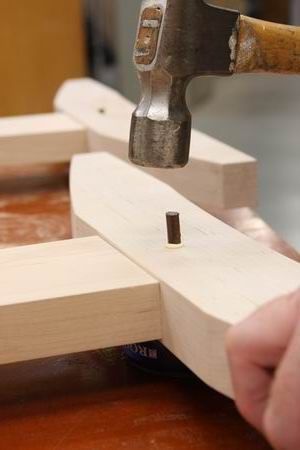
Hammer the dowel home. Keep driving until you hear the tone of the striking hammer change, which indicates that the dowel has bottomed out. I can’t really describe the sound, but you’ll know it when you hear it. |





Comments
Wouldn't the peg be stronger if you rive it instead of ripping it on the TS?
(nit-picky? yes. Otherwise, totally an idea I get behind)
I found that instead of using flat stock for the dowel plate, a solid round dowel plate made nice, round, smooth dowels.
I drilled a 3/16" (what I needed and hard to find size) diameter hole in a 1" diameter solid round. A wood jig makes centering the 3/16" on the 1" solid stock easy.
Once the round dowel plate is made, I ripped some 3/16" square Cherry. Used a block plane to remove corners at one end so it fits in the round hole.
Here's the trick - "chuck" up the square dowel material in a portable drill and turn slowly into the round dowel plate. It feeds itself and perfect dowels.
The sinusoidal profile of the hole in the round dowel plate makes a better cutting edge than a flat plate and driving it home with a hammer.
@kingfinny,
I rive out a block so that all four sides are as nice and parallel to the grain as I can get, then cut the block into dowel blanks on the bandsaw (far less waste than the tablesaw, as well as easier and safer to handle, given that the block is relatively small, typically about 2" x 2" x 6").
-Steve
To NM WOODWORKER - Did you harden the steel?
@RoBanJo,
No sir, I didn't heat treat.
Had some 1" round handy, so thought I'd give it a go. When I drilled the 3/16" dia hole, it went very easy, so I'm assuming it was mild steel.
The change in souond is easy - it goes from "Tuck, Tuck, Tuck" to "Doonk".
I found one of these some years ago. I use it occasionaly and it works well. It is similar to Lie-neilsen's but not as many hole sizes. It also cuts grooves as it forms the dowel and it has a sharpener to champfer the end of the dowel. No manf markings.
I think riving is the way to go, especially if you're draw boring the pins. I made my own dowell plate from a piece of half inch plate I had in my scrap metal box. I drilled holes in 16th increments from 1/4 to 1/2 and left enough room for some mounting holes to mount it to one of my bench legs. I heated it up to cherry red with a friends acetylene torch and dunked it in a bucket of water. I tend to pull the dowels through with some vice grips after witteling down the end. I start a few sizes bigger than what I need and work it down with successive holes. I got the idea from one of Roy Underhill's books.
I used a chunk of an old car's leaf spring that my bud tossed into a campfire in order to remove the temper. Softened it right up. It's about a 5/16" thick. Whenever I need to make a different size dowel I just drill a different hole in it.
DO NOT remove the burr raised around the hole. That's what assures a clean sized dowel. Easy peasy.
always,
I've an old Moore and Wright 1/8" thick drill sizing plate with holes from 1/16" to 1/2" in 1/64" steps (and marked with decimal equivalents!). It's an ideal dowel maker. They appear occasionally on eBay.
This sounds like a great idea, but it also sounds time consuming. I agree, there is nothing better than home made dowels. I use scraps from my project and just run them through the router table using a round over bit. You have to start about three inches in from one end and stop three inches in from the other end to keep square ends on the table, but you make four quick passes and your done. A little touch up with some sandpaper any your finished. Basically, a 1/8th round over bit will give you a 1/4 dowel and a 1/4 round over bit will give you a 1/2 dowel and so on.
I use the Veritas dowel maker from Lee Valley. It,s ajustable so you can make your dowel slightly larger or smaller to suit your needs. Start with a square blank any length a little larger than the nominal size of the dowel, chuck one end in a 3/8 drill and power it thru the dowel maker. Works like a charm.
For large wood dowel plugs I have used a piece of wood chucked into my metal lathe not as quick as using a dowel plate.
By the way if you are using a very low carbon steel heating and quenching it is not going to do much.
You might need to use Kasenit and case harden it.
I use a multitude of 1/4 inch dowel pins, mostly maple and walnut, for pinned MT joints. I order from Atlas Dowel or Midwest Dowel, asking that they not be undersized. They are very good in sending sized and slightly over (1/32?). I chamfer the ends in an old hand crank pencil sharpener, cut to length and hammer through a sizing plate. Has been working wonderfully for 12 years.
I use the LN dowel plate for all my pegs. I crosscut a short length of the stock I'll be using, rive off a section with a wide chisel, split that again if it's wide enough, then sharpen the end quickly with the chisel and drive it through from largest hole down to desired hole. This is a good use for old offcuts that have been sitting in the scrap bin drying for the past few years. You could also dry the stock a bit further with hot sand or a small light-bulb kiln (an old chairmaker's trick). Bone dry, they'll absorb any moisture in the workpiece or glue, and swell up snug.
Because it's riven, meaning continuous grain fibers for the entire length providing maximum wood strength, you don't really have to chamfer the edges with a block plane. The blank can be driven through the first hole quite fat and square without damaging it. Fast and easy (if a little noisy).
For the purist or for the woodworker who has too much time on their hands this sounds like a fun project. Frankly, I'd rather spend my time focusing on the more interesting, complicated and important details.
I buy three (3') dowel rods and keep them stored in two (2) length categories, short and long (highly technical as you can see). My storage containers are two (2) pieces of 1 1/2" cpvc shackled to the side of a shelving unit.
In terms of fit; these dowel rods are made God knows where these days. So sizes are all over the block. But if you have a complete set of number, letter and metric drill bits in addition to your fractionals in a matter of minutes one can find the appropriate drill bit.
GBonaparte
Century Millwork
I found a piece of tube the right internal diameter to fit a drill bit - I think they're 10mm but could be wrong. I cut bits of scrap pine blocks to the length+ of the dowel I need, hammer the tube through, and push the dowel out with a narrower drill bit. The sawn edge of the tube gives the dowel some 'fluting', which is enhanced further by the use of a craft knife. The end not hit by the drill bit is chamfered, and then the rest is tap it into the hole, and cut off the excess. So, possibly the same as riving, but not sure. Oh, and most of the work I do is pine, so I'm using up old lengths of blocks, less wastage that way! Sorry for the ramble.
I found a piece of tube the right internal diameter to fit a drill bit - I think they're 10mm but could be wrong. I cut bits of scrap pine blocks to the length+ of the dowel I need, hammer the tube through, and push the dowel out with a narrower drill bit. The sawn edge of the tube gives the dowel some 'fluting', which is enhanced further by the use of a craft knife. The end not hit by the drill bit is chamfered, and then the rest is tap it into the hole, and cut off the excess. Most of the work I do is pine, so I'm using up off cuts - less wastage that way! Sorry for the ramble, and if this comes on twice - didn't seem to appear the first time...
Great comments. I had a dowel plate made many years ago with tapered holes. First I make dowels oversized. Then I steam then, soak them or boil them a bit and then drive them through the tapered hole which compresses them. Then I drive them into a joint with glue. I have a number of work boxes made with these compressed dowel joints and not a one has ever come lose! Lou :-)
I just drill a hole through a small block of wood and take it to the store and select a dowel that fits nicely.
Having a father who is a machinist, I had him make me my own dowel plates from 4140 steel, basically a copy of the L-N design for the most part.
And for those doubting this, saying it sounds "time consuming", I assure you, it takes FAR less time than a drive to the store (unless you like next door to a shop that sells quality dowels) and less time than it will to call and order or even turn on the PC and place an order.
I normally keep a few different types of stock in thicknesses just oversize of the dowels I normally use, trying to use straight grain material for the stock. And then when I need a peg or two, I just grab my Japanese carpenter's knife (or chisel for really thick or tough stock) and split off as much peg stock as I need, round the end a bit with the same knife, and pound it through the holes until I reach the desired size. Super fast, super easy.
Not to mention you can make dowels from species you will never find offered commercially!
Another neat trick, use sawn stock of size you have a square mortise chisel for and rather than pound the peg all the way through the dowel plate, leave a square section at the top. Now take your hole for the pag, line the mortise chisel up around it and tap it in about 3/16" deep, maybe a bit more, and clean the hole up nice. Now you can pound in the half round peg and have the appearance of a square peg with a nice clean fit!
Also, grade 8 washers will also work in a pinch, especially if you lap them flat to sharpen the edges. Also, large, thick grade 5 washers can be used as well, just drill the size hole you need in the washer (not the center hole, off to the side) and use as normal. These will stay sharp much longer than normal mild steel.
If you have a drill press and want to make your own plate, places like http://www.onlinemetals.com/ will sell you the steel you need in whatever thickness you want, then all that's left is to drill some holes!
I made a dowel plate using an old Stanley plane cutter, drilling multiple sized holes.
When I need dowels in other material than the common maple ones, I use it.
In any event, I measure the dowels first with a dial caliper and use the next drill size down for compression (I have a full set of fractional, numbered and lettered bits). I taper the dowel end slightly on my belt sander.
You can make it even more simple by attaching the dowel to your hand drill and driving it through the desired hole. No muss, no fuss
I had a similar device custom made by a local machine shop several years ago. It has many more diameters (up to 1 inch) in a half inch steel plate. I don't remember the cost but I doubt that it was as much as the commercial item. It works pretty well, even with locust, which I use for outdoor structures.
To NM Woodworker: I am having trouble visualizing what the round dowel plate would look like, and why the dowels would come out better. Any way you can post a picture?
I use only 1/2 and 1/4 inch dowels, but if I were making many different sizes, it seems that one plate with many different sized holes (like a drill bit gauge, but heftier) would be convenient.
@tarsier: I believe what NM is referring to is a hole drilled through the diameter of the round, not through the flat ends, hence his recommendation for a jig to center the hole on it. The fluted sides of the hole then make better cutting edges than a flat hole, especially since spinning the peg with a drill causes a spiral cutting action. Interesting.
For those who can find one or can afford it, the Stanley # 77 Dowel maker is still works great for me. Although the odd size dowel cutters are hard to find and expensive you can make almost any size and length of any type of wood you can find.
This looks easy enough. Can't wait to give it a try? Will let everyone know how I did.
Try gripping the rough dowel in your hand drill and then spinning the wood through the dowel plate. It is faster than hammering, doesn't leave you with a mushroom end and saves time if you need to make a larger number of them.
Thanks for the tip, Swagmann
Many good tips listed. One other, which is similar to SDBranam's tip: I had some maple dowel stock (store purchased) that was slightly too large for the mating holes. I cut the stock to length, then placed them on a microwave safe plate, and hit them with full power in our microwave for about a minute. I did about 2 dozen at a time. This dried them out, and subsequently reduced their diameter sufficiently to easily fit the holes. After they were glued up, they expanded from the glue's moisture, and weren't going anywhere. Just another alternative.
Why not simply make your own dowel plate by drilling a set of the right-sized holes in a 1/4" or 1/2" piece of scrap steel plate? Deburr the holes with a flat file and run the drill(s) in and out a few times to retain the sharp edge on each hole. Alternatively, leave the burr in place and run the dowels in with a rotating drill and the steel burr will trim them nicely.
My friend has a piece of 1/2" angle iron that he drilled his holes in "V" side up. To make a dowel he just chucks a length of wood in his drill and feeds it through the appropriate size hole. The hole in the angle iron acts more like a pencil sharpener and you get really nice looking dowels.
Have you ever tried a hollow auger? I have two, one has eight size options and the other is infinitly adjustable. They work well, especially on hard woods.
I use the LN plate but a local cabnetmaker taught me a mini bench hook with a v cut in the face and a very small stop. rotate the piece and block plane for easier starting. Harry
I realize that you did not want to use store bought dowels. But why? Because you did not want to store them? How much space can that take? And because they might warp? I store all mine with other dowels secured by rubber bands. I've never had any of them warp so much they were unusable. And instead of sizing a dowel to fit your drill bit it is much easier to measure the dowel diameter with a caliper then select the appropriate drill bit to fit the dowel diameter. DUH?
That's kind of ironic that you posted a tutorial on making dowels with the plate. Here's a link to my recent blog post on the same thing!
http://woodworksbyjohn.blogspot.com/2012/05/dowels-with-lie-nielsen-dowel-plate.html
Is it really necessary to harden the steel plate? I mean, which is harder, steel or wood?
I'm going to try doing this!
Log in or create an account to post a comment.
Sign up Log in