Frame-and-Panel Doors Made Easier
A pro's tips for building, fitting, and hanging a traditional door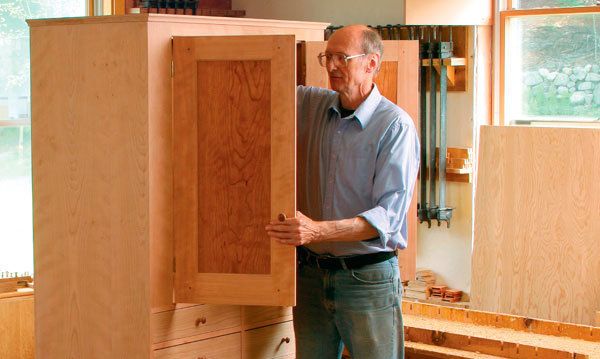
I make Shaker doors differently than others do. While you can’t beat a mortised-and-tenoned, pegged frame for strength and style, I prefer a thin, inset panel surrounded by a quarter-round molding as opposed to raised-panel or pillowed-panel doors. Although the Shakers used moldings sparingly, the quarter-round along the inner edges of the frame makes for a clean, slightly rounded, and understated design. This style can blend into both period and modern environments.
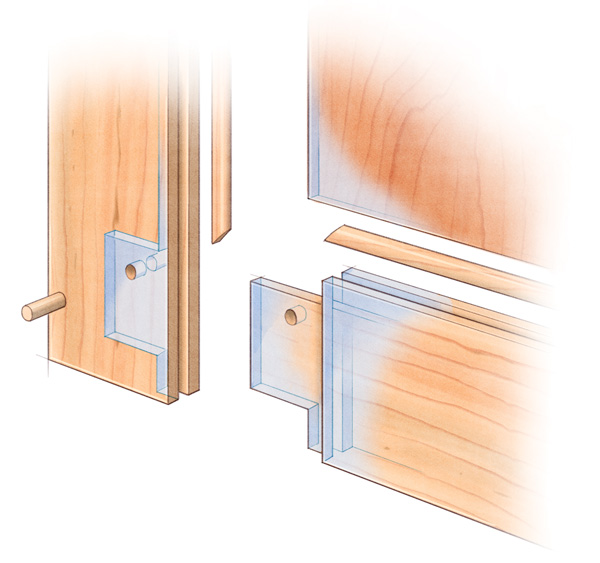
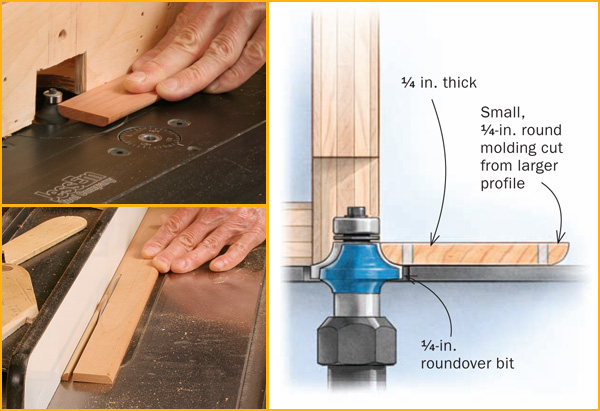
The second difference is that I apply the molding, rather than cutting it into the frame parts. The flat, inset panels are only 1/4 in. thick in a 3/4-in. frame, leaving room for the quarter-round molding around the inside edge. I apply the moldings because it’s tedious and tricky to cope or miter the profiled frame. And if you mess it up, you have to go back and remake the part, which not only means time lost, but also could jeopardize a nice grain pattern you’ve already chosen. Also, the anatomy of a molded frame is much more complex. By the way, Shaker furniture makers occasionally applied these moldings, too.
A better way: Add molding after assembly
 |
|
Applying the molding after the fact allows you to have a simpler mortise-and-tenon joint, with even shoulders. |
Making the doors
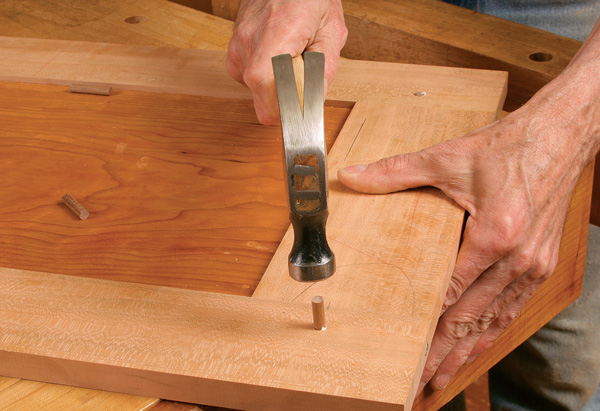
I try to use quartersawn stock to minimize the gaps created by seasonal movement between the door panels and face frame. Cut the four stiles 1/8 in. longer than the opening and the four rails, then cut the grooves on the inside edges of all the parts on the tablesaw. Using a router or drill press followed by a mortise chisel, cut the mortises. Then cut the tenons on the tablesaw, leaving a 1/2-in. haunch to fill the exposed grooves, top and bottom. Next, cut the bookmatched door panels to size, sand them, and test the fit. Before gluing the doors together, I oil the panels so no raw wood shows if they shrink in dry months. Glue and pin the joints, and sand both faces.
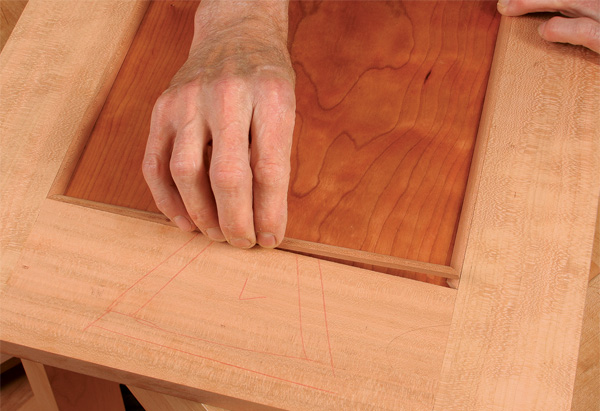
Now I simply cut, fit, and glue the 1/4-in. quarter-round moldings to the outside face of the frame, all the way around the panel. Then I fit the doors to the opening.
Simplify construction with an applied molding
|
Start with a solid frame. Becksvoort recommends a full mortise and tenon. A single peg in each corner adds a decorative element and ensures that the joint stays strong. He finishes the panel beforehand. |
Getting the doors to fit the case
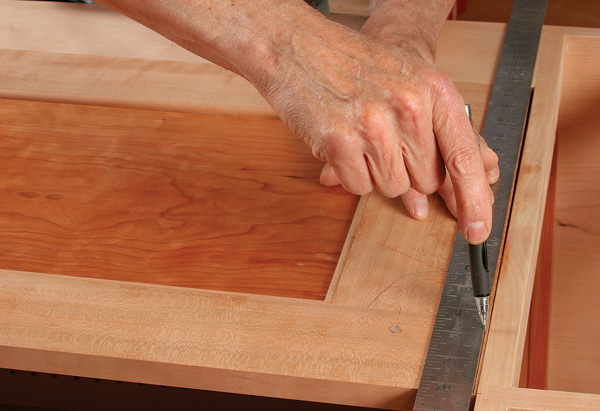
Start with a slightly oversize door and work on the length first, then the width. Working on one door at a time, butt the first door to the hinge side of the opening. Things can be very slightly out of square. This isn’t a problem. If the bottom of the door isn’t square to the case, mark it and square it on the jointer. Then, because the top of the opening might not be parallel to the bottom, do the same thing to the top of the door. Once the bottoms and tops of both doors match the case, take off enough material to leave a 1/16-in. gap on the top and 1/8 in. on the bottom. This technique also works for a single door.
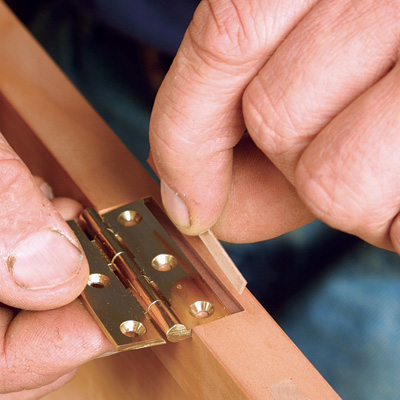
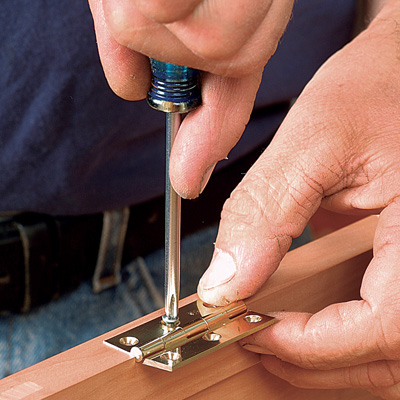
To fit the width of the doors, set both doors in place and trim them (on the jointer) so they just fit into the opening with about a 1/16-in. gap at the hinges. The final fitting will be done after the hinges are in. Last, drill for the doorknobs and add brass butt hinges on both doors.
|
How to install butt hinges |
|
Jointer speeds door-fitting
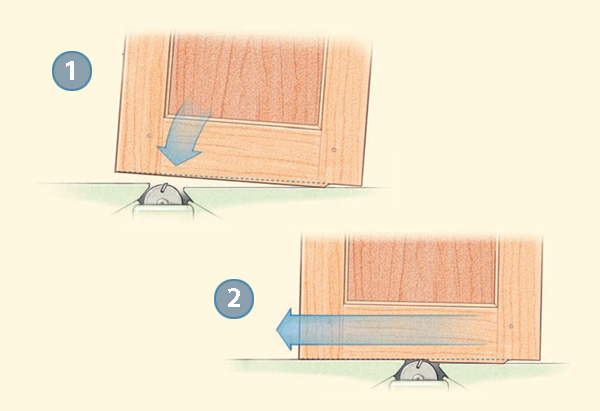
Begin by getting the top and bottom to fit in the opening. One or both may not be parallel to the case or each other, but the jointer gets them to fit perfectly whether you have to cut a straight line or a taper.
Jointer handles straight and tapered cuts
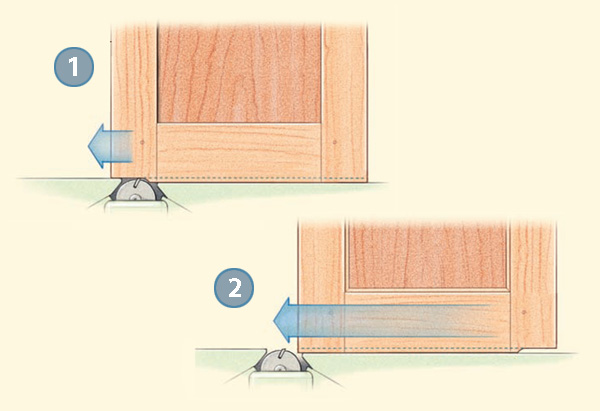
You can’t run the entire end of the door over the jointer or the end grain on the trailing edge will blow out. Becksvoort’s technique prevents that. And he uses a time-tested trick for tapered cuts.
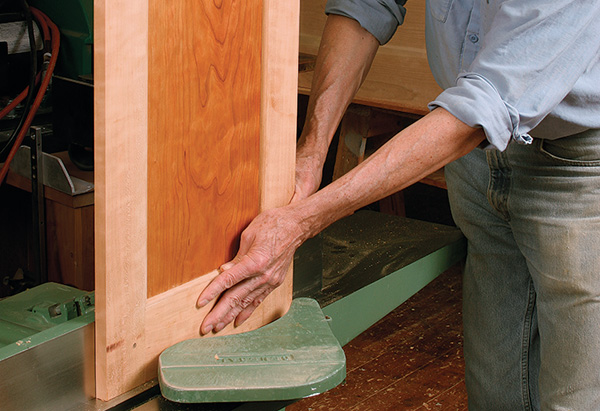 |
For a straight cut
 |
|
First, with the cut set to the final depth, feed the leading end just a bit. Then reverse the door so the first cut is on the trailing end. Run the door straight through to complete the cut. |
For a tapered cut
Fine Woodworking Recommended Products

Starrett 12-in. combination square
Dubuque Clamp Works Bar Clamps - 4 pack



Log in or create an account to post a comment.
Sign up Log in