Perfect Bevels on a Bench Grinder
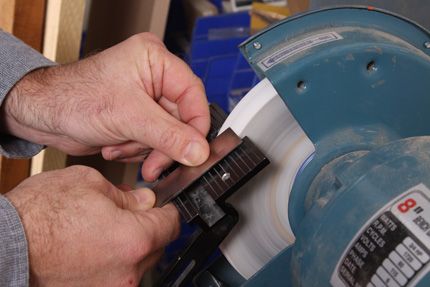
Learn how to use a conventional bench grinder to obtain a perfect bevel on your chisels.
OK, I admit it, I’m spoiled. Since arriving at Fine Woodworking magazine a few years ago, I’ve been lucky enough to have access to a shop I could never afford to assemble myself. Case in point: our sharpening station. We’ve got a pretty sweet Tormek wet grinding wheel that would send me straight to the doghouse if I were to shell out the Benjamins required to bring one home. And the prospect of now learning how to grind a bevel on a conventional 6 or 8-in. slow speed bench grinder always seemed akin to learning how to drive with a Mercedes, and switching to a ’78 Pinto.
 Grind Perfect Edges without Burning |
A recent demonstration by Asa Christiana here at the FWW shop changed all that for me. In less than three minutes, he was able to turn out a uniformly ground bevel that was ready for honing. For even more information about this technique, be sure to check out Joel Moskowitz’s 2008 article. He covers processes for bevel grinding, as well as how to repair damaged tool edges. Here’s how it works, in a nutshell:
 click to enlarge |
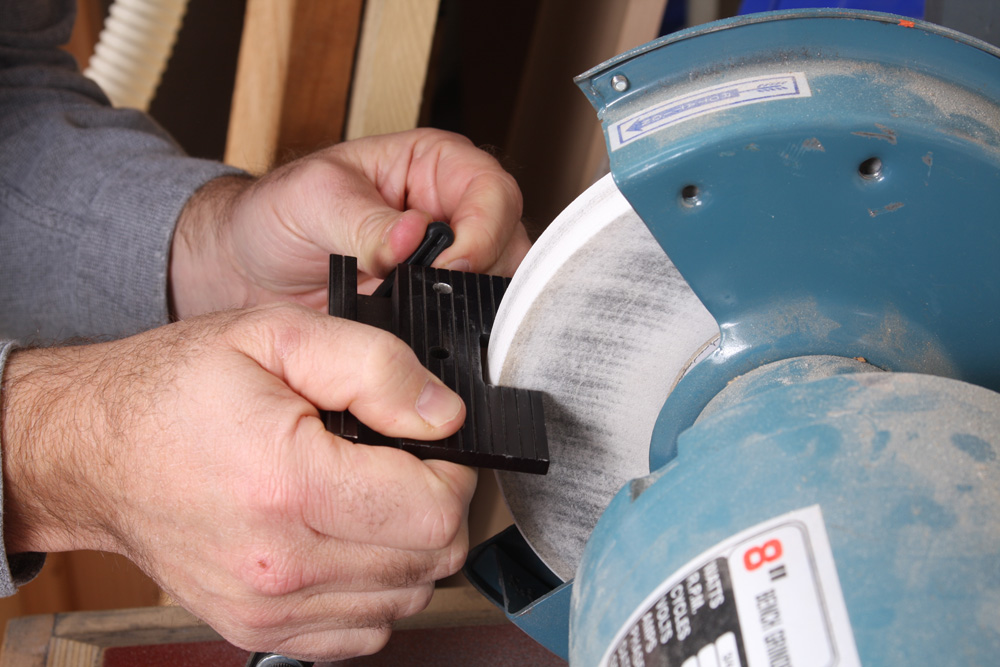
Adjust the rest—In order to dress the wheel ahead of grinding, adjust the rest to 90-degress of the wheel. |
 click to enlarge |
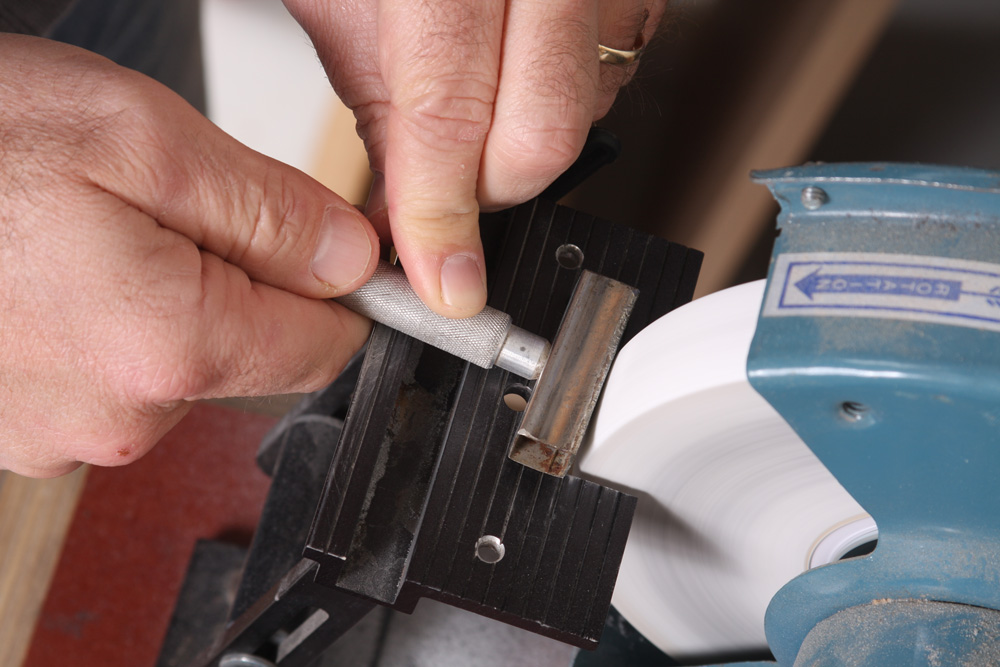
Dress the wheel—Use a diamond tipped wheel dresser and a light touch to add a slight crown to the grinding wheel. A 1/64-in. difference between the center of the wheel and it’s sides is all you need. |
 click to enlarge |
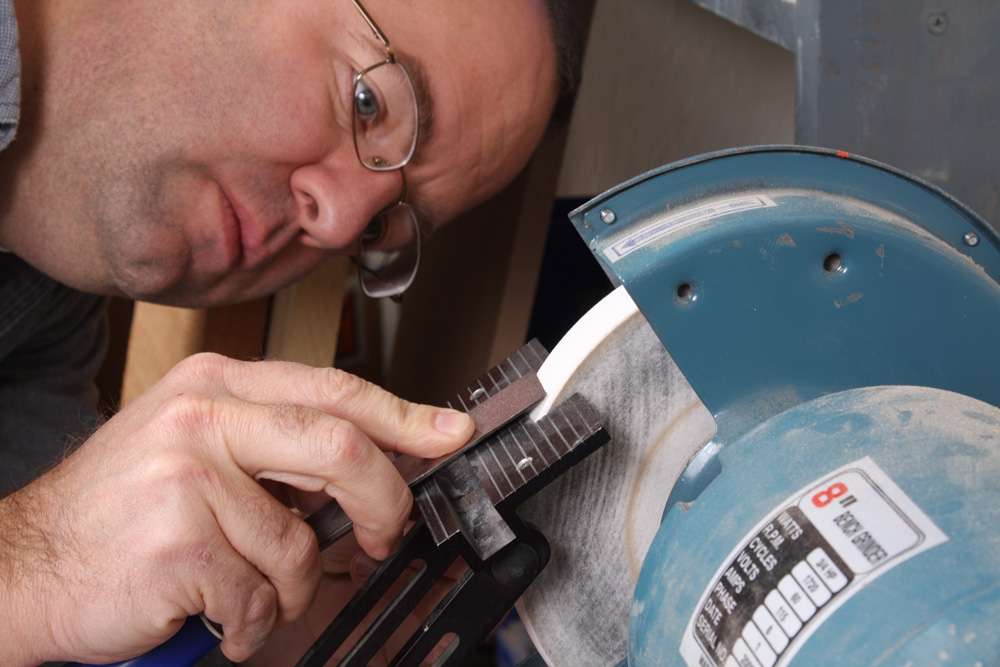
Readjust the rest—With the grinder off, lay the chisel flat on the rest and see where the bevel touches the wheel. Adjust the tool rest so that the contact point is in the middle of the bevel. |
 click to enlarge |
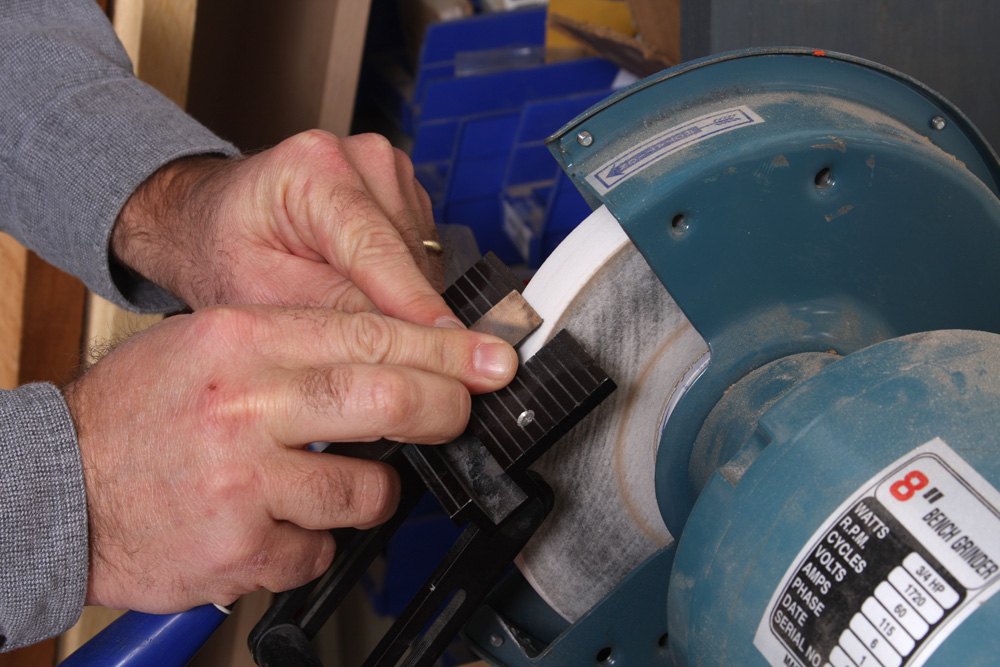
Check the adjustment—With the grinder still off, hold the chisel against the tool rest and rub the bevel back and forth across the wheel a few times. |
 click to enlarge |
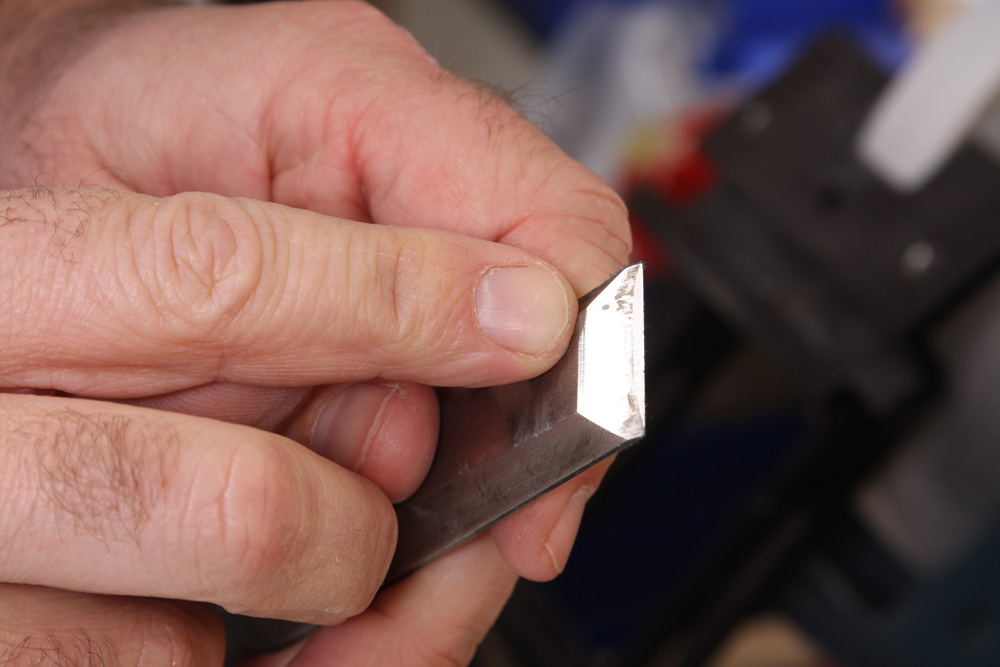
Check the scratches—You’ll know the tool rest is adjust properly when the scratches are centered on the bevel. In this case, my scratches are way off. I’ll readjust until it’s just right. |
 click to enlarge |
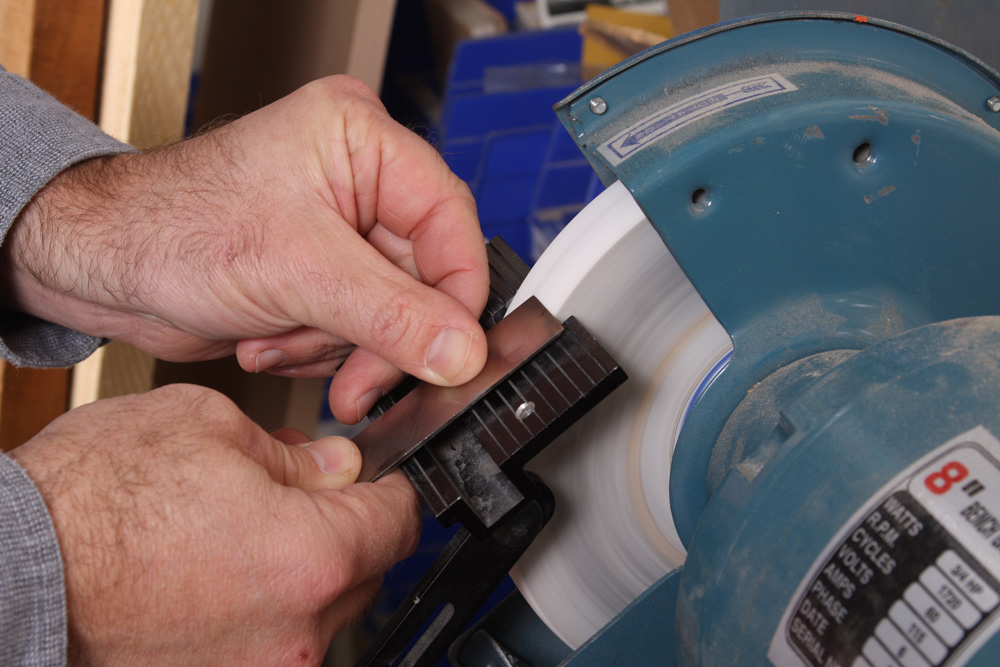
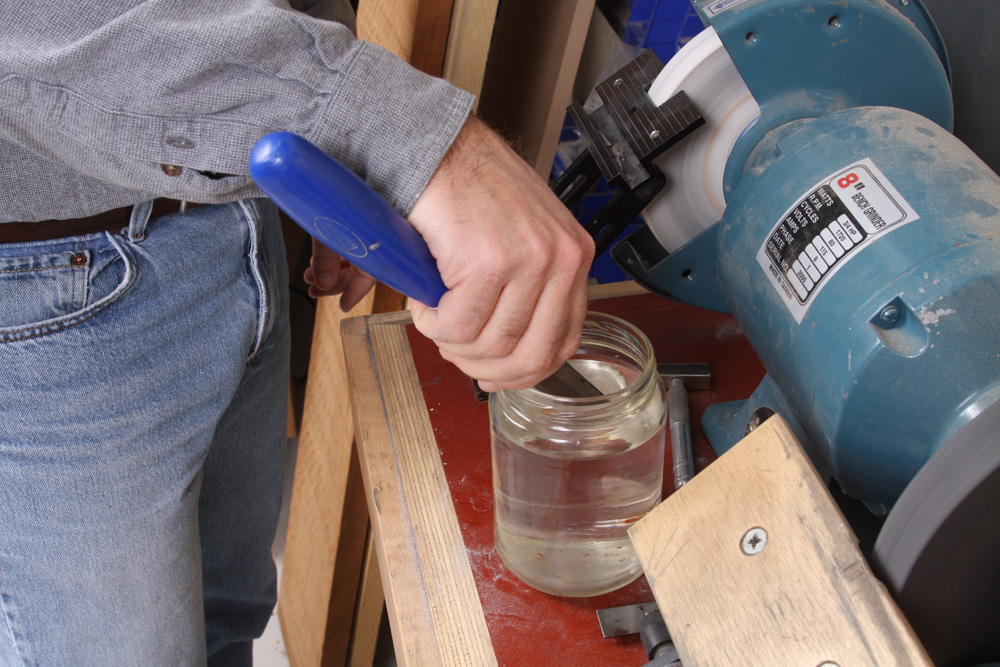
Now grind—Using the index finger of my right hand as a stop, resting against the tool rest, I slide the chisel back and forth across the wheel. Use a light touch and keep your fingers close to the edge to feel the heat building up in the steel. |
 click to enlarge |
Cool the steel—The edge will heat faster as the new bevel gets closer to the tip, so have a jar of cool water close at hand, and dip the steel to keep it from overheating. You don’t want that metal turning blue on you! |
 click to enlarge |
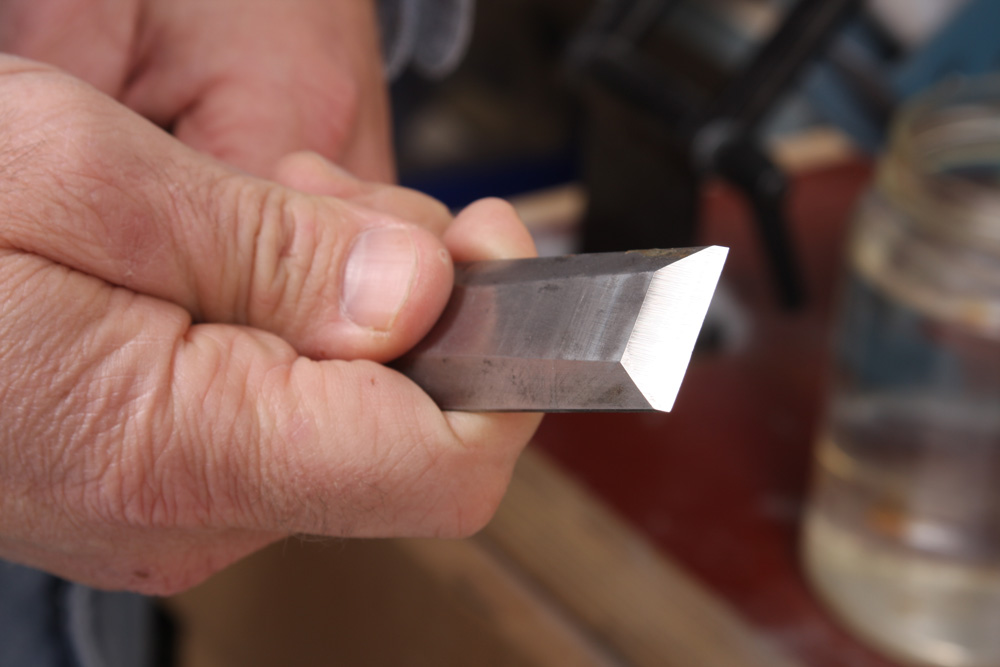
The last pass—The job is done when the grinding marks reach the edges. You’ll know you’re there when you feel a continuous, fine burr along the back. This edge is ready for honing. |




Comments
A few comments if I may.
You're on the right track but as a former professional cutter-grinder I think I can offer some tips that will save money and time.
Re: dressing the wheel, while a diamond dresser such as you show is very good but also costly in some opinions; a simple carborundum stick will do well too at a fraction of the cost.
Also, if the wheel is maintained perfectly flat rather than crowned and kept square to the sides, a true grind will be achieved in a fraction of the time with much less metal ground away.If you're worried about grinding off corners, the same light, controlled touch you employ to prevent burning will keep the edge from bluing or digging in on the corners.
To assure the bevel on your tool steel is going to be ground square to the sides, before grinding simply place a small machinists square across the back or flat of the tool, referenced to one of the sides and with a red indelible marker draw a line encompassing the extreme edge behind the bevel going back about 1/32". This clean line, square to the sides will be a constant visual reference for squareness as you grind.
With the same indelible red marker (not black or blue which are hard to see when grinding) lightly coat the entire bevel to be ground so you can easily see where you're removing steel rather than looking for "scratches".
Lastly, make sure there is ample light, both direct and incident, so you can see what you're doing safely and can view the edge being worked illuminated by a refractive light source so you can see the light as it glints off the surfaces and edge.
I hope this helps.
Good technique, the crowned wheel is certainly a good idea, otherwise its really easy to burn the corners of the chisel. I see a fair amount of black residue on the side of the grinding wheel, have you been a naughty boy and used the side of the wheel?
Who makes the tool rest used in these photos?
Veritas ( Lee Valley Tools ) has the tool rest. You can also get accessories for it for gouges and the like and an angle setter which gets you close to the needed angle for grinding.
Want to sharpen a chisel so you can shave with it?
Old trick but some may not be aware of it. Here it is:
Grind the shape on any abrasive wheel. I often use a worn wheel disc sander and sometime just a grinding wheel(fine grit). Once I have the desired shape, I go to the buffing wheel and buff only the ground side of the chisel point(I use a white or black buffing compound). Within 2 minutes I have an edge which will shave the hair on my arm.
And if I want to follow a more correct protocol(grinding in stages), I will take a flat surface like steel or glass, place a sheet of emory cloth or wet sand paper onto this and grind the slanted side of the chisel or blade, using paint thinner as a lubricant. I almost never do this because I am usually in a hurry but if I do, I still move to the buffing wheel as my last step.
In 1996 we were building a high end house and designed a lot of molding that couldn't be bought and for which ready made knives were not available. So we took tool steel, ground the desired shapes and did the final sharpening with the buffer wheel and white diamond compound. Was alway amazed at how smoothly those knives cut.
That looks like an aluminum oxide grinding wheel, correct? What grit grinding wheel is used in the demo?
Sharpening a tool is like cooking good beef brisket, low and slow is the way to go. Too much margin for error in this technique.
As someone who spent years as a cutter-grinder may I offer the following which I've used successfully for decades:
- A carborundum stick with a straight surface will do as good a job dressing the wheel as the diamond dresser shown at about 1/3 the cost. Both work well.
- dressing the wheel perfectly flat and square to the sides will allow you to produce a well profiled bevel in far less time and with less metal ground away than if you crown the wheel as you suggest. The same gently controlled touch you use to keep the tool steel cool will help you keep from grinding the corners away if that's your concern and as you're producing a good bevel quicker, the tool will be cooler still.
- to make sure the edge ground is square to the tool sides, using a small machinists square referenced to the tools side and a red indelible marker,lay a red mark at the extreme cutting edge and back about 1/32" behind the bevel on the back of the tool steel. This will be a constant visual reference as you grind.
- use the same red (not black or blue as these colors are hard to see as you grind) indelible marker to coat the entire bevel area you're going to grind so you can plainly see where the metal is being removed rather than inspecting for 'scratches'.
- make sure there's ample light, both direct and incidental, in the immediate area where you're grinding so you can safely see what you're doing and can inspect your progress with light refracting off the bevel / edge rather than hitting it straight on.
Trust me, the crowned wheel works way better than a square edge. I was a machinist (trade school) before I was a woodworker, and I always believed in the square edged wheel too. But then I tried this amazing technique, recommended by Joel Moskowitz, from Tools for Working Wood, which was taught to him by an old-school guy from Europe.
Rounded wheel gets you a square edge! It's counterintuitive, I know, but you have to try it. It focuses the grinding action on one part of the edge at a time, making it much easier to control. And as for keeping the edge square, it is simple. If the edge is already square, you just use that to track your progress, flipping the tool over to check.
If the edge isn't square, mark a line across the back, set the tool rest to 90 degrees, and grind the tip blunt at 90. Then reset the tool rest to the grinding angle, usually 25, and start grinding, using the blunted tip to track your progress.
Try it. It is amazing.
Aluminum oxide wheel, 80 grit. Get a friable wheel like this one. Particles break off leaving fresh edges behind.
and it is nowhere as fine of an edge as a Tormek. You may please a few poor people with this claim but for those of us who own a nice wet grinder like a Tormek we know the difference as well as you do. I am great on the grinder always have been but my best day on a bench grinder was never as good as my worst day with a Tormek. I just spent 3 months with the top sharpening tools in the world and the Tormek is the best of the crowd. High end woodworking is not a poor mans gig.I hate to say even hand tools are expensive and no tool works well dull I fear you are giving people the idea that the grinder does as good a job as a Tormek this claim will ruin you credibility as too many independent tool testers have said it again and again Tormek is the best edge a tool can get. I would use hand whetstones from several companies before I would trust a grinder to put a fine edge on a tool IMHO
@thedude50:
I think you need to go back and reread the full text. It describes a process for creating a hollow-ground bevel, not honing an edge.
-Steve
thedude50: saschafer is correct - this technique is just for grinding the bevel - not for honing.
I must say, I still prefer the Tormek - it's nearly brainless when used with the guide - but with a new baby and all the expenses that go along with that - I'll be sticking to a conventional grinder for the time-being (in my home shop at least!).
Best to you,
-Ed
I would go more coarse on the wheel than 80. 46 is a better choice unless the wheel has to do double duty with bench and turning tools.
"thedude" - I don't think you have any idea what you're talking about. I could do professional work with a $50 bench grinder and a few pieces of brazed scrap steel for a rest, and spend less time on the grinder and stones than you do on the tormek (and get a better edge).
The hollow off the tormek doesn't hang in as long as a 6 inch grinder hollow does - it's not as deep, and you have to keep water in it. It does a good job, and the water and slow speed is nice for sensitive steel (like japanese tools in need of repair), but...
..I have no clue, but for a beginner, who would ever worry about the keenness of the edge off of a grinder.
Point taken Saschafer. I still feel the writer is misleading new people. They will think they can get a sharp ready to use edge on a bench grinder. Hell I own two bench grinders one fast and one slow. I have used them in the shop for over 35 years and I only shape tools on the grinder. I never would think of a grinder as a finishing tool. I have a full set of Shapton Stones and a Trend Diamond stone to do hand work and even with the new Tormek jig for the Bench Grinder it is still not a finishing tool you will never get sharp off a bench grinder ever. and David Weaver your an arrogant ass there is no way you could come close with a bench grinder and you old oil stones to the edge i get on any tool with a Tormek T7. I am sorry your too poor to own a Tormek maybe one day you will find one on Craig's List for a good price. Then you could step up to a real fine edge With us more fortunate folk. The fact is I can do more faster on my Tormek than you ever could dream of doing with a bench grinder you got at Harbor freight for 39 bucks.Get a Life
thedude50...in reading you comment I though I was reading smart-assed comments that get posted on Facebook all the time. Sure, there are differences of opinion on many subjects but for lands sake there is no need to speak of the author the way you did. Respect other opinions and learn from them. I probably have $8,000 worth of sharpening equipment and in spite of all that I have a friend who makes scary sharp chisels with different grits of emery paper glued to some plate glass that I would be hard pressed to improve on - and his work is very nicely done.
Log in or create an account to post a comment.
Sign up Log in