Synopsis: Sending jointer knives out for sharpening is inconvenient and the results are not always great. Also, re-setting the new knives in the jointer is a time-consuming and tedious job. So Hendrik Varju came up with a way to sharpen jointer knives without removing them from the cutterhead. A simple locking jig and his easy to understand instructions are all you need.
From Fine Woodworking #224
Sending jointer knives out for sharpening is inconvenient enough, but I’ve also been unhappy with the results. I’ve tried half a dozen sharpening services over the years, and the edges were rarely very fine and often quite coarse. Also, re-setting the new knives to perfection is a time-consuming and tedious task—time I’d much rather spend woodworking. For years, I’ve been trying to devise a reliable way to get really sharp knives without having to remove them from the cutterhead. Any freehand method wasn’t accurate enough. And then I came up with this jig. It is simple to make and can be adapted easily to your own machine’s dimensions.
This DIY sharpening doesn’t completely replace the need for a sharpening service. If your knives get large chips, it’s best to have a sharpening service do the heavy grinding work. However, a hobbyist who uses his machines carefully should get years of use before having to remove the knives.
1. Lock the head in place
To ensure that each of the knives is sharpened at the same angle and left at the same height, it is critical that the cutterhead is locked in the same position when each knife is sharpened. The jig does that.
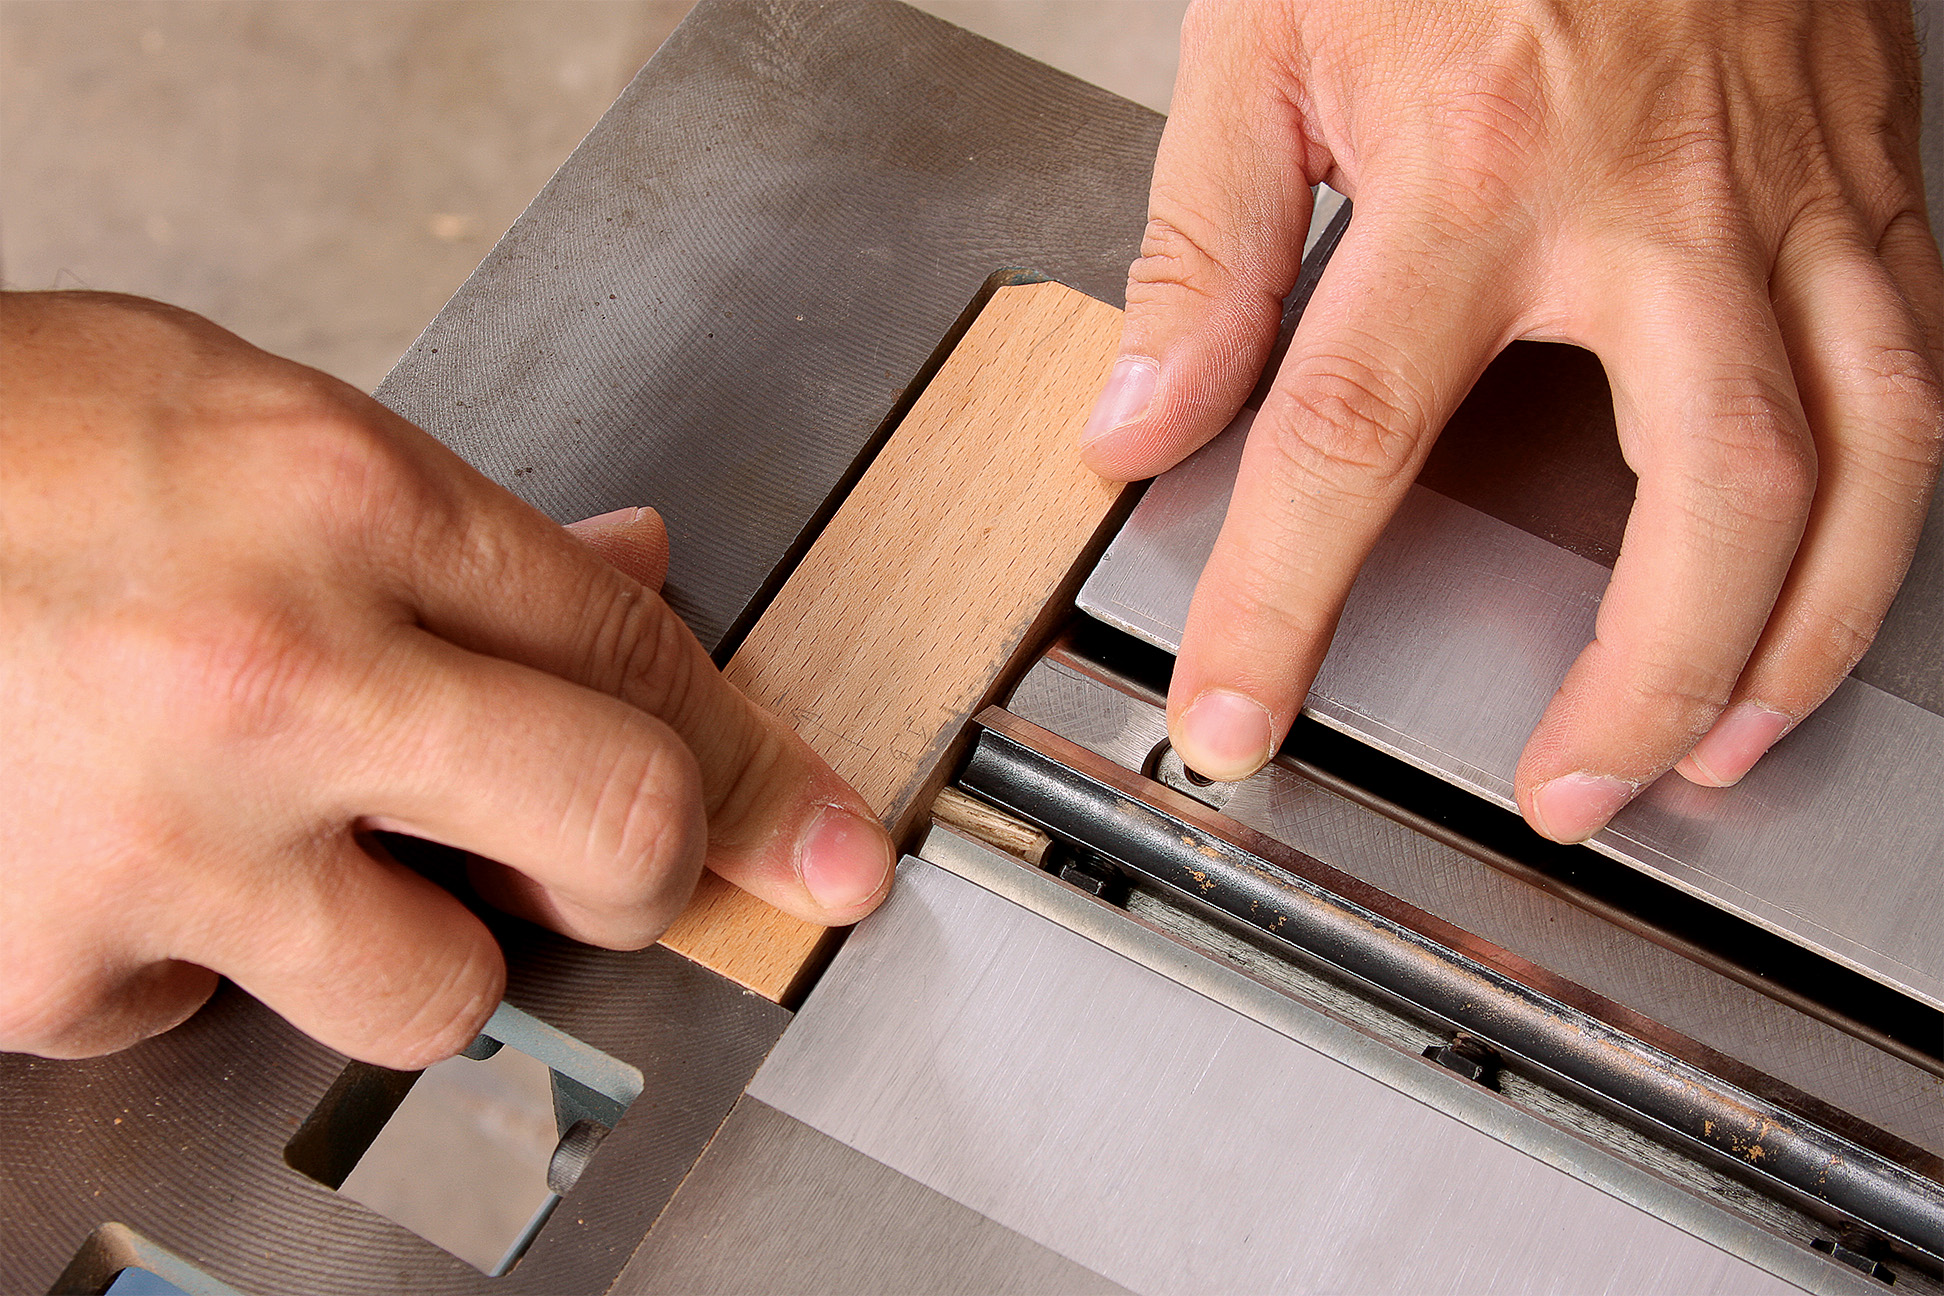
Make a jointer locking jig
The hardwood body goes into the opening in the rabbeting ledge adjacent to the cutterhead. The fit should be snug enough to avoid any slop but still be easily removable.
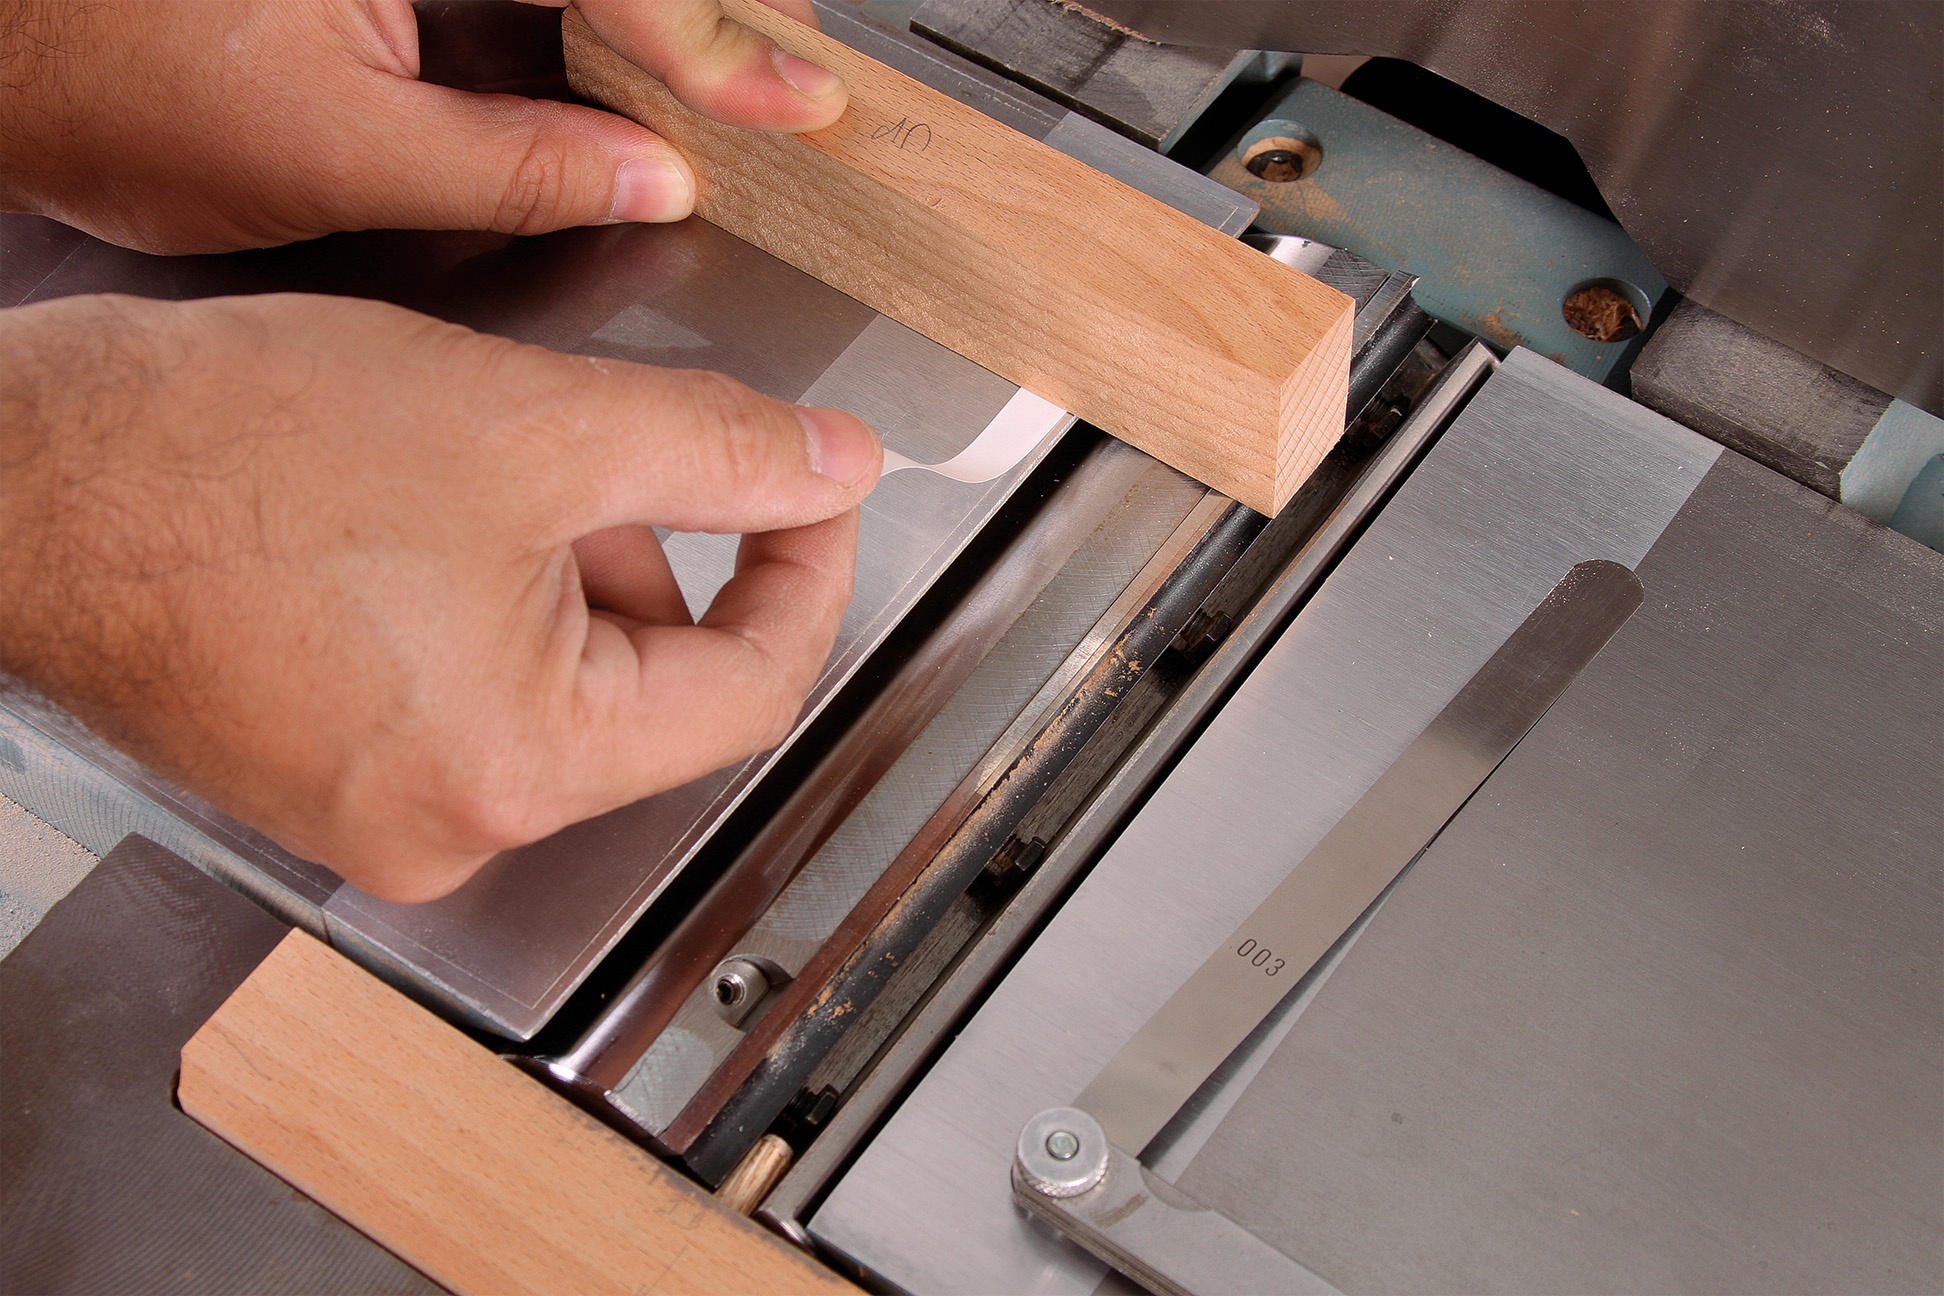
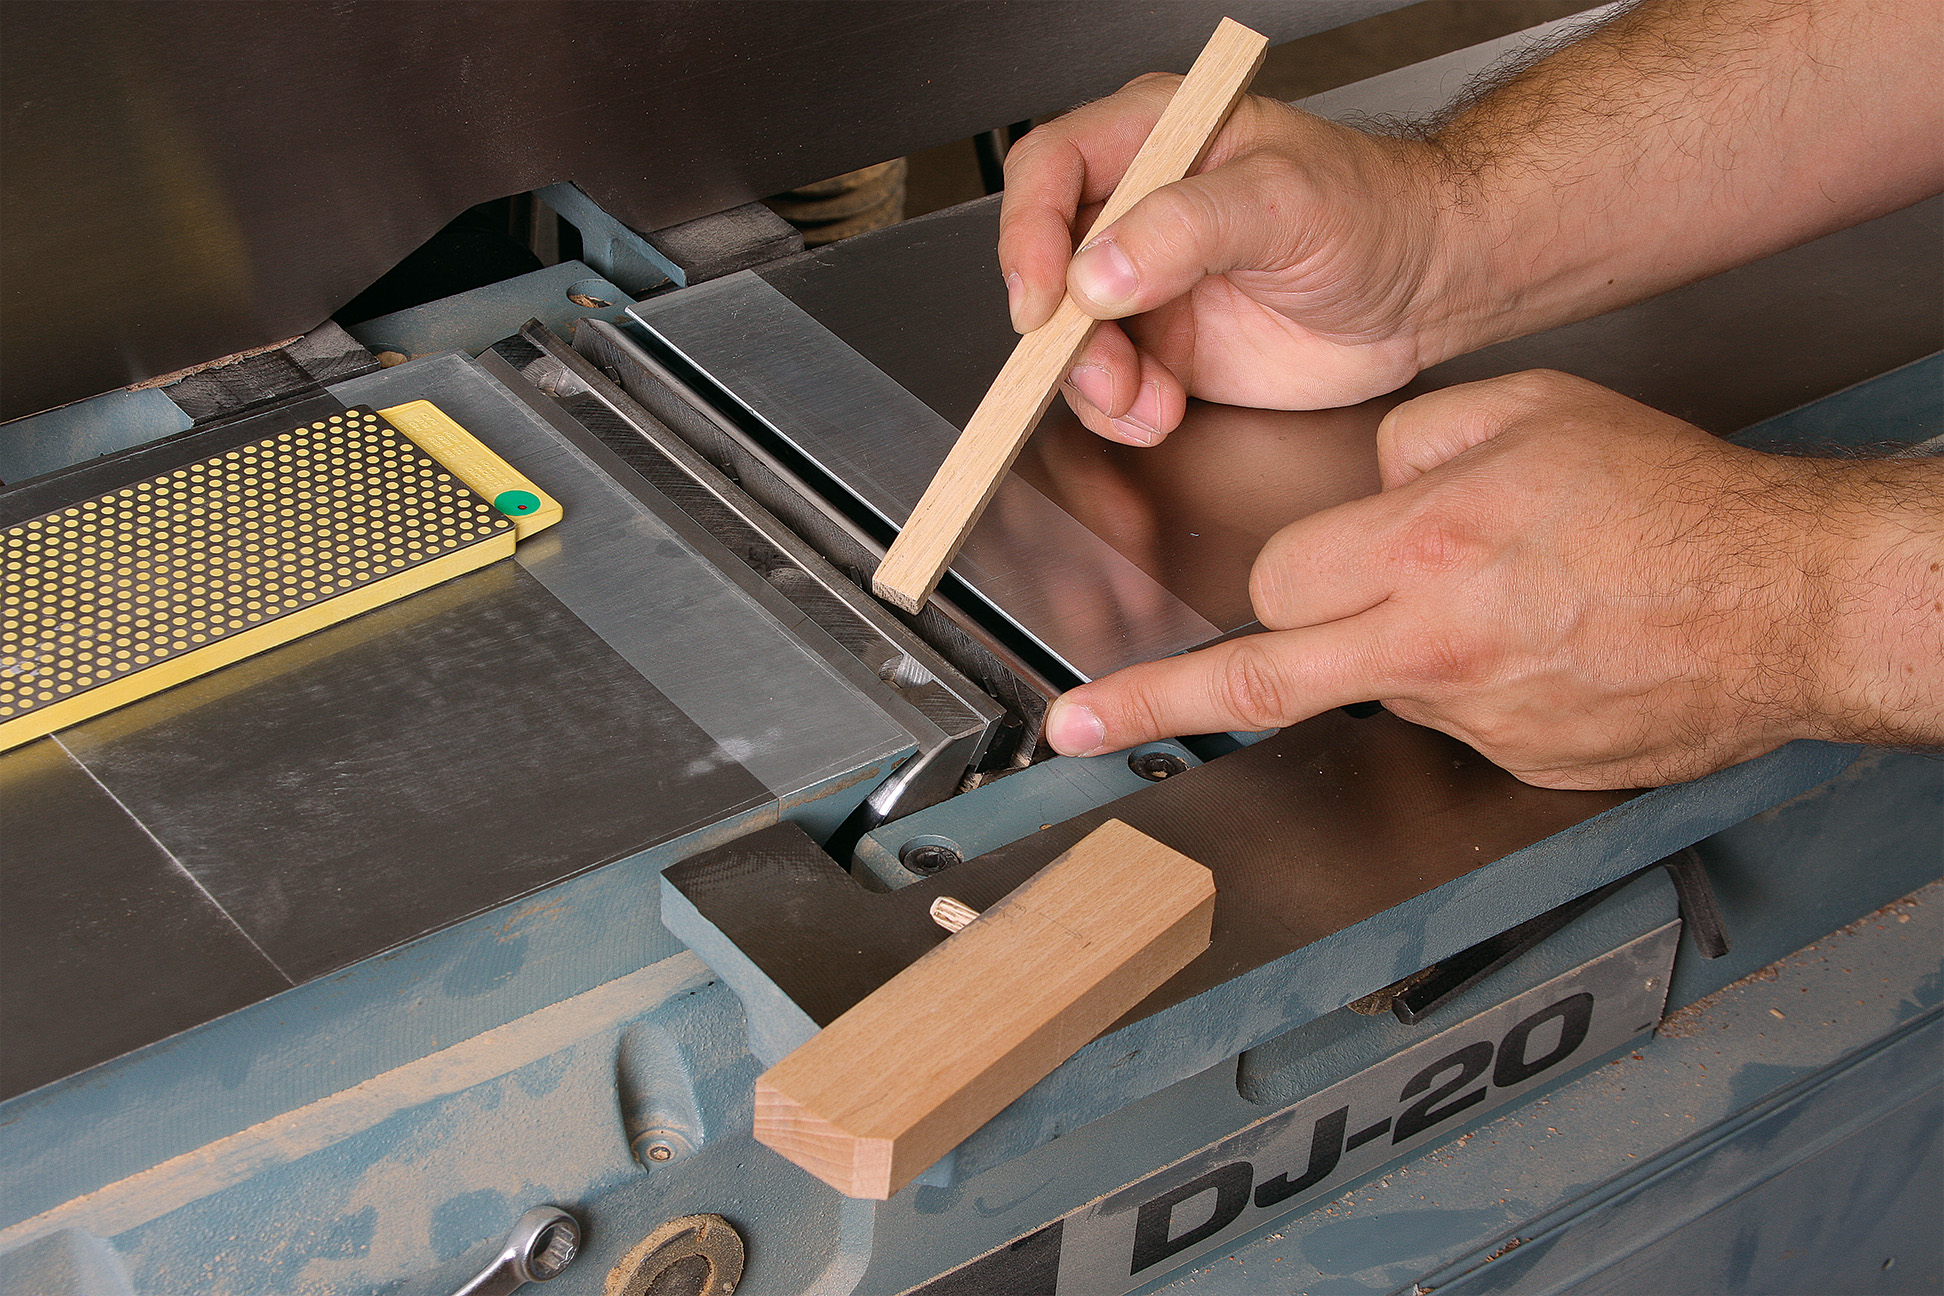
Insert locking jig. With the machine unplugged, the infeed table all the way up, and one of the knives at its apex of its arc, test-fit the jig.
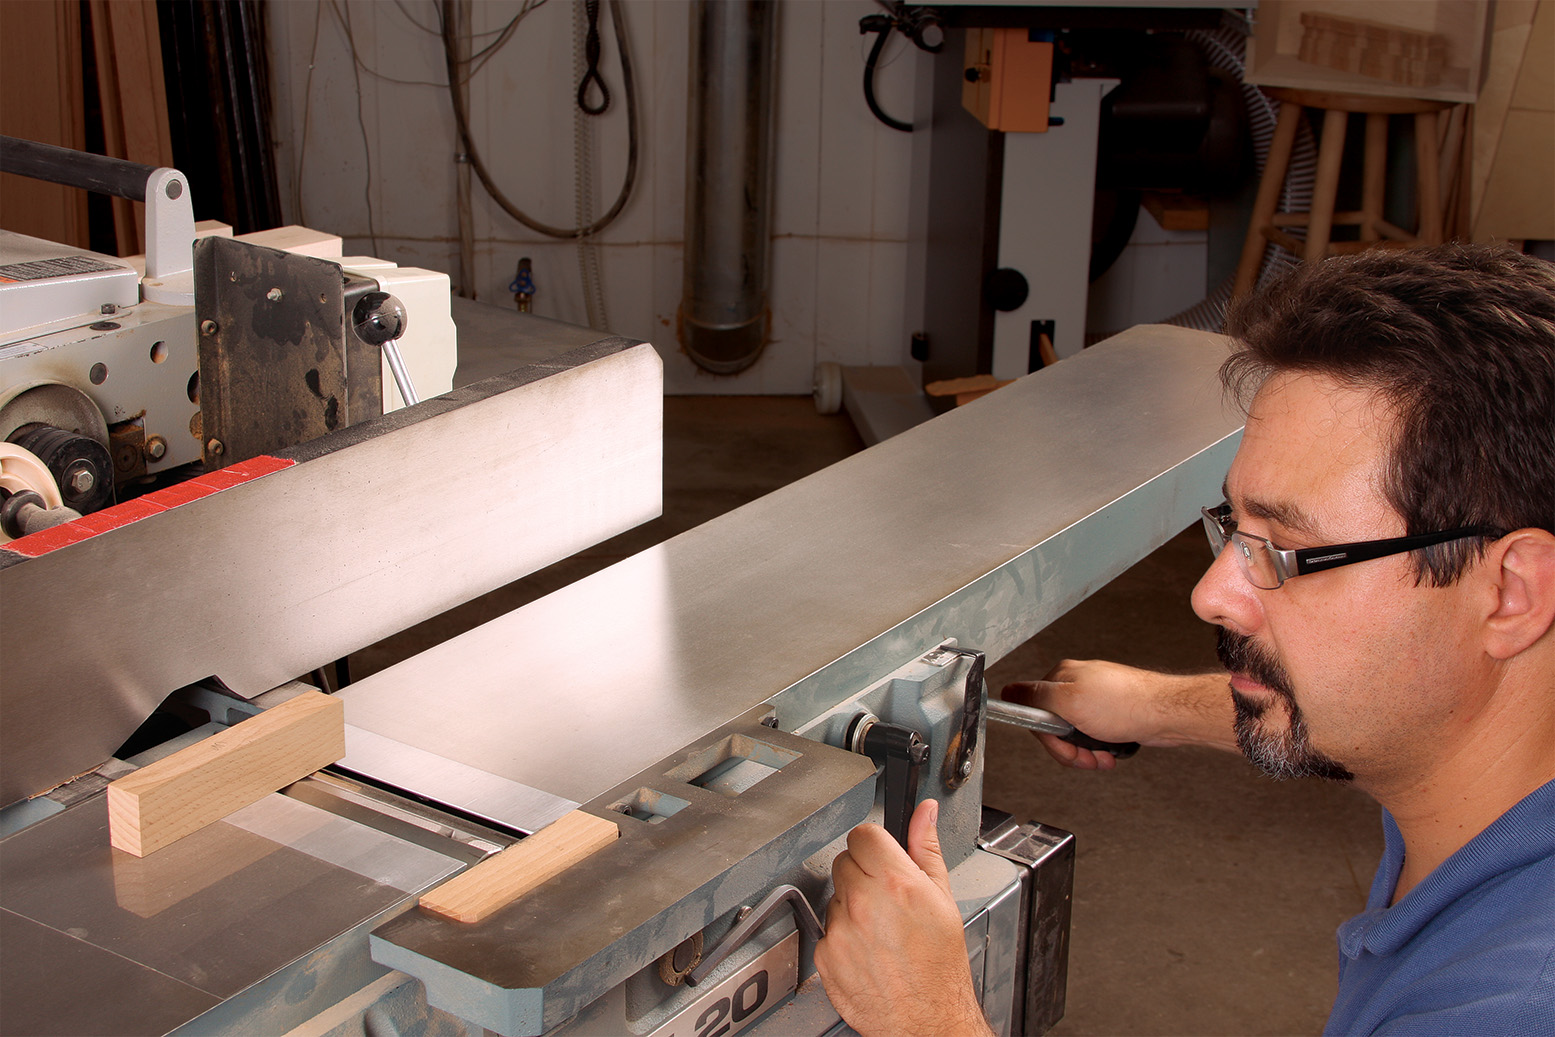
Lower the infeed table an 1/8 in.
Move the table. This will rotate the knife forward, so it ends up about 1⁄8 in. below a block of wood representing the sharpening stone. Now you can hone the bevel at an angle that won’t rub on the workpiece.
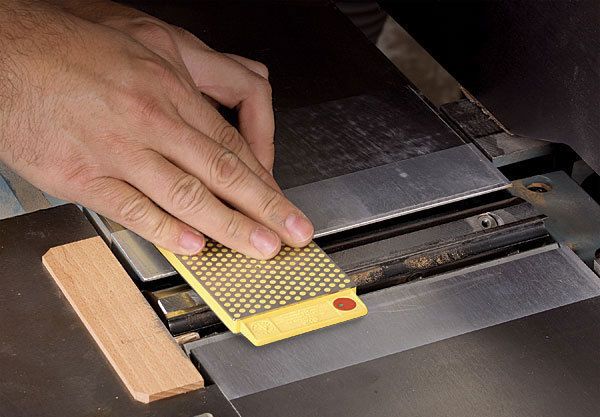
2. Hone a microbevel
Your aim is to remove only enough metal to get rid of any small nicks in the knife. This secondary bevel should be much smaller than the main bevel.
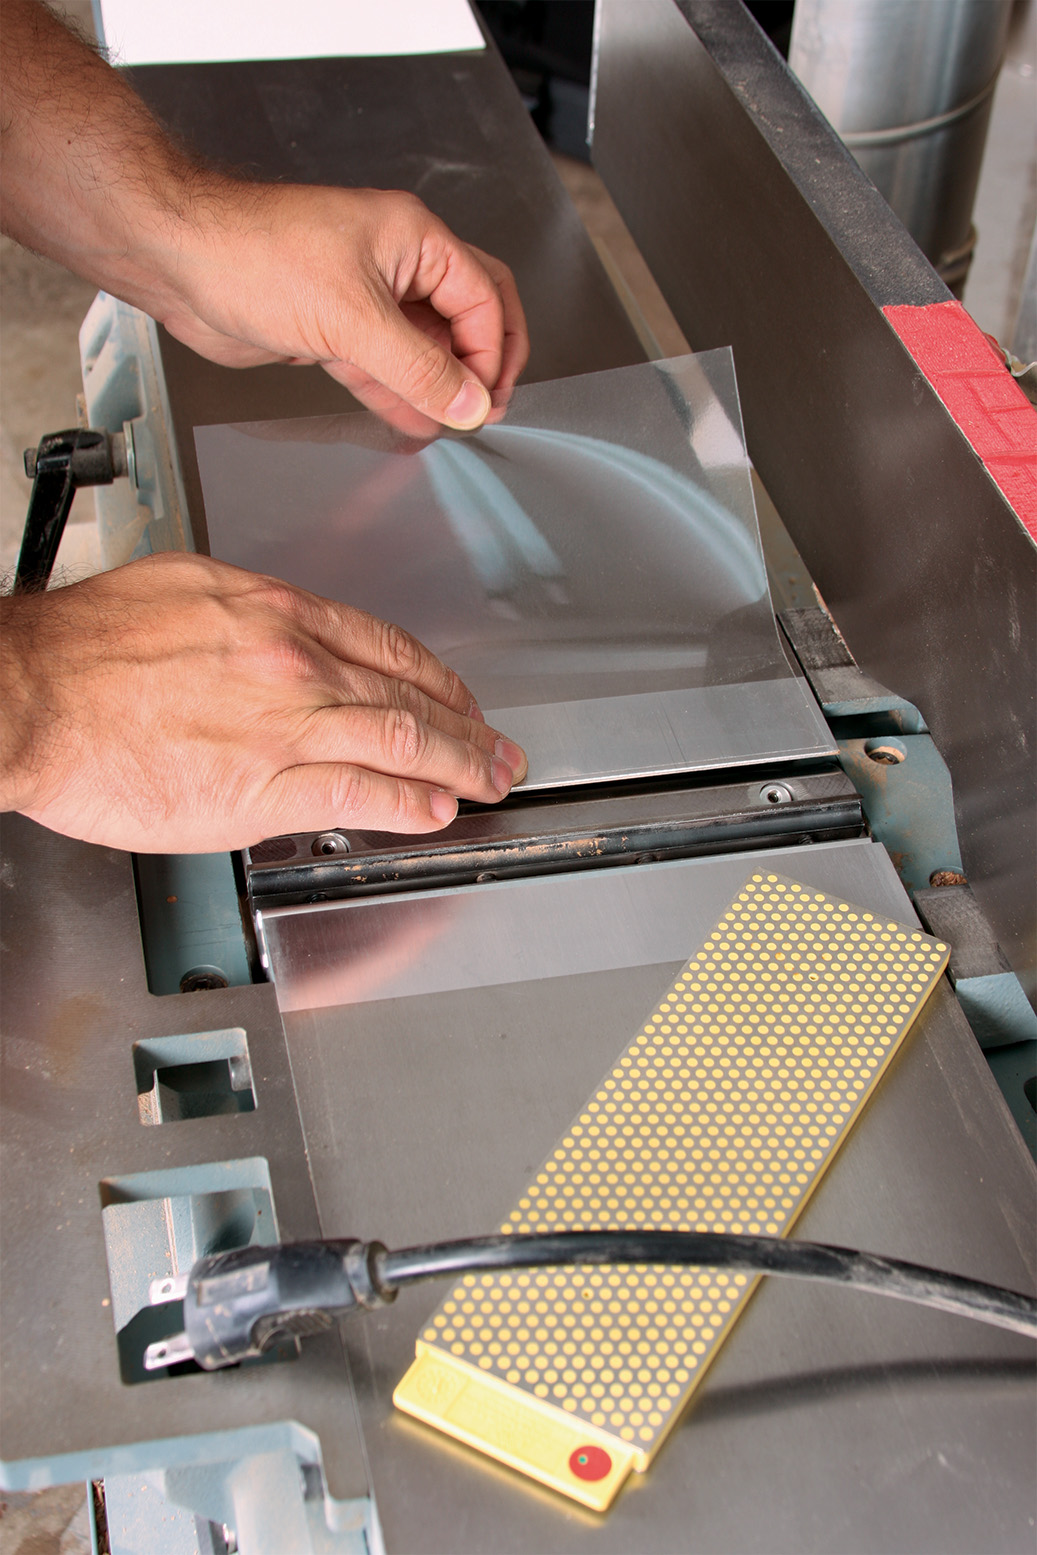
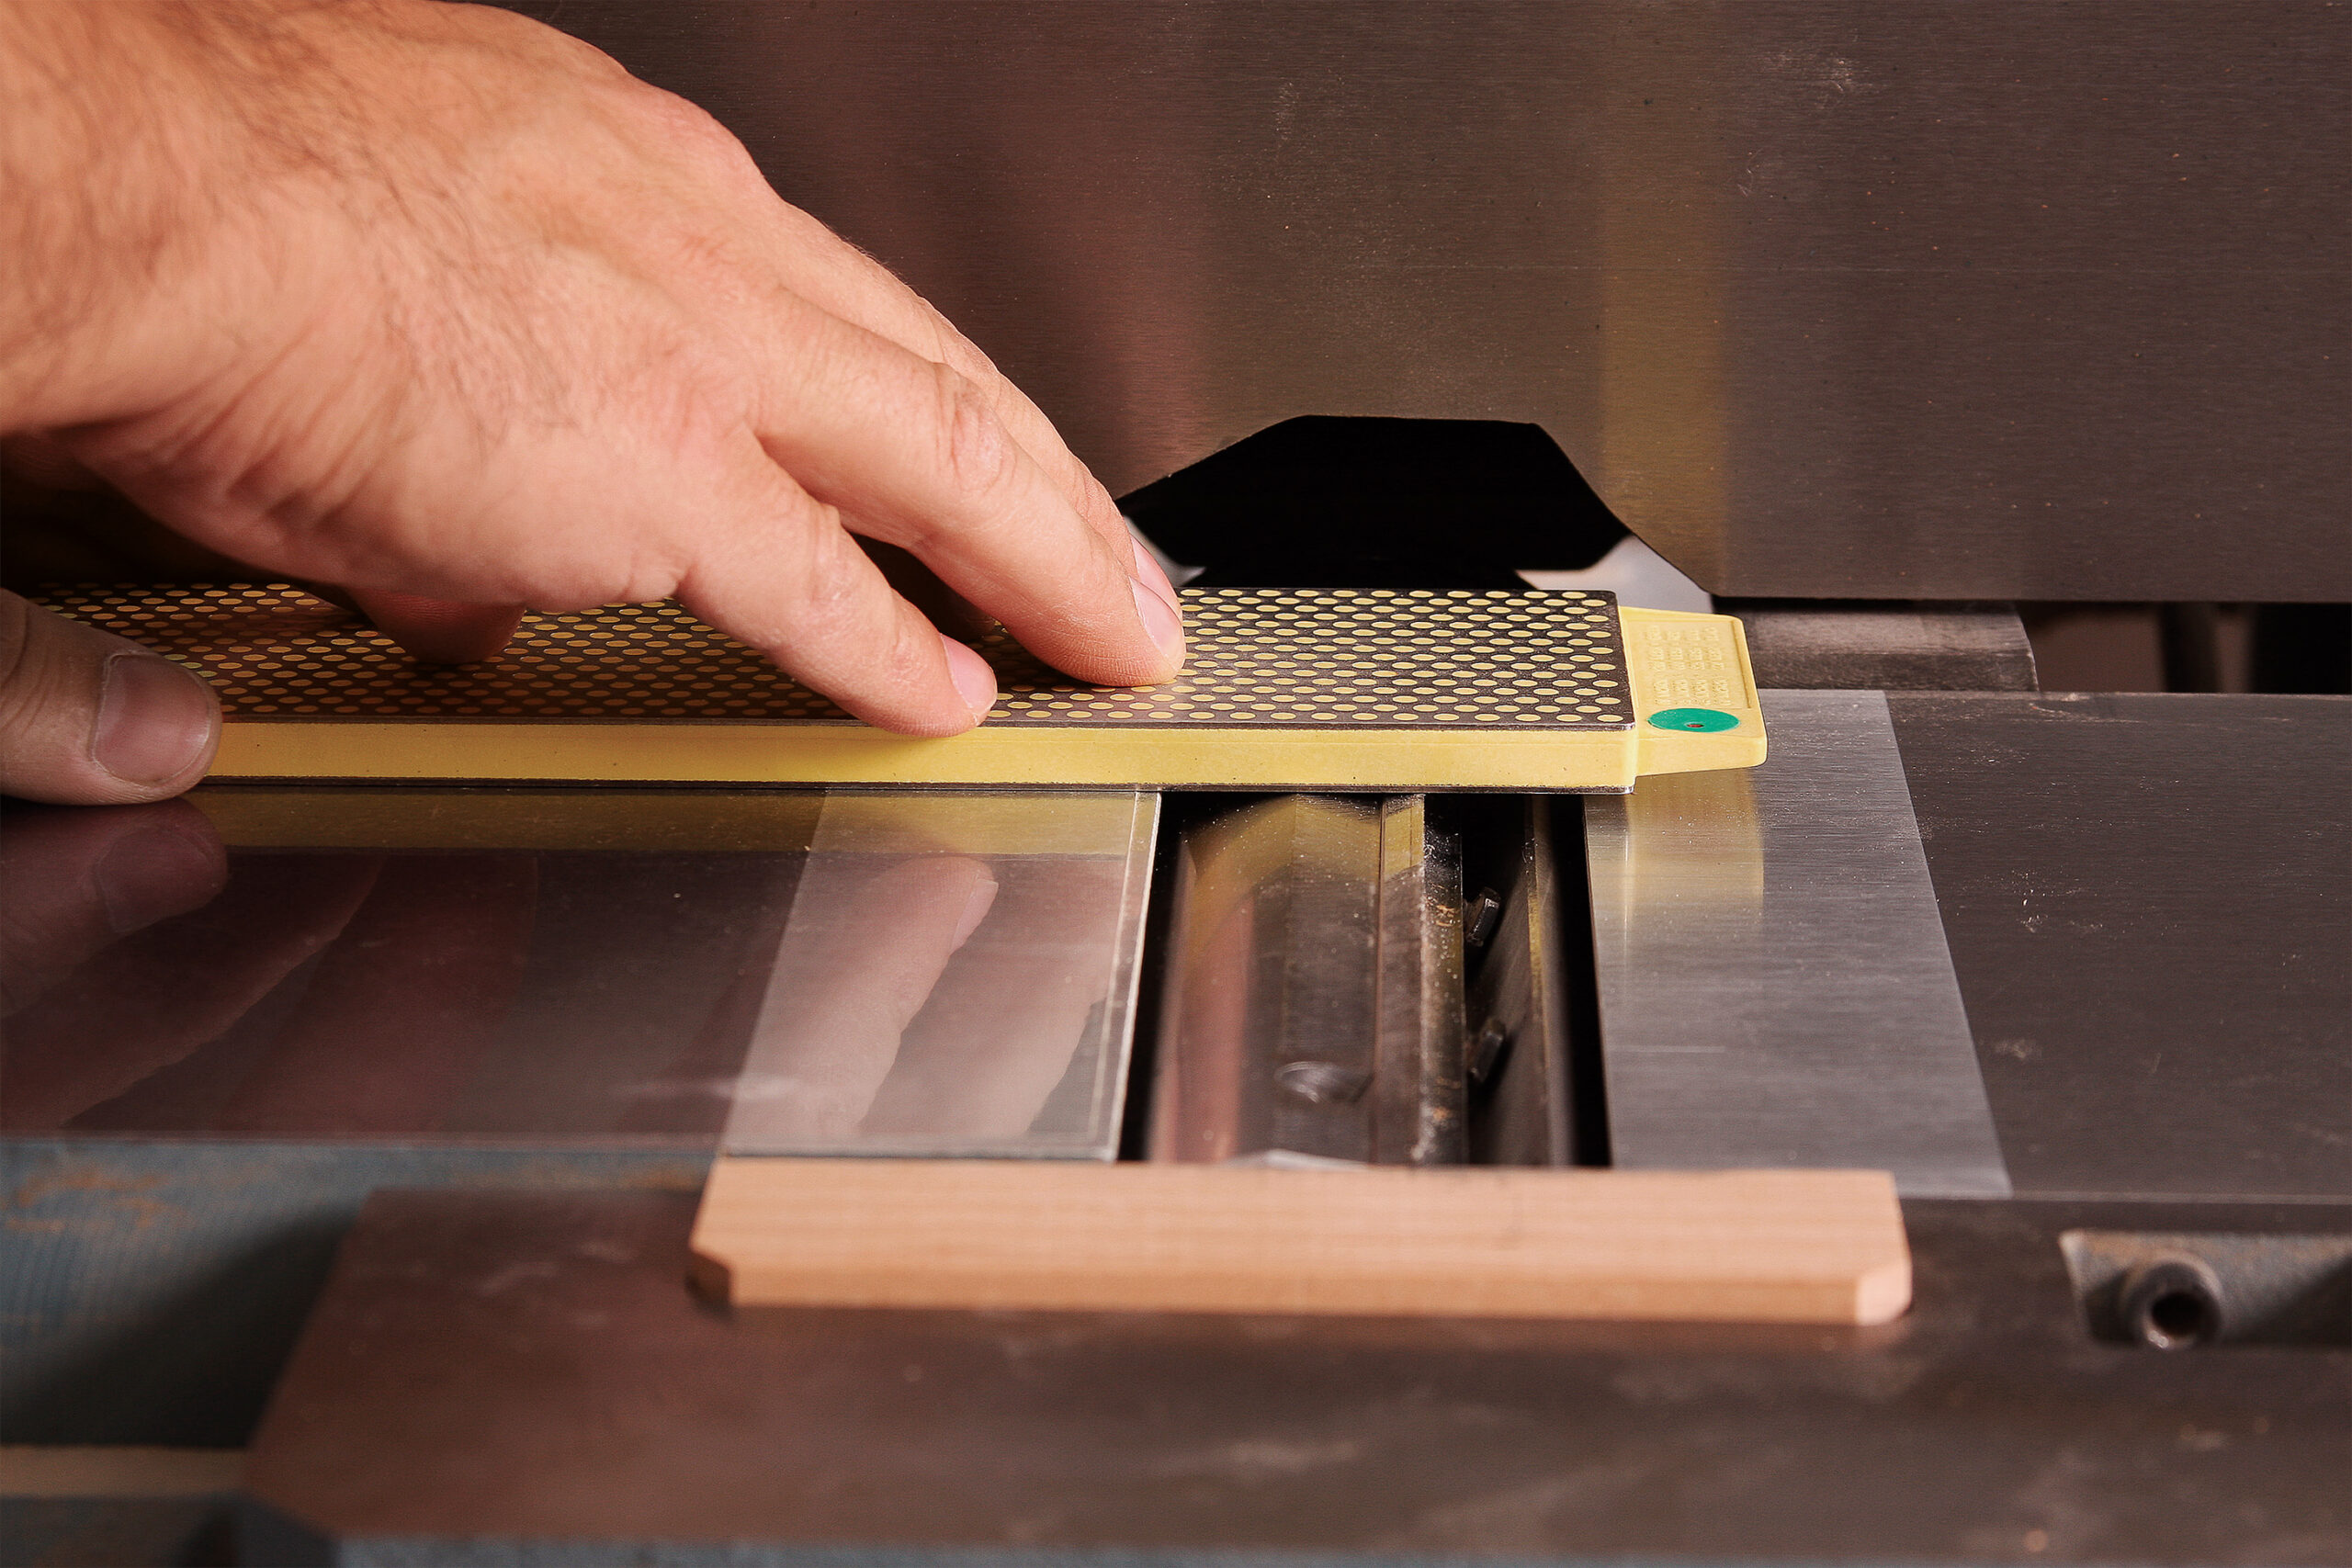
Protect the table. Apply some self-adhesive, plastic laminate sheet (leevalley.com) to the start of the outfeed table. This will protect it from the sharpening stones. If you are just lightly honing the knives, clear packing tape works fine.
Set the depth of cut. Lower the outfeed table until a block of wood (representing the sharpening stone) just touches the knife. A strip of copier paper should just slip under the wood at the start of the outfeed table.
Sharpen the knife. Place the fine (600-grit) side of the diamond stone on the knife with about half its length on the outfeed table. You can also use water- or oilstones, or sandpaper on plywood. Draw the stone toward the outfeed table, to avoid creating a burr. Lift the stone back over the knife and repeat the step.
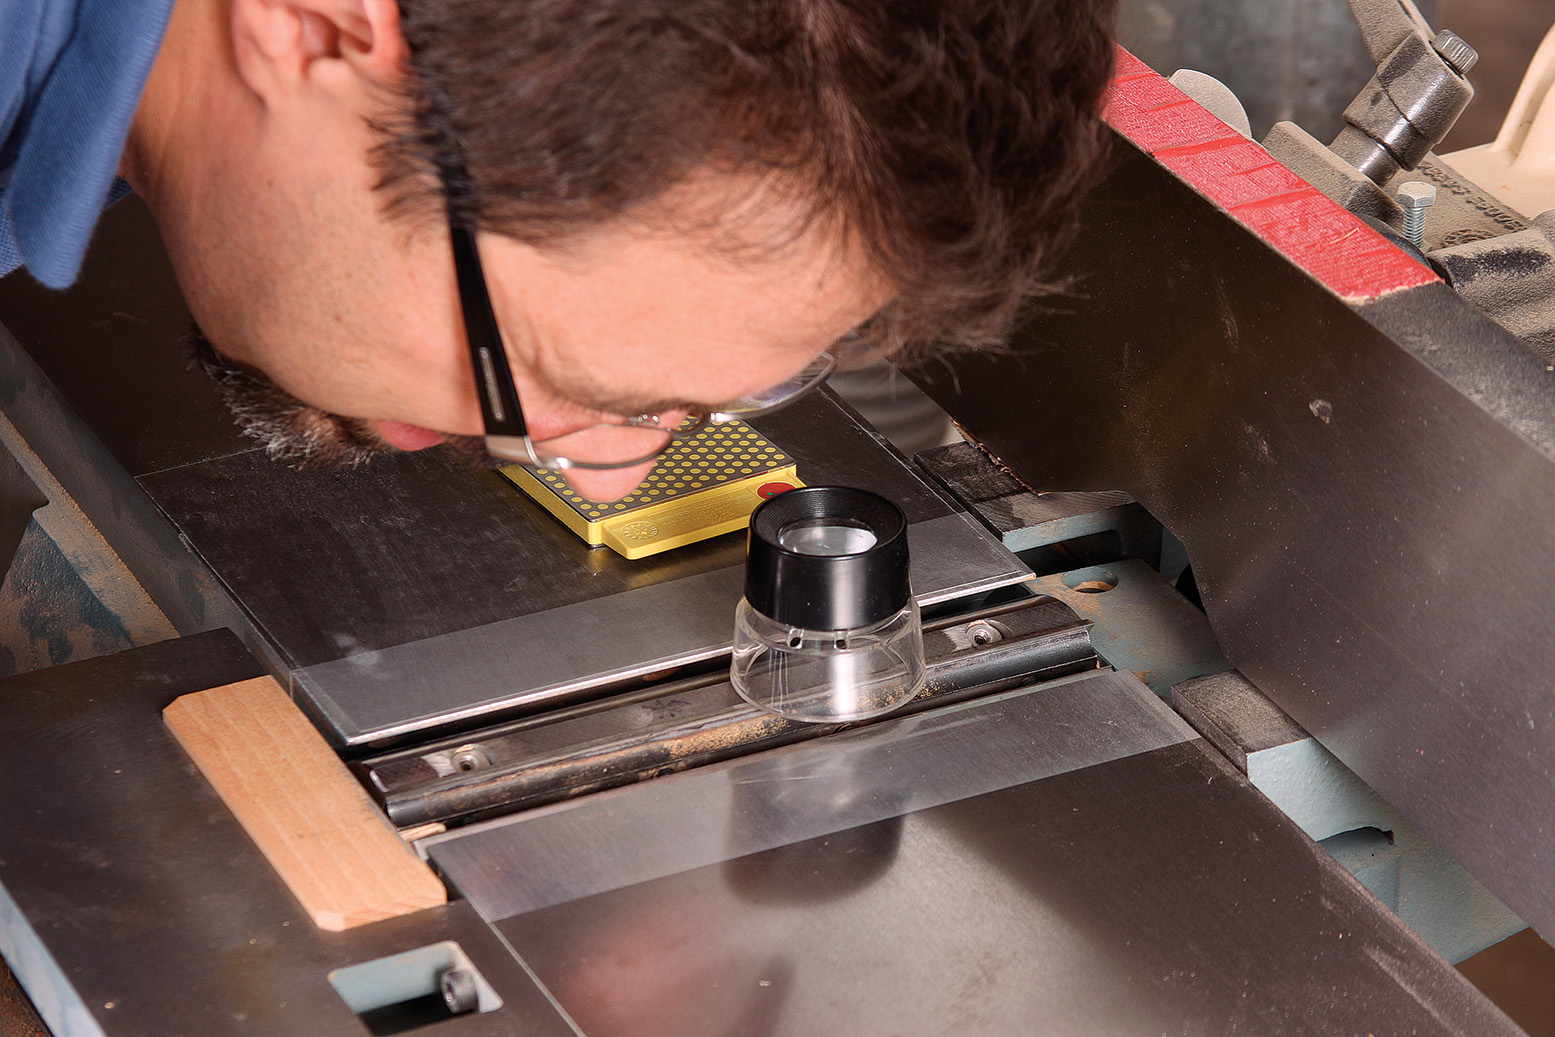
Check your progress. Before switching to the 1,200-grit side of the stone, use a magnifying glass to check the microbevel. The width doesn’t have to be uniform, but it must extend along the full length of the knife. You will automatically stop cutting when the tip of the knife is no longer proud of the outfeed table.
Tip: Burr be gone. If you only move the stone from right to left, you won’t create a burr on the flat side of the knife. If you go from left to right and create a tiny burr, it is easily removed with a small slip stone.
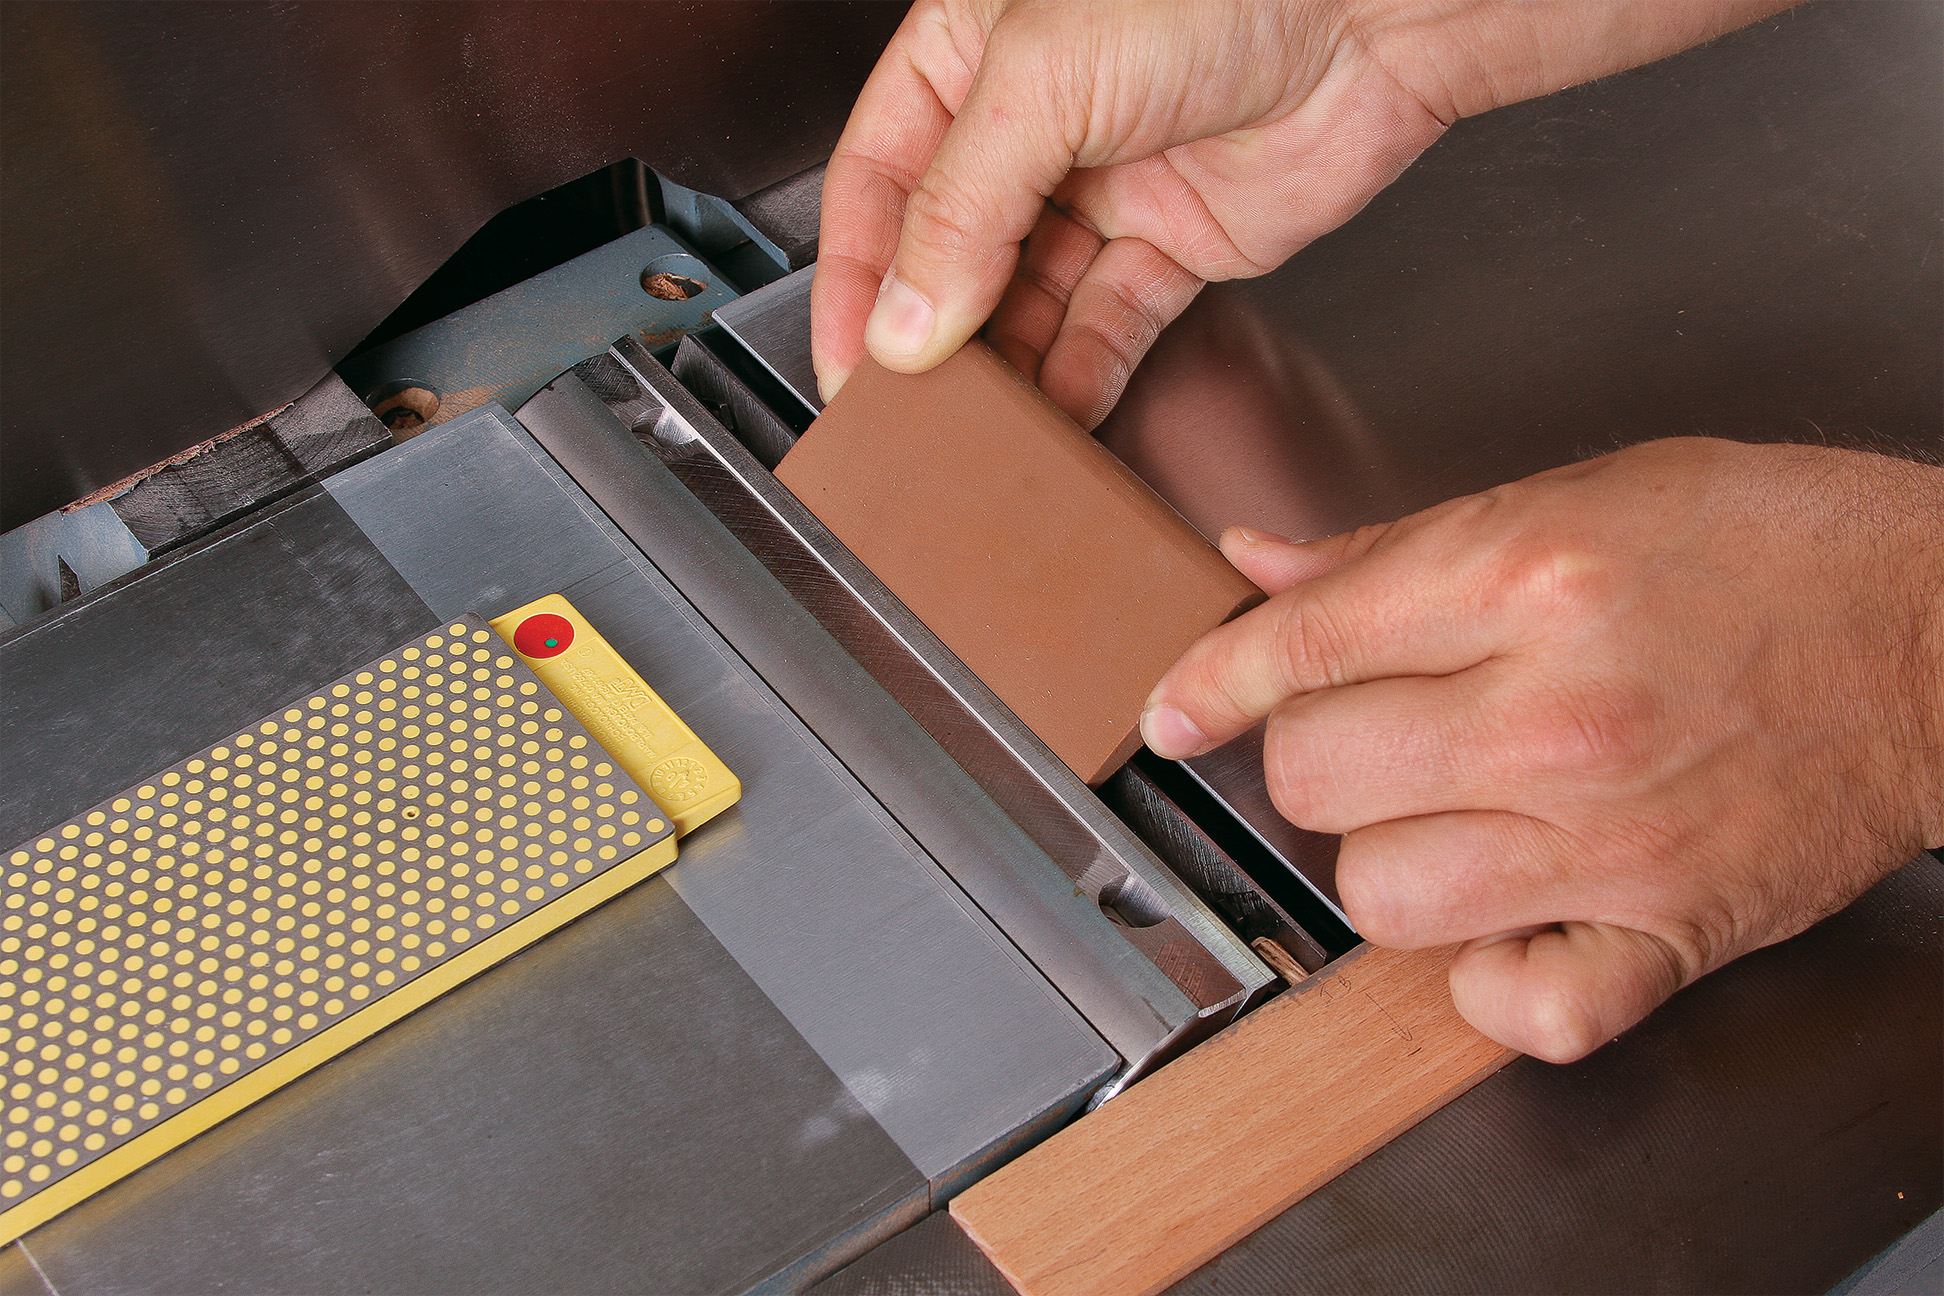
Next knife. Without adjusting the tables, remove the locking jig, rotate the cutterhead to the next slot, and reinsert the jig to lock the second knife in the same position. When all the knives are done, raise the infeed table, then the outfeed table until snipe disappears.
At 6 in. wide, with plenty of length for standard waterstones, they have grippy dimples that keep the stones stable and level, plus wide channels all around to catch the water. They also lock together, side by side, so I can have all of my stones available at the same time.
Become an UNLIMITED member and get it all: searchable online archive of every issue, how-to videos, Complete Illustrated Guide to Woodworking digital series, print magazine, e-newsletter, and more.
We use cookies, pixels, script and other tracking technologies to analyze and improve our service, to improve and personalize content, and for advertising to you.
We also share information about your use of our site with third-party social media, advertising and analytics partners.
You can view our Privacy Policy
here and our Terms of Use here.


Log in or create an account to post a comment.
Sign up Log in