Applied carving
Best way to make carvings that stand proud of a surface
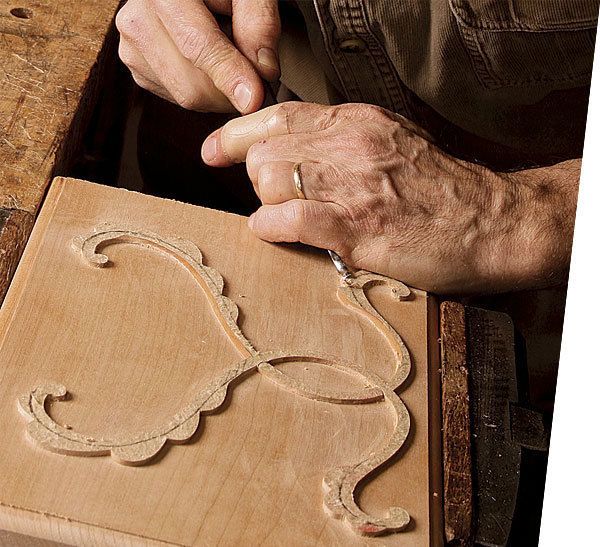
Synopsis: A traditional and useful technique, applied carving makes it easier to get a smooth background than carving done “in the solid,” where you have to lower the background with relief cuts or a router. With applied carving, the design is cut out with a scrollsaw and then applied to a backer board, carved, and glued to the workpiece. Learn this method, and an alternative one where the blank is applied directly to the workpiece and carved in place.
Woodworkers often react to applied carving as “cheating,” a somewhat grudging admission of its effectiveness. It is a traditional but still very useful technique. Sure, every applied carving could be done “in the solid,” with the carving outlined by vertical stop cuts, and then the background lowered with numerous relief cuts or perhaps with a router. But achieving the smooth background normally needed for furniture can be very time-consuming.
With applied carving, the outline of the carving is cut with a coping saw or scrollsaw. You then temporarily attach the blank to a backing board, carve it, and glue it to the workpiece.
If the carving is particularly large and complex or narrow and fragile, you take a different path: After sawing out the blank you apply it to the workpiece and carve it in place. I’ll explain the first approach and show you when to use the alternative one. With a little practice, soon you’ll be accused of cheating, too.
Wood selection is critical
Grain that is straight and not pronounced generally gives better results than figured wood. In addition, the appliqué should match the background. A carving with clashing color or grain patterns will look stuck on.
One way to get a good match is to resaw a thick piece, using one piece for the background and the other as the carving blank. Remember to mark the parts and keep track of the match when you saw and carve. The other way to get a good appearance is to slip-match. The carving blank comes from an adjacent section of the same board as the background and slides on top so that the growth rings nest when you look at the end grain. This works best if the board has mild grain and a similar look along its length. Before I cut the carving blank to the pattern, I lay it on the background piece to see where it best matches the growth-ring pattern on the end grain.
From Fine Woodworking #226
For the full article, download the PDF below:


Log in or create an account to post a comment.
Sign up Log in