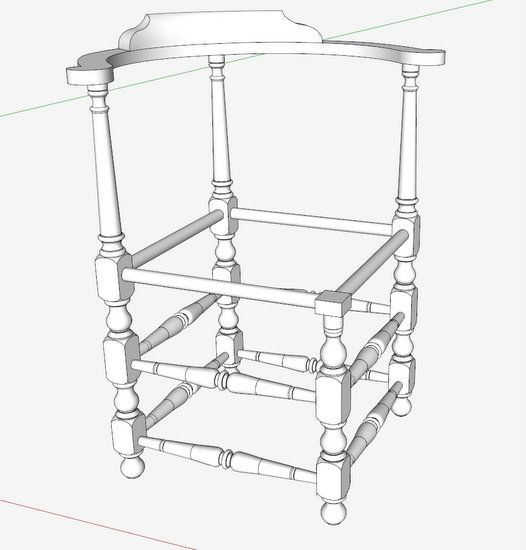
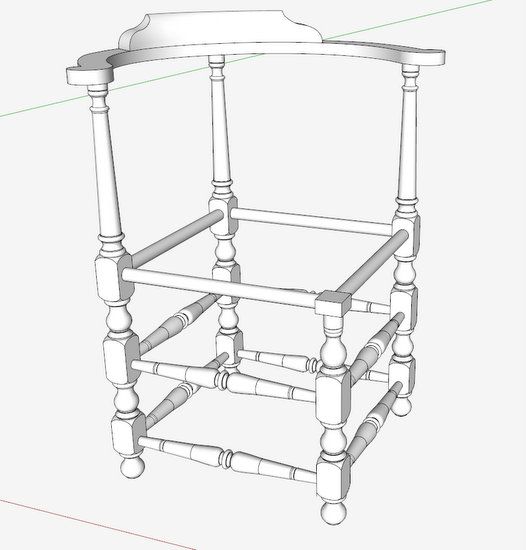
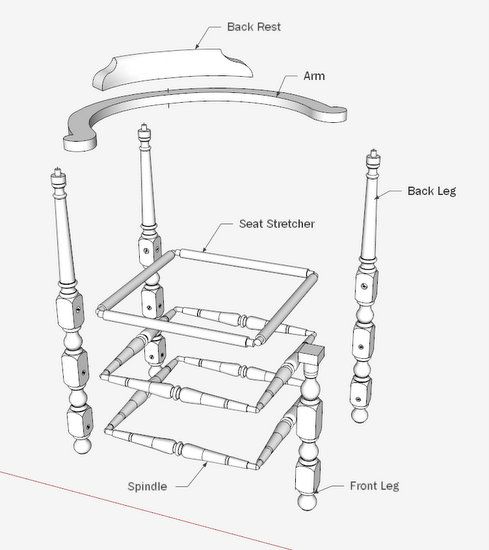
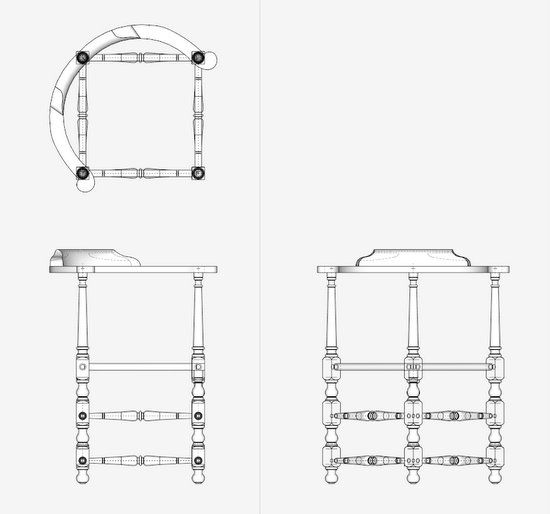
I built one of these corner chairs in 1982 – it would have been nice to have access to SketchUp at that time. Recently, I modeled the chair – it is based on a sketch by Wallace Nutting in his book “Furniture Treasury”. The chair looks rather simple, but I found the modeling to be more of a challenge than expected. Particularly, modeling the Back Rest (the applied piece sitting on top of the circular Arm) was particularly difficult. Not only is this component curved to fit the Arm, but also it is rounded over in shape on the front face, with a scrolled shape at its ends. Also, there is an interesting carved out area in the back of the Back Rest.
Here are pictures of the modeled chair shown in three different views.
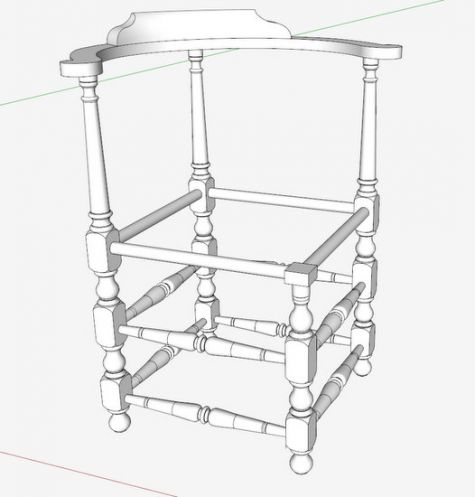
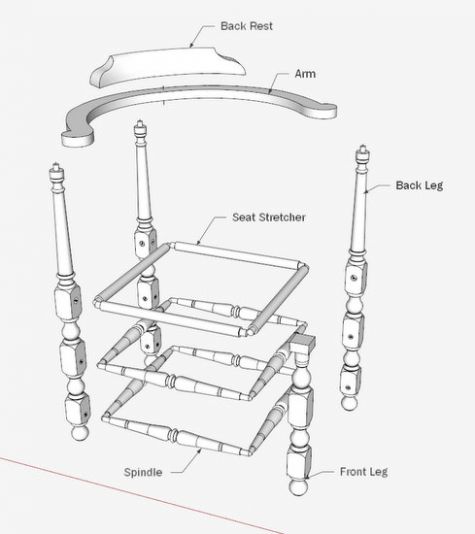
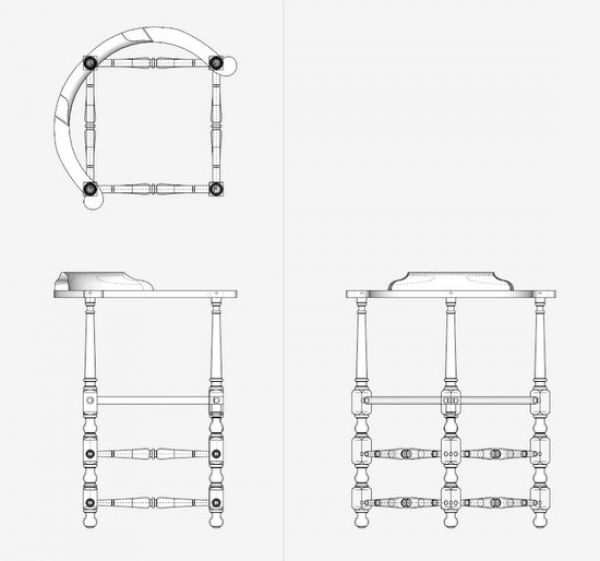
Here are the steps I used in making the Back Rest.
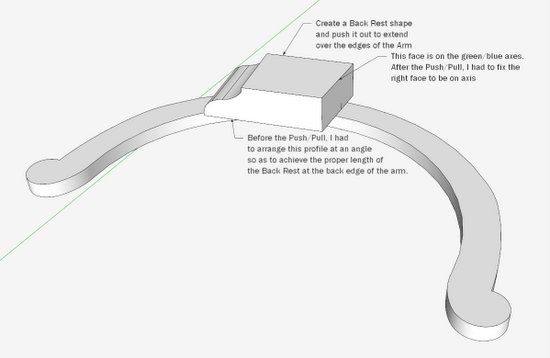
Step 1: I imported the small drawing from the Nutting book, and traced over the shape of the Back Rest.
I used the Push/Pull Tool to make an enlarged half-shape and placed it on the Arm.
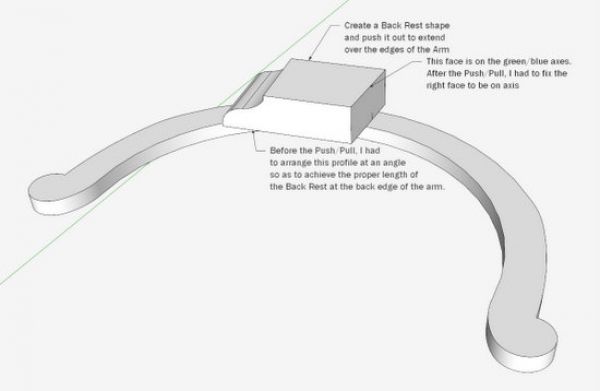
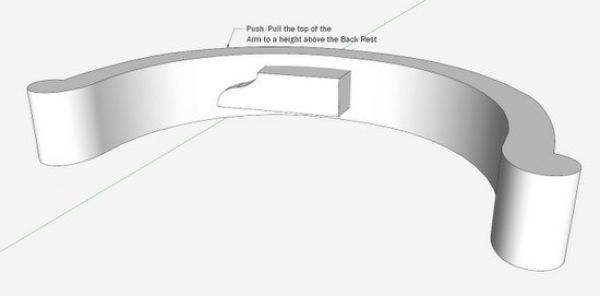
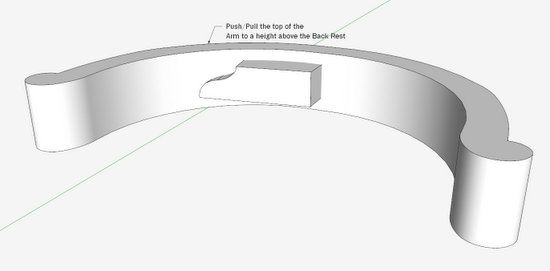
Step 2: Using a copy of the Arm, I raised its top surface up around the Back Rest in preparation for an Intersection to slice the Back Rest into an arc shape.
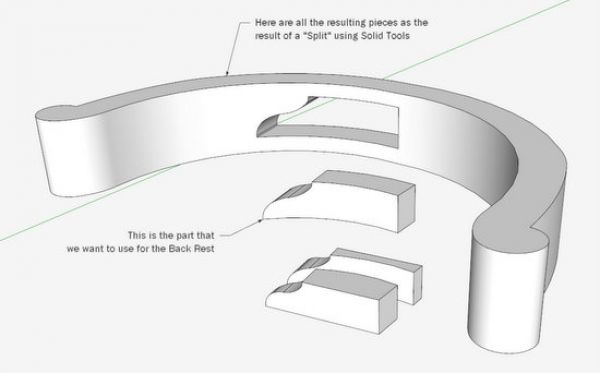
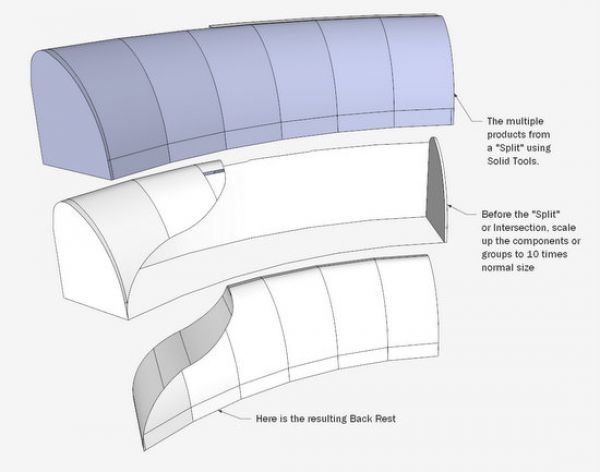
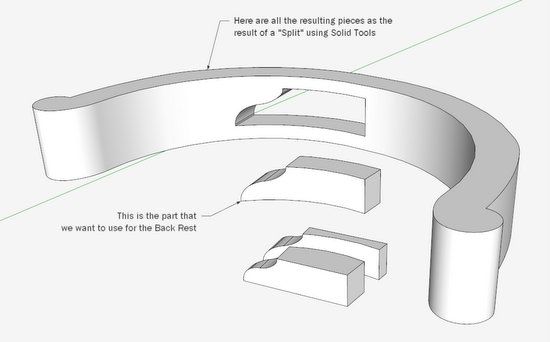
Step 3: You can use Intersection to derive the proper arc shape of the Back Rest. I used the “Split” command in Solid Tools. This command creates a lot of waste shapes but also the part that is needed to make the Back Rest. Using Solid Tools, eliminates the need for tedious cleaning up with the Eraser after the Intersection.
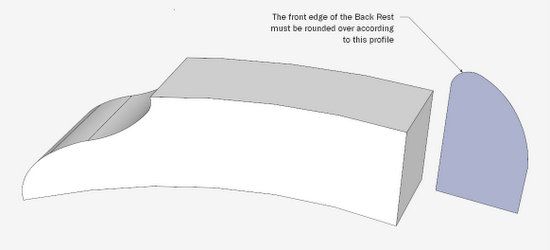
Step 4: The front face of the Back Rest is not a flat face, rather a sweeping round-over as shown in the blue profile below.
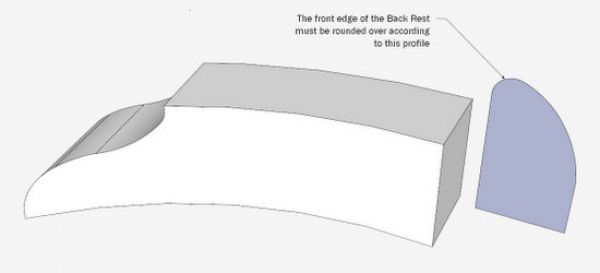
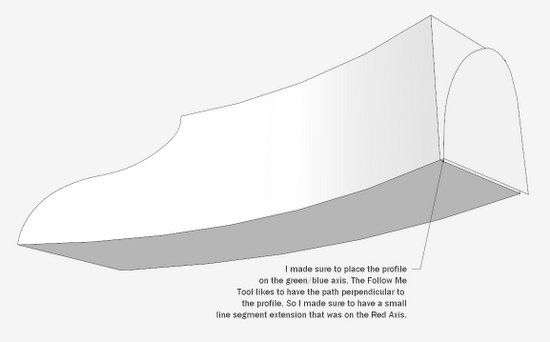
Step 5: Position the profile shape at the end of the Back Rest to prepare for a Follow Me. When using Follow Me, you always want to have the profile situated perpendicular to the end of the path. So I made sure that there was a straight end of the path on the red axis, and had the profile face on the green axis.
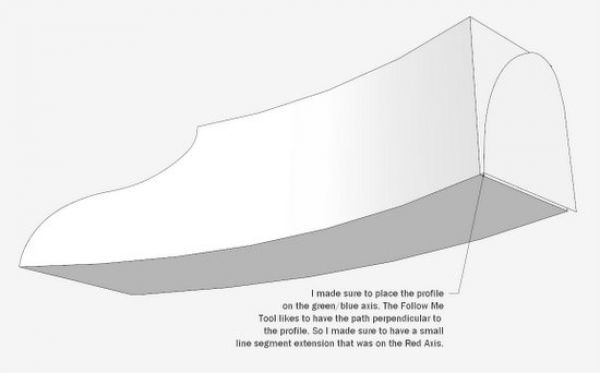
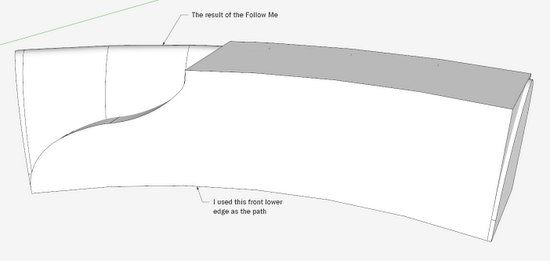
Step 6: Execute the Follow Me using the lower front edge as the path.
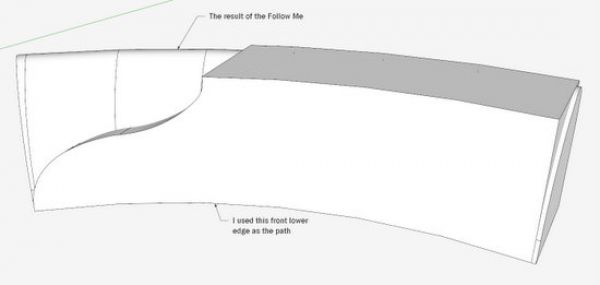
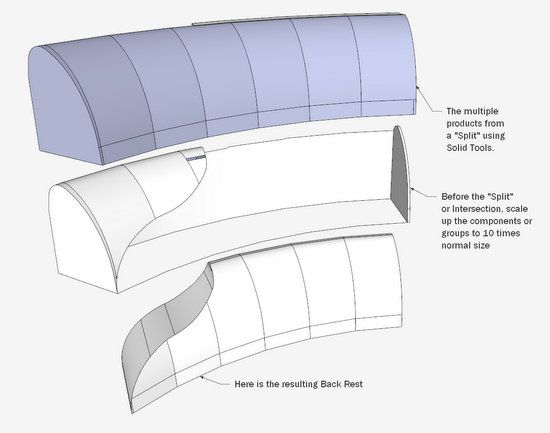
Step 7: Again I used “Split” in Solid Tools to create the desired Back Rest shape. You can also use the Intersection command. Before doing the Intersection I scaled up the Back Rest to 10 times normal size.
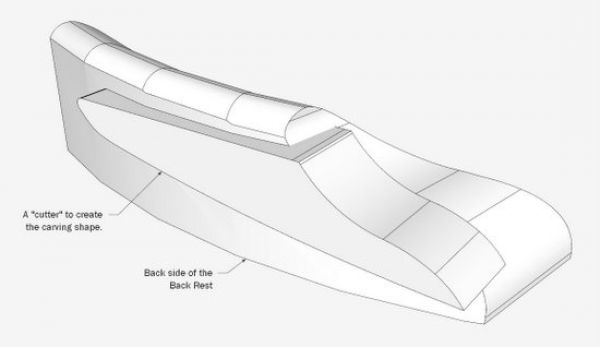
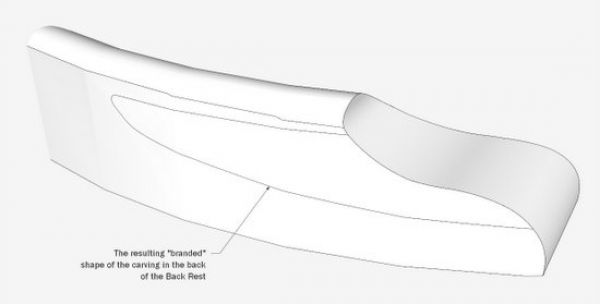
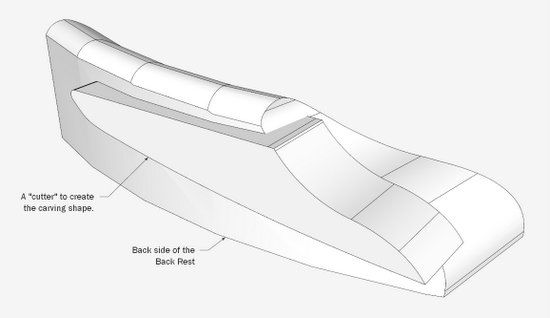
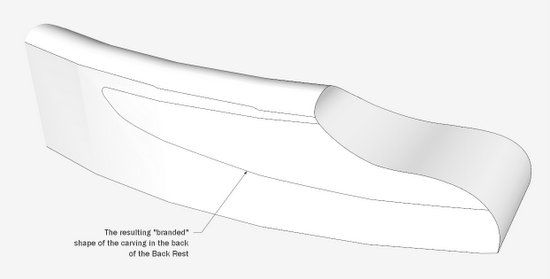
Step 8: The back face of the Back Rest has a shallow carving. I shaped a “cutter” to create the outline of the carving. The resulting “branded” shape is shown below. You could spend a lot of time in SketchUp making an actual cutout in that carving area. I find this to be very difficult and time consuming in SketchUp without a payoff in the shop. It is not necessary for me to do the work in the shop. The most important thing for me is to have the boundary shape of the carving.
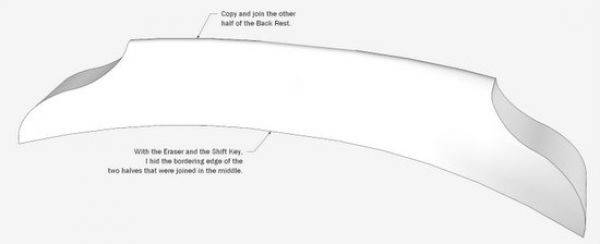
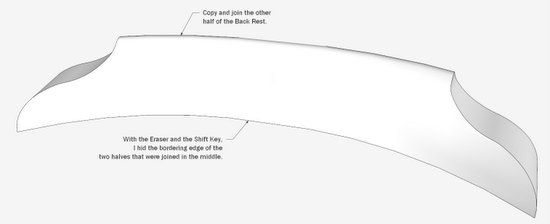
Step 9: I appended a copied and flipped half of the Back Rest and connected in the middle. I used the Eraser Tool with the Shift Key to hide the intersecting edge connection in the middle of the Back Rest.


Log in or create an account to post a comment.
Sign up Log in