Curved Moldings on the Router Table
Over-arm jig lets you form complex profiles with standard bits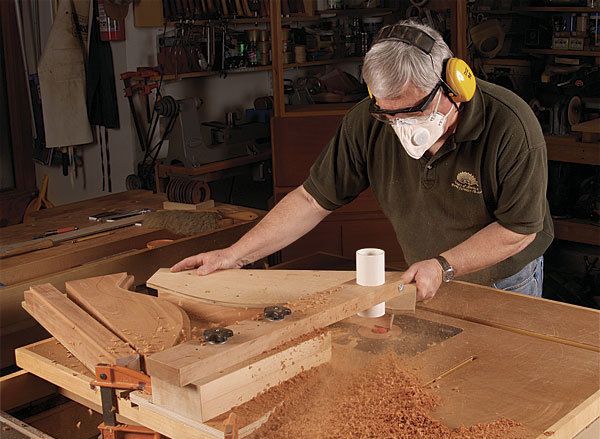
Synopsis: You need to make curved molding, but you don’t have the time or inclination to do the whole job by hand with carving gouges, and you don’t have the money or desire to buy custom-ground shaper bits that fit your desired profile. That’s OK, you can still make curved molding with this simple over-arm guide used on the router table. Using off-the-shelf router bits with this jig, you can create almost any curved molding profile.
Whether it’s a gooseneck molding for the top of a tall clock or handsome trim for an arched opening between two rooms, curved molding has long been a challenge to cabinet makers and trim carpenters alike.
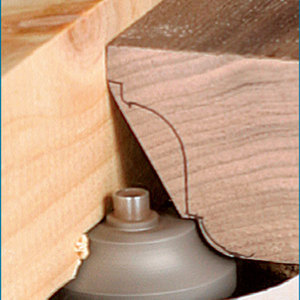
If time is no constraint, you can make molding the traditional way: by hand with carving gouges. If money is no object, you can have shaper bits custom-ground to your desired profile. For every one else, a simple over-arm guide on the router table is the way to go. A small tube acts as an adjustable bearing surface suspended over the cutter. In turn, you guide a template, which you attach to the workpiece, against the tube. It’s basically an upside-down, shopmade version of a commercial pin router. Using off-the-shelf router bits with this jig, you can create almost any curved molding profile.
Decide on the design, then make a template
Your first task is to create the molding’s profile or cross section. If you’re making an exact replica, look for router bits that match each section of the profile as closely as possible to minimize cleanup scraping. If you create your own design, feel free to adjust it closer to bits you already own. For the gooseneck molding on my Philadelphia-style secretary, I chose a commonly used crown profile: a large cove flanked by an ogee at the top and a thumbnail at the base.
With the cross-section profile drawn, you need to determine the molding’s front profile—its length and the radii of its curves. Create a full-size master template out of 1⁄4-in.-thick plywood or MdF. Extend the template a few inches at each end and ensure that the edges are smooth, square, and parallel over its entire length.
You now need to create the routing templates that will attach to the workpieces and guide them.
From Fine Woodworking #227
Online Extra: Master Template for Curved Moldings
For the full article, download the PDF below:
Fine Woodworking Recommended Products

Jorgensen 6 inch Bar Clamp Set, 4 Pack
Bessey K-Body Parallel-Jaw Clamp






Log in or create an account to post a comment.
Sign up Log in