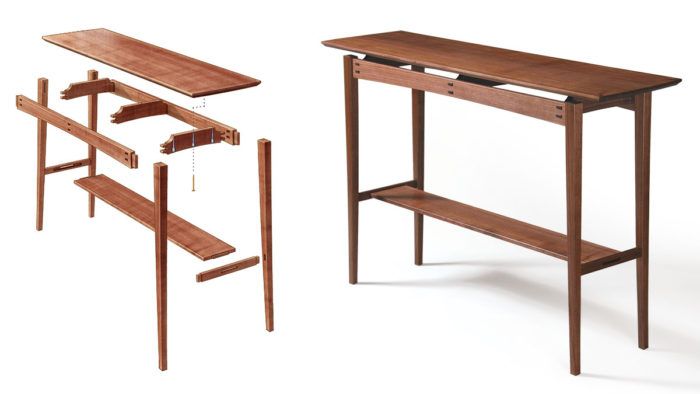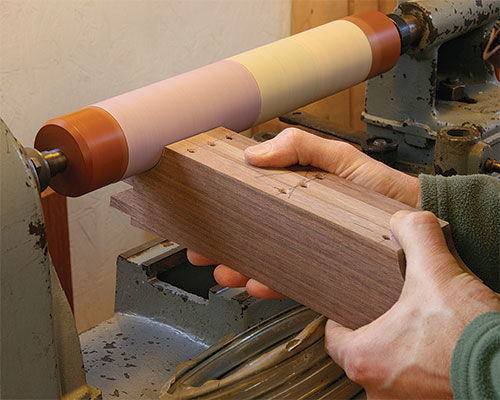
Synopsis: This elegant hall table features graceful curves and exposed joinery with a distinctly Eastern flair. Building this seemingly simple design hinges on a variety of techniques designed to expand the abilities of intermediate woodworkers. You’ll learn how to produce beautiful tapered legs using a patterning sled at the router table, and how to add slight curves using an ingenious tapering jig that works with your thickness planer. Spacer blocks ensure perfectly matched through-mortise-and-tenon joinery, and a simple oil varnish finish helps bring out the tight, straight grain on the table’s quartersawn walnut.
When you float the top of a table—lifting it up to create a gap between it and the aprons—you’re contradicting centuries of sensible furniture making (traditional tops attach easily, and serve to stiffen the base). So why do it? For me, it’s partly for the kick of doing something different. And partly for the visual interest and refinement it can bring to a piece.

Some makers float their tabletops 1 ⁄2 in. or less, creating a dark shadowline, or reveal, below the top, which gives the table an air of mystery and makes you wonder what’s holding up the top. I prefer to float my tops higher, so you can see right through to the structure underneath, almost as if the table were an exploded-view drawing. Either way, a floating top will add flair to your table.
Most tables can be made with a floating top, but if you want to expose the structure, it helps to do so on a tall table; on a coffee table, even a wide gap will rarely be visible. I made a series of decisions in the design process to help expose the structure and create the floating feeling from every vantage point. First, I dispensed with end aprons and supported the top with under-rails inset from the ends. I designed the underrails so they would lift the top 7 ⁄8 in. above the front and back aprons, providing a clear view underneath. To increase the sense of airiness under the top, I cut away the shoulders of the underrails in deep curves and cut a shallow curve along their bottom edge. I also pushed the proportions of all the table’s parts to the thin side, and made the top appear even thinner by giving it an underbeveled edge. The 6-in. overhang at the ends also helps.
I’ll cover the parts of this table that support the floating top, giving you the fundamentals you need to build any table like it. For my complete video series on building this specific design from start to finish, go to FineWoodworking.com
From Fine Woodworking #229
For the full article, download the PDF below:


Comments
The link to the video series does not seem to be working.
Log in or create an account to post a comment.
Sign up Log in