Cut Perfect Tapers on the Table Saw
Make tapered legs of all types, quickly and safely.
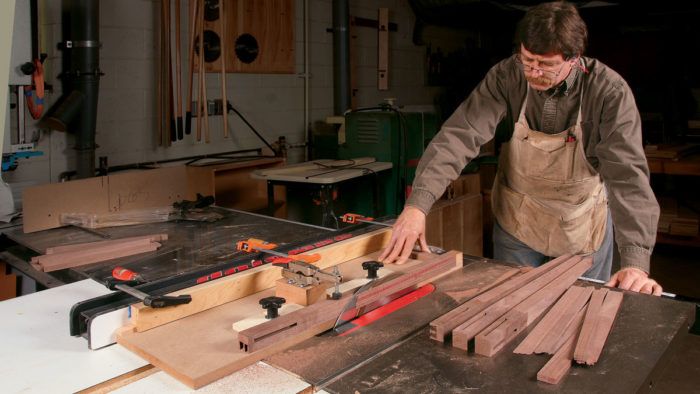
Synopsis: Found across a range of furniture styles, tapered legs are popular because they are good-looking. They break up a square, boxy piece of furniture and direct the eye toward the center. But cutting them accurately and safely can be a challenge. This tapering jig for the tablesaw makes it easy to set the location of the workpiece accurately for perfect cuts, and because it has a built-in clamp, keeps your fingers far from the blade. An L-shaped guide clamps to the rip fence to guide the jig, and a hardwood strip keeps the workpiece in place. You can use it to cut tapers on two, three, or four sides of a leg.
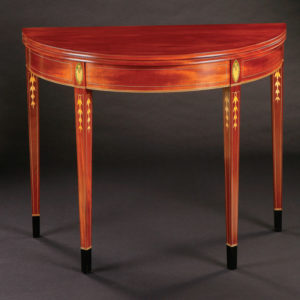
It’s no secret why woodworkers taper the legs of tables and chairs: It improves the appearance of the entire piece. Tapering breaks up that boxy square look, lightens the visual weight, and helps direct the eye toward the center. Tapered legs are found across the range of furniture styles. The majority have tapers on two adjacent faces that begin just below the apron or rail, keeping the joinery square. But you can also find tapers that extend to the top of the leg, and tapers on all four sides. What they all demand is a way to cut them accurately and safely.
While you can cut tapers on the bandsaw or the jointer, tablesaw cuts are cleaner and more accurate. However, the standard commercial tapering jig (two aluminum sections hinged on the end) has always scared me—strike that—terrified me. Because the workpiece isn’t clamped to the jig, your fingers have to come dangerously close to the blade.
Why I favor foolproof
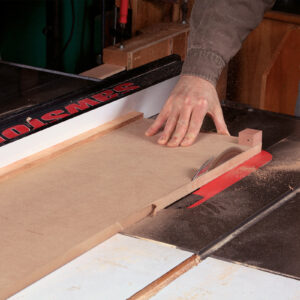
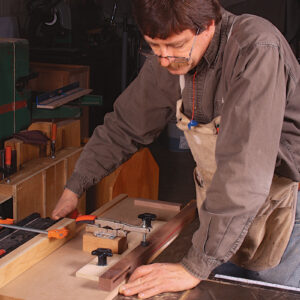
At the college where I work, many of my students are new to woodworking, so any jig has to be simple and safe to use. The jig we use to taper legs ticks both these boxes. It falls under the broader category of what I call carriage jigs, in that the work is carried on some sort of sled. Because one edge of the sled lines up with the path of the blade, setting the location of the workpiece is very easy, and with a built-in clamp to secure the workpiece, your hands remain well clear of the blade.
Instead of the sled being guided by the miter slot, as in most cases, I have it hooked to the fence. If the sled only rides in the miter slot, it wants to dip and come out of the slot before and after the cut. Some people try to use one knee to support the sled while doing an odd little one legged dance in front of the spinning saw. Not with this sled. It is tied to the fence with an interlocking strip that keeps it flat on the table at all times.
What’s more, one edge of the jig is near-zero- clearance, so it tells you where the blade will cut. That means you can simply align the layout marks on a leg with the edge of the jig, and cut with confidence.
Construction is straight forward
To make the jig, start with a piece of hardwood, rough
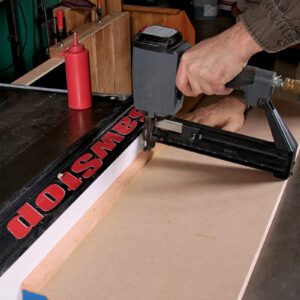
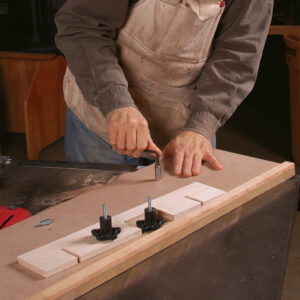
ly 7⁄8 in. thick by 2 in. wide by 38 in. long, rip off a 3⁄8-in.-wide strip, and cut it to 33 in. long. This strip will ride against the rip fence, so you want it just proud of the edge of the sled. To achieve this, place a piece of masking tape along the edge of the sled, place the strip and the sled base against the rip fence, and then glue and either screw or staple the strip to the sled. Peel off the tape, and you’re all set.
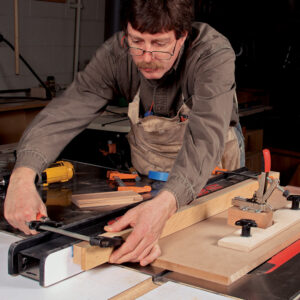
The two long sides of the sled must be parallel, so with the sled riding against the rip fence, trim the opposite side. But before you do that, attach the stop block, so it gets trimmed flush, too. Afterward, attach the sled’s adjustable fence, push handle, and toggle clamp.An L-guide locks the jig parallel to the fence yet al-lows it to glide smoothly with no slop. To make the guide, glue and nail or staple a 2-in.-wide by 38-in.-long strip of 1⁄2-in.-thick plywood to the remaining piece of hard-wood that you ripped earlier. Place the side of the base with the maple strip adjacent to the saw’s fence and clamp the guide to the fence. check to see if the sled slides back and forth. If it is too tight, simply add a strip or two of blue painter’s tape to the hardwood side of the guide before re-clamping it and testing the movement again.
Two-sided tapers are the most common
On traditional furniture across a range of styles, there is a basic rule for which faces of a leg to taper: If it falls under the aprons, it gets tapered. A tapered leg lends a piece the lightness and grace mentioned earlier, plus gives it a stable-looking stance without making it look splay-legged. on a typical four-legged table with a rectangular top, or even variations such as a bow or serpentine front, the two inside faces of the legs are tapered. To show how the jig works, I’ll cut one of these legs.
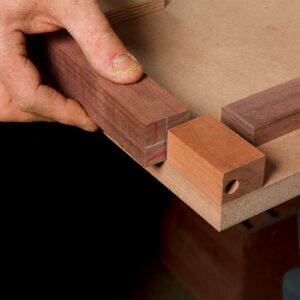
First, cut any joinery on the leg. It is much easier while the blank has straight sides. Layout, or more accurately the lack of it, is another advantage to this jig. A line marking the start of the taper and another on the bottom of the foot are all you need. The taper usually starts where the bottom of the apron or rail intersects the leg. I use a combination square to set the lines on the top, being careful to mark only the sides to be cut. Too many lines leads to mistakes! If the taper has a finished dimension of, say 5⁄8 in. at the bottom, I cut a piece of stock that thick, line up the blanks, and mark the bottoms with one swipe of the pencil. I rotate each leg 90° and make a second mark. Finally, I use a wax crayon to highlight the faces to be tapered.
When using the sled, the thin end of the tapered leg should always be closest to the operator. This way not only are you cutting “downhill” with the grain, but the action of the blade helps push the blank onto the sled. You also want to rotate the leg clockwise after the first cut, so the leg is resting flat on a non-tapered face during the second cut.
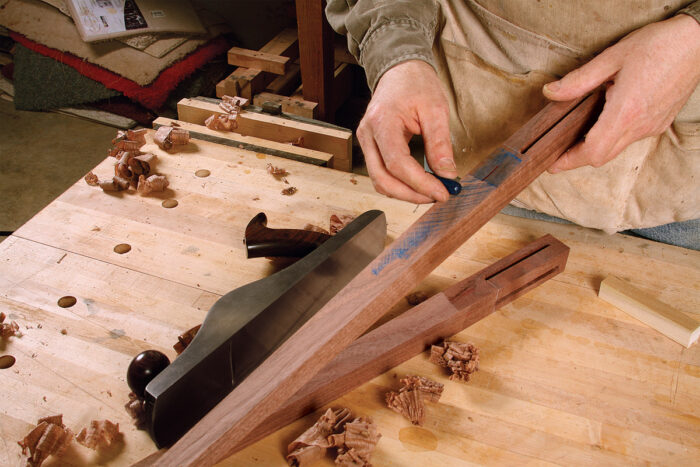
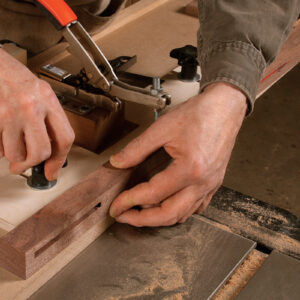
To position the leg in the sled, align the mark on the bottom of the foot with the edge of the sled and push the foot into the tip of the screw protruding from the stop block. Now align the start of the taper with the edge of the sled and set the adjustable fence against the leg. Finally, deploy the toggle clamp. Leave a little extra material to handplane and sand by setting the saw fence so that the side of the sled is about 1⁄32 in. from the blade. make the cut, using the handle to push the sled so that your fingers come nowhere near the blade. Pull the jig back to the front of the saw, loosen the clamp, rotate the leg 90° clockwise, and secure it again. cut the second taper. When cleaning up the saw marks, don’t remove any wood above the taper because this will leave a gap between the leg and the apron. To sneak up on the line, I mark the area below the line with a crayon, and then plane up the marked area, stopping just before the line. A final light sanding completes the job.
Three or four-sided tapers are no problem
On a round or oval period table with corresponding shaped aprons, the legs can be tapered on three or four faces. Further, on
contemporary furniture, it is common to find legs tapered on four sides, often extending all the way to the top, or even inverted with the wider part at the base of the leg. Never fear, this jig can handle all of these tapers and then some.
For example, with four-sided tapers, cut the first two adjacent sides as above. To cut the last two sides, first adjust the sled’s fence to take into account the tapered side of the leg that will now be against it. After cutting the third taper, you may need to place an offcut under the blank to support it during the fourth cut.
From Fine Woodworking #229
For the full article, download the PDF below:
Fine Woodworking Recommended Products

Jorgensen 6 inch Bar Clamp Set, 4 Pack

Stanley Powerlock 16-ft. tape measure




Comments
Worst Instructions ever!!!!
No dimensions provided for placement of the fence on the sled, location of threaded inserts, depth of recess in fence for the toggle clamp platform, clearance to platform to allow for angling fence. No guidance on platform height based on anticipated workpiece thickness(es). Just gotta eyeball it from drawing I guess.
I would imagine the exact location of the fence on the sled, location of the threaded inserts and other "missing" dimensions depend on the kind of work you are doing and could vary from one woodworker to the next. The base height is given in the exploded view as 3/4 in.
I like the fence guide system and the way it prevents the jig from being pulled up or down by the blade. The only thing I will do differently is to mount the toggle clamp directly to the fence, as the author's set-up limits the range of adjustment.
Log in or create an account to post a comment.
Sign up Log in